- Joined
- Jun 23, 2018
- Messages
- 6
- Reaction score
- 7
- Points
- 3
- Vehicle Year
- 2000
- Make / Model
- Ford Ranger XLT
- Engine Type
- V8
- Engine Size
- 5.0L
- Transmission
- Automatic
- 2WD / 4WD
- 2WD
So, I've already completed this swap, after taking many months of time to gather resources, do some homework, and jump into the grease pit but it was worth it.
My vehicle is a 2000 Ford Ranger 3.0 V6 FFV 2wd (non-edge)
I did not make use of a donor vehicle for this swap.
Here's the information i've gathered and experienced by doing this swap
Disclaimer: when I say I 'found' a part, just know that I was, in fact, in a junkyard.
Computer
The required year explorer (1999-2001) has a Type B Passive Anti Theft System (PATS) with a key transponder and separate anti-theft module. I originally considered taking my ECU to a shop to tune out the anti-theft controls, but I ultimately found an entire set (ECU, Anti-theft module, key, and keyhole) in a 2000 mercury mountaineer.
Engine
The 5.0L (302) was pulled from a 2000 mercury mountaineer as a whole assembly (meaning only a few minor parts were missing).
The 1999-2001 model years were required because the older ones used different sensors, so I would be unable to use my 2000 mountaineer ECU with it properly.
This engine uses the returnless fuel rail running at 65 psi. The fuel pressure regulator in my Ranger's gas tank had to be changed for a non-ffv version of the same year to give the proper fuel pressure.
The oil filter on this year engine does fit in the ranger with the stock 90 degree adapter.
The throttle and cruise control cable with both work and fit on this type of ranger.
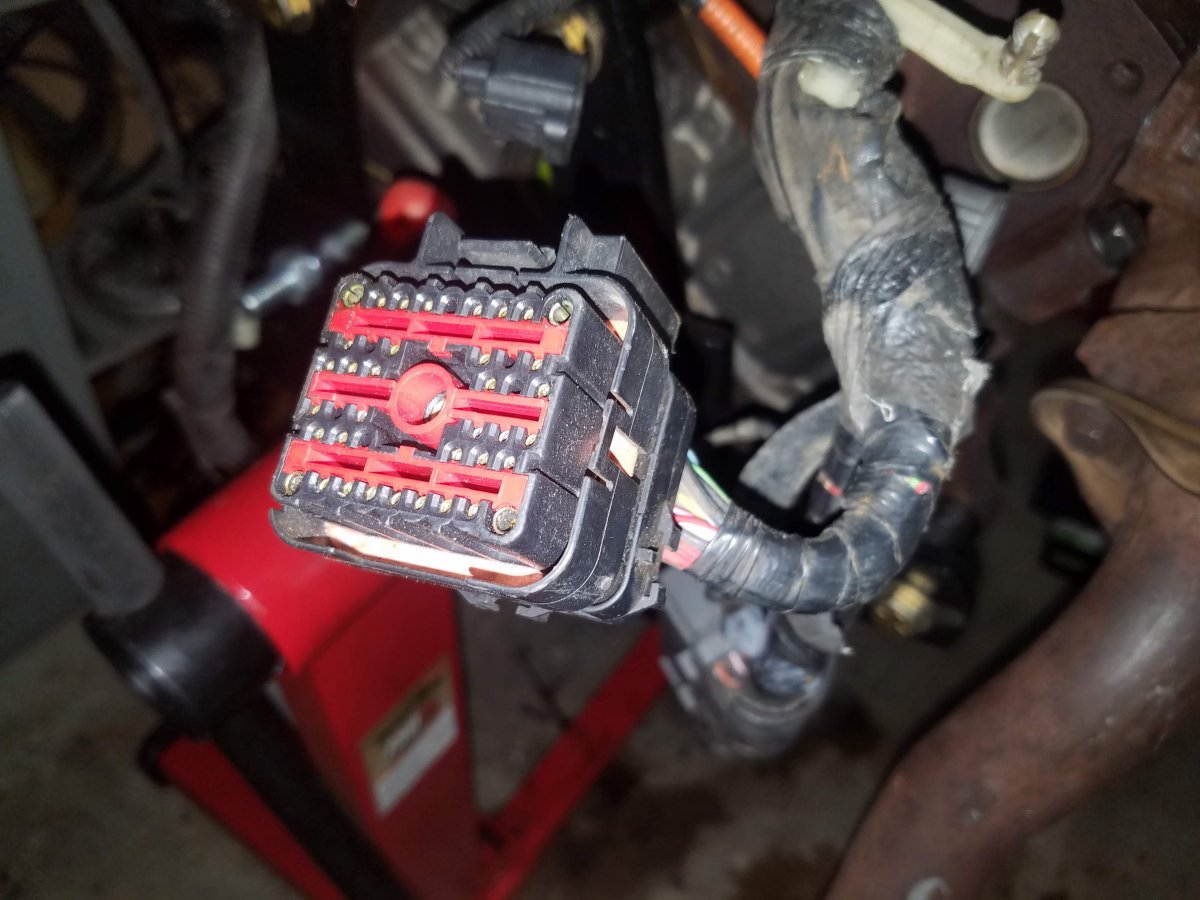
The main wiring harness has a large 42-pin connector right above the intake, and is completely plug-and-play.
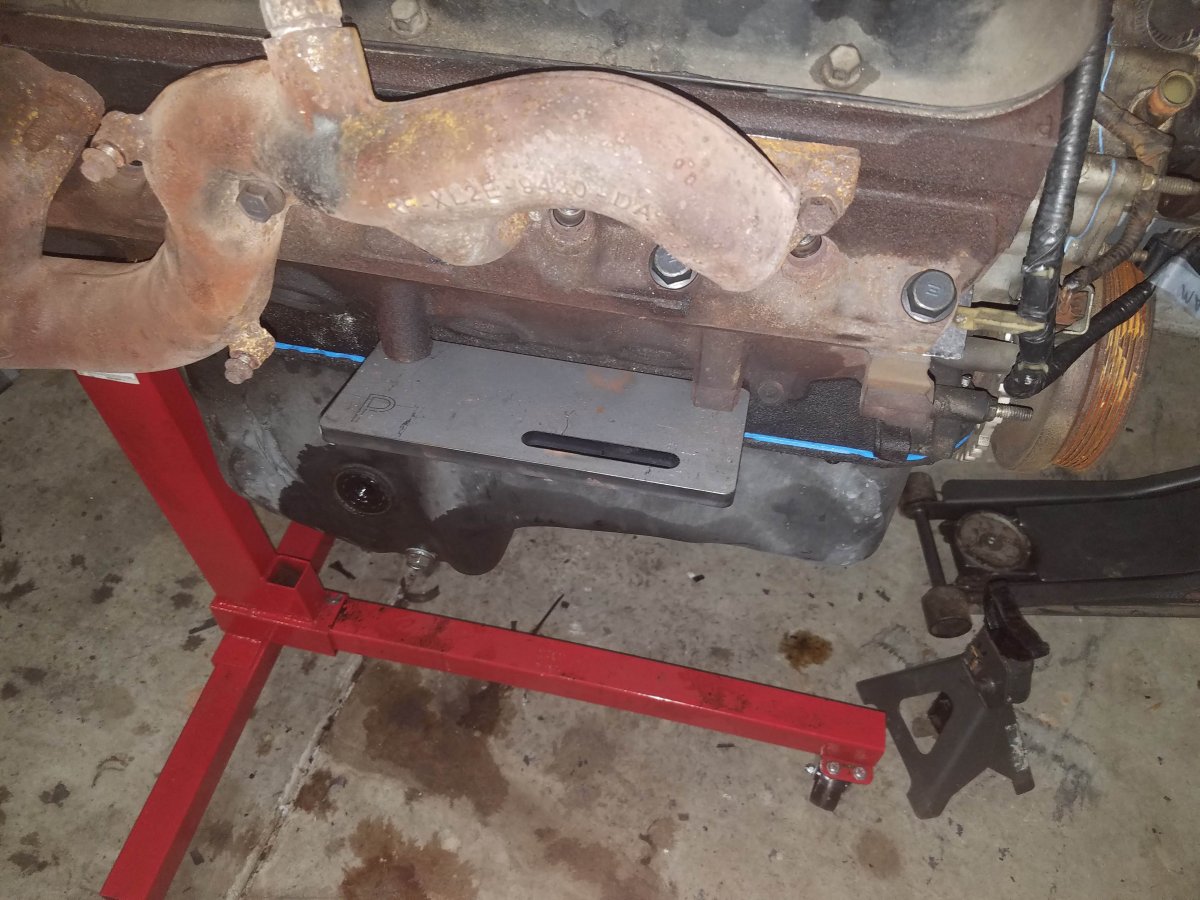
The motor mounts on my 3.0L V6 can be used with RicksRangerz Motor mount adapter plates. Really you just need to make sure the studs on your motor mounts are perfectly inline, and not staggered. https://www.ebay.com/itm/98-11-Ford-Ranger-V8-302-swap-kit-motor-mounts-plates-2wd/152046882412?hash=item2366b34e6c:g:qIMAAOSwN7BdMOyq
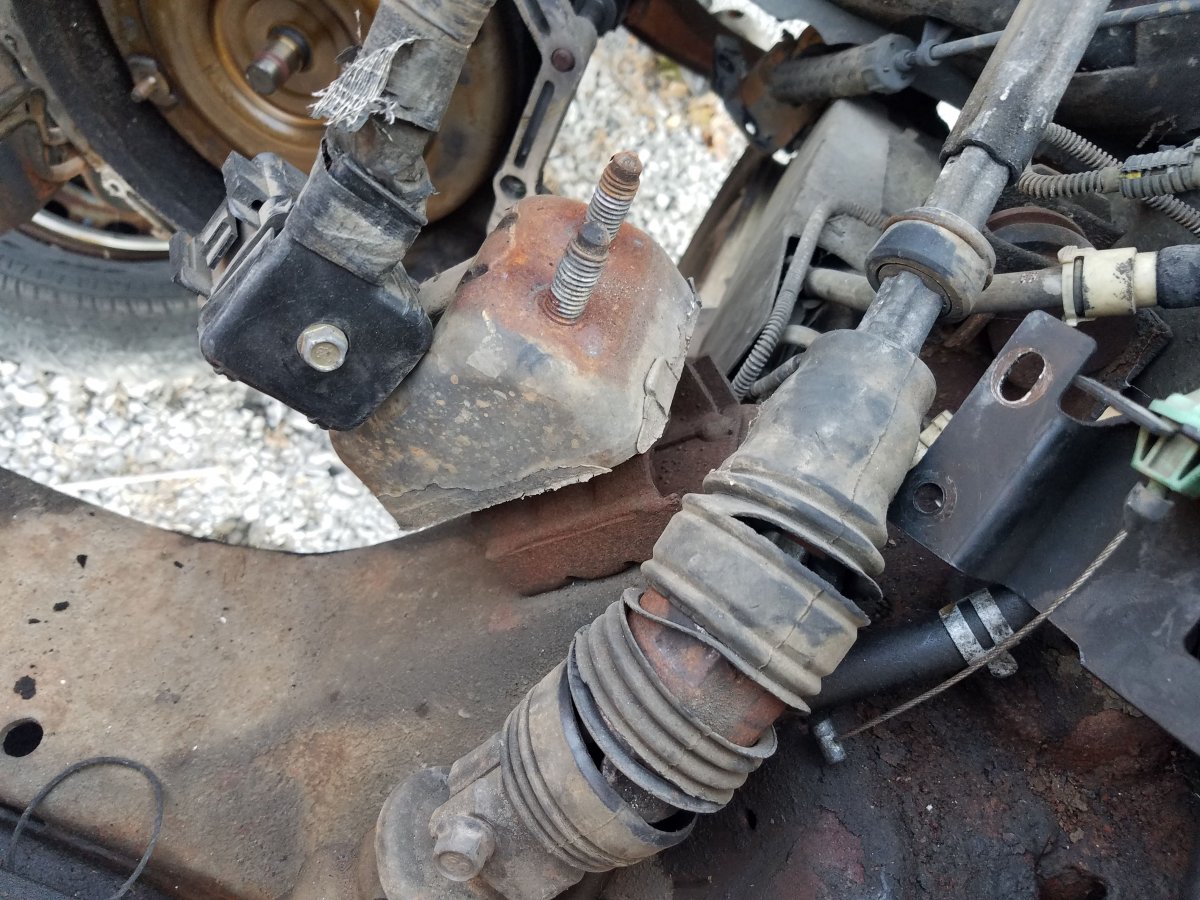
The Drivers' side motor mount for the 3.0L V6 has a spacer block on it, and the drivers' side coil spring needs to be removed in order to remove the spacer block. Then the front crossmember needs the alignment hole drilled out slightly to fit the motor mount into.
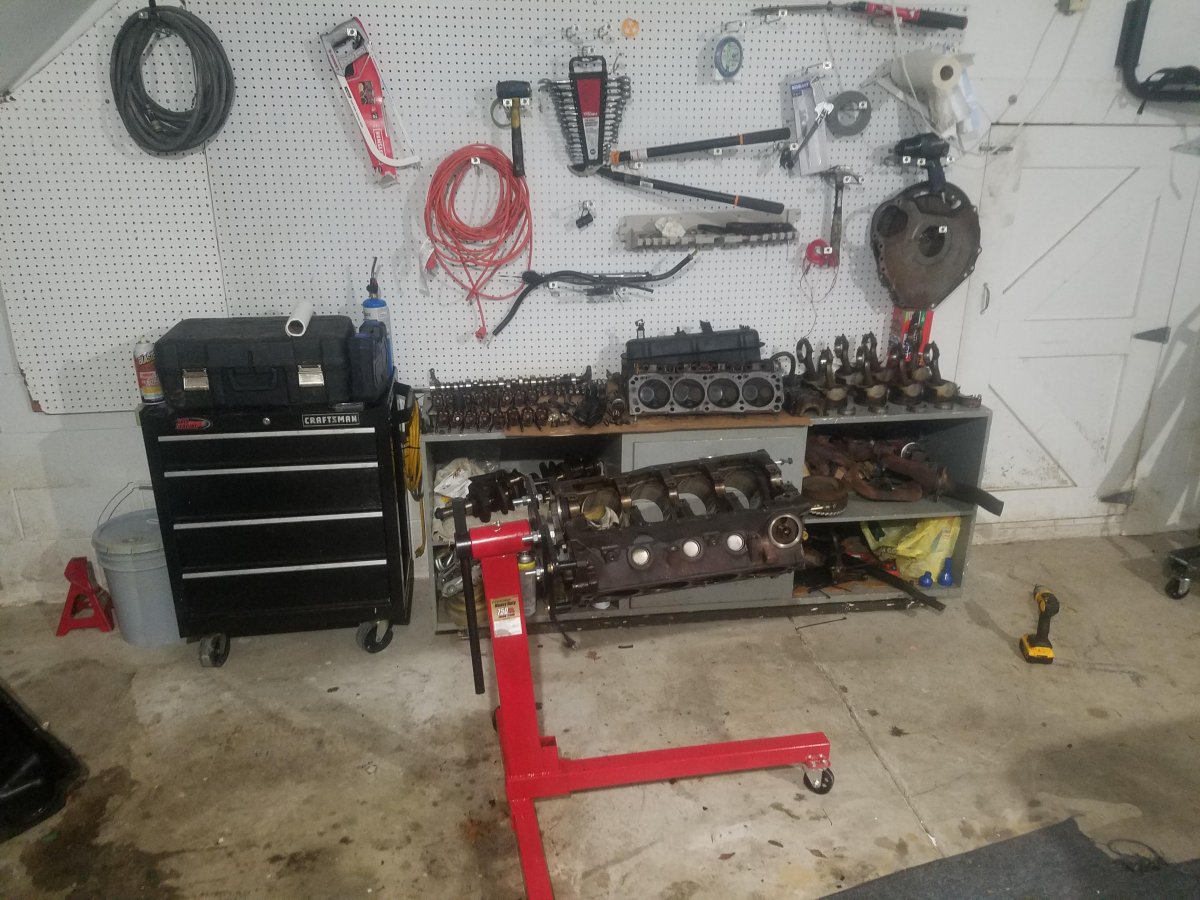
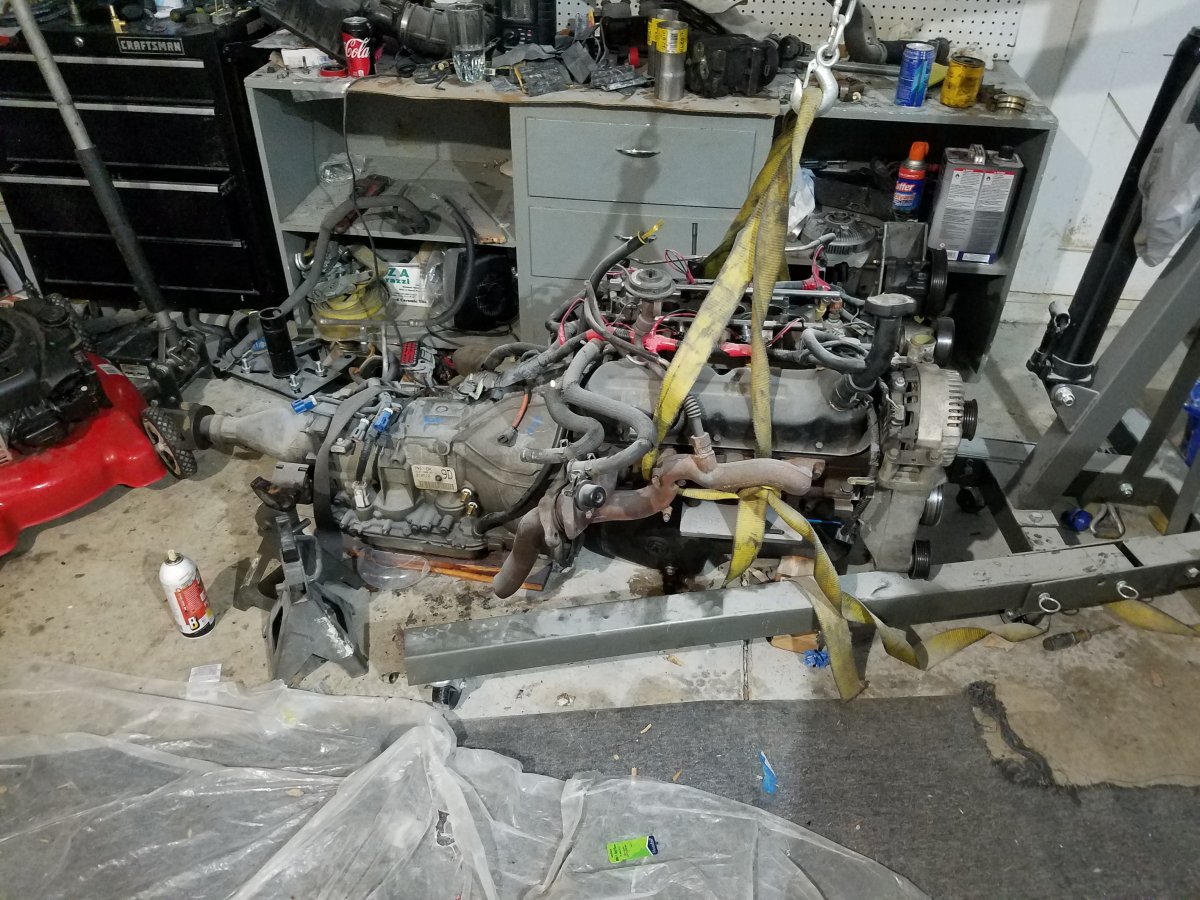
My 5.0 got a near full rebuild, Same piston rings and it was not machined, but all the bearings were changed, all the seals were replaced, and all the gaskets were replaced. When I put it back together, I left off the upper intake, but I installed the wiring harness, just to have it routed properly before installing it.
Transmission
I pulled my transmission from a 1999 2wd 5.0 explorer.
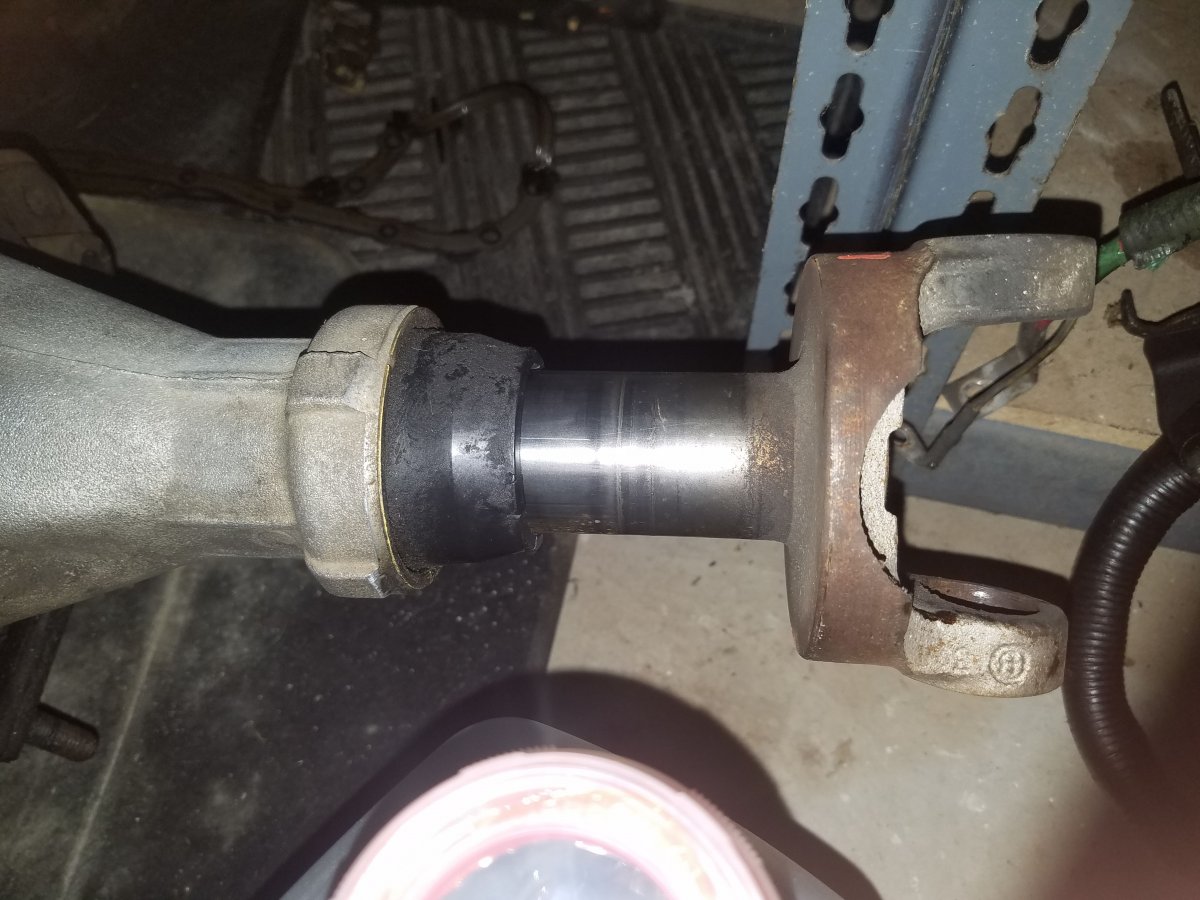
The output shaft on these is 28 splines, and the stock 3.0 ranger's driveshaft spline is 25, so you need to scavenge the slip yoke from the same explorer (which uses the same size u-joint) or from another compatible ford driveshaft that uses the same u-joint (Dana spicer 1330 series in my case)
My driveshaft was 1" shorter than expected, which caused vibrations at highway speeds, I fixed this by adding 1" spacer to the differential flange. I've come to understand that many driveshafts might not be compatible at all depending on your ranger's configuration. Just do some measurements beforehand.
the shifter linkage in the ranger fit into the 4r70w linkage bracket and onto the DTR sensor.
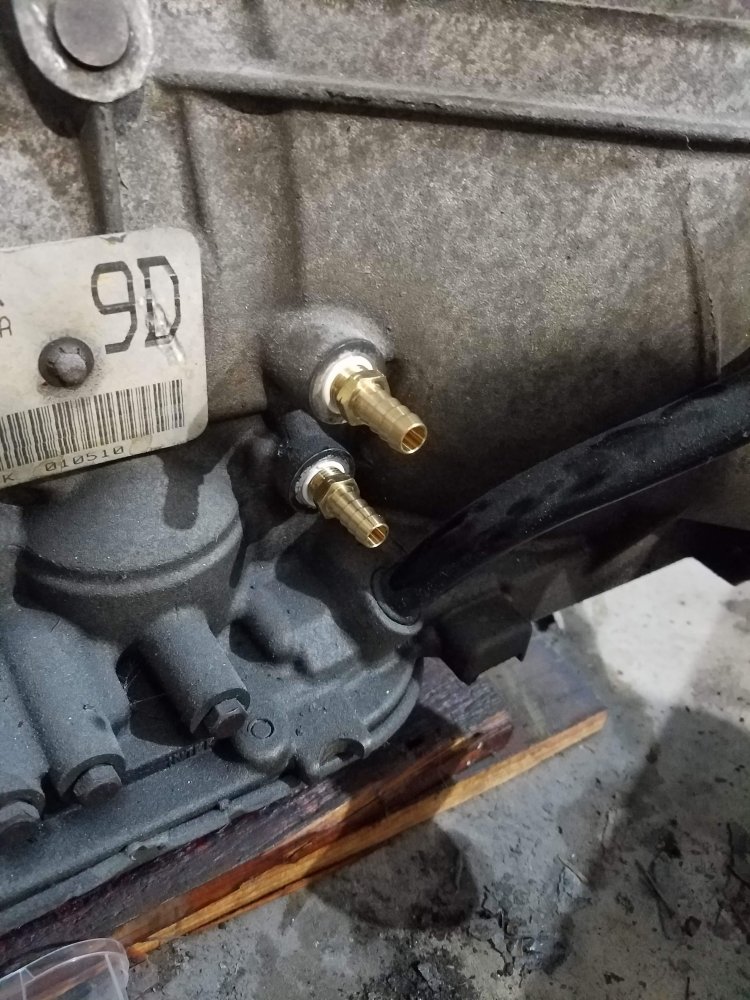
The transmission cooler lines were made by using 1/4" NPT fittings off the transmission into some oil hose, then, I used the old hardlines, cut short, and then the hoses clamped to the hardline.
this trans also had its small wiring harness installed before the swap.
Power steering
All you need to do it take the return hose to the reservoir and the main pressure hose from the pump to the rack, from the explorer. Plumb these up in the same spots they would be on your ranger and you will have power steering.
Air Conditioning
Take the hardlines that run between the compressor and the accumulator / condensor and you will be good. I've yet to actually fill mine up with freon, but the hoses will connect at the very least.
Radiator
I chose to stick with the Ranger's stock radiator, which is half the thickness of the explorer's radiator, but having driven this around for about 2 months, I've yet to have any cooling issues.
Exhaust
I'm using the stock manifolds, which I know are restrictive, but I have little choice given my budget. the stock manifolds fit no problem but because I did not have the downpipes, I had to fab my own exhaust from the flanges back.
Procedure
Getting the whole thing done, in the grand scheme of things was really simple.
Transmission out
Engine out
Fix motor mount
Engine in
Transmission in
Done.
That's generally the order you're going to follow when doing this for a purely running standpoint.
Let's just go through this in a little more detail.
Pulling the old Trans
First things first, remove any extraneous things that might tether the engine/transmission into the vehicle. this starts with the exhaust and the driveshaft, just unbolt these and move them aside. I understand that the manifold flanges on rangers might be super rusted so be sure to use penetrating fluid on these many days before, or, you can try to remove these before even trying to start this swap, just to have them broken loose.
Next, I drained all the fluids that i needed to drain, which included mainly the coolant, and transmission fluid. Draining the coolant was easy, but to drain out the transmission fluid, I chose to just remove the cooler lines, on the transmission and catch all the fluid that came out, just so I didn't have to drop the entire transmission oil pan. After prepping the transmission for removal (removing the shifter linkage and unbolting the torque converter, as well as unplugging all the electrical connectors) I unbolted the trans and used a transmission jack to lower it out of the car (please get a trans jack it made this process 100000% easier). Now, I can move onto the engine.
Pulling the V6
This was a bit more complicated since we had accessories to handle, but I began by first removing the fan, shroud and radiator. This gives us a lot more room up front to disassemble things. The next thing I handled was the power steering, which I promptly drained, and then removed the lines for. The final accessory to remove is the A/C compressor, but this was the point of no return. Once the freon is released from the system, you can't go back without losing your A/C. Obviously, if you didn't have A/C then this doesn't matter. I removed the A/C lines and set them aside. Then some little things to finally remove from the engine (Vacuum lines and the wiring connections to the body. The wiring connections included the 42-pin connector above the intake and the large connector going to the ECU. Now I was able to strap the Engine to a lift and unbolt the motor mount plates and lift it out. be sure to strap the engine very closely together or you might not have enough hoist clearance to get it over the rad support. I made the mistake of not strapping it very closely to the engine, and I had to remove the oil pan in order to clear the rad support.
Now the motor mount problem. I had to completely disassemble my drivers' side front suspension in order to reach the bolt that holds the mount in. This just took a floor jack and some patience to carefully remove the coil spring from the control arm. After removing the mount, I removed the spacer bolted to it, and used a dremel to notch the crossmember and allow the alignment pin to fit. After that I just reassembled the suspension and was ready for the 5.0 to drop in.
Putting the 5.0 in
I strapped my 5.0 to the lift and made sure my plates were bolted securely, then lowered the 5.0 into the engine bay. The plates fit perfectly and I bolted it firm but with some give (since the motor mount plates were slotted instead of just having holes in them.) Once it was In it was just a matter of getting the transmission in and mounting it on the crossmember.
Installing the trans
This was a pain.
The 4r70w is a significantly beefier transmission than the old 4r55e, so you need to hammer in the pinch weld on the firewall in order to get it to even consider fitting. (Again, make sure you have a trans jack before trying this swap or you will pull your hair out) Once you get the thing into position and get it bolted down get your trans crossmember ready. You will likely need to add some shims on the trans mount studs because otherwise you will have clearance issues with the engine oil pan and the front crossmember. Once you shim the trans mount and bolt that in, just bolt your crossmember into the frame and you're good.
buttoning everything else up
Since I installed the wiring harness before doing this swap, it was real simple to just plug all the connectors where they needed to go. I also added the upper intake and the radiator upfront. The next hard part was getting the starting system working.
There is a connector underneath the brake master cylinder that connects between the body, and the charging/starting harness. This will rarely be plug and play. What I opted to do was take the longer power wire to the starter, and run that separately from the battery to the starter. Then I took the stock ranger harness, and spliced into the starter signal wire with a longer wire, and ran that to the starter. This completely covered the charging/starting harness. The next thing was the vacuum system. I just took some generic vacuum line and connectors from some junkyard fords and splices them together into a sealed and functional vacuum system that ran to all the things in needed to (heater core valve, evap, egr, fuel pulse regulator, vacuum reservoir, etc).
I opted to leave the transmission mostly dry except for like, 1 quart of trans fluid, just to hear the engine start.
Ran fine for no oxygen sensors, so after hearing it start I just started fabbing the exhaust and getting the rest of the engine dialed together. As for the oxygen sensors, the grey connectors are the upstreams and the Blue connectors are the downstreams. I was able to get a functional exhaust system with some random pipe and a flux core welder from harbor freight, and I filled the engine with coolant, filled the trans with fluid and took only one lap around the block as a test drive... because I was in a hurry... don't do what I did. Make time for this stuff. I spent the next several days having to fix dumb issues because I didn't have enough time, like a vacuum leak, loose fuel rail, and my exhaust welds failed.
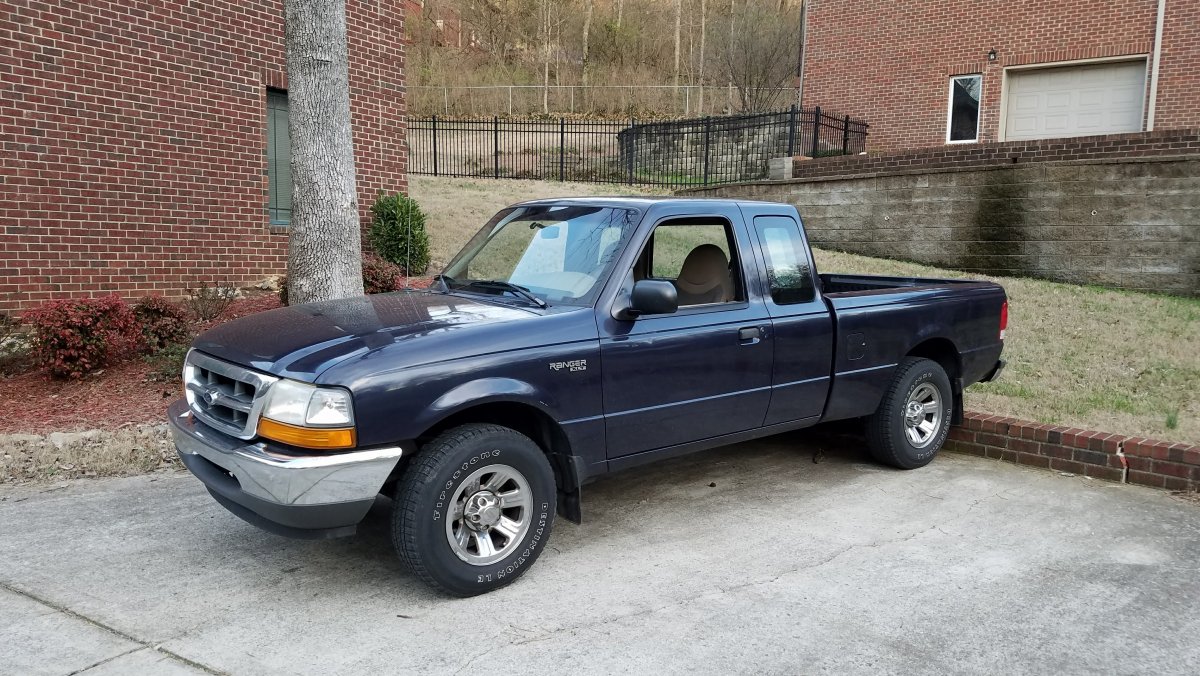
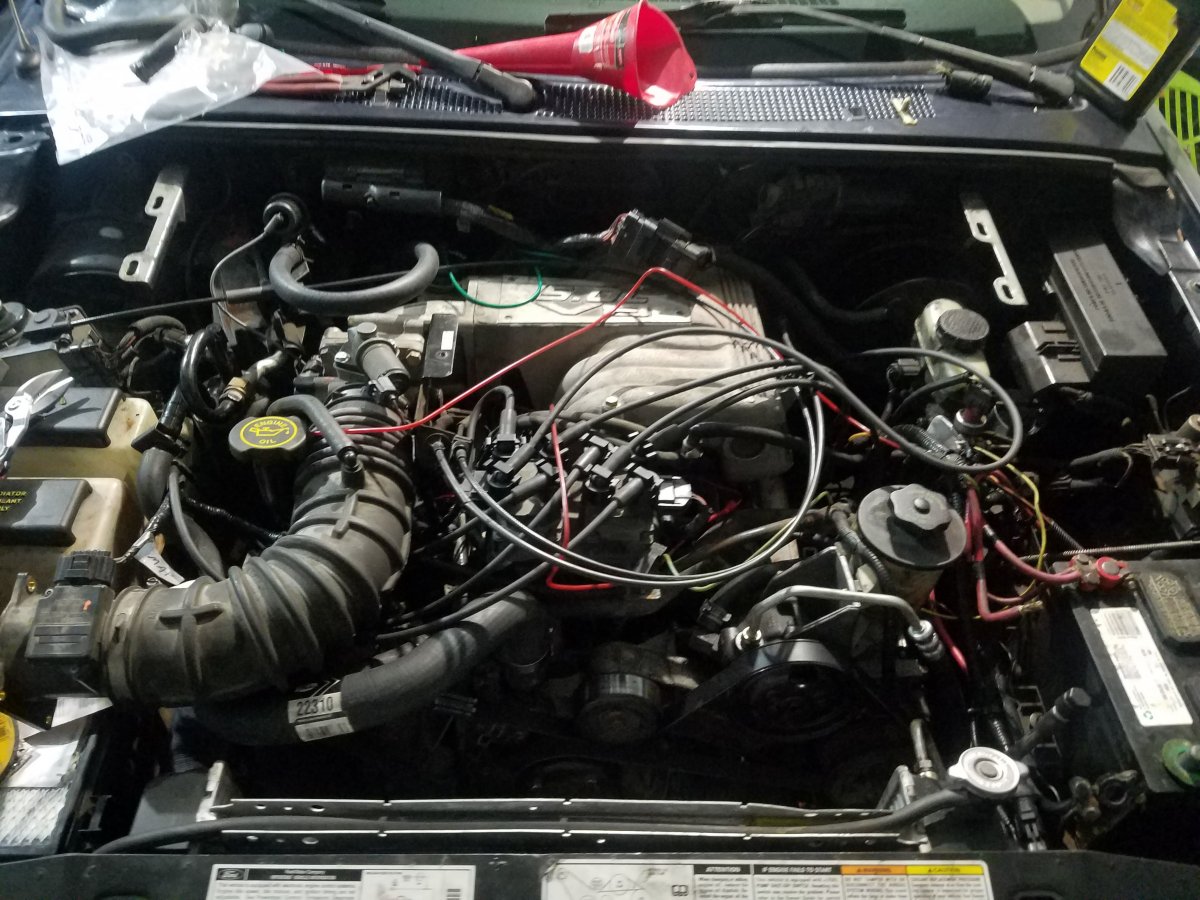
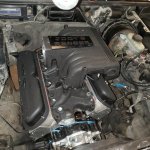
This is the result immediately after running it for the first time.
There's lots of stories and guides out there on this swap, so gather all the info you can. It will help you make this so much easier. Also, feel free to ask questions.
My vehicle is a 2000 Ford Ranger 3.0 V6 FFV 2wd (non-edge)
I did not make use of a donor vehicle for this swap.
Here's the information i've gathered and experienced by doing this swap
Disclaimer: when I say I 'found' a part, just know that I was, in fact, in a junkyard.
Computer
The required year explorer (1999-2001) has a Type B Passive Anti Theft System (PATS) with a key transponder and separate anti-theft module. I originally considered taking my ECU to a shop to tune out the anti-theft controls, but I ultimately found an entire set (ECU, Anti-theft module, key, and keyhole) in a 2000 mercury mountaineer.
Engine
The 5.0L (302) was pulled from a 2000 mercury mountaineer as a whole assembly (meaning only a few minor parts were missing).
The 1999-2001 model years were required because the older ones used different sensors, so I would be unable to use my 2000 mountaineer ECU with it properly.
This engine uses the returnless fuel rail running at 65 psi. The fuel pressure regulator in my Ranger's gas tank had to be changed for a non-ffv version of the same year to give the proper fuel pressure.
The oil filter on this year engine does fit in the ranger with the stock 90 degree adapter.
The throttle and cruise control cable with both work and fit on this type of ranger.
The main wiring harness has a large 42-pin connector right above the intake, and is completely plug-and-play.
The motor mounts on my 3.0L V6 can be used with RicksRangerz Motor mount adapter plates. Really you just need to make sure the studs on your motor mounts are perfectly inline, and not staggered. https://www.ebay.com/itm/98-11-Ford-Ranger-V8-302-swap-kit-motor-mounts-plates-2wd/152046882412?hash=item2366b34e6c:g:qIMAAOSwN7BdMOyq
The Drivers' side motor mount for the 3.0L V6 has a spacer block on it, and the drivers' side coil spring needs to be removed in order to remove the spacer block. Then the front crossmember needs the alignment hole drilled out slightly to fit the motor mount into.
My 5.0 got a near full rebuild, Same piston rings and it was not machined, but all the bearings were changed, all the seals were replaced, and all the gaskets were replaced. When I put it back together, I left off the upper intake, but I installed the wiring harness, just to have it routed properly before installing it.
Transmission
I pulled my transmission from a 1999 2wd 5.0 explorer.
The output shaft on these is 28 splines, and the stock 3.0 ranger's driveshaft spline is 25, so you need to scavenge the slip yoke from the same explorer (which uses the same size u-joint) or from another compatible ford driveshaft that uses the same u-joint (Dana spicer 1330 series in my case)
My driveshaft was 1" shorter than expected, which caused vibrations at highway speeds, I fixed this by adding 1" spacer to the differential flange. I've come to understand that many driveshafts might not be compatible at all depending on your ranger's configuration. Just do some measurements beforehand.
the shifter linkage in the ranger fit into the 4r70w linkage bracket and onto the DTR sensor.
The transmission cooler lines were made by using 1/4" NPT fittings off the transmission into some oil hose, then, I used the old hardlines, cut short, and then the hoses clamped to the hardline.
this trans also had its small wiring harness installed before the swap.
Power steering
All you need to do it take the return hose to the reservoir and the main pressure hose from the pump to the rack, from the explorer. Plumb these up in the same spots they would be on your ranger and you will have power steering.
Air Conditioning
Take the hardlines that run between the compressor and the accumulator / condensor and you will be good. I've yet to actually fill mine up with freon, but the hoses will connect at the very least.
Radiator
I chose to stick with the Ranger's stock radiator, which is half the thickness of the explorer's radiator, but having driven this around for about 2 months, I've yet to have any cooling issues.
Exhaust
I'm using the stock manifolds, which I know are restrictive, but I have little choice given my budget. the stock manifolds fit no problem but because I did not have the downpipes, I had to fab my own exhaust from the flanges back.
Procedure
Getting the whole thing done, in the grand scheme of things was really simple.
Transmission out
Engine out
Fix motor mount
Engine in
Transmission in
Done.
That's generally the order you're going to follow when doing this for a purely running standpoint.
Let's just go through this in a little more detail.
Pulling the old Trans
First things first, remove any extraneous things that might tether the engine/transmission into the vehicle. this starts with the exhaust and the driveshaft, just unbolt these and move them aside. I understand that the manifold flanges on rangers might be super rusted so be sure to use penetrating fluid on these many days before, or, you can try to remove these before even trying to start this swap, just to have them broken loose.
Next, I drained all the fluids that i needed to drain, which included mainly the coolant, and transmission fluid. Draining the coolant was easy, but to drain out the transmission fluid, I chose to just remove the cooler lines, on the transmission and catch all the fluid that came out, just so I didn't have to drop the entire transmission oil pan. After prepping the transmission for removal (removing the shifter linkage and unbolting the torque converter, as well as unplugging all the electrical connectors) I unbolted the trans and used a transmission jack to lower it out of the car (please get a trans jack it made this process 100000% easier). Now, I can move onto the engine.
Pulling the V6
This was a bit more complicated since we had accessories to handle, but I began by first removing the fan, shroud and radiator. This gives us a lot more room up front to disassemble things. The next thing I handled was the power steering, which I promptly drained, and then removed the lines for. The final accessory to remove is the A/C compressor, but this was the point of no return. Once the freon is released from the system, you can't go back without losing your A/C. Obviously, if you didn't have A/C then this doesn't matter. I removed the A/C lines and set them aside. Then some little things to finally remove from the engine (Vacuum lines and the wiring connections to the body. The wiring connections included the 42-pin connector above the intake and the large connector going to the ECU. Now I was able to strap the Engine to a lift and unbolt the motor mount plates and lift it out. be sure to strap the engine very closely together or you might not have enough hoist clearance to get it over the rad support. I made the mistake of not strapping it very closely to the engine, and I had to remove the oil pan in order to clear the rad support.
Now the motor mount problem. I had to completely disassemble my drivers' side front suspension in order to reach the bolt that holds the mount in. This just took a floor jack and some patience to carefully remove the coil spring from the control arm. After removing the mount, I removed the spacer bolted to it, and used a dremel to notch the crossmember and allow the alignment pin to fit. After that I just reassembled the suspension and was ready for the 5.0 to drop in.
Putting the 5.0 in
I strapped my 5.0 to the lift and made sure my plates were bolted securely, then lowered the 5.0 into the engine bay. The plates fit perfectly and I bolted it firm but with some give (since the motor mount plates were slotted instead of just having holes in them.) Once it was In it was just a matter of getting the transmission in and mounting it on the crossmember.
Installing the trans
This was a pain.
The 4r70w is a significantly beefier transmission than the old 4r55e, so you need to hammer in the pinch weld on the firewall in order to get it to even consider fitting. (Again, make sure you have a trans jack before trying this swap or you will pull your hair out) Once you get the thing into position and get it bolted down get your trans crossmember ready. You will likely need to add some shims on the trans mount studs because otherwise you will have clearance issues with the engine oil pan and the front crossmember. Once you shim the trans mount and bolt that in, just bolt your crossmember into the frame and you're good.
buttoning everything else up
Since I installed the wiring harness before doing this swap, it was real simple to just plug all the connectors where they needed to go. I also added the upper intake and the radiator upfront. The next hard part was getting the starting system working.
There is a connector underneath the brake master cylinder that connects between the body, and the charging/starting harness. This will rarely be plug and play. What I opted to do was take the longer power wire to the starter, and run that separately from the battery to the starter. Then I took the stock ranger harness, and spliced into the starter signal wire with a longer wire, and ran that to the starter. This completely covered the charging/starting harness. The next thing was the vacuum system. I just took some generic vacuum line and connectors from some junkyard fords and splices them together into a sealed and functional vacuum system that ran to all the things in needed to (heater core valve, evap, egr, fuel pulse regulator, vacuum reservoir, etc).
I opted to leave the transmission mostly dry except for like, 1 quart of trans fluid, just to hear the engine start.
This is the result immediately after running it for the first time.
There's lots of stories and guides out there on this swap, so gather all the info you can. It will help you make this so much easier. Also, feel free to ask questions.
")