
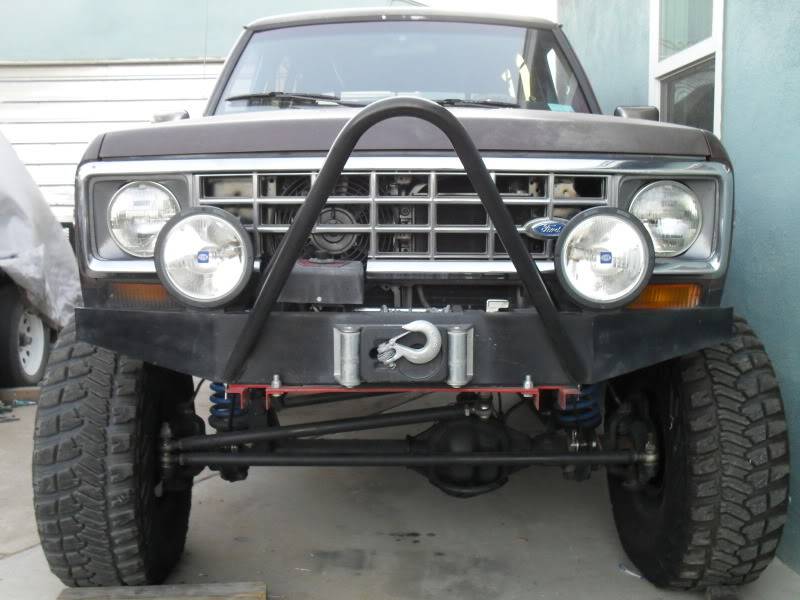
Round Headlight Conversion Using Older Ford Parts
By JoelH
This is one modification that I did that has everyone asking for more info. It’s not difficult to do but it did take some thought as to how to pull it off. I may go back and clean some of it up. The initial mockup was just a hack job to see if it could be done.
This Modification is a serious one as you don’t want to mess it up. Once done the only way to go back to the rectangular lights is to cut out the modified part and weld in new metal or replace the whole core support.
The lights I used were from a 1978 Econoline Van. I grabbed the lights, trim rings and housings. The plug is optional as the Bronco should have the same plug for the sealed beams.
To get the core support ready to accept the round lights the rectangular lights have to come off. With the lights off the plastic bucket pads will have to be removed along with the clip nuts for the adjusters.
With everything out of the way by placing the round light in the pocket you can see where the area needs to be massaged. For starters the upper adjuster on the rectangular lights protrudes out quite far. This will need to be beaten back and up some. A big hammer works best for this. I then used my channel lock pliers to form in the opening so that the round light fits in the pocket better.
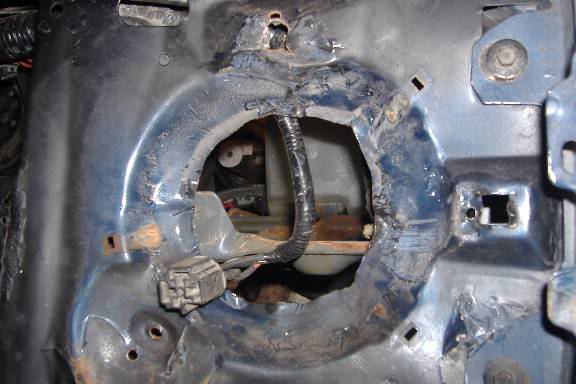
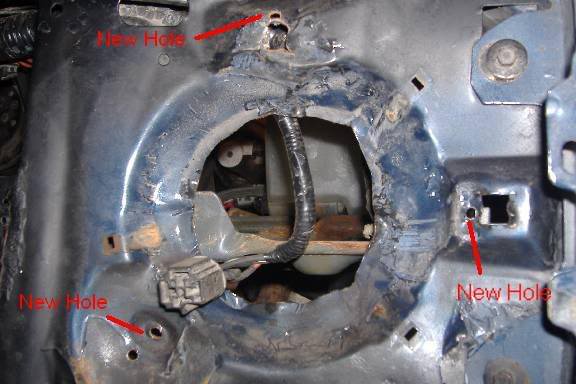
For sure it’s not pretty but it works. The once thing I’ve been thinking of doing is possibly cutting the area out and trying to replace it with the bucket out of the Econoline. There will also be a couple of new holes you’re going to have to drill. As you need clearance for the new adjuster hardware. The old hardware could be reused with a bit of ingenuity, but I chose to replace it with new stuff. Normally the lights are set up in the bucket and there are 2 adjusters and 1 spring. The spring is going to have to go. Again, I chose to go with new hardware. I found some square nuts at the local hardware store that were tapped with for a #12 screw. I set out for new hardware and found a couple of Allen head machine screw that were stainless. This will keep the adjuster’s movable for a long time to come. I was looking for some regular nuts in stainless but couldn’t find any so I settled for brass.
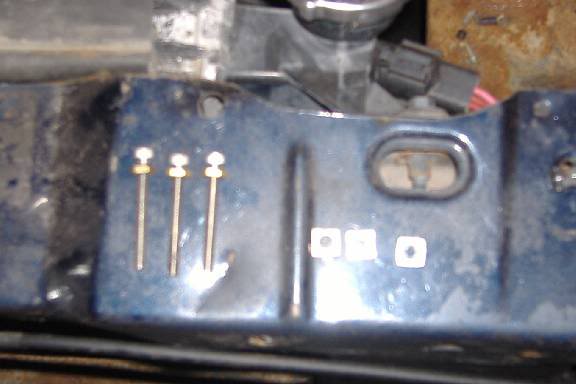
With the round bucket fitting snug your going to need to modify the light housing to add the third set screw. What I did was bent over the loop for the spring. This gave me the third mount i needed. The only other thing I needed to do was make the hole smaller as the screws I had were not big enough and would fall through the hole. Two snips and a pinch from the pliers made it the perfect size.
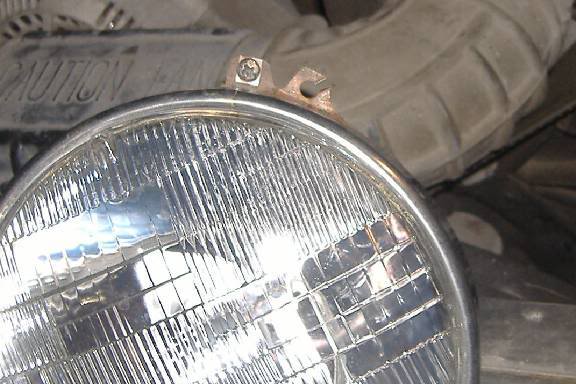
Now to set everything up. I used the brass nuts and screws to lock onto the tabs for the adjusters. I was then able to screw the square nuts into place. The holes I drilled were specific that they were larger than the machine screw used. With the light somewhat adjusted in place I tack welded the nuts to the core support. I then went back and welded them in a couple more places. This will give the lights a good solid mount. They will also be adjustable with the hardware chosen.
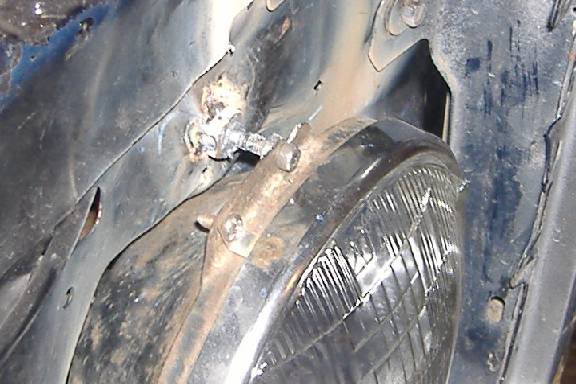
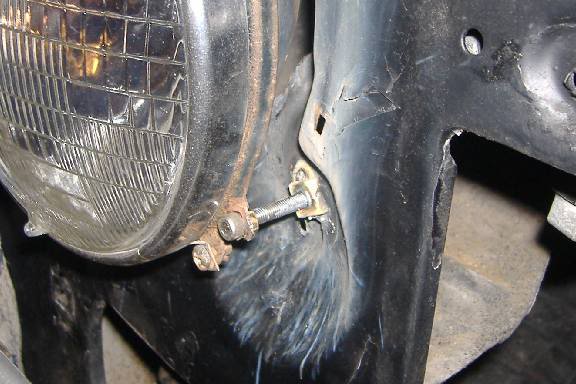
The brass nuts allow me to lock the set screw in place and will keep the light adjusted.
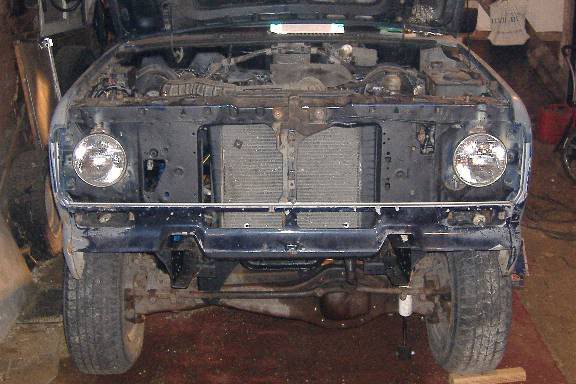
With the lights in place and working, it was now time to do something with the grill. It looks kinda goofy with the round lights in the square opening. On the grill there is a feature line that was used to trim the opening bigger to clear out the light opening. This part is optional as it’s up to you how you want it to look. With the opening cut it was time to think of how to blend things in.
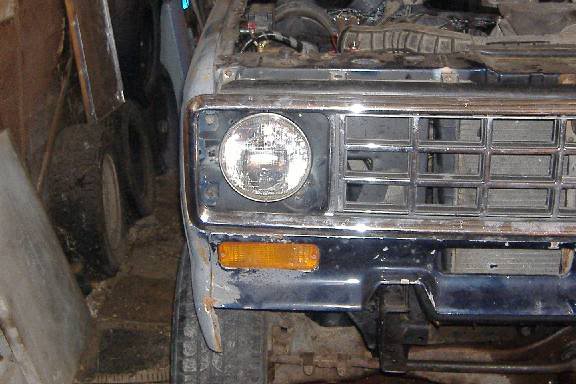
I planned to make a filler panel to blend the square opening to the round light. This will be made out of fiberglass. To get things going I made a cardboard template of the filler. From here I can make a mold to use for the glass fillers.
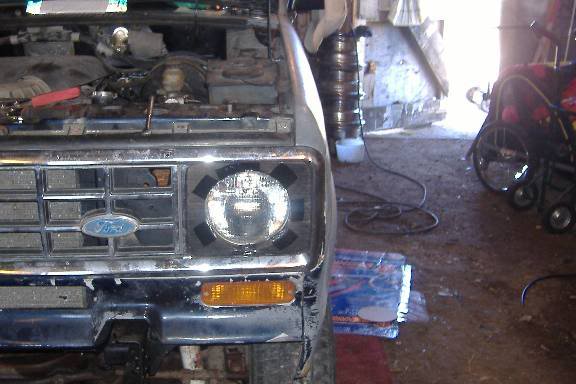
Here is the beginning of the filler panels. I’m making a mold from wood. These will be mounted to a board, and I will put fiberglass over them. I should be able to get a few pieces made.
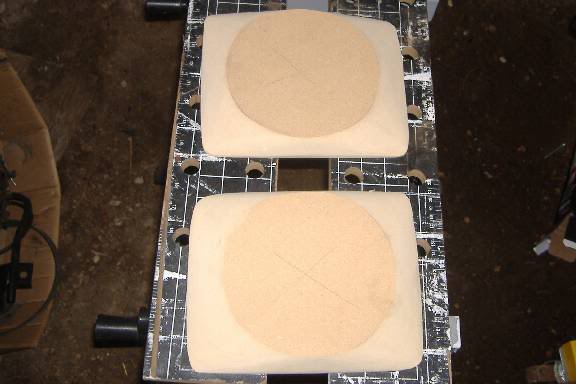
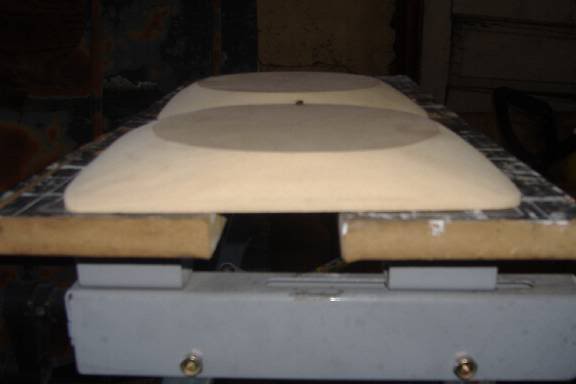
With the molds made I then mounted them to a base. I screwed them down to a couple of 2 x 4’s to keep the base flat. With the molds mounted I sanded them with some 220-grit paper to keep them smooth. I skipped the gelcoat stage as I couldn’t remember where I put it. The mold was then covered in a water-based mold release. Once it was dry I cut out the sheets of glass I was going to use. I was then ready to mix the resin and apply the glass. I only used 2 layers of mat as this would bring the thickness to just under 1/8″ thick.
Here the parts are drying in the sun.
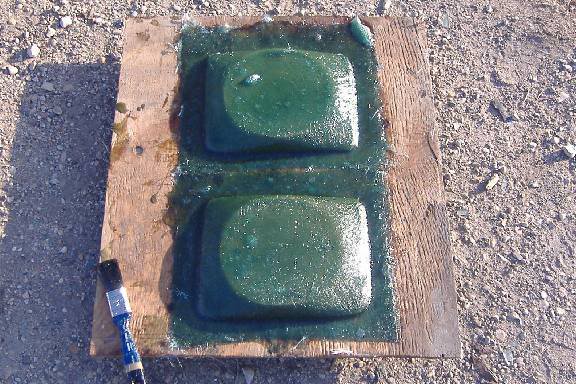
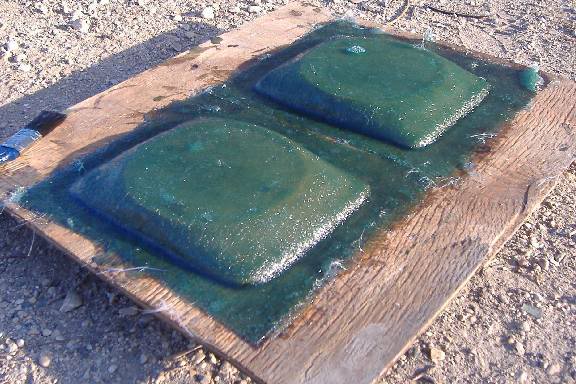
Once dry I was then able to remove them from the mold.
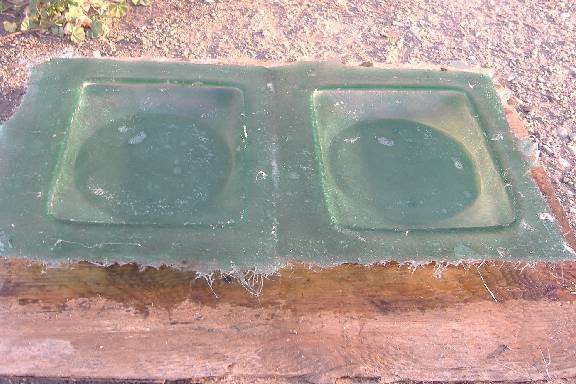
The parts were marked out and trimmed. With not using gelcoat there were a few air bubbles that I could not work out. After scuffing the surface, I applied a bit of Bondo to fill the holes. After sanding smooth it was time to test fit on the truck to see if there was more trimming involved.
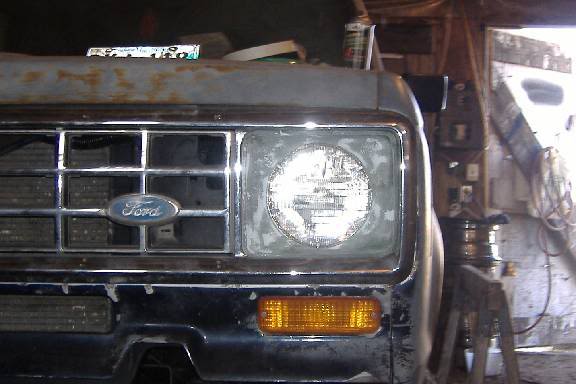
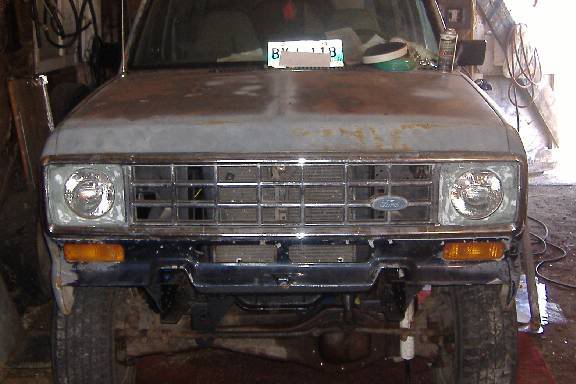
With them fitting great I was ready to paint them. I first used some primer then I applied a coat of truck bed liner in the spray can. This filled in any of the heavy scratches and any other little blemishes.
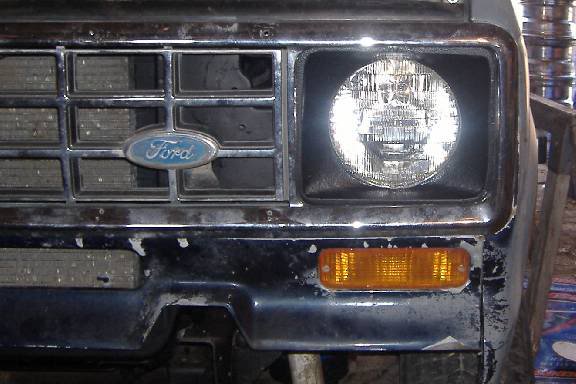
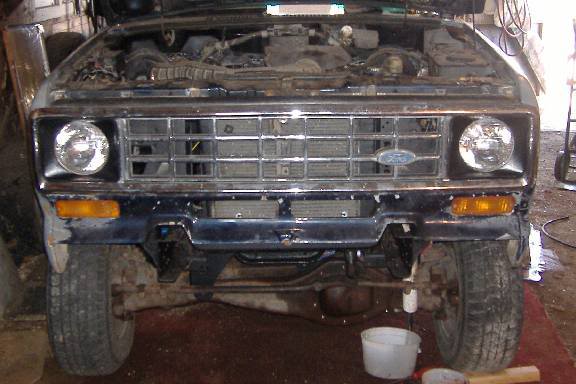
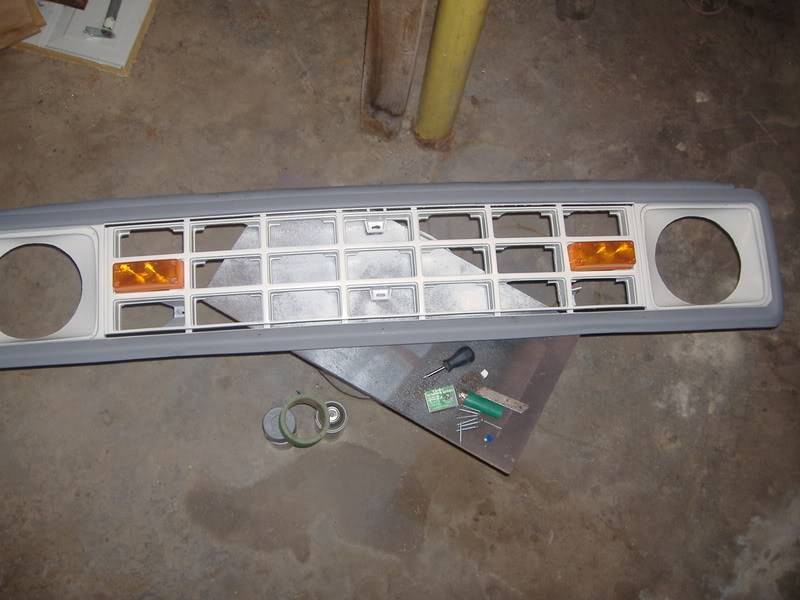
I then bonded the bezels to the grill from the back side. I started with a couple of globs of Bondo to fast adhere them into place. Epoxy could be used also. Once setup you can then go and seal the front side with a Urethane adhesive. Don’t use silicone as you can’t paint over it. I applied more urethane adhesive to the backside to ensure a good bond.
You could stop there or go one step further like I did and paint the grill body color.
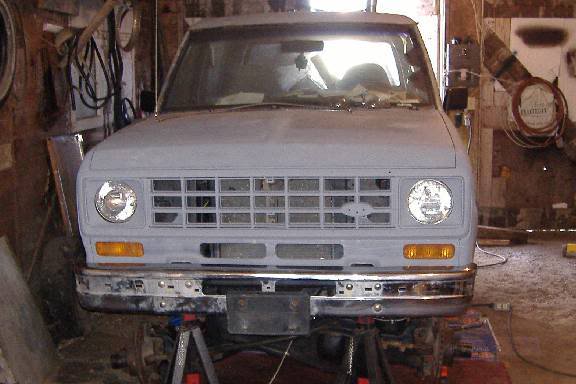
Here is a current shot of the round lights.
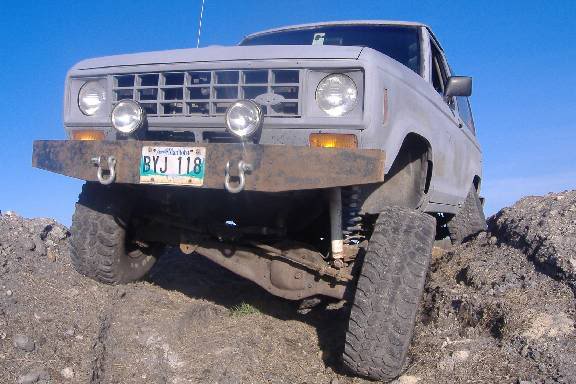

Related Articles
Round Headlights On Your Bronco II (The Easier Way)
About The Author
Jim Oaks is the founder of TheRangerStation.com, the longest-running Ford Ranger resource online since 1999. With over 25 years of hands-on experience building and modifying Ford Rangers — including magazine-featured builds like Project Transformer — Jim has become one of the most trusted authorities in the Ford Ranger off-road and enthusiast space.
Since launching TheRangerStation.com, Jim has documented thousands of real-world Ranger builds, technical repairs, drivetrain swaps, suspension modifications, and off-road adventures contributed by owners worldwide. TheRangerStation.com has been referenced in print, video and online by enthusiasts, mechanics, and off-road builders looking for practical, and experience-based information.