• Welcome Visitor! Please take a few seconds and Register for our forum. Even if you don't want to post, you can still 'Like' and react to posts.

2021 Ford Ranger FX4 TRS-3 Project Build


You probably know this, but plug in Forscan and adjust the tire size. You input the tire circumference in centimeters.
My experience took a little trial and error.
I looked up the tire circumference for my 265/70-17's on Cooper's website and converted it to cm.
Drove up and down the road at different speeds comparing the speedo to the GPS and it was reading way too high because the actual circumference number was too high.
Tinkered a bit and it was spot-on with the circumference at an even 2400 cm.
It's not just the speedo that needs to be right because it will affect the mpg display and the transmission shifting.

What if I ain't got Forscan?
 
I doubt that even a consideration. The engineers are given a set of equipment and parameters to work with and they make the wheels fit.

Style and aerodynamics play a part. It seems the more flush look of the positive offset/deep back spaced wheels is more visually appealing to the market and general and generate less aerodynamic drag than the older wheels with a more neutral/centered offset/back space.

Wheel damage is something vehicle enthusiasts worry about. Look at the average vehicle out there and how scuffed up their wheels and tires are and they just don’t seem to care.

And about every tire rotation gravel travellers have to have their wheels washed out because of the negative pressure that forms inside flush offset wheels. All is well as crap builds up in there until a chunk falls out... and then the vehicle is trying to wobble off the road above 50mph.

It is aslo nice black wheels are the current fad, so when you smear them on a rock you can proudly broadcast to the world that you actually wheel by having the black paint ripped off revealing the bare aluminum underneath.

What if I ain't got Forscan?

'tis but a free download for a laptop.
 
Dunno why thry put such scuffable wheels on these things. Somehow we have a big swirl in one of out Bronco wheels too.
If I would have went 285 70 17s or bigger I'd probably been fine. But sliding of rocks and deep waterr where you can't see what's there have taken a toll on the running the 255 75 17s. They had no budget really to protect the wheels. I've got all 4 on my truck pretty dag gum bad on a few. But they still balance and ride good.
 
And about every tire rotation gravel travellers have to have their wheels washed out because of the negative pressure that forms inside flush offset wheels. All is well as crap builds up in there until a chunk falls out... and then the vehicle is trying to wobble off the road above 50mph.

It is aslo nice black wheels are the current fad, so when you smear them on a rock you can proudly broadcast to the world that you actually wheel by having the black paint ripped off revealing the bare aluminum underneath.


'tis but a free download for a laptop.
Plus you can turn on Bambi Mode within and a few other cool options. I've even read where you can adjust the brakes where they are less soft. I'm fixing to order the attachment cable the a new TM switch and activate it on mine in the near future once money gets right.
 
What if I ain't got Forscan?
Your speedometer and shifting will be off.

'tis but a free download for a laptop.
Plus you can turn on Bambi Mode within and a few other cool options. I've even read where you can adjust the brakes where they are less soft. I'm fixing to order the attachment cable the a new TM switch and activate it on mine in the near future once money gets right.
Forscan is free. However you have to buy the $60 cable from Amazon. The $20 cable won't work. Trust me, I know this.
With the $20 cable you have to download a driver, something I haven't had to do for anything in ten years, but the website in the instructions for the driver no longer exists. At least Amazon gave me a refund.
It was near time for the Ford Nationals last year anyway so Todd Z from the Sport Trac site brought his cable and laptop and we tweaked it there.
There are videos on YouTube showing how to do it. You do have to click Save after you make adjustments.
We:
1. Fixed the tire size.
2. Turned on Bambi Mode, where the fog lights stay on with the high beams.
Some folks turn off the piped in engine sound thru the speakers but my STX with the base radio doesn't seem to do that and it was not an option.
I think you can turn off the auto stop/start, aka A.S.S., but my tailgate light bar did it for me since the truck thinks it's towing a trailer.
 
Your speedometer and shifting will be off.


Forscan is free. However you have to buy the $60 cable from Amazon. The $20 cable won't work. Trust me, I know this.
With the $20 cable you have to download a driver, something I haven't had to do for anything in ten years, but the website in the instructions for the driver no longer exists. At least Amazon gave me a refund.
It was near time for the Ford Nationals last year anyway so Todd Z from the Sport Trac site brought his cable and laptop and we tweaked it there.
There are videos on YouTube showing how to do it. You do have to click Save after you make adjustments.
We:
1. Fixed the tire size.
2. Turned on Bambi Mode, where the fog lights stay on with the high beams.
Some folks turn off the piped in engine sound thru the speakers but my STX with the base radio doesn't seem to do that and it was not an option.
I think you can turn off the auto stop/start, aka A.S.S., but my tailgate light bar did it for me since the truck thinks it's towing a trailer.

I used a wifi adaptor thing.

I wasn't doing this in depth of stuff, maybe it wouldn't work for this stuff.

Just diag stuff for my wife's edge and my old F-150.
 
Test Fit:

I test fit one of the new wheels on the Ranger.

20230427_133612.jpg

20230427_133626.jpg

And then had one of the tires mounted so I can test fit it after I install the lift.

20230427_163329.jpg

20230427_163958.jpg

20230427_163346.jpg

20230427_163815.jpg
 
trs-3_2021_ford_ranger_fx4_texas_red_river-1.PNG

trs-3_2021_ford_ranger_fx4_texas_red_river-2.PNG

Took a trip up to the Red River which is only about 15-20 minutes from my house. Found a trail that actually took me down to the rivers edge.
 
Forscan is free. However you have to buy the $60 cable from Amazon. The $20 cable won't work. Trust me, I know this.

Free for certain functions. I'm pretty sure reprogramming anything require the paid version. And IDK about a $20 cable but the $35 VGate VLinker worked fine with Windows 11 to connect to an 04 Mustang and a 13 Explorer. Had a buddy at work use it with his laptop to enable dark mode, change lock settings, disable seat belt warning, etc. on the Explorer. The list of options was insane.
 
Free for certain functions. I'm pretty sure reprogramming anything require the paid version. And IDK about a $20 cable but the $35 VGate VLinker worked fine with Windows 11 to connect to an 04 Mustang and a 13 Explorer. Had a buddy at work use it with his laptop to enable dark mode, change lock settings, disable seat belt warning, etc. on the Explorer. The list of options was insane.
The problem with the $20 cable was that you have to download a driver, something I haven't needed to do in ten years, but the website in the instructions to get the driver doesn't exist anymore. Amazon gave me a refund no problem. By that point it was almost time for the Ford Nationals last year so my bud from the Sport Trac club brought his laptop and cable and we tweaked it there.
 
I Installed the Skyjacker 3.5-Inch lift and got the wheels and tires mounted.

I'll post photos and details of the installation in the next few days. Until then, here's some photos of it all installed.

20230504_223037.jpg
20230504_223027.jpg
20230510_100823.jpg
20230510_100836.jpg
20230510_131055.jpg
20230510_131115.jpg
20230510_131141.jpg
20230510_133840.jpg
20230510_133931.jpg
20230510_134002.jpg
20230510_133938.jpg
20230514_160121.jpg
20230514_160133.jpg
20230514_160200.jpg
20230514_160214.jpg
20230514_160225.jpg
20230514_160256.jpg
 
Skyjacker 3.5-Inch Lift kit Installation / Dissasembly:

2021_ford_ranger_trs-3_skyjacker_lift_kit_installation_100.JPG

Link:


2021_ford_ranger_trs-3_skyjacker_lift_kit_installation_110.JPG

I juacked the Ranger up, placed heavy duty jackstands under the frame under the front of the cab, set the parking brake, and removed the front wheels.

2021_ford_ranger_trs-3_skyjacker_lift_kit_installation_120.JPG

I removed the bolts for the skid plates with a 15mm socket.

2021_ford_ranger_trs-3_skyjacker_lift_kit_installation_125.JPG


2021_ford_ranger_trs-3_skyjacker_lift_kit_installation_130.JPG

2021_ford_ranger_trs-3_skyjacker_lift_kit_installation_135.JPG

Next I had to unplug the (3) Electric Power Assist Steering (EPAS) connectors. A sudden jar of a hammer blow or impact wrench to other suspension components could cause contacts of EPAS internal power relay to arch or short out.

2021_ford_ranger_trs-3_skyjacker_lift_kit_installation_140.JPG

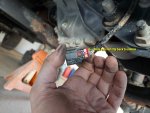
These connectors have a red plastic locking clip on them that need to be gently pulled back to unlock the connector before you can remove it.

CAUTION: Do not break the locking clip or the connector itself!

I sprayed a little WD-40 on the red locking clip and gently worked it backwards to unlock the connector.

2021_ford_ranger_trs-3_skyjacker_lift_kit_installation_150.JPG

Next disconnect the (2) ABS wire plastic clips from the Upper Control Arm (UCA) with a plastic fastener removal tool.

Then disconnect the ABS sensor bracket from forward side of the knuckle with a 8mm socket \ wrench and the brake line bracket from rearward side of the knuckle with a 10mm socket \ wrench.

2021_ford_ranger_trs-3_skyjacker_lift_kit_installation_155.JPG

2021_ford_ranger_trs-3_skyjacker_lift_kit_installation_160.JPG

Remove the ABS sensor from the knuckle.

2021_ford_ranger_trs-3_skyjacker_lift_kit_installation_180.JPG

Loosen, but do not remove the tie rod nut from the knuckle using a 21mm socket \ wrench. Unseat the tie rod by striking the tie rod boss of knuckle at tie rod end to dislodge. Note: ONLY strike knuckle portion. Remove nut and remove tie rod end from knuckle.

2021_ford_ranger_trs-3_skyjacker_lift_kit_installation_170.JPG


2021_ford_ranger_trs-3_skyjacker_lift_kit_installation_190.JPG

Then remove the tie rod. I used a 8mm wrench to hold the joint while I removed the nut with a 21mm wrench.

2021_ford_ranger_trs-3_skyjacker_lift_kit_installation_175.JPG

Use a 18mm wrench to remove the upper sway bar link from the knuckle. I had to use an Allen wrench to hold the joint while I loosened the nut.

2021_ford_ranger_trs-3_skyjacker_lift_kit_installation_200.JPG


2021_ford_ranger_trs-3_skyjacker_lift_kit_installation_210.JPG

Disconnect the brake caliper from the knuckle using a 18mm socket \ wrench. Remove the brake rotor from hub and set aside. Do Not hang the brake caliper by the rubber brake line.

2021_ford_ranger_trs-3_skyjacker_lift_kit_installation_220.JPG

2021_ford_ranger_trs-3_skyjacker_lift_kit_installation_230.JPG

I hung the brake caliper from the body using a small bungie cord. See the photo below.

2021_ford_ranger_trs-3_skyjacker_lift_kit_installation_240.JPG

I had to remove the axle nut and I didn't have an impact, so I removed the center cap from a wheel, mounted it back on the hub, lowered it to the ground so it couldn't turn, and then used a 36mm socket on a breaker bar stuck into a pipe for leverage.


2021_ford_ranger_trs-3_skyjacker_lift_kit_installation_250.JPG

Once I got the nut broke loose I used my ratcheting breaker bar.


2021_ford_ranger_trs-3_skyjacker_lift_kit_installation_260.JPG


2021_ford_ranger_trs-3_skyjacker_lift_kit_installation_270.JPG

With the axle nut removed (and the tire) I supported the lower control arm with a jack and loosened the upper ball joint nut.

2021_ford_ranger_trs-3_skyjacker_lift_kit_installation_280.JPG

And then struck the knuckle with a ballpeen hammer to get it to drop loose.

2021_ford_ranger_trs-3_skyjacker_lift_kit_installation_290.JPG

2021_ford_ranger_trs-3_skyjacker_lift_kit_installation_300.JPG

Next I loosened the lower ball joint nut with a 21mm wrench

2021_ford_ranger_trs-3_skyjacker_lift_kit_installation_310.JPG

Again I used a hammer to get the knuckle to drop loose.

2021_ford_ranger_trs-3_skyjacker_lift_kit_installation_315.JPG

Then I removed the knuckle.

2021_ford_ranger_trs-3_skyjacker_lift_kit_installation_320.JPG

Remove the (3) upper strut mounting nuts from frame mount using a 15mm socket \ wrench.

2021_ford_ranger_trs-3_skyjacker_lift_kit_installation_330.JPG

2021_ford_ranger_trs-3_skyjacker_lift_kit_installation_340.JPG

Remove the (2) lower strut mounting nuts from lower control arm mount using a 18mm socket \ wrench.

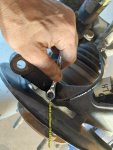
The instructions say to mark cam bolt position of lower control arm. Loosen, but do not remove the (2) cam bolts on lower control arm at frame using a 21mm and a 24mm socket \ wrench. Let lower control arm hang down.

You can see in the picture below where I marked the cam with a yellow paint pen to keep the alignment.

2021_ford_ranger_trs-3_skyjacker_lift_kit_installation_350.JPG

2021_ford_ranger_trs-3_skyjacker_lift_kit_installation_355.JPG

Advice / Experience #1: Loosening this will allow the lower control arm to drop down so you can get the strut out. The problem is that the lower strut mount is in a rubber bushing. If you look at the photo below, you'll see that the mounting studs are angled a little to the right. This is the strut turned 180 degrees from its original mounting position, and this is the way it's going to get re-installed. These studs and the part that goes through the rubber bushing are pretty much stuck in this position. I tried to loosen it up with some WD-40, but it didn't allow me to move them by hand.

When I tried to re-install the strut, these studs would not line up with the mounting holes in the lower control arm. I ended up having to remove the lower control arm to mount the strut, and then reinstall the control arm.

So even though the instructions tell you to just loosen it, you're probably going to end up completely removing it.

Advice / Experience #2: You will eventually have to cut the differential mount starting at Step 53 in the instructions. It would have been easier to cut that mount while I had the driver side lower control arm removed.

2021_ford_ranger_trs-3_skyjacker_lift_kit_installation_360.JPG

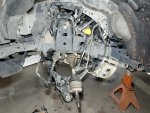
Here's the strut removed.

2021_ford_ranger_trs-3_skyjacker_lift_kit_installation_370.JPG
 

Attachments

  • 2021_ford_ranger_trs-3_skyjacker_lift_kit_installation_150.JPG
    2021_ford_ranger_trs-3_skyjacker_lift_kit_installation_150.JPG
    96.6 KB · Views: 80
  • 2021_ford_ranger_trs-3_skyjacker_lift_kit_installation_180.JPG
    2021_ford_ranger_trs-3_skyjacker_lift_kit_installation_180.JPG
    110.1 KB · Views: 84
  • 2021_ford_ranger_trs-3_skyjacker_lift_kit_installation_370.JPG
    2021_ford_ranger_trs-3_skyjacker_lift_kit_installation_370.JPG
    134.4 KB · Views: 79
Skyjacker 3.5-Inch Lift kit Installation / Strut:

Once the strut is removed you have to mark the pieces of the assembly with a paint pen to make sure they all line up when it goes back together.

2021_ford_ranger_trs-3_skyjacker_lift_kit_installation_380.JPG

2021_ford_ranger_trs-3_skyjacker_lift_kit_installation_390.JPG

2021_ford_ranger_trs-3_skyjacker_lift_kit_installation_400.JPG

Then compress the coil spring with a strut spring compressor to relieve the tension from the strut top. I stuck it in my vice to make disassembly and reassembly easier.

2021_ford_ranger_trs-3_skyjacker_lift_kit_installation_410.JPG

2021_ford_ranger_trs-3_skyjacker_lift_kit_installation_420.JPG


2021_ford_ranger_trs-3_skyjacker_lift_kit_installation_430.JPG

2021_ford_ranger_trs-3_skyjacker_lift_kit_installation_440.JPG

2021_ford_ranger_trs-3_skyjacker_lift_kit_installation_450.JPG

You can see that with the strut spring off I marked an alignment mark before removing the lower spring seat.

2021_ford_ranger_trs-3_skyjacker_lift_kit_installation_460.JPG

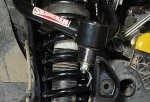
With all of the parts removed I installed the Skyjacker Strut Ring Spacer and then began reassembling the strut.

2021_ford_ranger_trs-3_skyjacker_lift_kit_installation_470.JPG

Making sure all of the alignment marks line up when reassembling.

2021_ford_ranger_trs-3_skyjacker_lift_kit_installation_480.JPG

2021_ford_ranger_trs-3_skyjacker_lift_kit_installation_490.JPG

I like that the Skyjacker spacer has studs welded into it where-as some kits require you to install the studs and pull them through tight when you tighten the nuts down.

2021_ford_ranger_trs-3_skyjacker_lift_kit_installation_500.JPG

2021_ford_ranger_trs-3_skyjacker_lift_kit_installation_510.JPG

Below you can see the new strut spacer sitting on the strut. Since there are (3) studs and they have to be opposite of the factory studs to be able to sit on the strut, this will mean that the strut will be positioned backwards from its original position when installed.

2021_ford_ranger_trs-3_skyjacker_lift_kit_installation_520.JPG

Here's the strut spacer installed. I ended up using a ratchet strap going under the strut with the hooks up on the spacer to pull it down enough to get the center nut started.

2021_ford_ranger_trs-3_skyjacker_lift_kit_installation_530.JPG

Skyjacker 3.5-Inch Lift kit Installation / Upper Control Arm:

Time to remove the upper control arm. Remove the upper control arm from the frame using an 18mm socket \ wrench and a 21mm socket \ wrench.

2021_ford_ranger_trs-3_skyjacker_lift_kit_installation_540.JPG

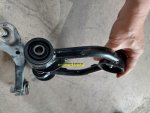
The factory upper control arm is replaced with this Skyjacker beefy control arm made from steel tubing. Note the welded gusset for added support.

2021_ford_ranger_trs-3_skyjacker_lift_kit_installation_550.JPG

2021_ford_ranger_trs-3_skyjacker_lift_kit_installation_560.JPG

2021_ford_ranger_trs-3_skyjacker_lift_kit_installation_570.JPG

Install the new upper control arm with the factory hardware. Do not tighten it until the lift kit is installed and the truck is sitting on the ground with the full weight of the vehicle on it.

2021_ford_ranger_trs-3_skyjacker_lift_kit_installation_580.JPG

Install the upper strut mount and secure it with the new nuts using a 15mm wrench

2021_ford_ranger_trs-3_skyjacker_lift_kit_installation_600.JPG

Install the lower strut mount with the factory nuts and an 18mm wrench / socket.

2021_ford_ranger_trs-3_skyjacker_lift_kit_installation_590.JPG

Re-installed the steering knuckle while making sure I guided the axle through the hub.

2021_ford_ranger_trs-3_skyjacker_lift_kit_installation_610.JPG

When installing the upper ball joint you have to use the extra thick spacer that comes with the kit and goes on before the castle nut.

2021_ford_ranger_trs-3_skyjacker_lift_kit_installation_620.JPG

Then install the lower ball joint.

Installed the axle nut. I'll tighten it up when the wheel is on the ground just like I loosened it.
Re-installed the rotor and brake caliper. Use the supplied thread locker on the caliper bolts.

2021_ford_ranger_trs-3_skyjacker_lift_kit_installation_630.JPG

Reinstalled the ABS sensor wire and brake line brackets. Also reinstalled the ABS sensor in the knuckle.

2021_ford_ranger_trs-3_skyjacker_lift_kit_installation_640.JPG

Re-install the hose clips into the new upper control arm.

2021_ford_ranger_trs-3_skyjacker_lift_kit_installation_650.JPG

Re-installed the upper sway bar link.

2021_ford_ranger_trs-3_skyjacker_lift_kit_installation_660.JPG

Reinstalled the steering tie rod. Also

2021_ford_ranger_trs-3_skyjacker_lift_kit_installation_670.JPG


2021_ford_ranger_trs-3_skyjacker_lift_kit_installation_680.JPG

Passenger Side Installation:

The passenger side is a repeat of the drivers side.

Here you can see where I'm installing the strut with the lower control arm already attached.

2021_ford_ranger_trs-3_skyjacker_lift_kit_installation_690.JPG

Skyjacker 3.5-Inch Lift kit Installation / Front Differential:

2021_ford_ranger_trs-3_skyjacker_lift_kit_installation_700.JPG

The instructions come with templates to cut out and use as a guide, so you know where to cut the factory front differential mounts.

I placed a floor jack under the differential for this part of the install.

2021_ford_ranger_trs-3_skyjacker_lift_kit_installation_705.JPG

Above you can see the mount on the passenger side of the truck and below you can see where I cut it off.

2021_ford_ranger_trs-3_skyjacker_lift_kit_installation_710.JPG

This new 3/16" Skyjacker bracket will bot in its place.

2021_ford_ranger_trs-3_skyjacker_lift_kit_installation_715.JPG

Here's where it gets interesting. Notice in the photos below from the instructions that this bracket has a nut welded at the top of it. Mine did not. I thought this was something they missed when they welded the bracket, but the Skyjacker photo of the kit components below those photos show the new part without the nut welded to it. Skyjacker supplies a bolt, a dished style washer, and a lock washer, but no bolt. Fortunately, I had a nut to fit it.

2021_ford_ranger_trs-3_skyjacker_lift_kit_installation_730.JPG

You use a factory hole for the upper bolt, and then drill out the lower bolt hole with a 7/16" drill bit as shown in the photos above. I did not fully tighten the very top bolt with the nut I supplied until I completed the next step below.

2021_ford_ranger_trs-3_skyjacker_lift_kit_installation_720.JPG

I removed this factory bracket from the (passenger) side of the driver side differential mount.

2021_ford_ranger_trs-3_skyjacker_lift_kit_installation_740.JPG

Removed the long bolt holding the differential in the mount, and then cut this side of the mount using the supplied template.

2021_ford_ranger_trs-3_skyjacker_lift_kit_installation_745.JPG

2021_ford_ranger_trs-3_skyjacker_lift_kit_installation_750.JPG

Then fought to drill the two required holes using the marks in the template. This was a pain in the ass. I ended up drilling them from the back (passenger) side. It would have been so much easier if I would have drilled these when the drivers side lower control arm was off.

2021_ford_ranger_trs-3_skyjacker_lift_kit_installation_760.JPG

This new bracket bolts on to the passenger side of this mount.

2021_ford_ranger_trs-3_skyjacker_lift_kit_installation_780.JPG

Here's the new bracket installed on the drivers side of the differential mount after it has been cut.

2021_ford_ranger_trs-3_skyjacker_lift_kit_installation_770.JPG

Here's the other side with everything bolted up.

2021_ford_ranger_trs-3_skyjacker_lift_kit_installation_790.JPG

From here I tightened up the top bolt in the first bracket that I installed earlier (the one where I supplied the nut).

With all of this tightened up I put the wheels and tires back on so I could set the truck on the ground and tighten the axle nuts through the removed center caps using a 36mm socket and breaker bar.

Then I reconnected the (3) Electronic Power Assist Steering (EPAS) plugs to the steering assembly.

Then eventually reinstalled the skid plates.
 

Attachments

  • 2021_ford_ranger_trs-3_skyjacker_lift_kit_installation_570.JPG
    2021_ford_ranger_trs-3_skyjacker_lift_kit_installation_570.JPG
    111.7 KB · Views: 70
  • 2021_ford_ranger_trs-3_skyjacker_lift_kit_installation_620.JPG
    2021_ford_ranger_trs-3_skyjacker_lift_kit_installation_620.JPG
    104.3 KB · Views: 71
Last edited:
Skyjacker 3.5-Inch Lift kit Installation / Rear Lift:

The rear lift is pretty easy.

I jacked up the rear of the ranger and set it on jack stands. Since my Ranger has a receiver hitch, I was able to place my large jackstands under the hitch at the frame rails.

With the rear of the truck supported, I jacked up the axle enough to get a rear tire off of the ground, and then removed the tire.

With the tire off, I removed the lower shock bolt. Not sure why. Skyjacker says to swing it out of the way. Maybe they're concerned you'll overextend the shock dropping the axle, or that it will keep the axle from dropping away from the spring.

I then removed the (2) U-bolts holding the leaf spring to the axle.

2021_ford_ranger_trs-3_skyjacker_lift_kit_installation_800.JPG

With the U-bolts off, I lowered the jack to allow the axle to drop down from the leaf spring.

I then inserted the new Skyjacker 1.25 inch spacer block between the spring perch and the leaf spring making sure that the pin on the block was in the center hole of the spring perch, and the pin under the leaf spring aligned with the hole in the block.

2021_ford_ranger_trs-3_skyjacker_lift_kit_installation_810.JPG

The axle moved back a little when I lowered it, so I attached a ratchet strap to the axle and the frame under the cab and ratcheted the axle forward until the pins all lined up.

With everything lined up I jacked the axle back up until the block was up against the leaf spring.

2021_ford_ranger_trs-3_skyjacker_lift_kit_installation_820.JPG


2021_ford_ranger_trs-3_skyjacker_lift_kit_installation_830.JPG

Then installed the new U-bolts and nuts.

2021_ford_ranger_trs-3_skyjacker_lift_kit_installation_840.JPG

Then I repeated this on the other side.

With it all done I reinstalled the lower shock bolt.
 
Last edited:

Sponsored Ad


Sponsored Ad

TRS Events

Member & Vendor Upgrades

For a small yearly donation, you can support this forum and receive a 'Supporting Member' banner, or become a 'Supporting Vendor' and promote your products here. Click the banner to find out how.

Recently Featured

Want to see your truck here? Share your photos and details in the forum.

Ranger Adventure Video

TRS Merchandise

Follow TRS On Instagram

TRS Sponsors


Sponsored Ad


Sponsored Ad


Amazon Deals

Sponsored Ad

Back
Top