
Introduction
This article will show you how to install a 1995-2001 Ford Explorer Full Length Center Console in your Ford Ranger.
Tools Needed
- 1995-2001 Ford Explorer full length center console
- Drill
- T55 torx head
- Hammer
- Self-tapping screws
- Time
Procedure
Start out by getting the old console and seats out.
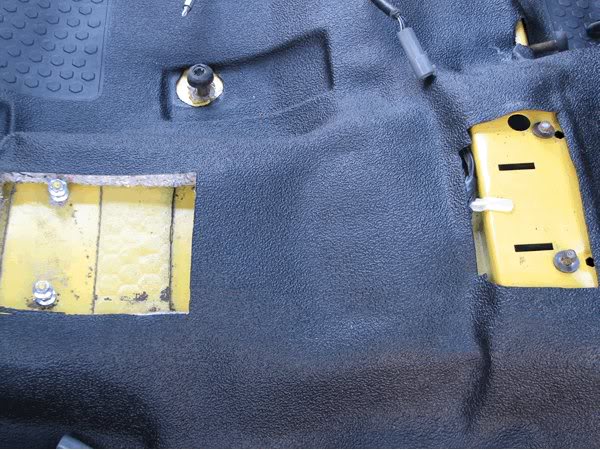
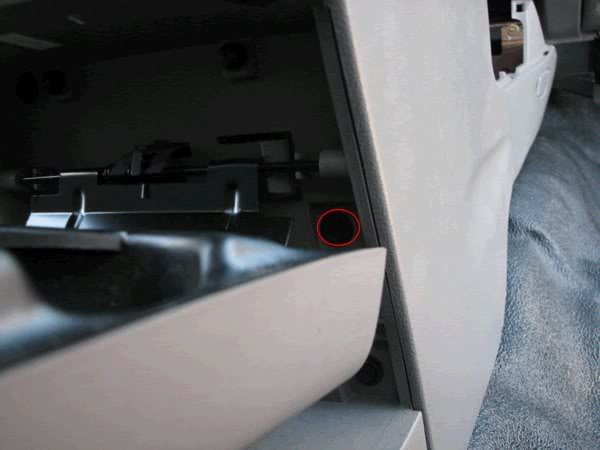
Remove the airbag and ash tray.

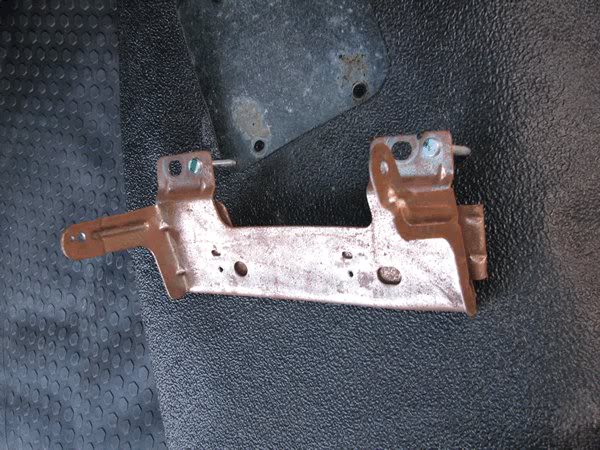
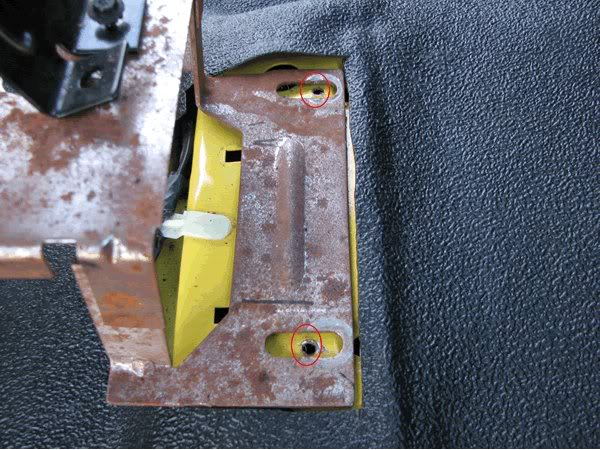
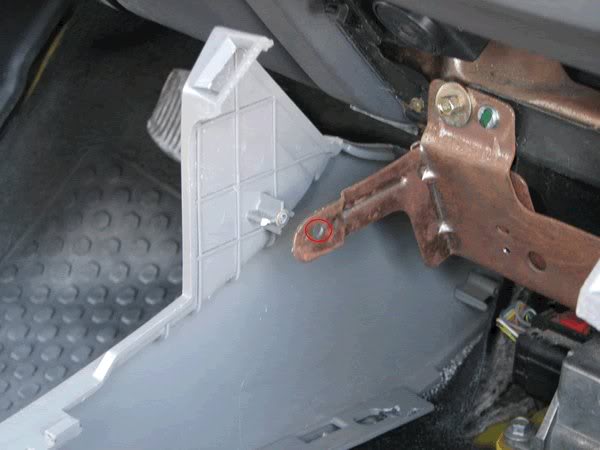
Grab the small front bracket for the explorer console. I folded the bottom to the top for it to fit.
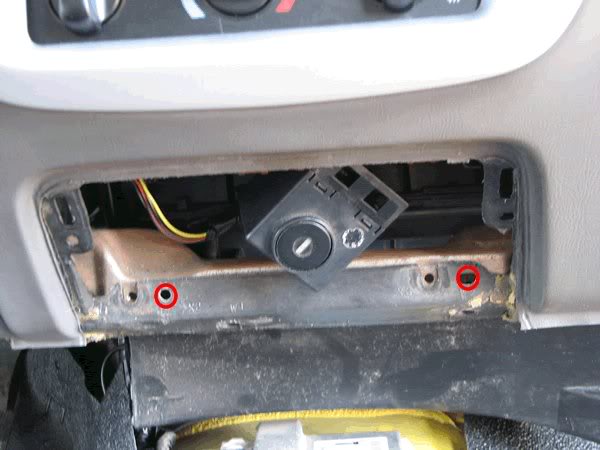
Bolt it to the bar that the air bag and ash tray were. The red circles are where the studs of the bracket go.
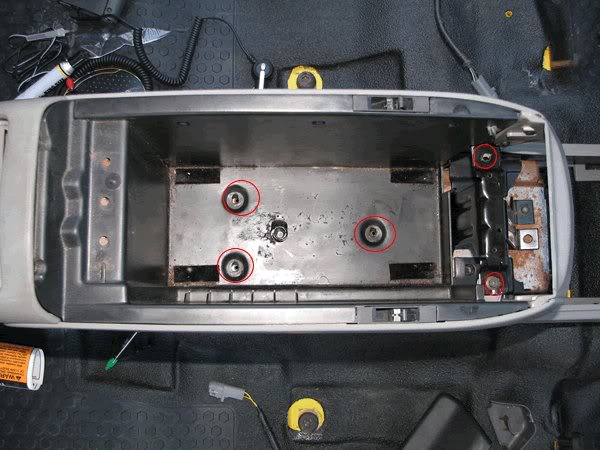
Next get the big bracket and lay it on the floor to see where you need to drill at.
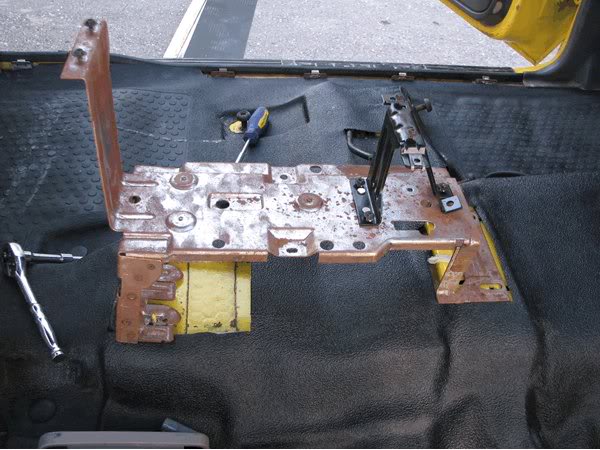
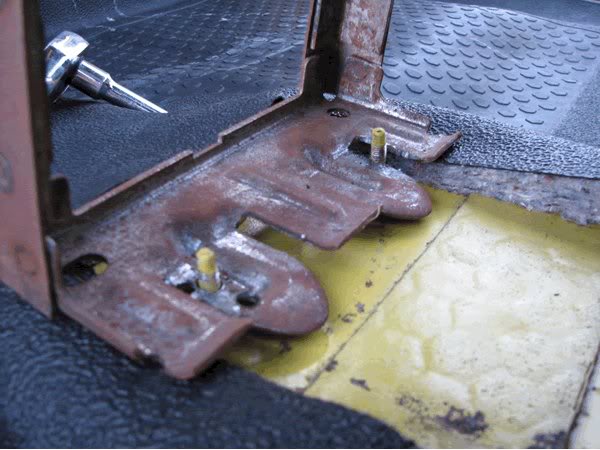
As you can see I didn’t drill in the right place the first time.
Next drill two holes for the front bracket and use self-taping screws to bolt it down.
Take the shell of the console and lay it on the large bracket.

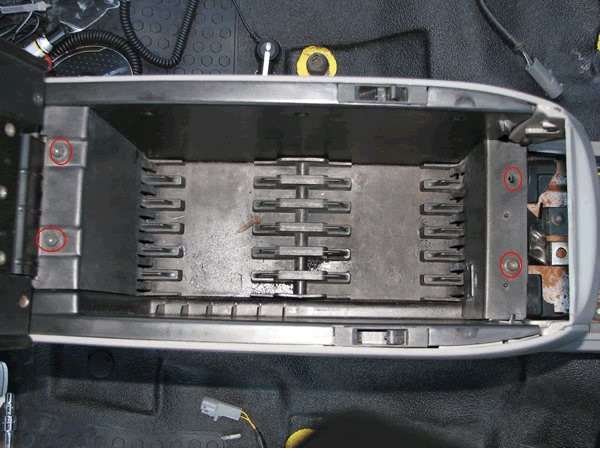
Now grab the rear temp control and mount that to the shell.
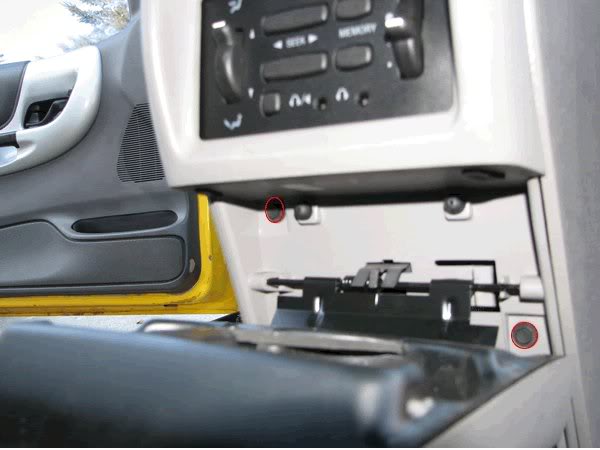
In red is where the bolts go.
Grab the black plastic that goes inside the arm rest, Not the cd holder one. Bolt this down circled in red.
Screw the (6) screws on the top of the sides of the cubie holder.

Next screw the last two bolts in the back trim, and ac controls.

Take the CD holder and put it in the cubby and bolt down the (4) screws.
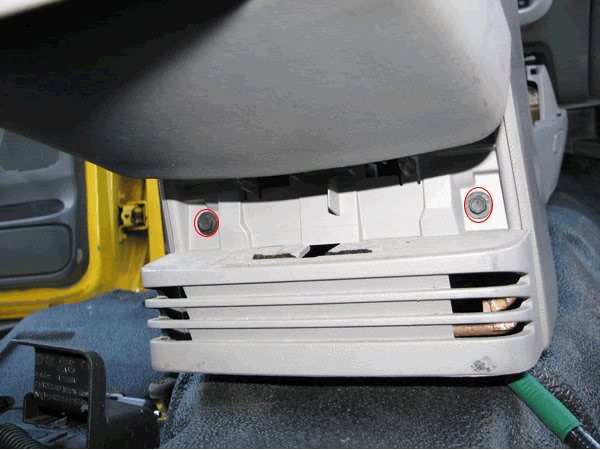
Mount the arm rest with two screws.
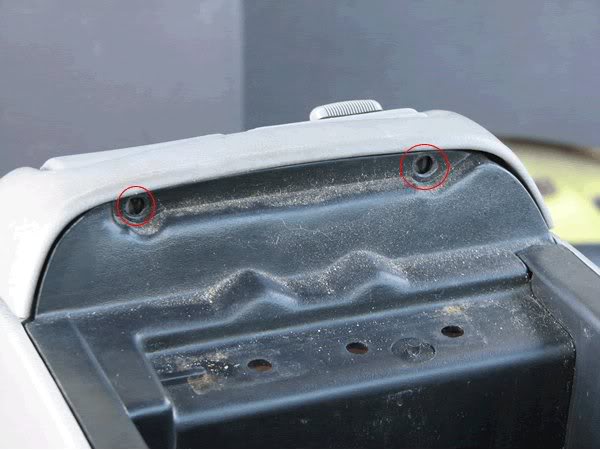
Use the bottom holes in the picture above.
Bolt the two screws for the font down.

Last step put the cup holders and the top cubby in and enjoy all the work you’ve done.
Related Articles
1995-2001 Ford Explorer Center Console Removal
Remove / Install 2002-2005 Ford Explorer Center Console
Explorer Center Console Upgrade
How To Remove The Center (Short) Console
Explorer Overhead Console Upgrade
Ford Explorer Console Information Center
Last Updated:
About The Author
Jim Oaks is the founder of TheRangerStation.com, the longest-running Ford Ranger resource online since 1999. With over 25 years of hands-on experience building and modifying Ford Rangers — including magazine-featured builds like Project Transformer — Jim has become one of the most trusted authorities in the Ford Ranger off-road and enthusiast space.
Since launching TheRangerStation.com, Jim has documented thousands of real-world Ranger builds, technical repairs, drivetrain swaps, suspension modifications, and off-road adventures contributed by owners worldwide. TheRangerStation.com has been referenced in print, video and online by enthusiasts, mechanics, and off-road builders looking for practical, and experience-based information.