
Introduction
Whether you’re removing your Ford Ranger center console or you’re salvaging one from a donor vehicle, this article will show you how to remove it.
Tools Needed
- 10mm socket
- 8mm socket
- Ratchet, and an extension
- Phillips head screwdriver
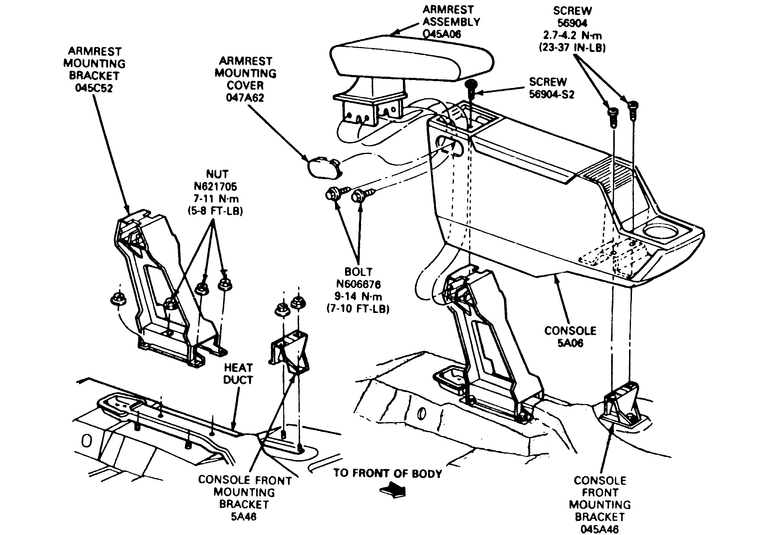
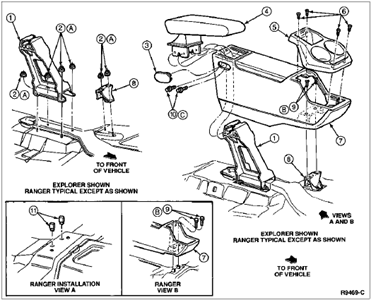
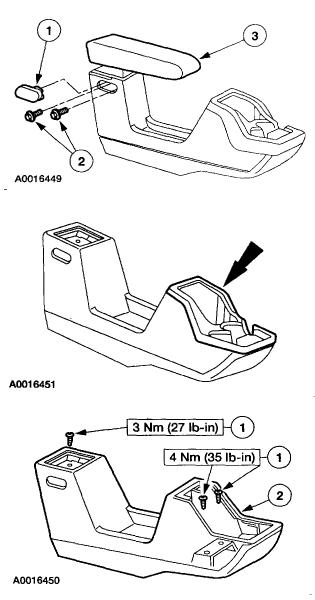
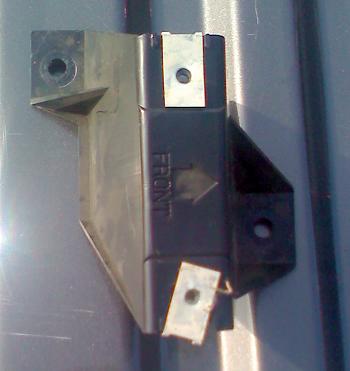
Diagrams
Removal of Console
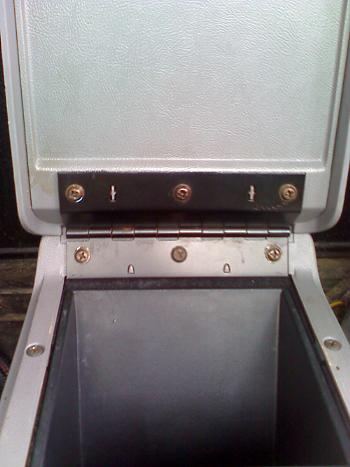
Removing the console begins by opening the lid and removing the (3) screws holding the lid to the console
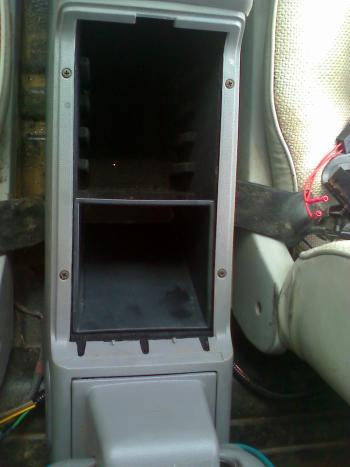
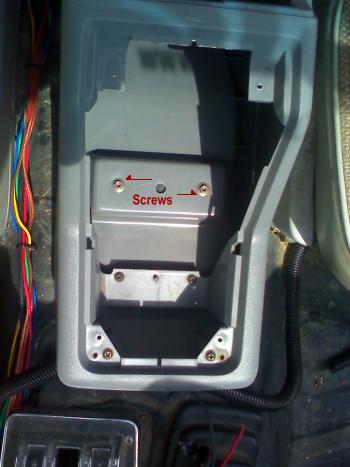
Once the lid is off you’ll see the (4) screws holding the black inner compartment up in place. The plastic console is somewhat flexible and once you remove those screws you should be able to pull that inner compartment out.
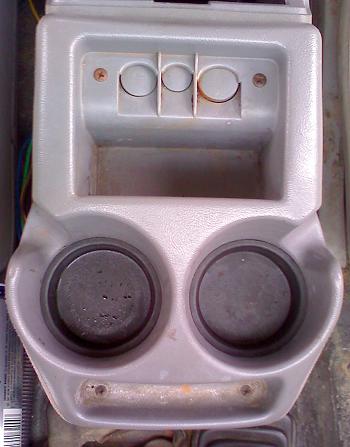
Next remove the screws that hold the front cup holder section in place. There are (2) screws in the front of the cup holder (Bottom part of photo above). There’s a good chance that your donor console may be full of crud and these screws aren’t visible. Clean it out so you can get the screws out and remove all (4) screws.
If your console has the cup holders inline instead of side by side, remove the cup holder by lifting up on the front of it.
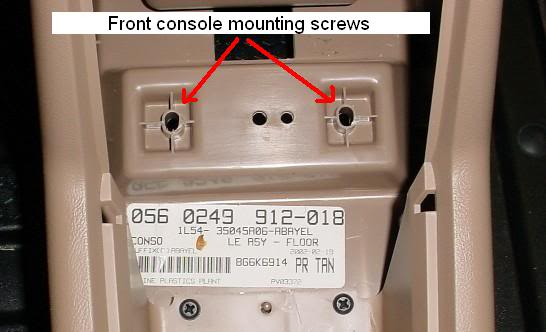
After removing the front cup holder section, remove the (2) screws holding the front of the console down to the mounting bracket.
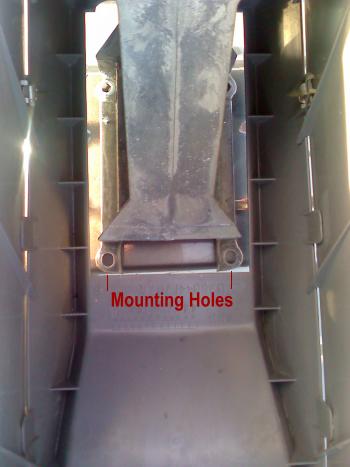
Then remove the (4) 10mm nuts from the metal upright console bracket (missing from photo – see mounting holes in photo). The carpet and insulation will probably be in your way.
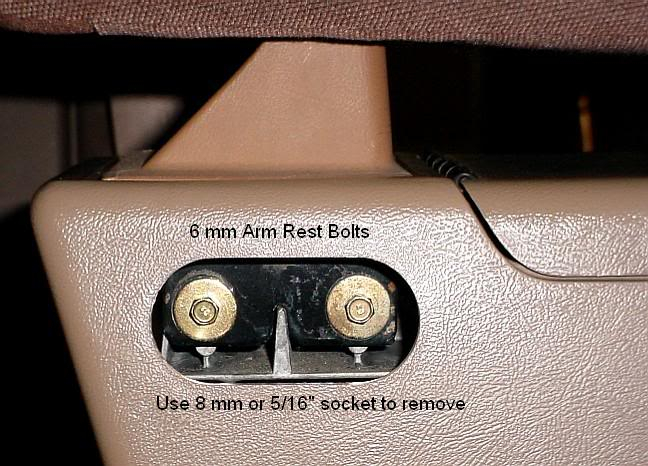
You can also remove the caps on the rear sides of the console, and remove the (2) 8mm bolts on each side. Then you can remove the arms rest.
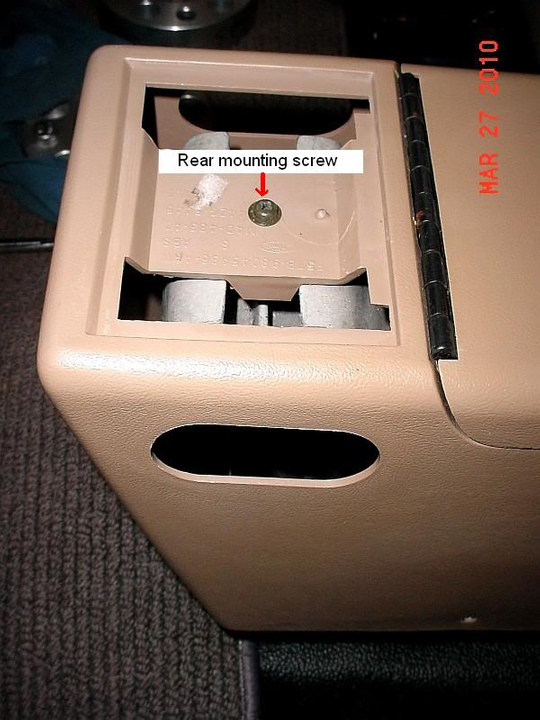
Then remove the screw holding the console down to the rear mounting bracket.
Then lift the console off of the rear mounting bracket to have better access to the (4) 10mm mounting bolts.
From here you should be able to remove the whole console.
Make sure when you remove it you get the front plastic bracket that’s still mounted to the floor.
Related Articles
1995-2001 Ford Explorer Center Console Removal
Remove / Install 2002-2005 Ford Explorer Center Console
Explorer Center Console Upgrade
Ford Explorer Full Length Console Install
Explorer Overhead Console Upgrade
Ford Explorer Console Information Center
Last Updated:
About The Author
Jim Oaks is the founder of TheRangerStation.com, the longest-running Ford Ranger resource online since 1999. With over 25 years of hands-on experience building and modifying Ford Rangers — including magazine-featured builds like Project Transformer — Jim has become one of the most trusted authorities in the Ford Ranger off-road and enthusiast space.
Since launching TheRangerStation.com, Jim has documented thousands of real-world Ranger builds, technical repairs, drivetrain swaps, suspension modifications, and off-road adventures contributed by owners worldwide. TheRangerStation.com has been referenced in print, video and online by enthusiasts, mechanics, and off-road builders looking for practical, and experience-based information.