
K-Slice
New Member
- Joined
- Sep 28, 2010
- Messages
- 107
- Reaction score
- 6
- Points
- 0
- Location
- Traverse City. MI
- Vehicle Year
- 1989
- Make / Model
- Ford
- Engine Size
- 2.9
- Transmission
- Automatic
Original Poster: ME!
Difficulty: 3 out of 10
Time to install: +- 1hr
Disclaimer: The Ranger Station.com, The Ranger Station.com Staff, nor the original poster are responsible for you doing this modification to your vehicle. By doing this modification and following this how-to you, the installer, take full responsibility if anything is damaged or messed up. If you have questions, feel free to PM the original poster or ask in the appropriate section of The Ranger Station.com forums.
Brief Explanation: I'll show you how to put lights on the front bumper of your first or second gen ranger without drilling into your nice chrome bumper!
Tools Needed:
- Bench vice
- Channel locks
- Ratchet and sockets
- 1/2" drill bit
Parts Needed:
- 2 4"-4.5" corner braces
- 2 lock washers (recommended)
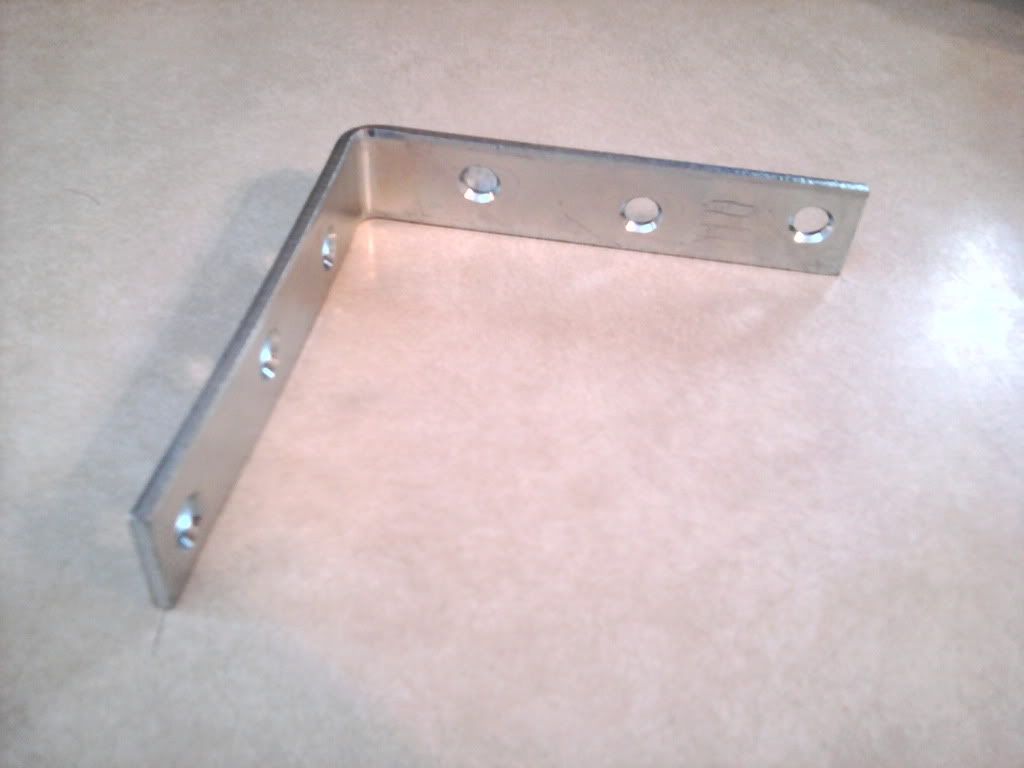
Step 1:
Get some 4-5 inch corner braces from any Home improvement store. I don't remember the exact size I bought, think they were 4.5 inch. And make sure the steel is thick enough to support the kind of light your using. The wall-mart specials I put on there don't weigh much, but some of the KC's and such do..
Step 2: Drill the holes on both ends of the tabs out. Drill one side to fit whatever size bolt your light mounts with and drill the other to a 1/2 inch hole. That should be just enough that you can slip it onto the bolt that holds the bumper on.
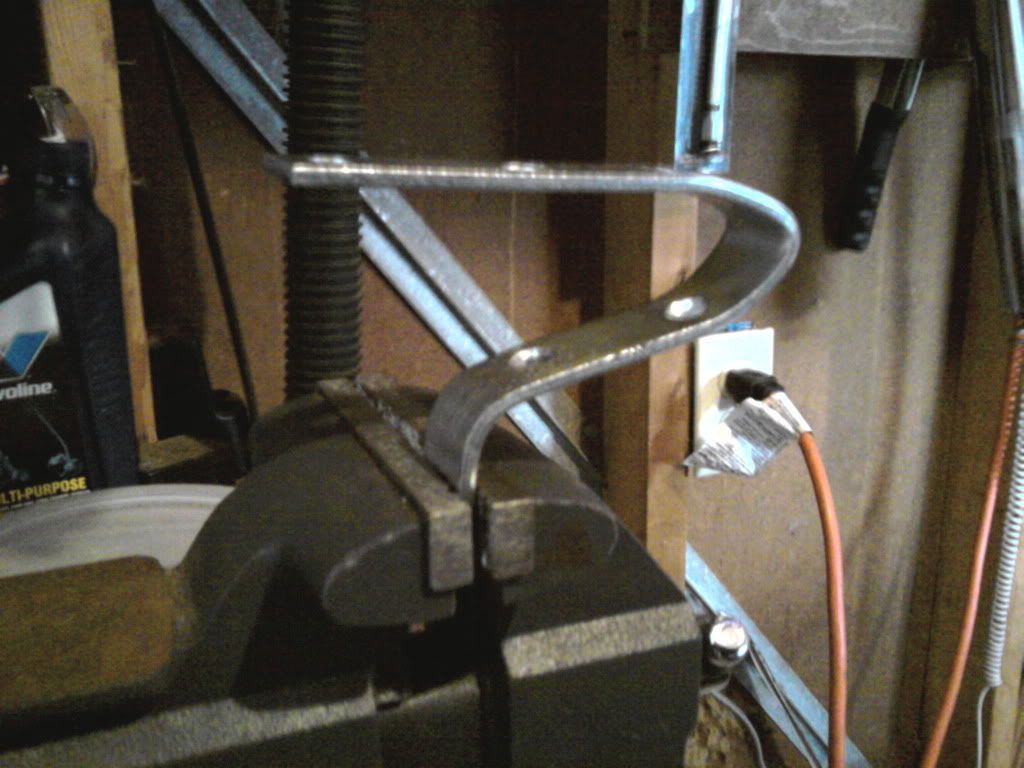
Step 3: Put the bottom of the brace in a vice and bend away! You'll want it to be a similar shape to what's pictured. Unfortunately they can't just be 90* like newer ranger light tabs. Make sure that you keep the bottom hole in or beneath the jaws of the vice.
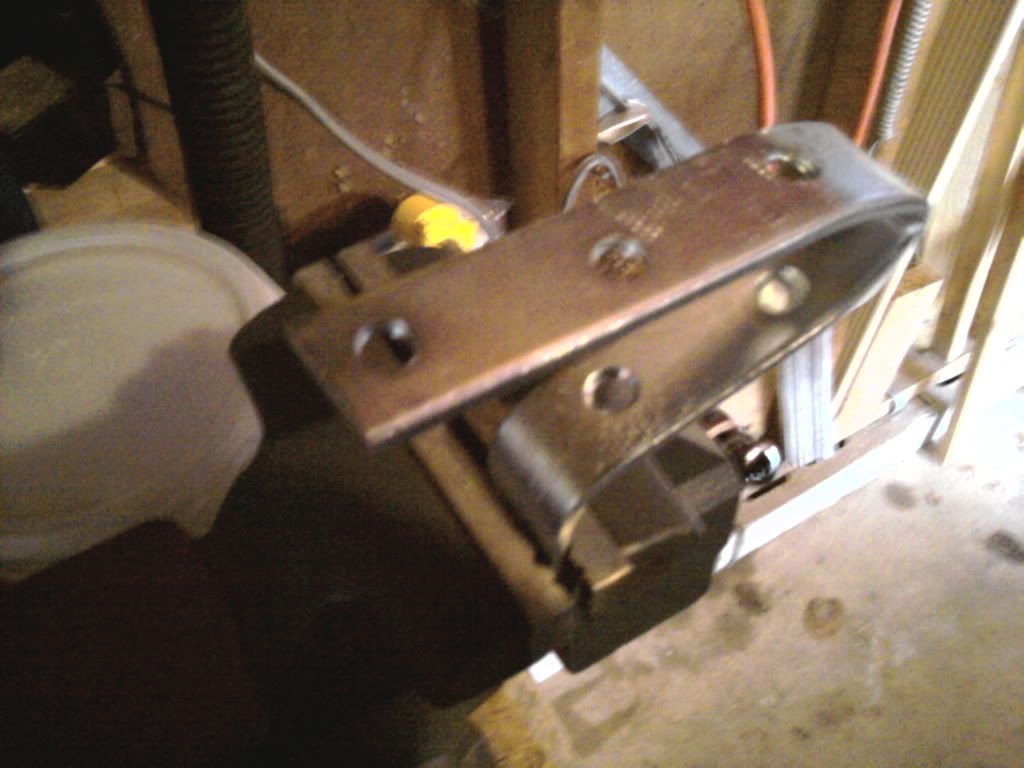
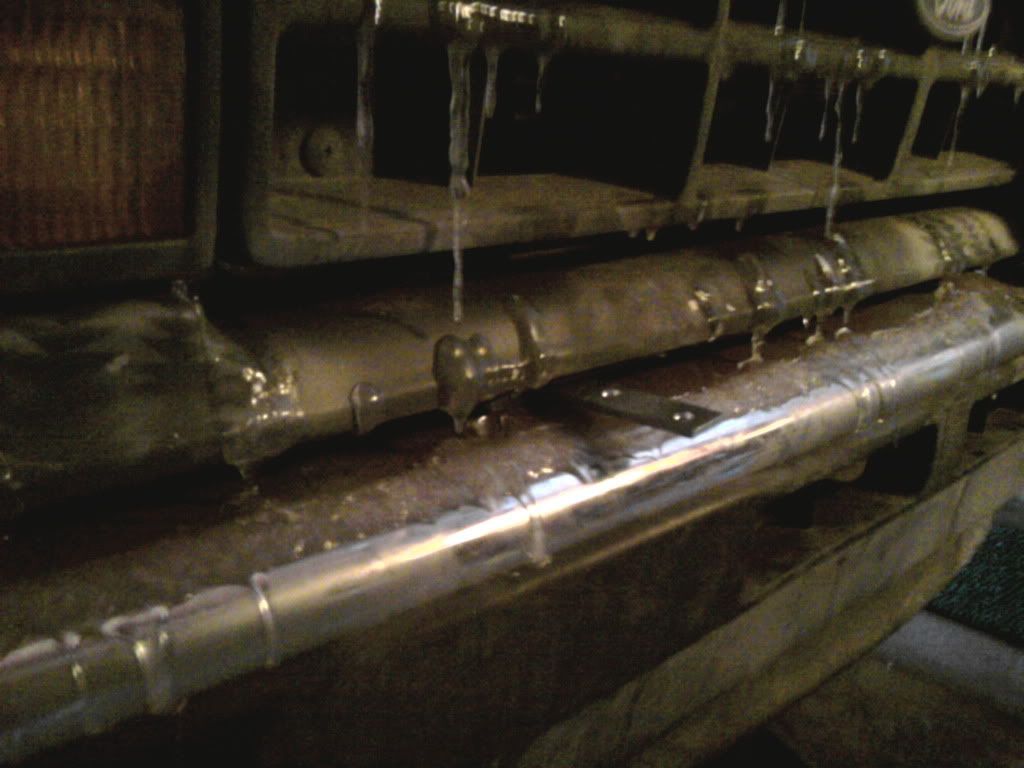
Step 4: Take off the nut on the upper bumper bolt and check if you have it bent right. It will probably take a few tries to get it exact. This is a pic of the bolt on the inside of the bumper with the bracket attached.
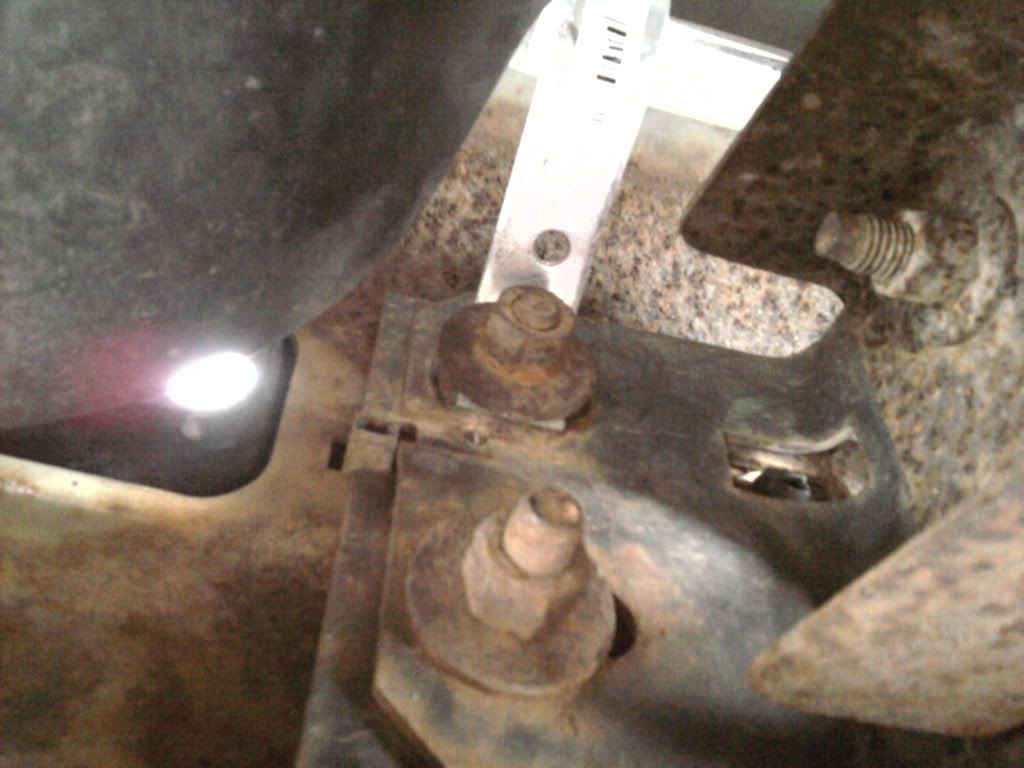
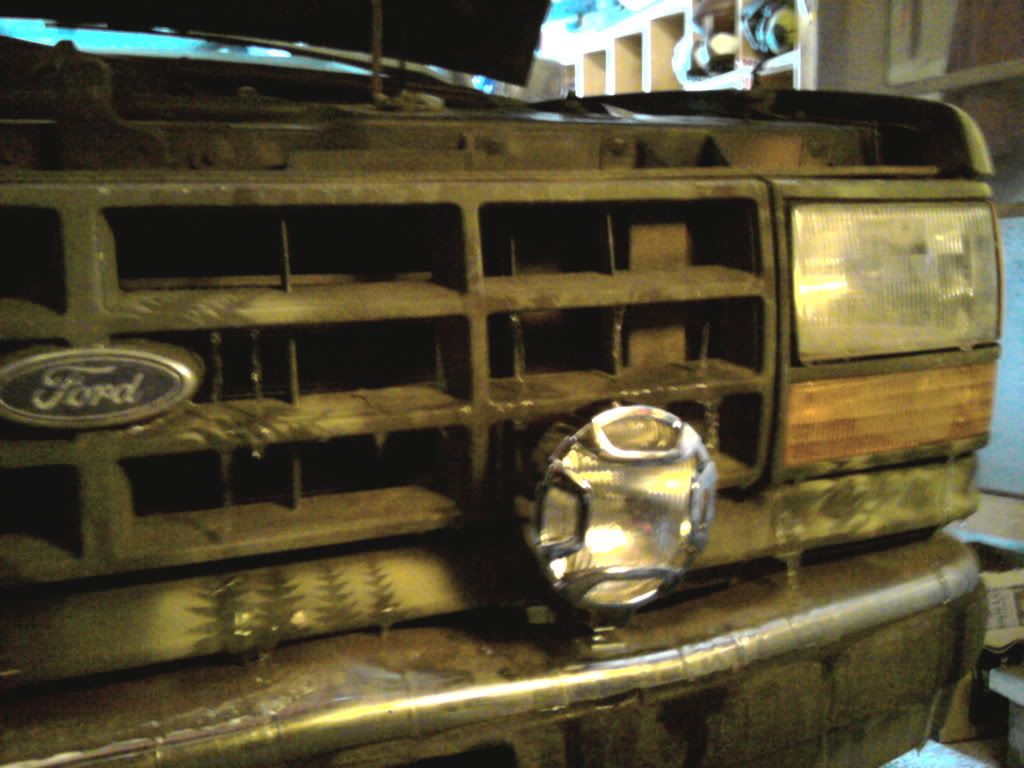
Step 5: once you have it bent perfectly so the top part sticks out in between the bumper and grill, bent the other one to the same shape. Slide them on the bolts along with a lock washer. The washer will prevent the brackets from tilting sideways, which I learned they do... Should look like this with the bracket attached:
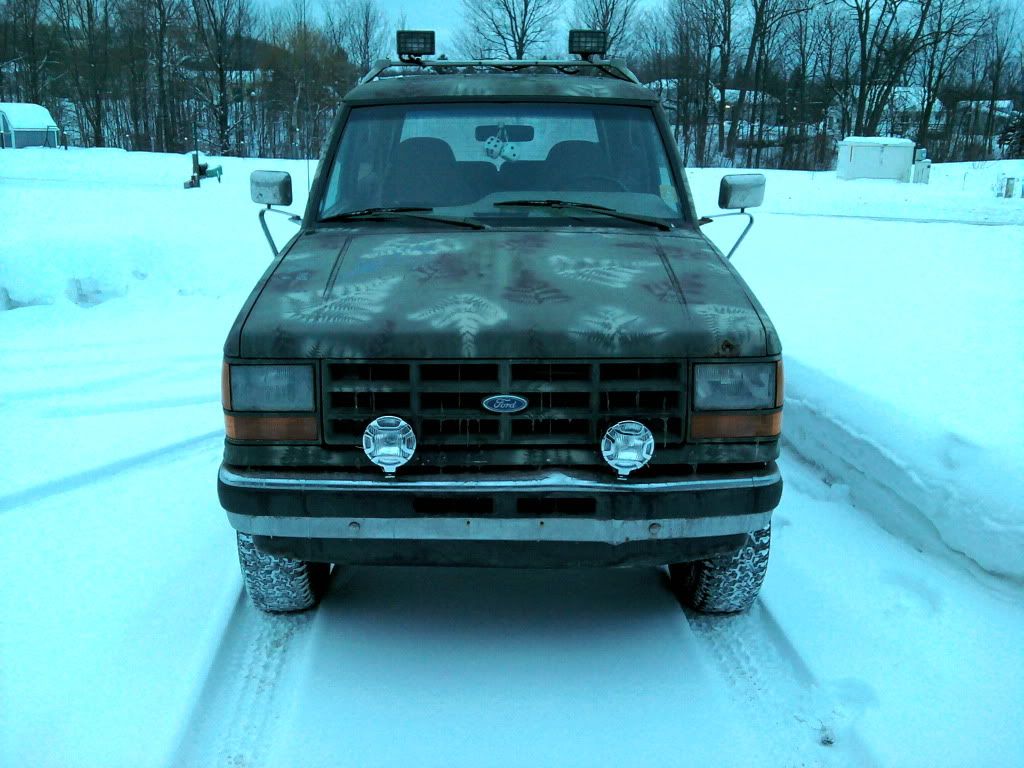
And with the light on it:
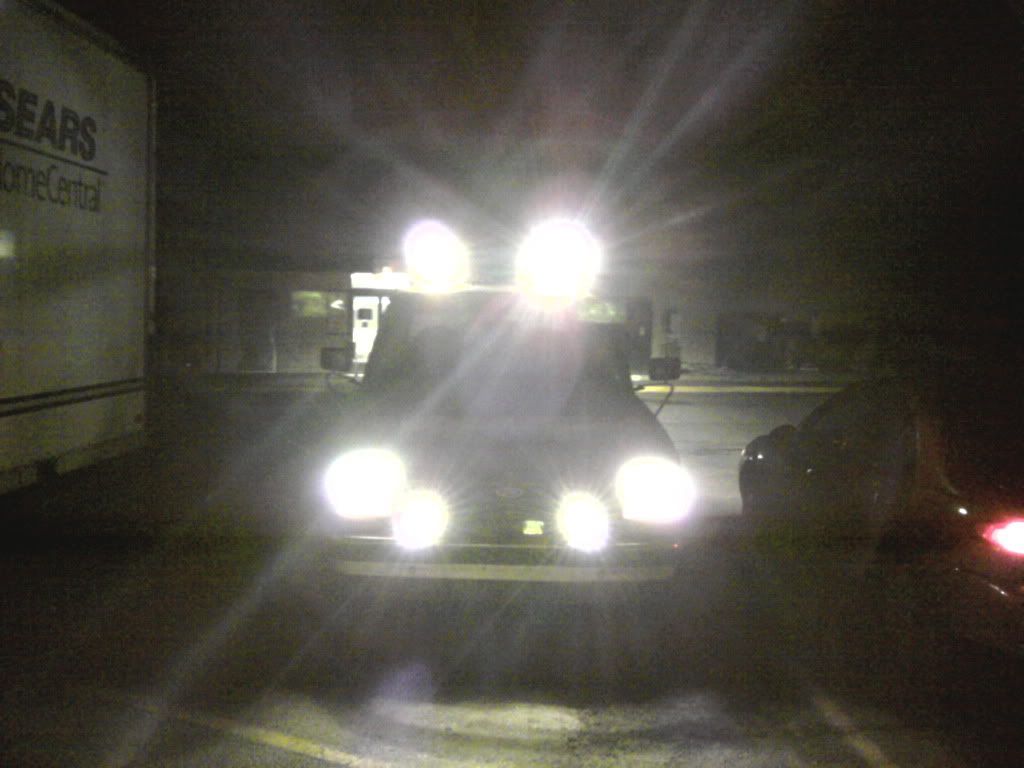
Now all that's left to do is wire your lights! Here are a few more pics after the install. Pretty good I think! And done for less than $15!
Difficulty: 3 out of 10
Time to install: +- 1hr
Disclaimer: The Ranger Station.com, The Ranger Station.com Staff, nor the original poster are responsible for you doing this modification to your vehicle. By doing this modification and following this how-to you, the installer, take full responsibility if anything is damaged or messed up. If you have questions, feel free to PM the original poster or ask in the appropriate section of The Ranger Station.com forums.
Brief Explanation: I'll show you how to put lights on the front bumper of your first or second gen ranger without drilling into your nice chrome bumper!
Tools Needed:
- Bench vice
- Channel locks
- Ratchet and sockets
- 1/2" drill bit
Parts Needed:
- 2 4"-4.5" corner braces
- 2 lock washers (recommended)
Step 1:
Get some 4-5 inch corner braces from any Home improvement store. I don't remember the exact size I bought, think they were 4.5 inch. And make sure the steel is thick enough to support the kind of light your using. The wall-mart specials I put on there don't weigh much, but some of the KC's and such do..
Step 2: Drill the holes on both ends of the tabs out. Drill one side to fit whatever size bolt your light mounts with and drill the other to a 1/2 inch hole. That should be just enough that you can slip it onto the bolt that holds the bumper on.
Step 3: Put the bottom of the brace in a vice and bend away! You'll want it to be a similar shape to what's pictured. Unfortunately they can't just be 90* like newer ranger light tabs. Make sure that you keep the bottom hole in or beneath the jaws of the vice.
Step 4: Take off the nut on the upper bumper bolt and check if you have it bent right. It will probably take a few tries to get it exact. This is a pic of the bolt on the inside of the bumper with the bracket attached.
Step 5: once you have it bent perfectly so the top part sticks out in between the bumper and grill, bent the other one to the same shape. Slide them on the bolts along with a lock washer. The washer will prevent the brackets from tilting sideways, which I learned they do... Should look like this with the bracket attached:
And with the light on it:
Now all that's left to do is wire your lights! Here are a few more pics after the install. Pretty good I think! And done for less than $15!
Last edited:


