Not so much what I did to my Ranger today, but what I bought for mine this week.
As mentioned in the WDYDT thread, I hit up the salvage yard after work today. Several items on the scavenger hunt list, but I only had about 1.5 hours to close, so no way I was going to find all of them. Here's what scored for today along with the two boxes that were waiting for me when I got home.
So... Can you guess what's in the boxes? Hint: It's related to something that I got at the salvage yard.
Want to convert my truck to the edge front end, and already have the hood and header pannel. While white wasn't isn't my first choice an unbroken and looks like factory grill was good enough for me. Nothing a little paint and new emblem can't fix. I've also got an unpainted honeycomb section I picked up last year when I had a line on a free grill that needed one. Could probably still get the freebee (and might try to), but fell out of touch with the co-worker that had it. It was already half removed so definitely worth grabbing. I'd have grabbed the nearly new lights too, but someone had broken a couple of the mounting pieces.
The seat tracks are for 83-92 regular cab buckets or split-bench. My 85 was a factory bucket and center console truck, unfortunately by the time I got it they had been replaced with a bench. Years ago I picked up a set of first gen bucket seats and some seat tracks, unfortunately those tracks got messed up so I needed another set. Finding them that old in the yards here, with the right tracks, in usable condition is easier said than done. Fortunately I happened to notice on the yard's website when looking for other stuff today that two second gens had recently been added and they both had the split bench. So that was one of the priorities to get a set before they could be hacked apart or dumped in the truck bed exposed to the weather.
Was also looking for several driveshafts and potentially a transfer case. Also took some time to search Car-Part for what was available in the state.
- 4406 E-shift (99 AWD to 4WD)
- They had lots of the 4406, but didn't have time to pull one.
- No jacks allowed and I don't really want to bench press a 100lb transfer case in the gravel of the salvage yard.
- Costs $110 + $30 for the shift motor. They're running a 35% off this Saturday if I want to get help and go back.
- Full service yard about 1.5 hours away has two on the shelf for 110 including shift motor. I think I'm going to hit the easy button on the next free weekday I have.
- '97-'03 F-150 4.6L front shaft (4406 swap)
- Looked like plenty availably, but none already removed.
- Seat tracks are harder to find and I didn't have time to get both.
- $33 at u-pull $100ish at full service. Might go back and grab this weekend if I find more stuff to get during the sale, other wise another day after work.
- '97-'03 F-150 4.6L RC/SB rear shaft (4406 swap maybe)
- No luck at u-pull. Google got me on the vin decoding. The one truck I Thought fit this was actually a 2wd.
- Can find at semi-local full service yard for $75-100, unfortunately not the same one as transfer case.
- '05-'10 Mustang V6 manual driveshaft (experiment)
- They had the right year and engine, but I had a brain fart on manual or auto. Fortunately, I didn't grab it because that car was an auto.
- Again I can get it locally for that $100 range.
They were nice enough to let me know that another of they yards in the state is doing an $85 all you can carry in two weeks if I wanted to try there. Considering that a transfer case is about all I could carry and gas would cost more than I saved, it probably isn't worth the trip. I'd still have the removal assistance to deal with too.
Now, if you guessed that the boxes were related to the seat tracks you would be right. We'd have to go back a long ways for the full story, but for this thread I'll keep it current. Long, but curent.
I discovered shortly after getting my '85 that it was originally a bucket seat, center console truck (and that the driver side floor pan is in rough shape). Unfortunately it'd been converted to solid bench and the parts were long gone. I had already wanted to bucket seat the '86 before it got sidelined into a parts truck, wasn't difficult to decide the same for this one, but I wanted to take it a step further. I wanted to mimic the interior (interior only) of the Saleen Sport Truck as found in the article here on TRS, particularly the white one since the '85 is silver with blue.
Here's a link if you haven't seen it or need a refresher. Those don't appear to have a console though and I'm add one back in.
The seats are the visual item that I want and hard to get. They look like Recaros, but I've seen strong indicators (not just the article) that Saleen used Flo-Fits in these. Either way they can be difficult to come by in good shape*, are expensive when they are (also when they're not), and never match the color scheme you want**. Ford also used a similar styled Sport Seat in the 80s Mustang GTs, much more affordable, but still difficult to find in good shape and never in the right colors. Allegedly blue was a pretty rare interior color for them and that was 35-40 years ago.
Last week I was browsing marketplace and almost made a move on an '86 Thunderbird Turbo Coupe as a drivetrain donor for the '85. This was the interior shot.
Turns out that the '86 Turbo Coupe used almost the same seats as the Mustang GT, from research it looks like the TC backs were about 2" shorter to clear the roof when tilting forward. No halo headrests, but that coloration would be great match for the Regatta Blue interior of my silver truck. The headrests use the same posts as the Mustang, so theoretically I could get a set of vinyl halos and dye them to match. Unfortunately the car sold before I contacted seller and while I was arranging things to go get it.
Well over the weekend I was searching eBay and something inspired me to search for Thunderbird seats. You can imagine my surprise when thisd image appeared in the lresults. Unfortunately it was the only picture seller had of the seat face sionce they were already boxed to get an accurate shipping quote. Since I know that adjusting gamma, contrast, etc can do a lot to brighten an image. Being encouraged by Jim's recent creations, I decided that removing the shadows was a good task to throw at one of those AI programs and it gave me promising results.
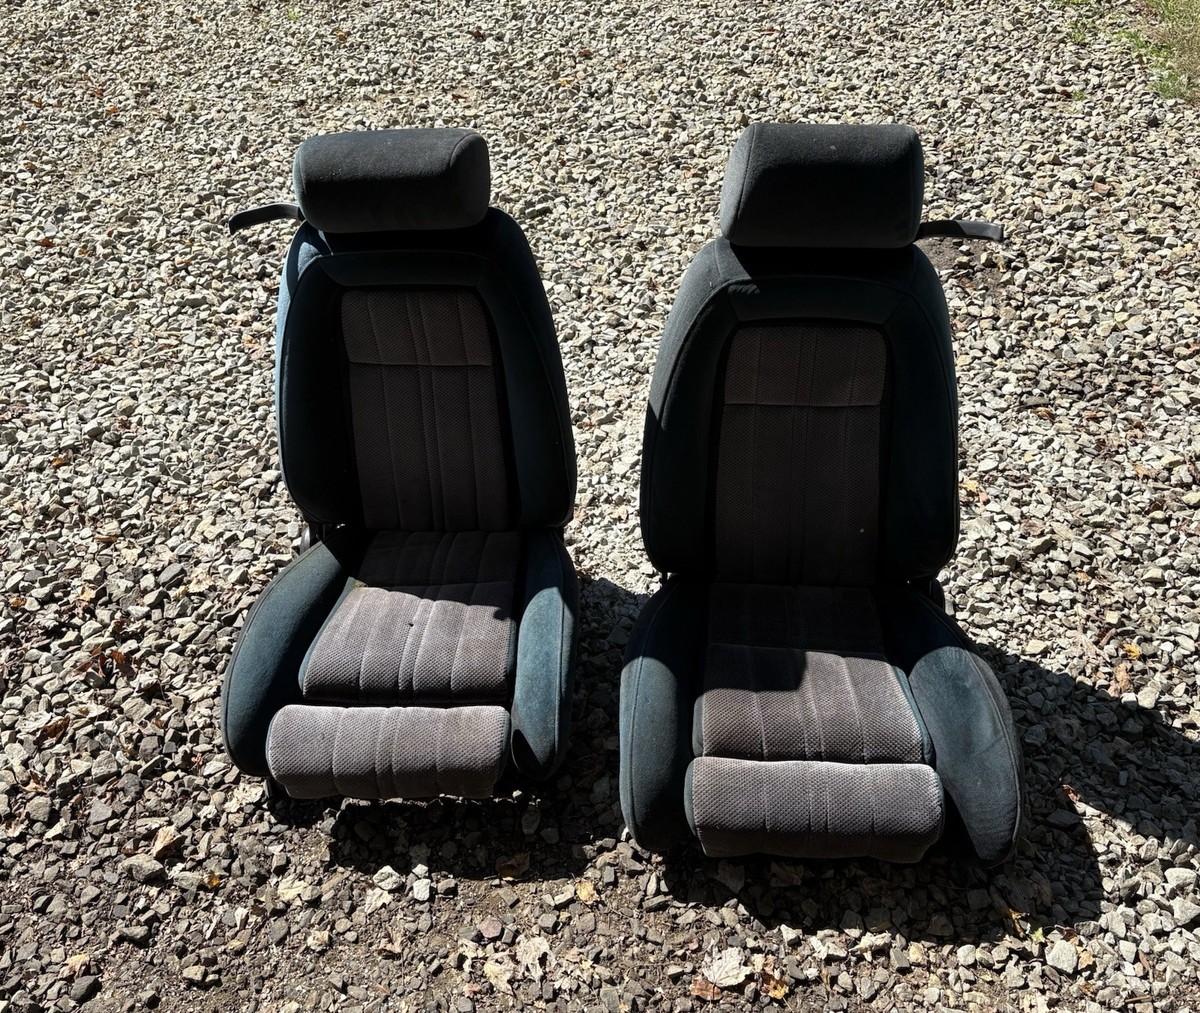
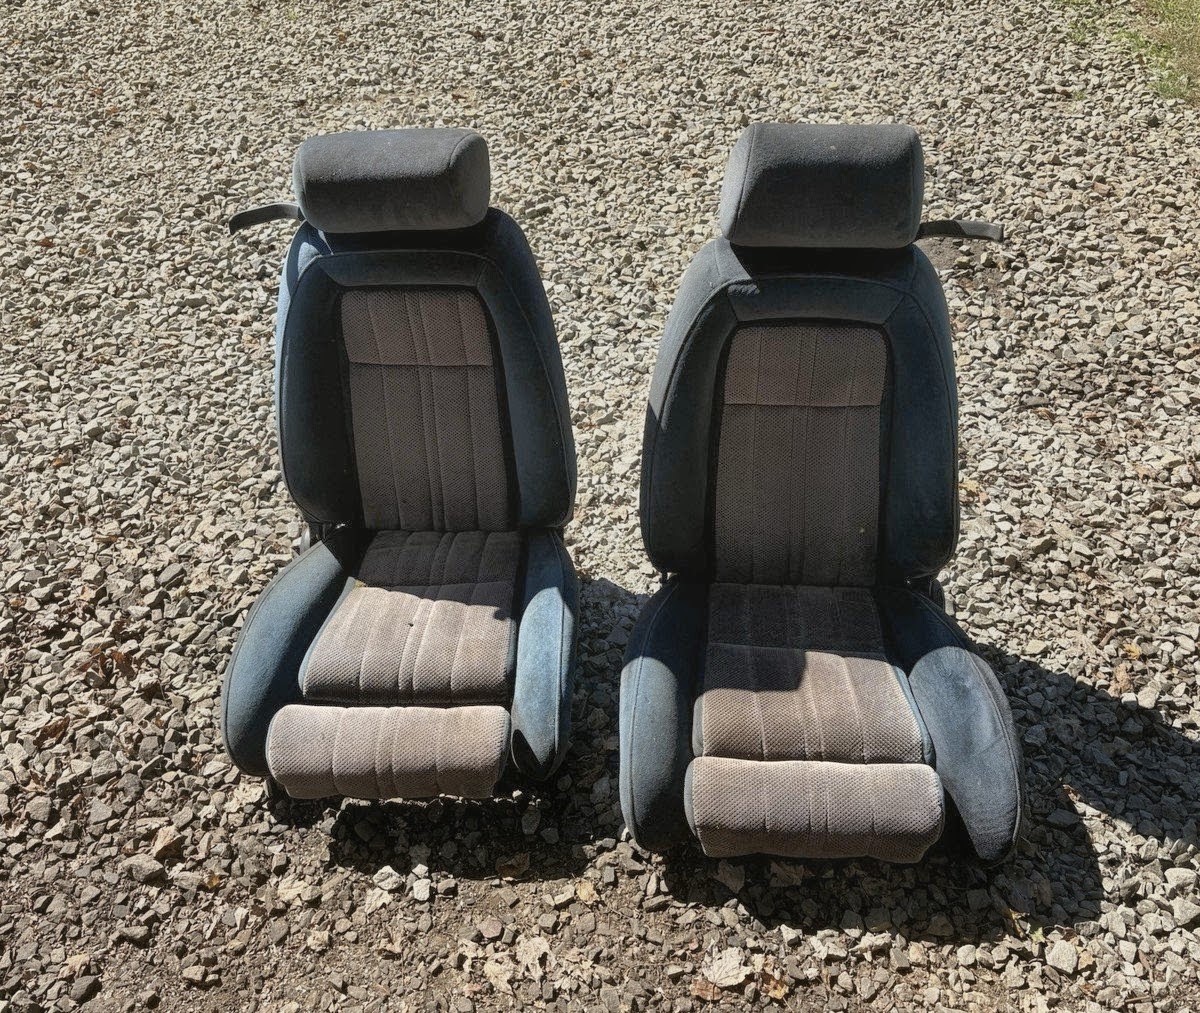
So Monday morning I paid the man, $150 for the seats + $100 shipping, and they went to FedEx in Ohio that afternoon. FedEx said todayt for deliver, but with there record for my deliveries I didn;t rally trust it until I got home and say the boxes by the porch steps. Probably not going to unbox and reassemble until I get the shed finished up, but I did open the tops for a peek. Looks like AI got it about right, though lightened a little too much.
EDIT: I got carried away and forgot my * and ** up there, so... *A couple of years ago I did find a set of Flo-Fits locally, and in good shape for a good price too. **They were not the right color scheme for my '85, and did not have the halo headrests. I don't want to install them in it until they are reupholstered with matching door panels, so they may find a home in the 99 temporarily.