• Welcome Visitor! Please take a few seconds and Register for our forum. Even if you don't want to post, you can still 'Like' and react to posts.

Project Little Green Turd


It really is that easy. Camera lenses can detect infrared light, and the human eye can't. Thermal imaging is a little more challenging lol


Sent from my iPhone
 
So I just noticed my front tires are wearing noticeably more on the inside. After reviewing the steering tech article, I think my problem is the angle of the tie-rods. I just ordered a drop pitman arm. Hopefully that will correct the issue and help with the bump steer I get from time to time.

I have to get new tires for the Super Duty this year. I wasn't looking to re-shoe the Ranger again.....
 
I got the pitman arm on this past Saturday. Was more of a pain in the ass than I anticipated. To get room to work, I had to pull the drivers side coil spring and shocks to get the suspension to droop low enough that I could get a the puller and socket on the pitman arm. After that, it was a piece of cake.

I ordered a new arm from Zone Offroad. It seemed to be very well made. They market it as a 4" drop, although I would call it a 3" drop.


Steering angles are much better and there seems to be little to no bump steer now.

I also learned a few things about setting the toe. I made toe plates this time, which made life a lot easier. I'll post pictures later. These made taking measurements much easier. Also, take your toe measurements with the weight on the tires. I thought it would be enough to do it with jack stands on the edge of the axles, but it isn't. When I set the toe on jack stands I was 1/8" toe in. When I put the truck on the garage floor, I was 5/8" toe out. I think this could have been part of my problem with the tire wear. But I got it squared away now (hopefully) :icon_thumby:


On an unrelated note, I added some Tuff LED Lights 27W flood lights to the front of my quad. I wanted to increase visibility while plowing and have additional light while night riding. I have to say that these are amazingly impressive lights at $90 for a 4 pack.

Mounted on the quad:


This is just the two work lights:


This is work lights + pod light + high beams:


If anyone is looking for some really bright lights at a reasonable price, check these out: http://www.amazon.com/Tuff-LED-Lights-27watt-Polaris/dp/B009ERTIKI/?tag=959media-20

:beer::beer::beer:
 
Bleeding the clutch master cylinder the easy way

The truck has been getting really tough to get into gear when it warms up... I had never got all the air out of the line from the rebuild. I was actually thinking that I needed a new master cylinder, but I thought I would try bleeding it first.

I found this handy video on youtube and was able to complete the bleed in about 30 minutes by myself. I have full pedal now, no more play at the top of the travel and the clutch lets at the very end instead of almost at the floor.

https://www.youtube.com/watch?v=Pd1KDCAhTLc

If you don't want to watch it, basically you open the reservoir and add some extra fluid. Then, you remove the interlock start switch on the clutch pedal. The, in the top of the master cylinder there is a little snap ring to hold the plunger in the cylinder. If you pop that snap ring out, you can up travel the pedal until the air comes out and fluid runs out on the floor. That's its...


The only downside to this method is that it is a bit cramped. I'm a small guy, so it wasn't too bad for me. Hopefully, this will help someone else out.

:beer:
 
It's been almost a year since I've posted on here.... wow.

Ranger is still running good. Just rolled over 219,000. The only thing I have replaced in the last year is rear drum brake shoes, e-brake cables, and O2 sensor. My plans for it this year are new radiator, new fan clutch, new flywheel, new friction disc, new injectors, new coil packs, and new plug wires. We will see if I have the time and funds to complete all of this. Probably going to need a new set of tires too.

The wife's car needs all fluids changed and some exhaust work. Factory system is about rotted away.

F250 has developed a small exhaust leak. Its going to get headers and a y-pipe at some point. Just did front outer u-joints and seals this past weekend. It needs diff fluid and t-case fluid changed as well. I need to finish my under rail bed lighting too.

ATV will need a new battery and new rear tires before next winter. It is also due for a fluid change.

Plenty to keep me busy this year. Plus my dad's Ranger needs some attention. It has a busted rear shackle and a nasty case of rear frame rail rot.
 
Oil change coming up and I've had a new PCV valve in the garage for a while so I decided it was time to locate it and change it. It has 220xxx miles on it and it still had the original PCV in it. It is a little devil to find too. It's under the intake manifold in between 2 hoses.

Top connection:


Bottom connection:


And here is what I found...


Plunger still moved but there was a large amount of buildup in the valve.


It started up and ran fine after. I am curious to see if this had anything to do with some of my rough idle....
 
Just had the start rebuilt. Had a wire pull out of a ring terminal and the stud sheared off when I tried to remove the nut.

Local guy rebuilt it for $35. Works great and starts up fast now.


Rebuilt is the way to go if there's someone close by that does it!


Sent from my iPhone using Tapatalk
 
My Ranger has been running hot, so I decided to flush the radiator again. This time, I had much better results.


Normal for my truck should be at the left end bar of the normal range. That is where it would be when I first bought the truck.

I started by looking at the fan clutch. Mine is original and may need replacing. But since I have to order one, I figured I would do some tinkering first. These things are pretty neat. Here is how they work:
http://www.haydenauto.com/upload/HaydenAuto/Documents/Cat_Hayden/Fan_Clutches_How_They_Work.pdf

After that, I found an article describing how they could be rebuilt. http://oppositelock.kinja.com/how-to-rebuild-your-cooling-fan-clutch-1661694405

I may try the rebuild after I fix the radiator if the clutch does not kick in. What I did was make sure the little thermostat in the center was working. I wire brushed off and then soaked it in PB Blaster for a while. I then twisted it with pliers to make sure is would turn and then heated it with a heat gun to make sure the spring turned the valve. All of this checked out.

So now it was on to the radiator. I have flushed this thing a few times in the past few years. I finally figured out that the rust in my cooling system is because my reservoir did not work. It was sucking air in and there lies the problem. Armed with this knowledge, I am now prepared to do away with this problem for good.

Rust....


So I rigged up a way to flush with the garden hose. Simple, but effective.


I pulled the petcock out because my drain is clogged. Look at the crud on it.


I decided to blow air through the drain to help unclog it....


After seeing all of this stuff, I got out a block of wood and while flushing the radiator, I banged it off of the wood to loosen crap. I got a lot of rust and I seemed to get a bunch of larger crap out of the drain corner of the radiator.


I am confident now that the radiator will function better. But I am not done yet. I decided to soak the radiator in CLR (calcium lime rust). As I had the radiator soaking I noticed on the back it said "Do not use with..... aluminum" ****. So I drained the radiator back out. The CLR was in there about 5 minutes and nothing else came out. I think white distilled vinegar is the better soaking agent here.

Now it is time for the flush. I need to get the rest of the rust out. I found a product called Evapo-Rust Thermocure. From everything I could find, it is almost a miracle product. I figure my Ranger is a good test. I ordered a bottle from Amazon (because of prime shipping), but Summit has the most reviews and a video. http://www.summitracing.com/parts/sum-tc001/overview/"

I saved a sample of the coolant in a mason jar. I will save a sample of the Thermocure when I remove it and I will compare with a new jar of coolant. Should be interesting to see. I can tell you the coolant I saved looks very similar to the coolant drained from the Corvette in the video.

https://youtu.be/mzmgPYqjXd8

I added the bottle of Thermocure and added distilled water to fill the system.


It says it can be left in for several days if there is a lot of rust. I put it in alst Thursday and will remove it tomorrow.

Here is what the concentrate looks like going in. It is a little viscous but doesn't smell bad. It is mostly clear.
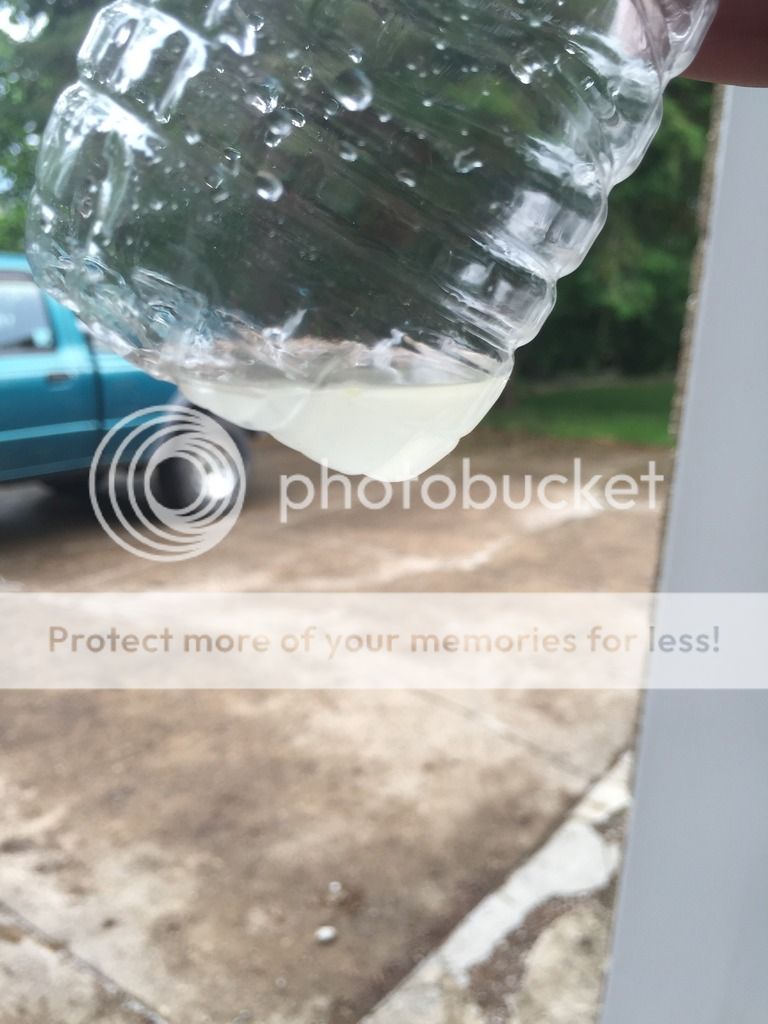
After running for a little bit, I noticed that it will make a little bit of foam.


I topped it off with distilled water and closed the radiator cap and took it for a drive. I ran it pretty hard to see what I could get the temperature to do. This was as high as I could get it.


I am certain the radiator flush had something to do with this. I let it sit over night and drove it to work the next day. One thing I did notice is that the truck responds to temperature changes much quicker now. Going up a long hill I could watch the temp climb a bit. Going back down a hill, the temp came back down much quicker. I have yet to hear of feel the cooling fan kick in. I checked yesterday and the clutch only got up to 135. From what I gather, they typically don't kick on until 170. I may throw the top fan shroud back on to see if that also helps. I thought it was only there for safety, but that may not be the case.

I took a little sample of the coolant on Monday. I can't see into the radiator to see how much rust has dissolved, but by the color of this fluid, some definitely has....


I will flush it all out tomorrow and fill it with coolant. Hopefully it will be smooth sailing from there. :D

Today I ordered some parts from Rock Auto for a few projects. For the Ranger, I ordered the flywheel, friction disc, rear main seal, and pilot bearing (if needed). Sometime in the near future, I am going to pull the tranny back out and change those. I also need to patch an exhaust leak on the wife's car and do her rear brakes for inspection. I also am installing longer wheel studs on her car. We got a set of aftermarket wheel because the stock ones rusted until air leaked. The new aluminum wheels are thicker and the lug nuts seem to like to cross thread. I am sick of dealing with it, so I ordered 20 new longer studs and a stud installer tool. Hopefully that will solve the problem. :annoyed:
 
Thanks for the reminder. Flushing the coolant system has been on my to-do list since buying the truck a few months ago. I did clean out the overflow reservoir. It had a lot of sludge and I was afraid the bottom of the hose may have been buried and not able to transfer coolant both directions as needed.
 
Keep up the good work man!

Thanks, you too! You should post some boat photos in your thread. Its nice to see what others have been working on.

Thanks for the reminder. Flushing the coolant system has been on my to-do list since buying the truck a few months ago. I did clean out the overflow reservoir. It had a lot of sludge and I was afraid the bottom of the hose may have been buried and not able to transfer coolant both directions as needed.

Sure thing. I took my hose out and snake a piece of copper wire through and the rinsed it really well.

One other thing to check is that the hose on the inside of the reservoir that goes down to the bottom is still attached. Mine fell off off. Unless your hose connects at the bottom like my dad's 99 3.0.

:icon_cheers:
 
No. Mine connects at the top with that little black elbow fitting. Something had chewed a hole in the elbow so it leaked. I ended up getting a whole tank from the junkyard. That's the one that had so much sludge in it.
 
Take your time and clean it out well. I didn't get to drain mine last night due to beer drinking and the Pens game.... Hopefully I will get to it tonight.
 
I flushed the Thermocure out on Friday. It actually came out through the petcock. I just clamped a hose on to make this less messy.


It looks like motor oil in the jug.


Here are some before and after shots...


Finally, the left is the coolant I removed. The middle is Thermocure after 8 days in the radiator with daily driving, and the right is the fresh coolant I put in after flushing the radiator twice.


I'll probably take a sample in a few months and see how it is holding up. My conclusion is that Evapo-rust Thermocure works AMAZINGLY well. My temperature is back to normal even on hot days :yahoo:
 

Sponsored Ad


Sponsored Ad

TRS Events

Member & Vendor Upgrades

For a small yearly donation, you can support this forum and receive a 'Supporting Member' banner, or become a 'Supporting Vendor' and promote your products here. Click the banner to find out how.

Recently Featured

Want to see your truck here? Share your photos and details in the forum.

Ranger Adventure Video

TRS Merchandise

Follow TRS On Instagram

TRS Sponsors


Sponsored Ad


Sponsored Ad


Amazon Deals

Sponsored Ad

Back
Top