• Welcome Visitor! Please take a few seconds and Register for our forum. Even if you don't want to post, you can still 'Like' and react to posts.

I know I shouldn't...but can I?


I do know the design was changed. I don't know the reason for the change.

The multi-piece gasket should have two rubber strips to seal the front and rear of the valley where the lower intake ends. The joints are then sealed with RTV, and it will all crush together and squeeze as the intake is torqued down. Sealing/protection of the valley should be the same or better or else the design change was pointless.
 
From what i've been able to find, I believe that the one piece gasket tended to fail around the coolant ports because the material from which they were constructed did not play well with newer long life coolants.

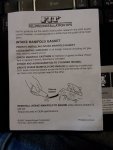
In my kit, I did not see any rubber strips at all, but did find this bit of instruction that seems to answer why:

20200417_215544.jpg
Just above the hand it says:
"Create intake manifold end seal(s)..."
Note the word "Create."

I will of course go through everything in the box again to be certain I didn't overlook anything. And I need to make sure I understand how the multi-piece metal gaskets fits.

Thanks very much for your input. It's very helpful.
 
QUESTION: I've read that when torquing the heads you also have to torque the lower intake manifold at the same time. So if that's true, would'nt you have to put both heads and the manifold on, bolted in place, and then go thru the torque process on both sides in the prescribed order? Seems odd, but do-able. Odd because no matter how you go about it, one side is gonna get torqued first.

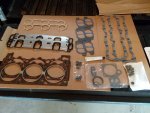
Also adding a pic of the gasket set that came with the heads. Some things I won't need since the heads already have these items installed. Not sure I will disassemble the fuel rail to install the bottom gasket either. And I guess the hardest thing about using the two metal gaskets for the lower intake manifold will be holding them in place while installing the manifold.
20200418_141554.jpg
 
Talked to rpm Ron the other day about 4.0 stuff. He has LOTS of 4.0 ohv performance parts. He's very cheap, small operation that sells on volume, so prices very good.

Might be worth calling him while you're this far down. Little improvements to aftermarket heads like mild porting (4.0 needs very little), blend and sand combustion chambers, and call someone like mentioned to talk about springs, valves, etc. Free float your rockers. I have a diy spec sheet I had drawn up around here somewhere The rewards will be massive when you get it back together.

I should have done it last year, but couldn't because I needed it back ASAP.

I'm in the middle of a bare block rebuild because I didn't.
Who is this rpm Ron you speak of? Looking for a set of aluminum rocker spacers. Anyone know where I can purchase said item?
 
Have to have them made.

I used a tech school in Maine.

There's a post in the 2.9 section on how I had mine made, plus how to measure for them.

 
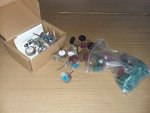
UPDATE: No update. Waiting on a couple of tools to remove the fan clutch and some polishing accessories for the heads. In the meantime, I'm practicing on the old ones using burr bits on the die grinder and smaller ones on the dremel as well as some polishing stones. I need the finer grit pads and the rouge but delivery is still a couple of days out.

I dry fit the Hedman headers and they look like they'll be a perfect fit with no modifications. Had to cut off the crossover pipe so now I'll have to deal with attaching the new one to the connector at the cat. So looking at replacement exhausts just in case. The existing one is pretty bad and I'm not sure I'll be able to save it

Water pump is ready to go back on as soon as the tools arrive so I can separate the fan clutch. I could try to reassemble with it attached, since that is the way it came out, but it is a real pain getting at the three bottom bolts.

Also waiting for the weather to warm up so I can paint the headers, valve covers and a few other smaller parts

That's all for now (y)(y)
 
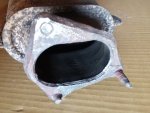
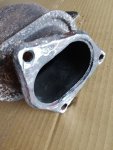
Played with the cat converter today. Cut the bolts at the connection to the tail pipe(?) and benched it. I did not know that the bolts that connect the cat to the crossover are welded studs. Anyway, I ground them off and drilled the holes clean so now I can at least reconnect it to the headers when it's time. Need to find a clamp for the tailpipe connection and that should get me going until I can afford a complete new exhaust.
20200422_145906.jpg 20200422_161719.jpg
 
More stuff came today !!
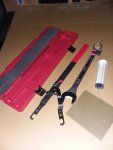
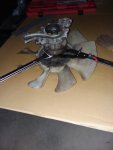
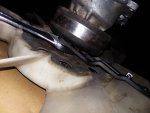
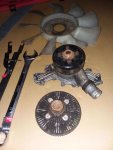
Been waiting for the combo wrench and the fan clutch holder so I could separate it and the fan from the water pump. I tried other methods (vises, pipe wrenches) and nothing I have in my tool box would work. Within half an hour of the arrival...done. I thought I read or saw something on YouTube that the fan clutch holder I purchased was a POS. I have to disagree. But maybe it was easier since I had the pump off the engine.

And what the heck is the nonsense on the fan shroud that says "Right hand thread on fan clutch?" PPPPFFFFHHHHTTT!!
Righty-tighty. Lefty-Lucy.

20200423_185159.jpg 20200423_185701.jpg 20200423_185720.jpg 20200423_185844.jpg
 
The needed sanding bits are starting to arrive....

20200502_172512.jpg
 
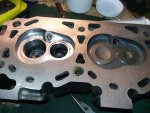
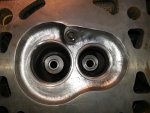
in spite of all the practicing on the old heads and watching all the videos on how to do this polishing business, it is still a bit unnerving to start carving metal away from a perfectly good head that you just spent a couple of hundred bucks on. Take out too much and you lose horsepower. If one is bigger than the other by more than .25 ml your f'ed. I tried that measuring stuff and it ain't easy - seriously? First get the head set up so that it's level, upside down level. I can laugh about this cause I am new to it and just went through it with the understanding that this is how you need to do it - but still, it's a PIA.

It's all good though and I am getting the hang of it. It just takes time. Here's a couple of pics just because....

20200507_175915.jpg 20200507_180033.jpg
 
Hey all,
I've been busy grinding away and polishing up the heads (specifically the combustion chambers). In doing the combustion chambers and measuring the volume between the polished and the unpolished, I'm wondering how much is too much and/or too little?

I'm measuring out at 60 ml after polishing. Compared to 58 ml prior to. I only want to remove enough material to get a nice smooth finish and not increase the volume too much to lower compression.

Any ideas or am I over-thinking?

thanks
 
Bring up a compression calculator, input engine specs. Shouldnt be too great of a loss.

Worst case, can have heads shaved down a few thousands to make up the difference.


Any of the 4.0 fan boys know what the limit is for valve interference?
 
I can do that. I think...
If not Ill figure it out.
thanks
 
Where are you located?
 
I'm at the opposite end of Woodhaven -- Emmett - 48022 - not the one down by AA, the one up by Port Huron.:p
 

Sponsored Ad


Sponsored Ad

TRS Events

Member & Vendor Upgrades

For a small yearly donation, you can support this forum and receive a 'Supporting Member' banner, or become a 'Supporting Vendor' and promote your products here. Click the banner to find out how.

Recently Featured

Want to see your truck here? Share your photos and details in the forum.

Ranger Adventure Video

TRS Merchandise

Follow TRS On Instagram

TRS Sponsors


Sponsored Ad


Sponsored Ad


Amazon Deals

Sponsored Ad

Back
Top