• Welcome Visitor! Please take a few seconds and Register for our forum. Even if you don't want to post, you can still 'Like' and react to posts.

The Lone Ranger – Kage’s ’94 X-Cab Leaf SAS and Bed Bob


kroussinoffroad

October 2011 OTOTM Winner
OTOTM Winner
Solid Axle Swap
Joined
Nov 4, 2009
Messages
1,713
Reaction score
14
Points
0
Location
marquette, MI
Vehicle Year
2000
Make / Model
Ferd
Engine Size
4.6
Transmission
Automatic
very similar to how I made my shaft except i drilled the original shaft every quarter and added some plug weld's for some extra strength. i had absolutly no vibration's from mine. I know this because i was searching for a vibration and the first thing I yanked off was the front shaft. after finding a broken belt in a tire. i threw the shaft back on and ran a spare tire in the rear, ran it up to 80 on the speedo (prolly 95 or so) and had no vib's, shimmy's shake's or rattle's.

however somhow I lucked out and am able to go back to a factory shaft in the front and I feel alot better about it.


railman

December 2011 OTOTM Winner
OTOTM Winner
Solid Axle Swap
TRS Banner 2010-2011
TRS Banner 2012-2015
Joined
Mar 31, 2009
Messages
2,660
Reaction score
12
Points
0
Location
Madisonville, KY
Vehicle Year
1996
Make / Model
Ford
Engine Size
4.0
Transmission
Automatic
personally I wouldn't worry about it being balanced since ya have front lock-outs....

nice progress by the way :icon_thumby::icon_thumby:

l8r, John
 

86 slo-vo

02/2011 OTOTM Winner
OTOTM Winner
TRS Banner 2010-2011
Joined
Jan 5, 2009
Messages
4,510
Reaction score
36
Points
0
Location
owensboro, KY
Vehicle Year
1994
Make / Model
ford
Engine Size
4.0
Transmission
Manual
personally I wouldn't worry about it being balanced since ya have front lock-outs....

nice progress by the way :icon_thumby::icon_thumby:

l8r, John
thats the rear shaft i believe.
 

Kage

March 2012 OTOTM Winner
OTOTM Winner
Solid Axle Swap
Joined
Oct 10, 2010
Messages
781
Reaction score
16
Points
18
Location
Near St. Louis MO on the IL side
Vehicle Year
1994
Make / Model
Ford
Engine Size
4.0
Transmission
Manual
very similar to how I made my shaft except i drilled the original shaft every quarter and added some plug weld's for some extra strength...
I thought about doing that, but then I got lazy :icon_twisted: Time will tell if it will come back to bite me in the butt.

personally I wouldn't worry about it being balanced since ya have front lock-outs....

nice progress by the way :icon_thumby::icon_thumby:

l8r, John
thats the rear shaft i believe.
Nope, this one is the front shaft. I'm still waiting for my 1354 yoke to get here so I can get a real measurement for the rear shaft. True that I can unlock the front hubs, but sometimes its nice to have 4wd at speed. Like when it snows (for all of about 2 days a year here). :icon_thumby:
 

robs

New Member
Joined
Jan 3, 2011
Messages
6
Reaction score
0
Points
0
Location
Southern IL
Vehicle Year
2005
Make / Model
Ford
Engine Size
2.3
Transmission
Manual
Shhhhhhh... Don't tell Kage... I'm secretly reading this post.... be very quiet... Just between you an me.... he don't know....

About a week way... teaser pic!


RacinNdrummin

Member
TRS Banner 2010-2011
Joined
Dec 21, 2008
Messages
629
Reaction score
7
Points
18
Location
Auburn, Wa
Vehicle Year
2005
Make / Model
Ford
Engine Size
3.0
Transmission
Manual
Extending your own driveshaft

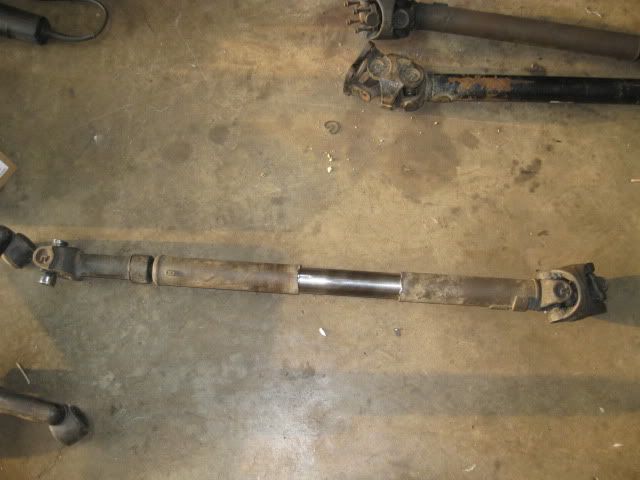
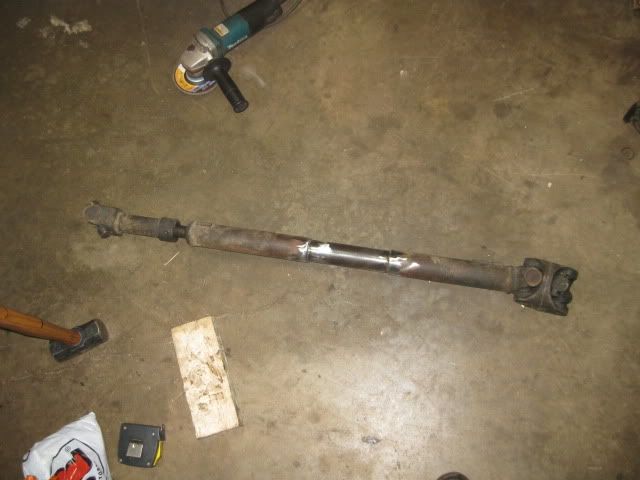
Well I’m one more step towards getting the truck mobile again. I extended one of the Cherokee driveshaft’s I have laying around. There’s really not much to this, and I’m hoping I can get the thing to balance out later. If it won’t balance, well, I made a nice spare shaft.

Going by Dana’s information, total allowable run out for the drive shaft is 0.020” which is about what I measured this shaft at when I was done. That’s said a little tongue in cheek though as I really don’t have a good way to measure this at home or at work.

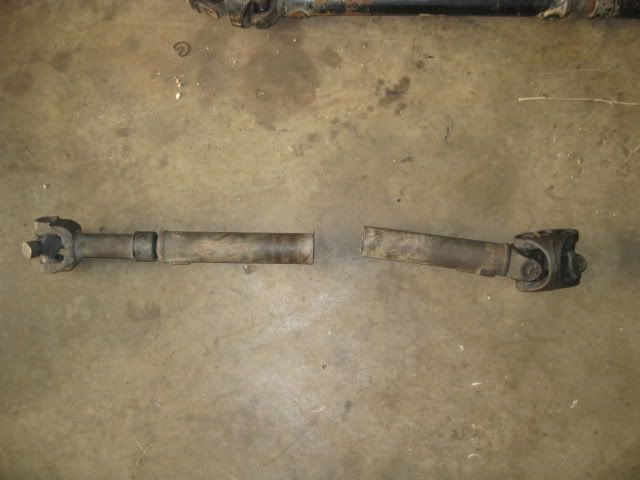
So step 1, acquire your shaft (no not that one, the drive shaft!) and cut it up:


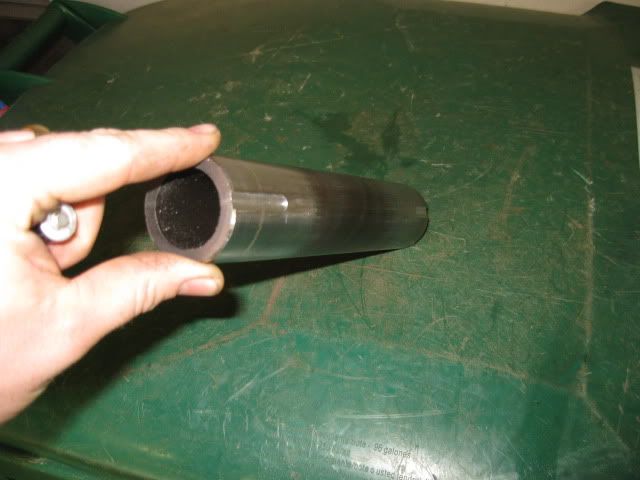
The Cherokee drive shafts are 1.75” on the ID and they are made with 0.120” wall HREW tube. Since its HREW, you can’t just slap a slug in there and call it done.

Enter Step 2, find some “Plug” material and mill a couple of slots to clear the weld slag inside the tube. The extra bonus of the slots is that it makes it easier to keep the two ends of the drive shafts even:


Step 3, hammer it all together as it’s a bit of a press fit. If you have some heat available to you, that’ll make life easier:


Step 4 is a little tricky. I don’t have a good way to hold everything in line, so I bolted the DS back in its home to check for the correct length. While it was there, I slapped a dial indicator on it to rotate and tap in line. This is far from ideal so I’m not so sure on how accurate my 0.020” run out reading really was. But as I said, worse case is I just have a spare shaft now. Add to it, I can’t really remember if this was a good shaft to start with so who knows how good it is at this point :icon_rofl:

Step 5, remove the now tacked together DS from the truck and burn everything home, clean off your slag and you’re done!


As a side note, for my plug, I’ve got an extra 1” that was driven into either side of the DS (I needed to extend the shaft 6.75” and my plug was 8.75” long, dig?). I’m sure this thing will work just fine for a spare, we’ll see how well it does at speed.

Once I find my U bolt’s for the front yoke, I’ll be able to move this thing again (Though, without brakes currently). I’ve bought three of these dang U joint U bolt sets, and I can’t find a single one of the dang things. Go figure right?
Just curious on why you didnt just retube it? Seems like it would be easier, Just as cheap, and be far less likely to vibrate. That slug seems like quite a bit of weight in the middle of the shaft...

Either way, enjoying the build...:icon_thumby:
 

Kage

March 2012 OTOTM Winner
OTOTM Winner
Solid Axle Swap
Joined
Oct 10, 2010
Messages
781
Reaction score
16
Points
18
Location
Near St. Louis MO on the IL side
Vehicle Year
1994
Make / Model
Ford
Engine Size
4.0
Transmission
Manual
Shhhhhhh...
I was wondering when you'd wander your way over here :thefinger:

Just curious on why you didnt just retube it? Seems like it would be easier, Just as cheap, and be far less likely to vibrate. That slug seems like quite a bit of weight in the middle of the shaft...

Either way, enjoying the build...:icon_thumby:
I couldn't find the material I needed in a timely manner. And you've hit upon my concerns about the slug causing some balance issues. Since I'm not 100% certian that was a good shaft to start with, I'm not too worried if I have to re do it at a later time.

Thanks for the comments guys!
 

Kage

March 2012 OTOTM Winner
OTOTM Winner
Solid Axle Swap
Joined
Oct 10, 2010
Messages
781
Reaction score
16
Points
18
Location
Near St. Louis MO on the IL side
Vehicle Year
1994
Make / Model
Ford
Engine Size
4.0
Transmission
Manual
Master Cylinder Swap

What I thought was going to be a simple swap turned into a big ole waste of time. So I thought I’d throw some information out for those who might need this in the future.

For the calipers for the Dana 44 I’m using the stock twin piston deal (same as what’s found on the Dana 60’s of the same vintage). The stock master cylinder for this vintage is in the 1-1/16 bore size range

For the Rear calipers, I’m using the ’99 E350 twin piston calipers that came with the Dana 60 I have. The stock master cylinder for this application is a huge 1-5/16 bore size.

As a reference, the stock bore on the ranger is 1” in diameter.

I have done quite a bit of reading on what MC I should use for my swap, but opinions abounded in the matter. Eventually, I settled for what I thought would be a decent setup. That being a MC from a ’91 F-350. The bore size for this setup measures 1-1/8”

Unfortunately, I didn’t see any mention of the funky/huge port that is on the this MC for the front lines. I could not find a fitting that would go in this hole. This is where the wasted time came into play as I went from part store to part store looking for this dang fitting (Ford dealership was closed, and I didn’t find any in the junk yard).

This led me to plan “B”. That is to use the tried and true MC of the ’99 Dodge 2500 gassers. This MC has a bore of 1-1/4” in diameter, which is a little larger than I want. But I’d rather have ‘hard’ brakes over ‘soft’ ones.

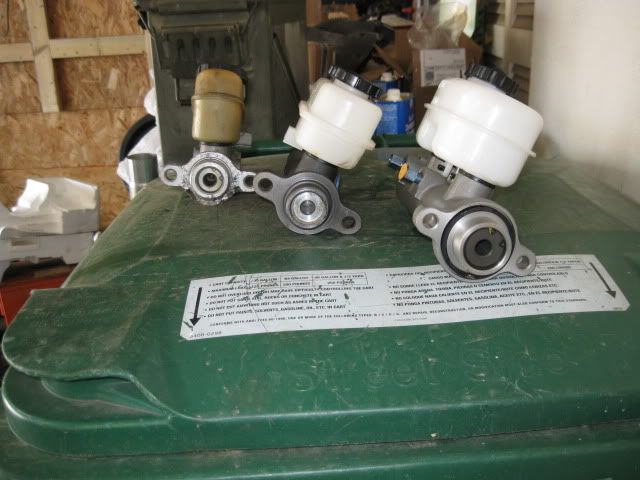
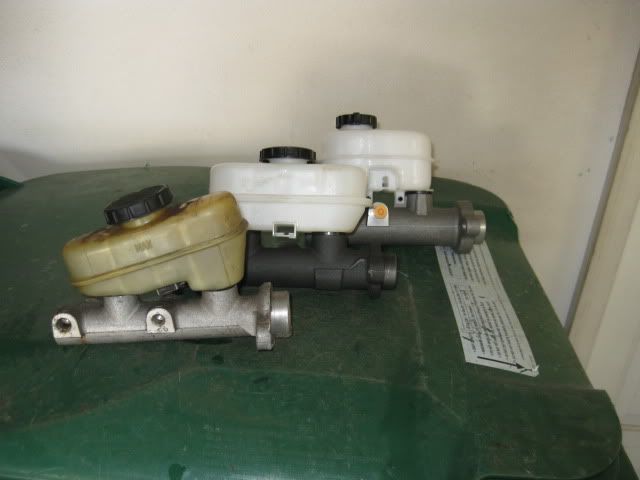
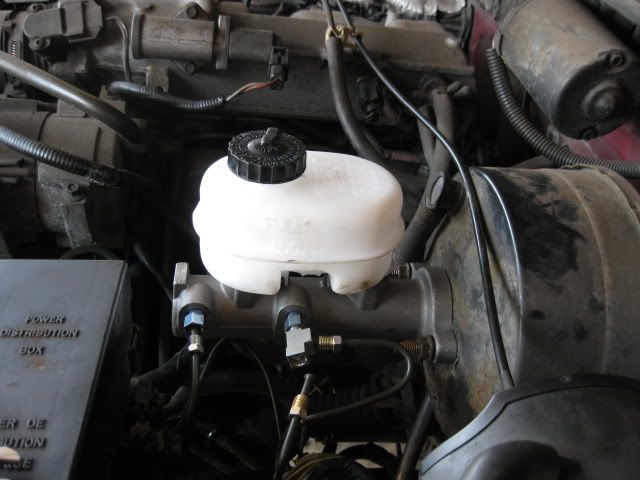
Here’s a comparison of all three MC’s. The stock Ranger is on the left, F350 is in the middle, and the Dodge 2500 is on the right:


Side view shot:


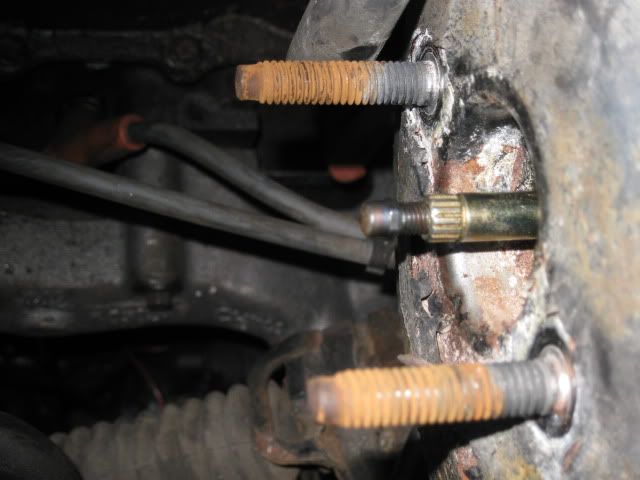
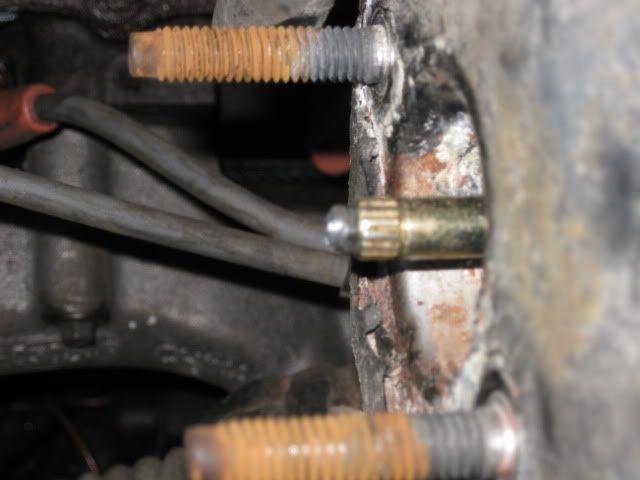
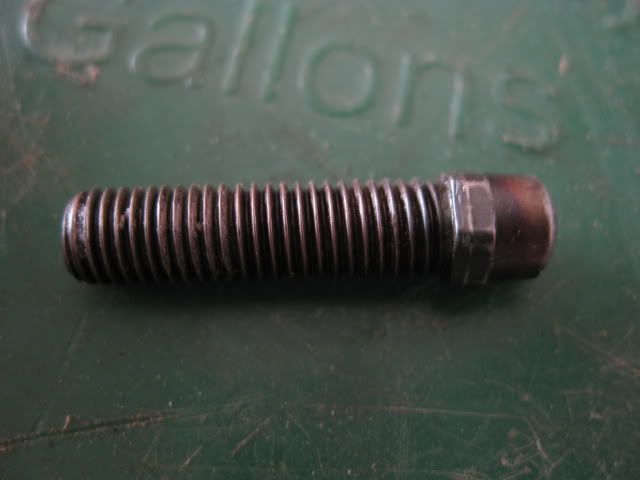
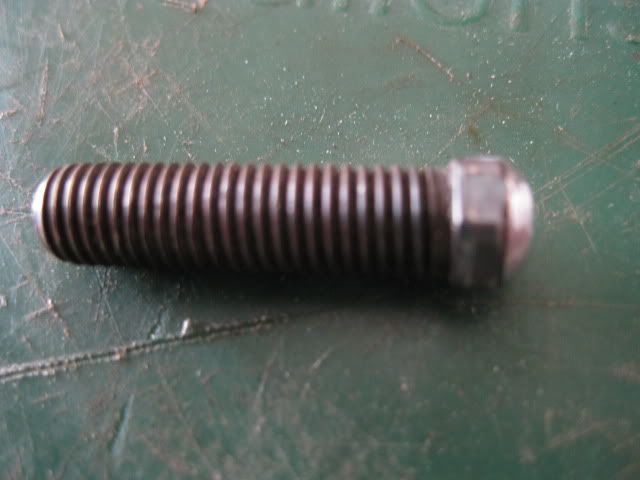
Both the Ford and the Dodge MC’s bolt right up to the stock ranger booster. However, with the doge MC, you will have to do a little work on your pushrod to get it to the right depth. The pushrod bolt must be shortened .325”. Which means you need to put crank the bolt all the way in, and then grind off a 1/8” off the end.

Stock Setup:


Shortened :


Bolt Pre grind:


After grinding off 1/8”:


After that, slap on your new MC and plumb your lines:


That’s all I have for now, I still need to finish hard mounting my lines so I don’t have any driving impressions at this point. I’ll edit this post when I do.

Edit: I've been tooling around the neighborhood at this point. The brakes are friggin awesome! The pedal feel is pretty much "Stock" and that MC moves enough fluid to bring everything to a halt quickly when need be.

Edit again: I've got about 2,500 miles on my brake setup and all I can say is WOW! The brakes are about as awesome as I've ever had in a vehicle before (I've had new cars that didn't have brakes this good). Couldn't be happier.

Edit again: Since I've swapped in the D60/14 bolt combo (with disc brakes) I've still retained the same Master Cylinder. I'm still competely in love with how well the brakes work on this truck!
 
Last edited:

Kage

March 2012 OTOTM Winner
OTOTM Winner
Solid Axle Swap
Joined
Oct 10, 2010
Messages
781
Reaction score
16
Points
18
Location
Near St. Louis MO on the IL side
Vehicle Year
1994
Make / Model
Ford
Engine Size
4.0
Transmission
Manual
Doubler Linkage

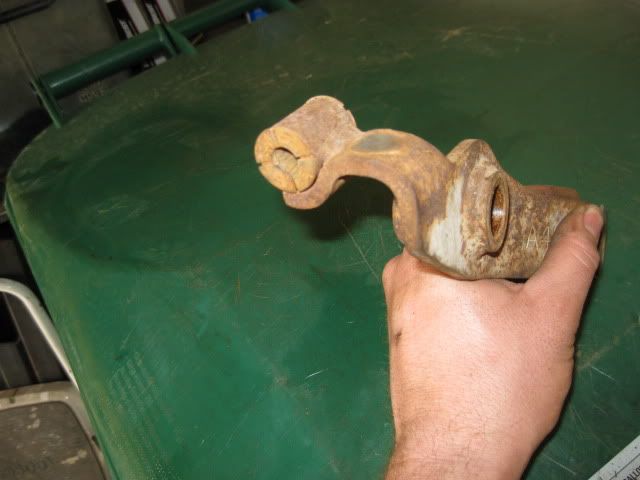
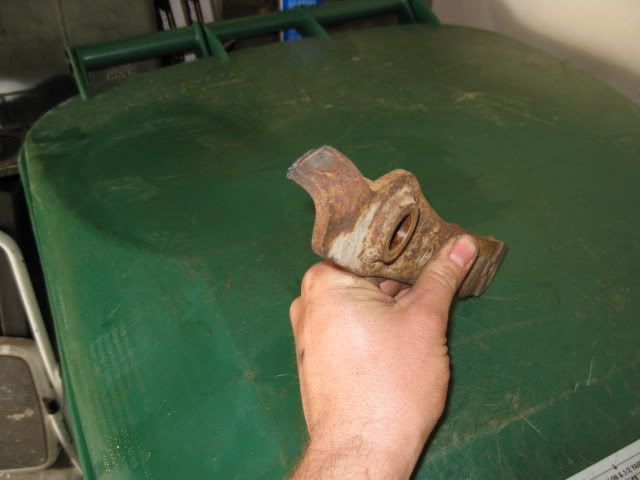
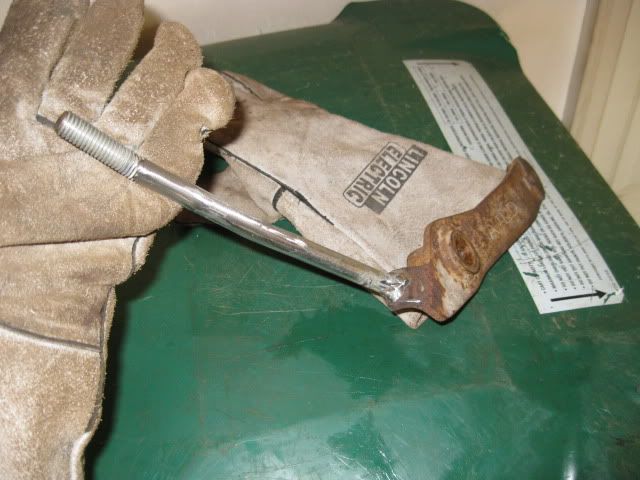
When I bought the 1350 to use for the doubler, it came with the linkage for the AL4D which is supposed to work with the M50D setup. I’m here to tell you it doesn’t, the upper portion of the linkage hits the back of the transmission in high range. So out came the welder and the chop saw!

Stock Arm:


Little cutting action:


Slap some ½” rod and a threaded section onto the old linkage:


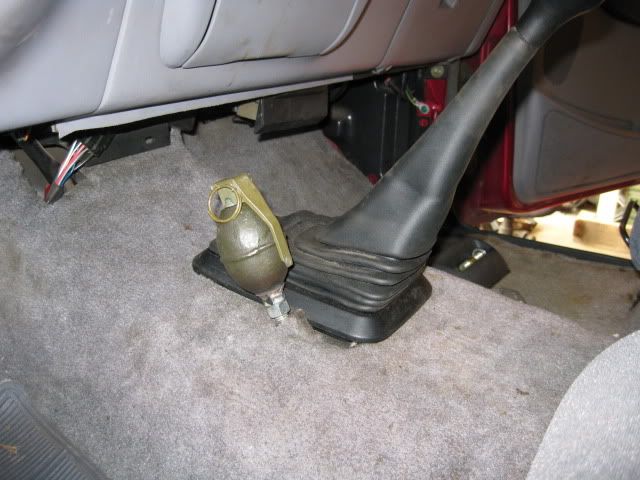
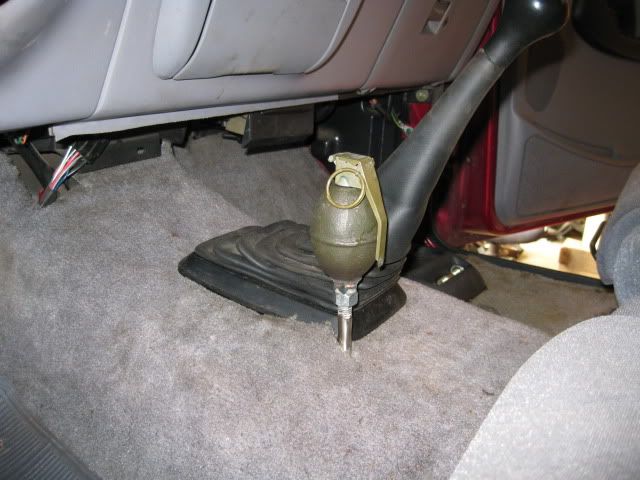
Get your knob of choice (I know it’s not original, but I like it) High range:


Low Range:


It wound up sitting right where the stock linkage would sit, so I might try to find the stock bezels to seal that up some. Right now, I just have the carpet laying over the hole in the floor which I don’t think is going to be a good permanent solution.
 

Kage

March 2012 OTOTM Winner
OTOTM Winner
Solid Axle Swap
Joined
Oct 10, 2010
Messages
781
Reaction score
16
Points
18
Location
Near St. Louis MO on the IL side
Vehicle Year
1994
Make / Model
Ford
Engine Size
4.0
Transmission
Manual
So quite a bit done this weekend. As of right now, I need to get some fluid in the brakes, and some oil in the front diff and I’ll be able to move the truck again!

I still need to finish setting up the rear suspension (looks like I need to move the rear mounts about a ½” down) and burn on the leaf mounts on the axle yet.

The goal of getting this thing drivable by the end of April is looking pretty likely right now. Or at least the ability to move it out of the garage anyway.

Side note, anyone have any idea what to do for a speedometer cable? I’m about 3” short from where I need to be. Any other extended cab doubler guys have an answer here?
 

robs

New Member
Joined
Jan 3, 2011
Messages
6
Reaction score
0
Points
0
Location
Southern IL
Vehicle Year
2005
Make / Model
Ford
Engine Size
2.3
Transmission
Manual
Bed Bob

This was a lot of fun!!!

First off... my qualifications...

Here's my present ride... and he's trusting bodywork to me :) :) :)


I am a Ranger guy. This was my first brand new ride ever... Loved this

truck.. had almost 10 years... This picture was taken at the exact moment it rolled 100,000 miles...


The little guy with the red hat in the middle? This is what he's driving

now...


It begins... My Body Shop... White trash patio in the back yard ;) I've

got lots more pictures that what'll be posted, so if you have questions

fire away (I probably won't have that pic :roll: )


He wanted 14-1/2" bob'ed...


Worked out well that the outside was 1" back (this kept the seam rigid)..


And the inside was 2" back.. this aligns with the double seam under the

bed for strength...


Just used a 4" grinder with a cut off wheel. Use PPE and take your time.

it can be very straight...


14-1/2" later... at the bottom LEAVE some steel because the flair at the

front is not as large as at the wheelwell...


Remember the inside is 1" 'shorter' than the outside. You have to trim the

rail where the inside meets the top rail on the outside of the bed...


If there was any part of this that sucked... it was matching up the

seams... Grind, fit, grind, fit, cuss, grind, fit, cuss, repeat..


You don't need to leave this much steel at the bottom, but with any

bodywork, always leave more than you need so you can trim and fit...


Let the fun begin... spot welds. Lots and lots and lots of spot welds.

Keep heat LOW... I found that using a wire feed about 1-1/2 times higher

than normal for a completely closed gap and up to 3 times more for filling

gaps worked well for my Lincoln Powerpac 100... Start the arc off the

side, and then rapidly wiggle it back and forth keeps from vaporizing the

thin sheetmetal... Move 6" away and start again. Once you have a good

bead, strike the arc on that and fill the gaps... Do nothing more than a

spot weld or the thin metal just goes away...


Oh...Wrapped towels on the end of the bed so I could stand it upright..

spatter and dry towels while spot welding kinda SUCK... :) ;)


Here's why you leave extra metal on the bed side.. basically cut the cap

and expand it... used wire to fill the gaps...


[Tommy Boy] Fat guy in a little bed... Fat guy in a little bed... [/Tommy

Boy]


Was able to
overlap the inside of the bed. Not worried about strength at

all... Around the mounting holes, just cut and weld up corrugation...


On the driver side you have to deal with the gas tank relief.. and on the

side, there's about 1" difference in the radius at this cut because of the

relief for laying 2x4's in the bed. I spent tons of time with a hammer and

dolly.. then just said eff it, and beat the snot out of it until it

aligned up...


Anytime you do this much welding, panels will warp.. get your hammer and

dolly and straighten back out...


Protect seams (roofing patch)...


Now comes the fun.. Bondo on. Bondo off. Bondo on. Bondo off. Two

skools... you can't have any more than 1/4" depth... so glob on snot

loads...


or smaller layers...


Been 30 years since I've done bodywork. Snot loads was much easier as you

just sand 95% off and you're done. Thinner layers means you do about 1/2

dozen and is much more work...

For the filler.. made a mask 8"x9" and notched it so I could center up on

both the bed and the filler door. Made Kage mark the spot for it...


Make a big hole...


Anytime you do this much welding on a flat panel, it's gonna warp like a

booger... Unfortunately, you can't really get behind it to do hammer and

dolly work. This will be "ok" but a 10 footer (look OK from 10 foot but

not necessarily closer)...


Mean time... Primer on. Primer off. Primer on. Primer off...


Brings us to today... Bought real paint to shoot on this and it's best if

it's 70F or better. We've had awesome weather until today. Cold front is

in and it'll be a week before it warms back up... So it's back to Kage's

place for fitting (keep your greasy mitts off of it! :) :) ) and then

we'll shoot paint...


Last edited:

Kage

March 2012 OTOTM Winner
OTOTM Winner
Solid Axle Swap
Joined
Oct 10, 2010
Messages
781
Reaction score
16
Points
18
Location
Near St. Louis MO on the IL side
Vehicle Year
1994
Make / Model
Ford
Engine Size
4.0
Transmission
Manual
Finial Rear Shackle Mount Location

It took me long enough to get around to this point, but I finally got the rear shackle mount where I wanted it (I think).

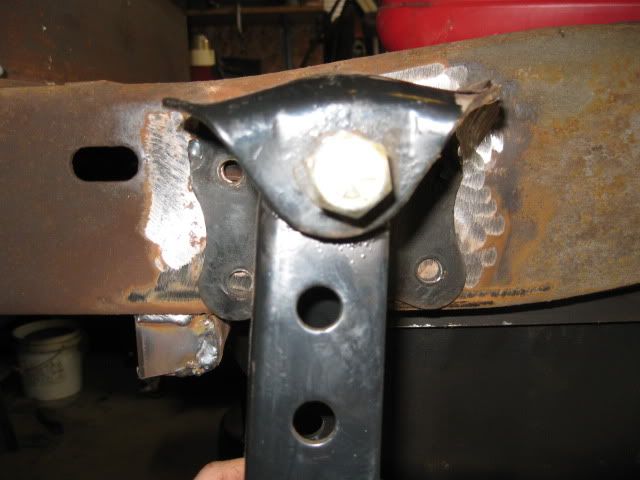
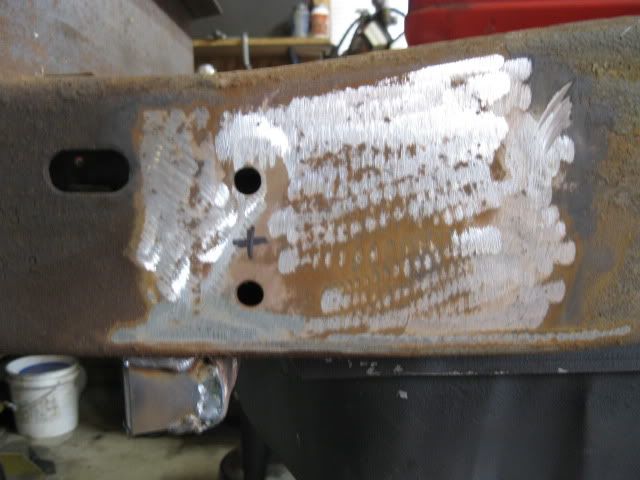
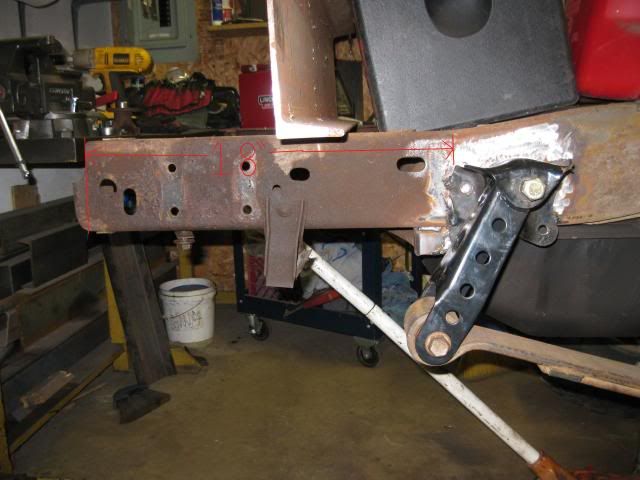
I started out using the spare tire carrier holes as a base line for locating the rear mounts. It turns out that they’re spaced perfectly in relation to my front mounts to get me the correct shackle angle.

First trial location (Looking at the passenger side):


While this placement got my horizontal location correct, my vertical placement was off a little bit. So I dropped the mounts down 1” (Where the “X” is):


I tacked the mounts onto the frame and puts some weight on the rear of the truck to check to see how level the truck is sitting and my shackle angle as well (3/4 tank of gas and a tool box for weight):


Everything is looking pretty good now! I'm on track to be able to pull this thing out of the garage by the end of this week :icon_bounceblue:
 

kroussinoffroad

October 2011 OTOTM Winner
OTOTM Winner
Solid Axle Swap
Joined
Nov 4, 2009
Messages
1,713
Reaction score
14
Points
0
Location
marquette, MI
Vehicle Year
2000
Make / Model
Ferd
Engine Size
4.6
Transmission
Automatic
:icon_hornsup: DUDE THAT"S GONNA LOOK AWSOME!!!:icon_hornsup:
 

RacinNdrummin

Member
TRS Banner 2010-2011
Joined
Dec 21, 2008
Messages
629
Reaction score
7
Points
18
Location
Auburn, Wa
Vehicle Year
2005
Make / Model
Ford
Engine Size
3.0
Transmission
Manual
Awesome! looking great.

On the MC... Did you look into the E250 MC? Seems to me that it would be fairly similar on the front brakes. I know my 91 E-250 had twin-piston calipers up front. Either way, looks like you got it figured out...
 

Sponsored Ad


Sponsored Ad

Staff online

Member & Vendor Upgrades

For a small yearly donation, you can support this forum and receive a 'Supporting Member' banner, or become a 'Supporting Vendor' and promote your products here. Click the banner to find out how.

Latest posts

Truck of The Month


Shran
April Truck of The Month

Recently Featured

Want to see your truck here? Share your photos and details in the forum.

Follow TRS On Instagram

TRS Events

25th Anniversary Sponsors

Check Out The TRS Store


Sponsored Ad


Sponsored Ad

Sponsored Ad


Amazon Deals

Top