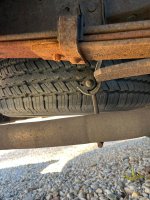
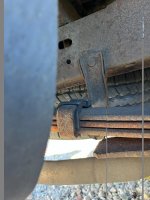
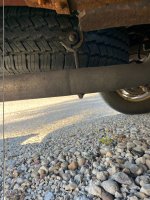
Rear exhaust hanger replacement.


Featured Build Threads

flyin-lowe

Forum Member

Law Enforcement
Joined
Aug 19, 2024
Messages
119
Points
101
City
Indiana
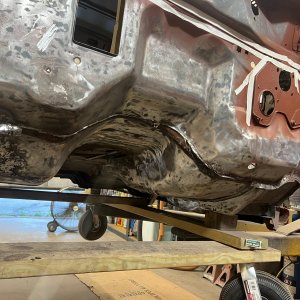
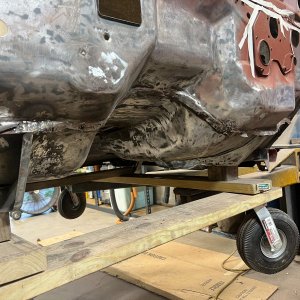
2004 2wd Ranger, 3.0. I noticed a rattle and looked and the rear exhaust hanger appears to be broken/breaking. It is not all the way loose but definitely getting close. Based on the pics, is there a replacement part that can easily be DIY'd? I am no mechanic but can handle the basics. I don't have much experience working on Rangers so not sure what this is supposed to look like and exactly what needs to be replaced.

 

Attachments

  • Rear exhaust hanger replacement.
    IMG_2443.JPG
    231.4 KB · Views: 23
  • Rear exhaust hanger replacement.
    IMG_2442.JPG
    162.6 KB · Views: 19
  • Rear exhaust hanger replacement.
    IMG_2441.JPG
    242.3 KB · Views: 22
Amazon has many of the rubber type with multiple holes for adjustment in height.
 
Something like Franklin posted, or similar. They work fine. They do tend to rust easily, even down here in the south. So I would recommend putting some paint on it. But it's a good, inexpensive solution.
 
If you have access to a torch and welder there are factory like hangers that bolt on and just a straight rod that you heat, bend, and weld. I’ve gone to using them since they hold up better than other hangers, but I also have welders and torches
 
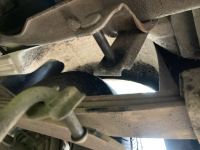
I dont have access to those. I bought the rubber isolator today thinking I could make quick swap. When I go under there and looked, the bottom rod that comes up from and is welded to the tailpipe is normal. But the top part of the bracket is actually a large rivet that is welded and boxed in, so there was no quick way to slide the old rubber off and slide the new one on. It looks like that rivet is going to have to be cut and drilled out and then run a bolt through with a nut. Makes no sense why they would make it this way, especially knowing it has a rubber part that isn't going to last forever. Here is what the top section looks like.
 

Attachments

  • Rear exhaust hanger replacement.
    HANGER.png
    815 KB · Views: 7
Yeah, once I got under there and looked I just got back out. I didn't pay attention to see how much room there is to get a drill or grinder under there to get that rivet out of there. It may be easier just to get one of the universal brackets like was linked above.
 
I dont have access to those. I bought the rubber isolator today thinking I could make quick swap. When I go under there and looked, the bottom rod that comes up from and is welded to the tailpipe is normal. But the top part of the bracket is actually a large rivet that is welded and boxed in, so there was no quick way to slide the old rubber off and slide the new one on. It looks like that rivet is going to have to be cut and drilled out and then run a bolt through with a nut. Makes no sense why they would make it this way, especially knowing it has a rubber part that isn't going to last forever. Here is what the top section looks like.
is there a nut at the top of that bracket securing it to the frame?
once removed it's possible the bracket splits into 2 pieces. or at least would be easier to cut the pin out.

it's been a while since I looked at that hangar, not sure if the bracket separates.
 
I didn’t feel for a nut because the head is round like a rivet and not a bolt or anything to grab on to. Even if it does come off the pin will have to be cut and drilled out and replaced with a nut and bolt. I’ll look at that option though
 
I dont have access to those. I bought the rubber isolator today thinking I could make quick swap. When I go under there and looked, the bottom rod that comes up from and is welded to the tailpipe is normal. But the top part of the bracket is actually a large rivet that is welded and boxed in, so there was no quick way to slide the old rubber off and slide the new one on. It looks like that rivet is going to have to be cut and drilled out and then run a bolt through with a nut. Makes no sense why they would make it this way, especially knowing it has a rubber part that isn't going to last forever. Here is what the top section looks like.
It would be nice to remove the rivet holding that to the frame. Then you could easily bolt a universal bracket to the same hole. Or... once removed, take out that rivet at the bottom and use a bolt to install one of the isolators that Roert linked to. Then you're back to having it nearly like it was from the factory.
 
on my 2005:
it's a 1/2" flange hex nut. yes, 1/2 not mm. the rivet is welded to the bracket ,it won't spin.
the bracket parts appear spot welded together, kind of hard to tell thru the rust. it would be easy to cut the pin out while in a vise.
use lock nut on the replacement pin. lower the spare and use a deep socket.
 
Last edited:
if you don't have a grinder, or don't want to drill.
once the bracket is off saw the pin on the inside as close to the small mushed end as possible.
place the big head end on something sturdy, place a socket or short pipe or bigger nut over the mushed end.
it has to clear the mushed pin and rest on the surrounding bracket. good hard smack with a hammer should drive the
bracket down and pop the mushed end out.
similar procedure for the bigger end, put a nickel in the saw slot if necessary.

we love to improvise, just unscrewing it wouldn't be any fun.
 

Upcoming TRS Events

Sponsored Ad

Featured Ranger Based Vehicle

TRS Latest Video

Official TRS Merchandise

Follow TRS On Instagram

Back
Top