• Welcome Visitor! Please take a few seconds and Register for our forum. Even if you don't want to post, you can still 'Like' and react to posts.

Project Putt Putt: 2002 B3000 4x4 swap thread


Dave18

Member
Joined
May 31, 2011
Messages
64
Reaction score
39
Points
18
Location
Littleton, Colorado
Transmission
Manual
2WD / 4WD
2WD
I figured I'd been asking enough questions on here that I might as well post some pics about my 4x4 conversion...
IMG_20170916_152526136.jpg

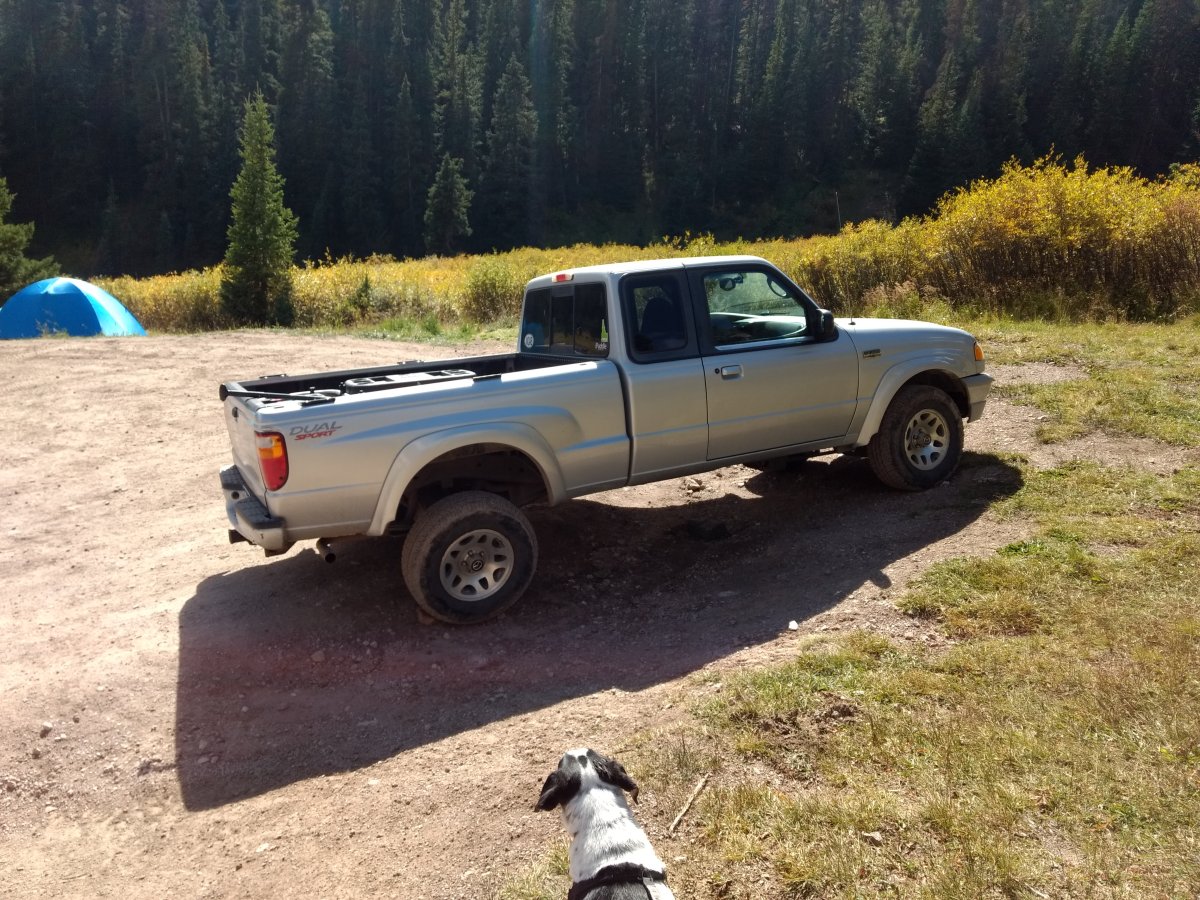
Here is the starting point... I learned to drive on this truck and it's been my only car since 2009. It's a 2002 B3000 "Dual Sport," which is the Mazda copy of the 3.0 Edge. When I first got the truck I wasn't interested in four wheeling, and the 2wd was cheaper and simpler... Since then I started doing a lot more hiking and camping and quickly began to wish I had a 4x4! I live in the Colorado foothills and mostly used the truck for work and on the weekends to access some of the 14er trailheads... the above picture is of the Nellie Creek 4x4 trailhead. The stock truck does surprisingly well but with the stickshift there is a certain steepness of trail you just can't climb.

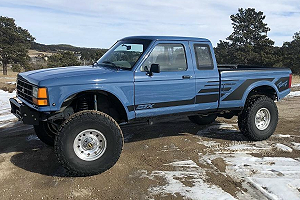
It'll be an abbreviated build thread because I did half the work a couple years ago... At first the scope of the project was only to swap a FX4 L2 rear axle (mainly for the Torsen diff and 4.10 gear ratio).
IMG_20181111_195340562.jpg

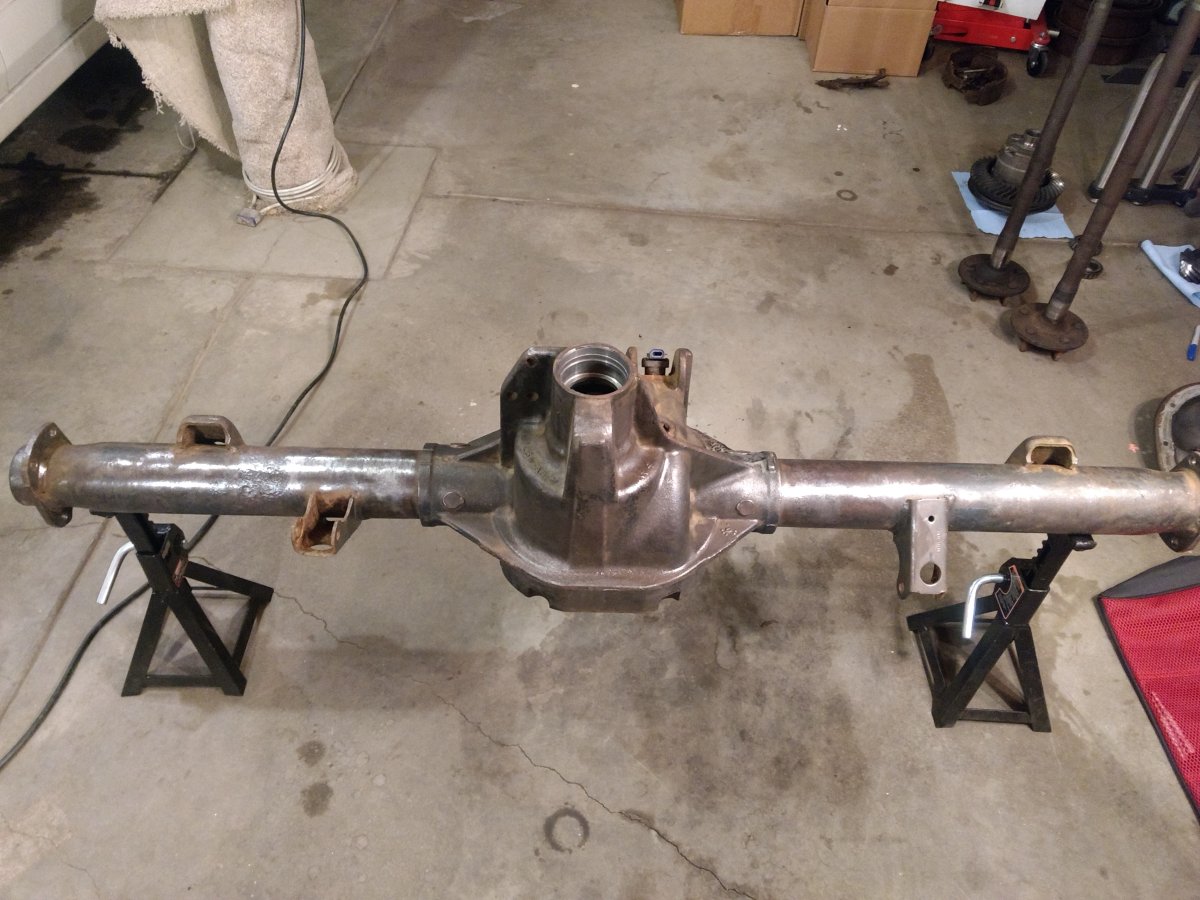
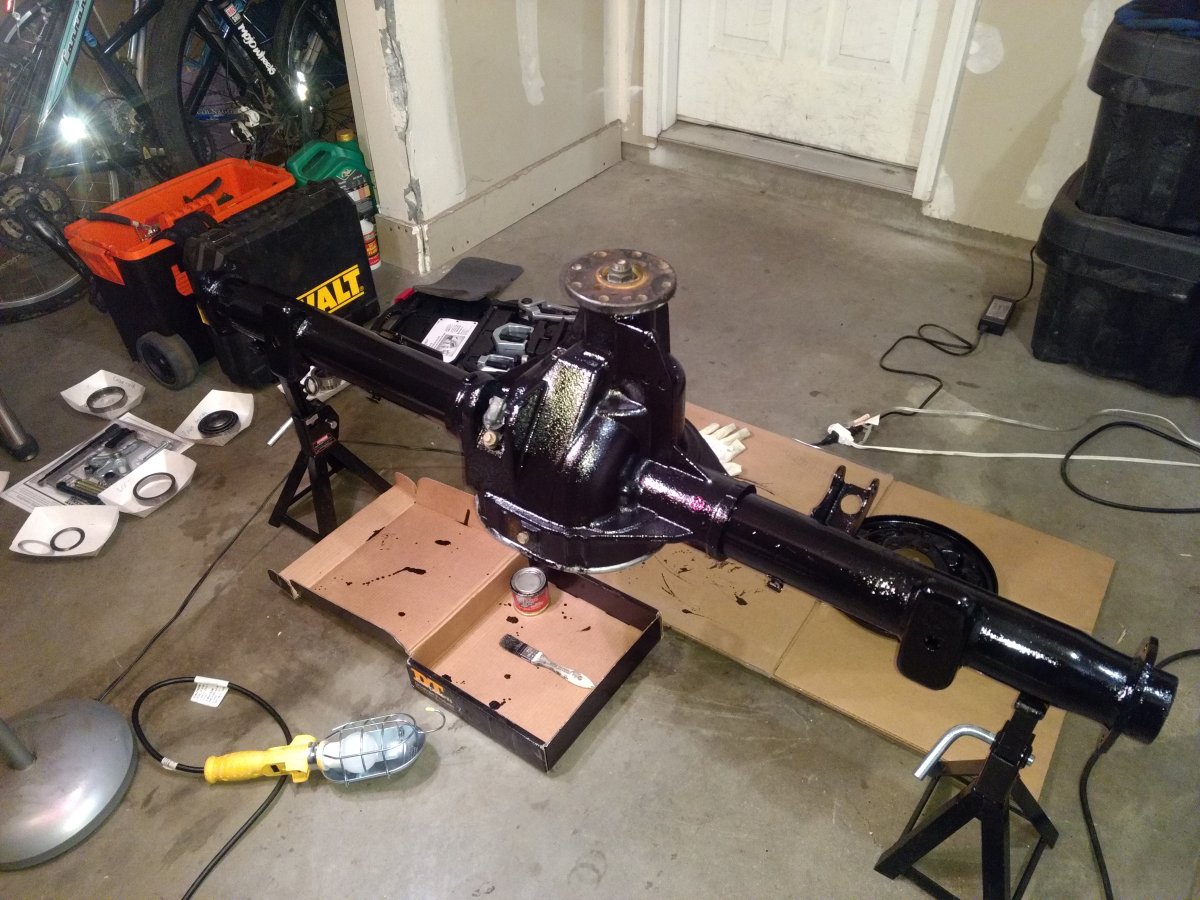
We bought a junkyard 8.8" 31 spline out of a Level II truck, wire wheeled the crap out of it and coated it in POR 15 to stop the rusty-ness (it was shipped from a yard in KY). Then I painstakingly replaced every bearing and seal in the thing, since I wasn't sure what kind of wear it had seen... This was a bear of a job for someone like me who hadn't set up gears before!
IMG_20181113_215844671.jpg

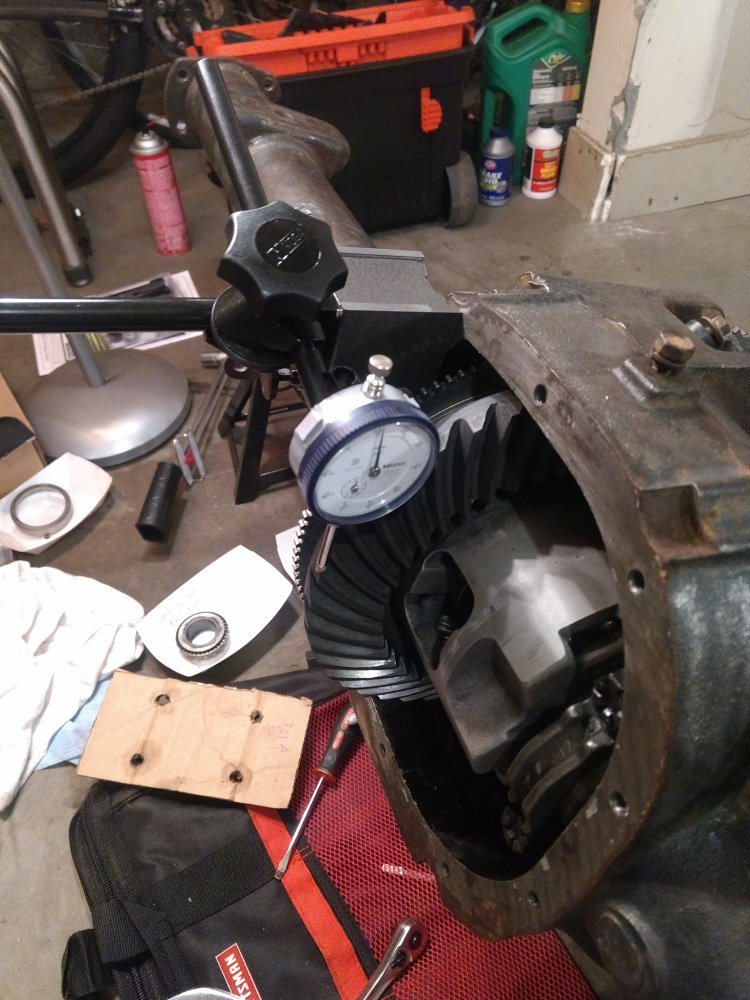
I had to buy a couple hundred bucks worth of tools like a dial indicator and magnetic stand and a couple torque wrenches. It was a good but frustrating learning experience! Here it is all complete and coated:
IMG_20181118_225421204.jpg


Dave18

Member
Joined
May 31, 2011
Messages
64
Reaction score
39
Points
18
Location
Littleton, Colorado
Transmission
Manual
2WD / 4WD
2WD
Installing the new rear end with its 4.10 ratio allowed us to go up to 31" BFGs without messing with the speedometer or anything:
IMG_20181120_114032897.jpg

This delivered a noticable increase in off road ability! The larger tires gave more clearance and the Torsen helped the traction situation a little. I think it also made a big difference in snow, although it could have also just been the new tires. However, the truck was still very limited by steeper trails since at a certain point the 3.0 would just stall without low range. The next step was to install a transfer case to allow low range (Rwd)... My transmission had developed an annoying whine at certain speeds, so I bought a Zumbrota remanufactured M5OD with the 4WD output shaft, and a remanufactured BW1354 manual transfer case.
20200505_185457.jpg

I wanted the manual transfer case linkage bosses, but didn't want to sacrifice the 3.72:1 1st gear ratio that my 3.0 originally came with. The 4.0L trucks apparently all came with a 3.4:1 1st gear ratio, and I wasn't sure whether any of the other transmission configurations came with the shift bosses... So I ordered the transmission for the smaller engines and swapped the tailhousing with a used one from a truck that had the manual T-case. I know the difference in gear ratios probably isn't noticable, but the transmissions were the same price so I figured it was worth the small amount of work to swap tailhousings... maybe?
20200505_200744.jpg

While everything was disassembled I replaced a bunch of stuff that would be a pain otherwise, like the clutch & hydraulics, oil pan gasket and oil pump... here are the oil pumps; I had never seen what they looked like before and thought they were interesting:
20200515_163713.jpg
 

Dave18

Member
Joined
May 31, 2011
Messages
64
Reaction score
39
Points
18
Location
Littleton, Colorado
Transmission
Manual
2WD / 4WD
2WD
I put all that together with a Dorman driveshaft and had pretty effective low range 2wd. My family teased me that I'd somehow made my slow truck even slower, haha. But I could get to trailheads and campsites I had to hike to before! I had been craving low range for so long that sometimes I'd shift the transfer case and crawl through resturant drive throughs just because I could! My wife and I drove all the way up Top of the Wold trail outside Moab in this configuration; there was a Jeep and Tacoma group that couldn't believe we didn't have a front drive axle.
20210522_152848.jpg

20210522_151844.jpg
A couple unforseen issues were that it's actually really annoying to only have one cupholder, and a LOT more road noise gets through the enormous slot in the access panel needed for the transfer case shifter:
20200531_201110.jpg

I even coated the access panel with Dynamat to try to quiet it down, but I really think the slot is just so much bigger to accomodate both shifters that the panel itself isn't really the problem. I still haven't done this, but I need to make some kind of custom fiberglass shift bezel thing that seals better and hopefully could incorporate another cupholder.
20200610_202054.jpg

The factory one looks cool but had a crack in it which kept it from making a great seal to the rest of the floor. Doesn't it seem like Ford could have at least kept the passenger side cupholder?? It's not like the transmission shifter moved any further to the right. Oh well. It does shift really easily between high and low range, so that's cool!

If anybody else with the factory manual setup has made a custom bezel/cupholder thing, I would love to see it!
 

Dave18

Member
Joined
May 31, 2011
Messages
64
Reaction score
39
Points
18
Location
Littleton, Colorado
Transmission
Manual
2WD / 4WD
2WD
All of that happened a couple years ago, and I've been happily using the truck since - I figured I'd include it as reference/background if anybody was looking for conversion info in the future... Now I think I'm getting up to where I am now... I'll add updates as I make progress and there will probably be more questions and unknowns from this point on haha!

In order to go ahead with the actual 4x4 part of the 4x4 swap, I bought a dana 35 SLA from ebay. The background was unknown but it was cheap and I was figuring on replacing all the wear parts anyway as part of a Torsen install:
20220414_174415.jpg

I also bought the Yukon Gear master rebuild kit (listed in the TRS store) from Amazon, and the Torsen itself direct from their site.
I've only been able to work on it a little bit each day due to my actual job, so progress has been pretty slow. The first thing I did was disassemble the old differential and clean out the housing. For future reference if anyone tries this, the disassembly is a lot easier than it is on a c-clip axle because you don't need to remove the center pin from the differential carrier. On a c-clip diff like the Ranger rear ends, you normally need to remove a retaining bolt (or roll pin) in order to let the center pin slide out, which allows you to push the axle shafts inboard enough to remove the c-clips. That lets the axle shafts be removed to free up the carrier.
In the Dana 35 SLA's case, there is only a "stub shaft" on the long arm side, and since it doesn't actually take any cornering loads there isn't a traditional c-clip. There is a small mini-c-clip that seems to act more like a retaining spring instead... the axle stub shaft won't fall right out, but give it a tug from the end and it should pop free!
I felt like I needed to include this because I had a mini panic attack when I realized the center pin could not slide out past the ring gear, and was scratching my head trying to figure out how they got the darn thing assembled in the first place! Many thanks to the folks who commented on my other thread to help me figure it out! Here's the differential carrier; you can see how there is no way the center pin was making it past the ring gear. Good thing it didn't have to!
20220428_194423.jpg

Remove the end seals, pop out the stub shaft, remove the carrier bearing caps (I made sure to document their position and orientation), and the carrier can be pried right out! Once the carrier was removed I unbolted the ring gear and drove it off with a punch, hitting the bottom surface of the empty tapped holes on its back side. I'm planning on re-using the gearset and (at least to my untrained eye) the teeth look to be in good shape. I wouldn't have removed the gear at all if I weren't changing the carrier. Here is the brand new Torsen beside the factory open carrier:
20220501_175954.jpg

The torsen is like a machined work of art. Made in USA too!!

I haven't pressed the old carrier bearings off yet, since I didn't have a suitable bearing splitter. When I did the 8.8 rear end, I used a bunch of tools from the Advance Auto loaner program (highly recommend), but my wife and I moved up into the foothills and car parts stores are more limited now haha. I tried using a three-jaw puller to pull them off, but the jaws didn't reach in far enough to grab the race. Oh well. I ordered a splitter set so I'll update when that gets here!
In the mean time I was able to remove the pinion subassembly:
20220502_215501.jpg

The pinion nut has loads of preload and I found the best way to get it off was to grip the pinion flange in a bench-mounted vise and use the biggest wrench with a cheater bar to help. Actually I wasn't sure whether the vise would marr the pinion flange so I bolted a flange wrench to it and then put that in the vise. Once you remove the nut, the pinion can be tapped out through the housing pretty easily, at least in my case. Hopefully the bearing splitter works for getting the bearings off that, too.
 

Lefty

Well-Known Member
Joined
Feb 8, 2022
Messages
1,632
Reaction score
1,811
Points
113
Location
Saint Paul, MN
Vehicle Year
2003
Make / Model
Ranger Edge
Transmission
Automatic
Wonderful work. It's way beyond my skill set, but the least I can do is look for a cup holder for you next time I pull parts.
 

superj

Well-Known Member
U.S. Military - Veteran
Joined
Oct 1, 2021
Messages
3,024
Reaction score
2,497
Points
113
Location
corpus christi, texas
Vehicle Year
2004
Make / Model
ranger edge
Engine Type
3.0 V6
Engine Size
3 liters of tire smoking power
Transmission
Manual
2WD / 4WD
2WD
Total Lift
none
Total Drop
none
Tire Size
235s
My credo
Grew up in the 70s, 80s, and 90s
the cup holder that mounts to the seat is waaaayyyyyy better then the ones that you lost. i got one off ebay with the mounting bolts for cheap. i just threaded them into the little indentions i could feel through the seat cloth. i have four cup holders now and the ones at the seat will hold a wataburger medium with no issues (wataburger medium is a large mcdonalds soda).
 

Bracket racer

Active Member
Canada Military - Veteran
Joined
May 29, 2018
Messages
429
Reaction score
232
Points
43
Location
Socialist republic of Nova Scotia Canadastan
Vehicle Year
1991
Make / Model
Ranger supercab
Engine Type
4.0 V6
Engine Size
4.0
Transmission
Manual
2WD / 4WD
4WD
Total Lift
Crap load
Tire Size
35X12.5 (bald so I don't break parts)
My credo
Low range in Nova Scotia on YouTube!
Awesome work on the rest ends, what do you do for a living? I was a mechanic for 36 years and it was rare to find a regular mechanic that knew how or would attempt at setting up a ring and pinion. You saw what you had to do, bought the tools and did it!👍🏻👍🏻👍🏻
 

superj

Well-Known Member
U.S. Military - Veteran
Joined
Oct 1, 2021
Messages
3,024
Reaction score
2,497
Points
113
Location
corpus christi, texas
Vehicle Year
2004
Make / Model
ranger edge
Engine Type
3.0 V6
Engine Size
3 liters of tire smoking power
Transmission
Manual
2WD / 4WD
2WD
Total Lift
none
Total Drop
none
Tire Size
235s
My credo
Grew up in the 70s, 80s, and 90s
thats true. most people are scared to do gears, even auto repair places won't mess with them and route to special shops
 

Dave18

Member
Joined
May 31, 2011
Messages
64
Reaction score
39
Points
18
Location
Littleton, Colorado
Transmission
Manual
2WD / 4WD
2WD
Thanks you guys, I really appreciate it! When I did the 8.8 I had a guidebook (I think it was mentioned in the tech section here on TRS), but I couldn't find any type of guide for the front axle... I'm hoping it all works similarly and referencing back to that book a lot. I'm a mechanical engineer for work but that job is more computer work than hands-on haha. I figured I'd try to at least document my mistakes and lessons-learned here in case anybody else is working on a similar project! Honestly this site and the people on it are incredibly helpful.

the cup holder that mounts to the seat is waaaayyyyyy better then the ones that you lost. i got one off ebay with the mounting bolts for cheap. i just threaded them into the little indentions i could feel through the seat cloth. i have four cup holders now and the ones at the seat will hold a wataburger medium with no issues (wataburger medium is a large mcdonalds soda).
Wait, there was a cupholder that mounts to the seat?? Was that an option for some years? I'd love to see what that looks like! Or is it an aftermarket thing? I could really use a couple more cupholders!
 

Dave18

Member
Joined
May 31, 2011
Messages
64
Reaction score
39
Points
18
Location
Littleton, Colorado
Transmission
Manual
2WD / 4WD
2WD
I haven't made much progress this week, but I did manage to press the inner pinion bearing off, and pull the old carrier bearings. I used the OTC 4518 5-ton puller set for both... On the carrier I was able to use a large socket and the forcing screw that came with the puller to remove the bearings, but I had to cut the bearing cages off first. The shims sit under the carrier bearings and their diameter is almost exactly the same as the bearing race, so there isn't really any lip for the bearing splitter to grab. If you cut away the cages it's easy to grab the upper lip of the, which I guess normally keeps all the rollers in line:
20220510_195012.jpg

This worked fine, but I'm not sure how I'll get the good new bearings off without destroying them if I need to adjust the shim stack during gear setup. Maybe I can cut a flat section into the shims so there's a gap in two sides of the stack? I'm a little worried about that...

For the pinion I used a press and the same splitter. It looked like the forcing screw would have worked here too if you don't have a press. Now all the shims are cleaned up and labeled!
20220511_205457.jpg

Now the only things left to remove are the axle bearings in either side of the housing, and the race for the inner pinion bearing where it sits in the housing. I cannot figure out how to remove that thing... There's no access to the back of the race to tap it out; it almost seems like the race is flush with the housing and there's nothing to pull or hammer on! It doesn't help that there is a sheet metal "oil baffle" sandwiched between the race and the bottom of the housing pocket it sits in. I destroyed this trying to pound the race free with various punches (I ordered a new one... it's Dana P/N 43599). Here's the view of the race from the carrier side:
20220511_210135.jpg

And from the pinion side:
20220511_210149.jpg

Any little edge to pull on is pretty obscured by the beat-up oil baffle, so I haven't figured out how to remove it yet.
 

pjtoledo

Well-Known Member
Supporting Member
U.S. Military - Veteran
Joined
Oct 5, 2007
Messages
5,337
Reaction score
2,906
Points
113
Location
Toledo Ohio
Vehicle Year
20002005199
Make / Model
Fords
Engine Size
3.0 2.3
I got one out with a large punch. had to keep dressing the tip for a good bite.
the last one I did I have a Tekton 41mm 3/4 drive socket that's 2.185" O.D. / 55.5mm that catches the race and passes thru the housing.
 
Last edited:

superj

Well-Known Member
U.S. Military - Veteran
Joined
Oct 1, 2021
Messages
3,024
Reaction score
2,497
Points
113
Location
corpus christi, texas
Vehicle Year
2004
Make / Model
ranger edge
Engine Type
3.0 V6
Engine Size
3 liters of tire smoking power
Transmission
Manual
2WD / 4WD
2WD
Total Lift
none
Total Drop
none
Tire Size
235s
My credo
Grew up in the 70s, 80s, and 90s
I just went on eBay and searched for ford ranger cup holder till I found the one for the seat. It's just a two cup holder made of black plastic

Like this one
 

superj

Well-Known Member
U.S. Military - Veteran
Joined
Oct 1, 2021
Messages
3,024
Reaction score
2,497
Points
113
Location
corpus christi, texas
Vehicle Year
2004
Make / Model
ranger edge
Engine Type
3.0 V6
Engine Size
3 liters of tire smoking power
Transmission
Manual
2WD / 4WD
2WD
Total Lift
none
Total Drop
none
Tire Size
235s
My credo
Grew up in the 70s, 80s, and 90s
But look for one with the mounting hardware. The flat topped bolts that have a short threaded area to thread into your seat frame
 

Dave18

Member
Joined
May 31, 2011
Messages
64
Reaction score
39
Points
18
Location
Littleton, Colorado
Transmission
Manual
2WD / 4WD
2WD
I haven't gotten much done on the project lately since I was camping for a week around Memorial Day, and was pretty focused on getting ready for the trip for the week before that (not a bad problem to have!)

I did finally get the last two bearings out of the old housing... for the inner pinion race I just used a large flathead and this GIANT old hammer that the previous owners left in our garage haha. Basically like pjtoledo said above. You just have to plan on replacing that little oil baffle I guess, which should be fine since they are just a couple bucks new. I also got that pesky passenger-side bearing removed finally... I couldn't get anything behind it because of the way the axle housing's tube tapers down in diameter. I eventually dremeled out a notch in the race so that the rollers could fall out, then used a pilot bearing puller with a slide hammer to grip the inside of the race (where the rollers used to sit).

I also grabbed the axle mount bracket from this 99 Ranger in the junkyard:
IMG_0299.jpg
Maybe it was a Gamber 500 car or somebody just really liked Jurrasic Park, haha! Ominously, the yard staff had written "watch for needles" on the side.
20220511_205807.jpg

I'll still need to go back and cut off the actual frame mount for the 3rd bracket, or make one out of steel and figure out how to weld it on. I'm not looking forward to that part, since I don't have any experience with cutting and welding.

Superj - those cupholders look amazing but sadly it seems like the threaded holes weren't added to the seat until 2004... Maybe I can fabricate a mounting plate inside the seat somehow? I'll have to look at it more closely. There is definitely some fairly sold material in there and I wonder if I could just tap threads into it... One cupholder just isn't enough haha!
 

pjtoledo

Well-Known Member
Supporting Member
U.S. Military - Veteran
Joined
Oct 5, 2007
Messages
5,337
Reaction score
2,906
Points
113
Location
Toledo Ohio
Vehicle Year
20002005199
Make / Model
Fords
Engine Size
3.0 2.3
Damn, that junkyard Ranger looks better than half of them on the road here in the rust belt.
 

Sponsored Ad


Sponsored Ad

Member & Vendor Upgrades

For a small yearly donation, you can support this forum and receive a 'Supporting Member' banner, or become a 'Supporting Vendor' and promote your products here. Click the banner to find out how.

Truck of The Month


Kirby N.
March Truck of The Month

Recently Featured

Want to see your truck here? Share your photos and details in the forum.

Follow TRS On Instagram

TRS Events

25th Anniversary Sponsors

Check Out The TRS Store


Sponsored Ad


Sponsored Ad

Sponsored Ad


Amazon Deals

Top