• Welcome Visitor! Please take a few seconds and Register for our forum. Even if you don't want to post, you can still 'Like' and react to posts.

1984 Skamper 072S


85_Ranger4x4

Forum Staff Member
TRS Event Staff
TRS Forum Moderator
Article Contributor
V8 Engine Swap
OTOTM Winner
TRS Banner 2010-2011
TRS 20th Anniversary
VAGABOND
TRS Event Participant
Joined
Aug 7, 2007
Messages
32,342
Reaction score
17,838
Points
113
Location
SW Iowa
Vehicle Year
1985
Make / Model
Ford
Engine Type
V8
Engine Size
5.0
Transmission
Manual
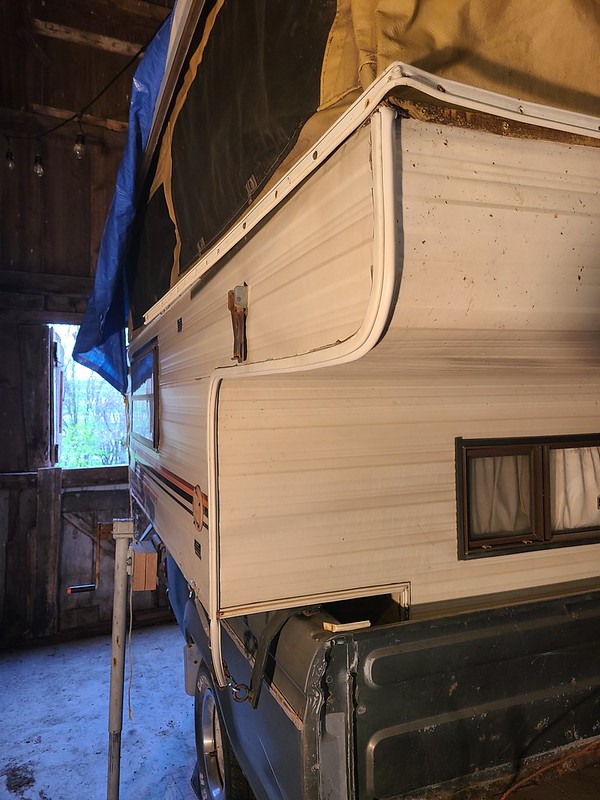
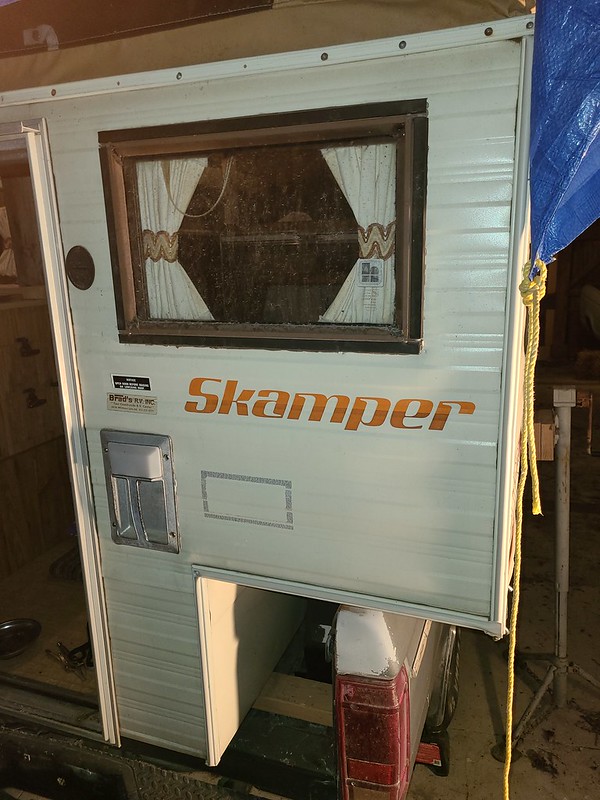
Wife wants to go camping Memorial Day weekend, are we going to camp on the ground like peasants or in the back of our old truck... like peasants?

Ok, lets get this party started!


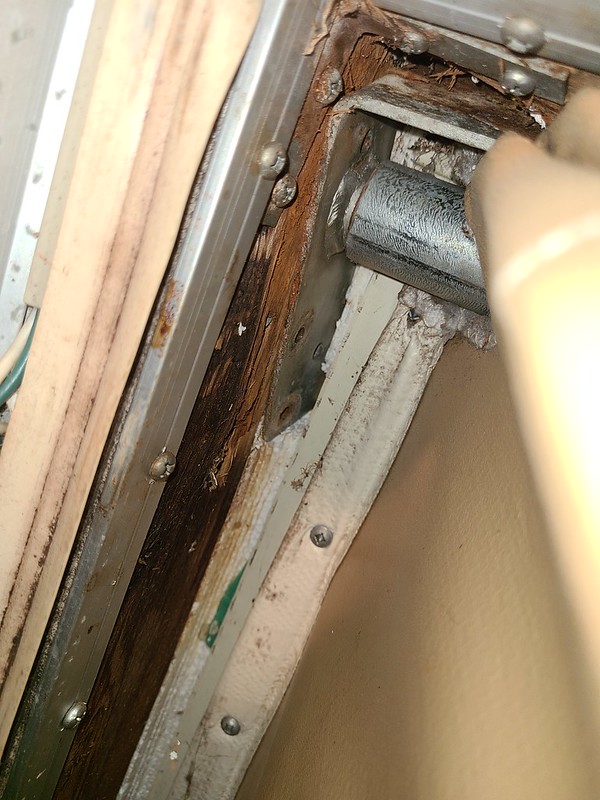
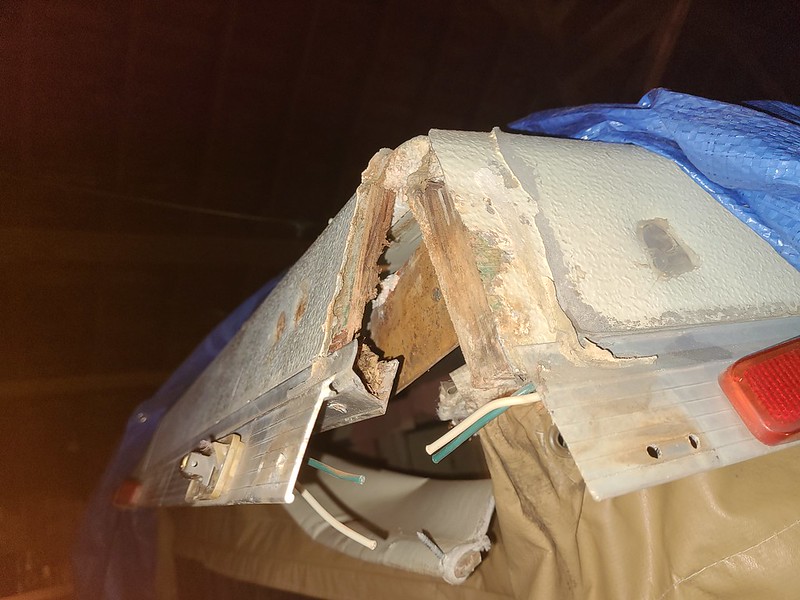
The "directions" say to just jam boards between the bulb seal and upper part of the lower hull. I don't see how this will have any kind of stability with both sides of the lift disconnected, it will just be the roof teetering on four 2x4's, it would probably work if you are just just doing one side but replacing that back board requires both sides to be disconnected.

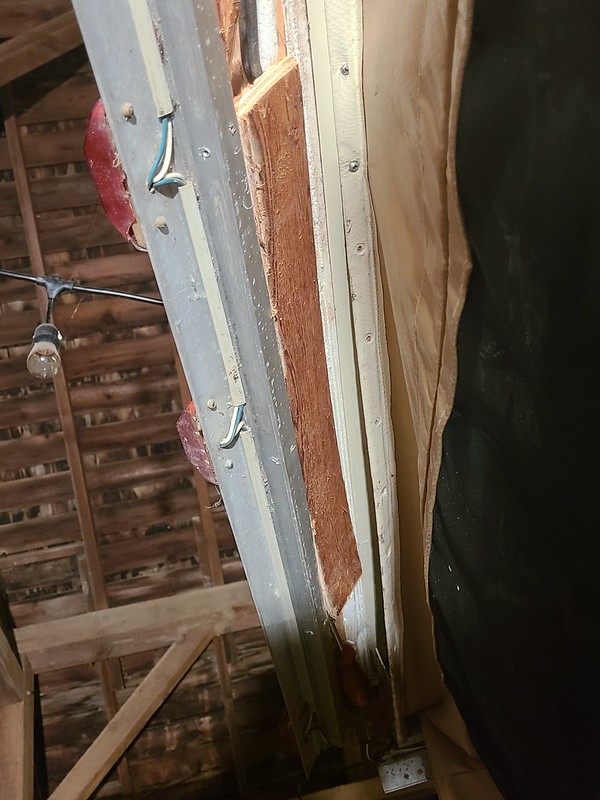
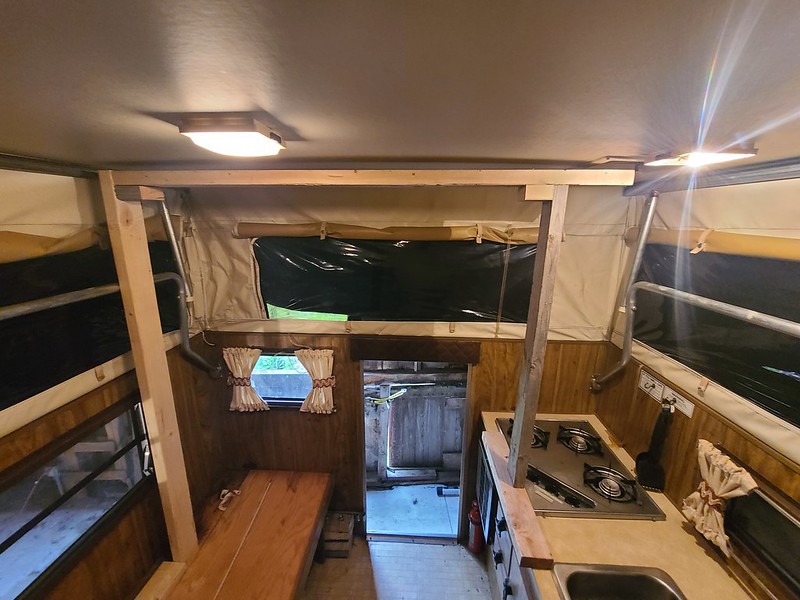
So I also read you can support the roof by building a frame on the inside so I am going that route.


My minion is kind of worthless for a helper...


Inner frame is done, I do need to sneak another towel out of the house though.


Not as strong as I like but I hope to have a quick turn around. Not like I am really splitting a tractor. Of note for the next guy that takes on one of these for a project I have the forward braces sitting on the studs the crossmembers for the front bunk are braced to. One side has a foot (made from 2x4 scrap) to help prevent it from rocking ahead. Rear mounts are on boards to spread the weight out (mainly worried about the counter) The drivers side are on the same plane so I could throw another 2x4 in there to connect both frames and add a little more rigidity.

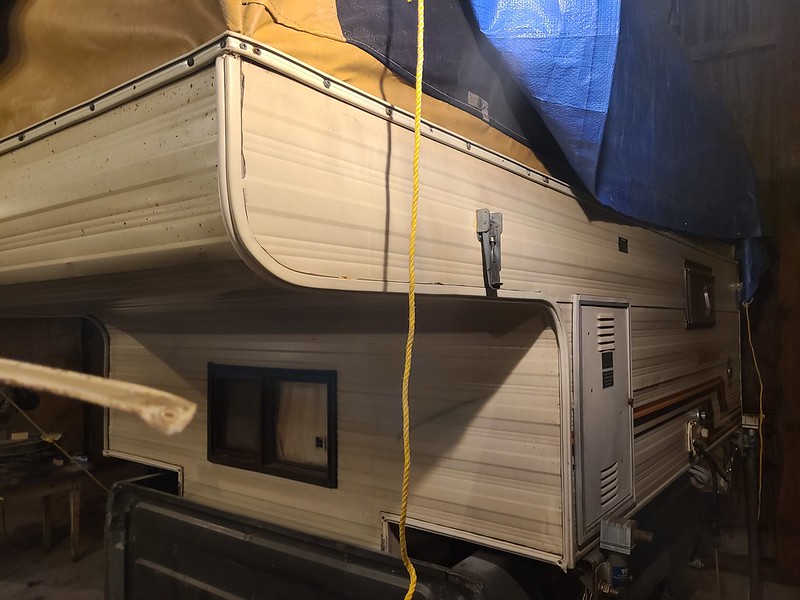
Its in my barn so hopefully it won't see too much wind.

Now I just need to round up a sucker volunteer to help get the lift disconnected...

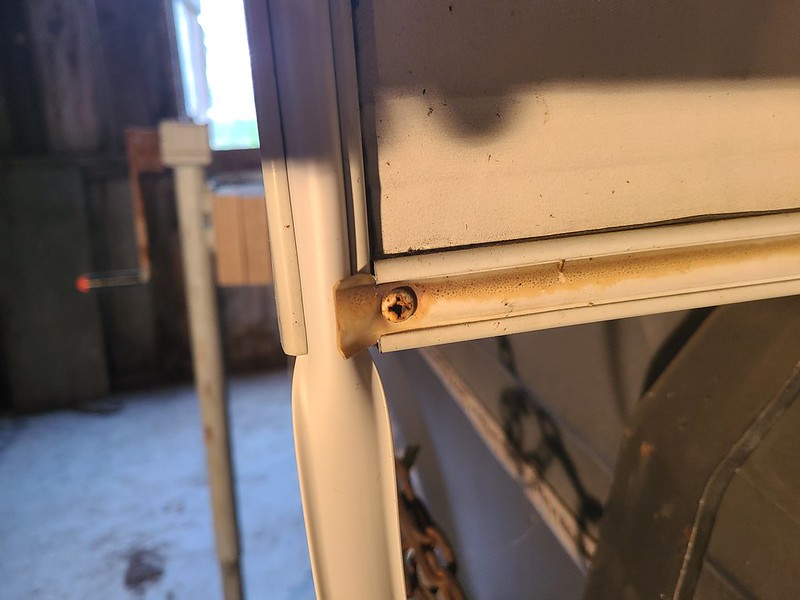
I also need to get a square drive bit rounded up and just take out the slider for the bottom bunk before I klutz around and break that thin lip off the edge.


Uncle Gump

Token Old Guy
TRS Event Staff
TRS Forum Moderator
Supporting Member
VAGABOND
TRS Event Participant
Joined
Sep 17, 2018
Messages
13,971
Reaction score
13,463
Points
113
Location
Ottawa IL
Vehicle Year
2006/1986
Make / Model
Ranger/BroncoII
Engine Size
4.0L SOHC/2.9L
2WD / 4WD
4WD
My credo
Lead follow or get out of my way
This is exactly why I sold it to you...I knew you were the "right" guy to get it.

Hang in there man... it will be worth it... not many folks can say they have one. I had some good times with it... you will too.

If I were closer... I'd be willing to lend a hand.
 

sgtsandman

Aircraft Fuel Tank Diver
TRS Forum Moderator
U.S. Military - Active
TRS 20th Anniversary
TRS Event Participant
Ham Radio Operator
GMRS Radio License
Joined
Mar 11, 2017
Messages
12,861
Reaction score
12,651
Points
113
Location
Aliquippa, PA
Vehicle Year
2011/2019
Make / Model
Ranger XLT/FX4
Engine Size
4.0 SOHC/2.3 Ecoboost
2WD / 4WD
4WD
Total Lift
Pre-2008 lift/Stock
Tire Size
31X10.5R15/265/65R17
I choose to sleep on the ground like a peasant.

Nice work on the repair!
 

85_Ranger4x4

Forum Staff Member
TRS Event Staff
TRS Forum Moderator
Article Contributor
V8 Engine Swap
OTOTM Winner
TRS Banner 2010-2011
TRS 20th Anniversary
VAGABOND
TRS Event Participant
Joined
Aug 7, 2007
Messages
32,342
Reaction score
17,838
Points
113
Location
SW Iowa
Vehicle Year
1985
Make / Model
Ford
Engine Type
V8
Engine Size
5.0
Transmission
Manual
Due to volunteer labor shortages I moved on to replacing the rubber trim on the outside. In addition to making it look nicer it also covers about 50 million screws so it counts in the "reseal" category. On the way home the trim on the front started coming off and flopping around in the wind... it is just hard and some of it looks pretty dingy.


Fun fact, that perimeter channel is what holds the bottom of the canvas to the camper.


The perimeter channel is basically two big "U's" so I started removing it from the end and about halfway across the front to get it out of the way. Then I you just pull a staple and carefully work the trim out from behind the canvas.


My new trim might be a little bigger than the old, or maybe because it is uncomfortably close to 40 years newer it hasn't dried out as much... so I trimmed some off the sides so it would fit up in the canvas better.


Then just restaple at the top and installation is reverse of disassembly.


I left it a little long in case it shrinks, it just gets stapled to the bottom.

New vs old (I am picking up white painted stainless screws after work)


That side is done (wife was on a run for more staples to staple the bottom)


I left the bottom two pieces on the front. It probably looks the worst from riding against the front pickup box bulkhead but is still sound. I can't really get to it as it is and nobody will ever see it when the camper is in a truck. I will reassess when i have it on jacks though.

Other side is the same:


Then onto the rear:


I still have one back corner to do yet, it is pretty fun stuff to work with.
 
Last edited:

Uncle Gump

Token Old Guy
TRS Event Staff
TRS Forum Moderator
Supporting Member
VAGABOND
TRS Event Participant
Joined
Sep 17, 2018
Messages
13,971
Reaction score
13,463
Points
113
Location
Ottawa IL
Vehicle Year
2006/1986
Make / Model
Ranger/BroncoII
Engine Size
4.0L SOHC/2.9L
2WD / 4WD
4WD
My credo
Lead follow or get out of my way
Shrinkage is a real thing with that stuff.

Not sure how you would prevent it from happening a few years down the road.
 

85_Ranger4x4

Forum Staff Member
TRS Event Staff
TRS Forum Moderator
Article Contributor
V8 Engine Swap
OTOTM Winner
TRS Banner 2010-2011
TRS 20th Anniversary
VAGABOND
TRS Event Participant
Joined
Aug 7, 2007
Messages
32,342
Reaction score
17,838
Points
113
Location
SW Iowa
Vehicle Year
1985
Make / Model
Ford
Engine Type
V8
Engine Size
5.0
Transmission
Manual
Shrinkage is a real thing with that stuff.

Not sure how you would prevent it from happening a few years down the road.
Leaving it long is all I have came up with.

The perimeter one has me kinda worried though.
 

Uncle Gump

Token Old Guy
TRS Event Staff
TRS Forum Moderator
Supporting Member
VAGABOND
TRS Event Participant
Joined
Sep 17, 2018
Messages
13,971
Reaction score
13,463
Points
113
Location
Ottawa IL
Vehicle Year
2006/1986
Make / Model
Ranger/BroncoII
Engine Size
4.0L SOHC/2.9L
2WD / 4WD
4WD
My credo
Lead follow or get out of my way
Leaving it long is all I have came up with.

The perimeter one has me kinda worried though.
I was thinking much of it has to do with putting any stretch in it while installing.

Hopefully it isn't super expensive and you can just replace it when and if it shrinks.
 

85_Ranger4x4

Forum Staff Member
TRS Event Staff
TRS Forum Moderator
Article Contributor
V8 Engine Swap
OTOTM Winner
TRS Banner 2010-2011
TRS 20th Anniversary
VAGABOND
TRS Event Participant
Joined
Aug 7, 2007
Messages
32,342
Reaction score
17,838
Points
113
Location
SW Iowa
Vehicle Year
1985
Make / Model
Ford
Engine Type
V8
Engine Size
5.0
Transmission
Manual
I was thinking much of it has to do with putting any stretch in it while installing.

Hopefully it isn't super expensive and you can just replace it when and if it shrinks.
$20 for 100' roll.

The sun is supposed to be what shrinks it and that perimeter trim only sees daylight when the top is up so I am probably overthinking it.
 

sgtsandman

Aircraft Fuel Tank Diver
TRS Forum Moderator
U.S. Military - Active
TRS 20th Anniversary
TRS Event Participant
Ham Radio Operator
GMRS Radio License
Joined
Mar 11, 2017
Messages
12,861
Reaction score
12,651
Points
113
Location
Aliquippa, PA
Vehicle Year
2011/2019
Make / Model
Ranger XLT/FX4
Engine Size
4.0 SOHC/2.3 Ecoboost
2WD / 4WD
4WD
Total Lift
Pre-2008 lift/Stock
Tire Size
31X10.5R15/265/65R17
I feel you on the never ending amount of screws. I’m experiencing the same thing with the trailer on each panel I work on. There is an end, it hut doesn’t seem like there is during the process of removal and install.
 

85_Ranger4x4

Forum Staff Member
TRS Event Staff
TRS Forum Moderator
Article Contributor
V8 Engine Swap
OTOTM Winner
TRS Banner 2010-2011
TRS 20th Anniversary
VAGABOND
TRS Event Participant
Joined
Aug 7, 2007
Messages
32,342
Reaction score
17,838
Points
113
Location
SW Iowa
Vehicle Year
1985
Make / Model
Ford
Engine Type
V8
Engine Size
5.0
Transmission
Manual
I feel you on the never ending amount of screws. I’m experiencing the same thing with the trailer on each panel I work on. There is an end, it hut doesn’t seem like there is during the process of removal and install.
Thank god for my cordless screwgun, the thing has been awesome for this.

I am going to have to drop all the upper canvas screws... it will be a PITA to go back together with those.
 

85_Ranger4x4

Forum Staff Member
TRS Event Staff
TRS Forum Moderator
Article Contributor
V8 Engine Swap
OTOTM Winner
TRS Banner 2010-2011
TRS 20th Anniversary
VAGABOND
TRS Event Participant
Joined
Aug 7, 2007
Messages
32,342
Reaction score
17,838
Points
113
Location
SW Iowa
Vehicle Year
1985
Make / Model
Ford
Engine Type
V8
Engine Size
5.0
Transmission
Manual
This is the trim stuff I have been using.


Anyway I got my dad conned into coming over to help get the roof disconnected.


The pipes coming down from the ceiling should be angled out 7*... not in.

I got replaced the trim on the last corner


The canvas (left) is held up by a strip with a bunch of screws. I need to drop that to get to the screws for the bulb seal that seals again the top of the lower hull... which is mounted to the boards that need replaced.


And when I say replaced I mean replaced. All three bolts on that side were broken. One was flat out gone when I got the camper and when I opened it last summer once a lock nut with a groady rusty stub of a bolt fell out the camper somewhere. The third was an old break.


I was figuring I would break off the other three but they came off like I had put them on yesterday.


I pulled the LH endcap off, it looked pretty good in there


RH endcap... not so much.


I need to drop the canvas next and disconnect the wiring, at 11:30 last night I decided I had found a good stopping point.
 

85_Ranger4x4

Forum Staff Member
TRS Event Staff
TRS Forum Moderator
Article Contributor
V8 Engine Swap
OTOTM Winner
TRS Banner 2010-2011
TRS 20th Anniversary
VAGABOND
TRS Event Participant
Joined
Aug 7, 2007
Messages
32,342
Reaction score
17,838
Points
113
Location
SW Iowa
Vehicle Year
1985
Make / Model
Ford
Engine Type
V8
Engine Size
5.0
Transmission
Manual
Well if you guessed I wasn't going to make it you were right.

Lows in the 40's and rain for the weekend so forget tent camping with a little kid too.

Stupid thing is putting up a fight getting the extruded aluminum trim off the top. I eventually broke out my occelating cutter and cut the inner piece of ply wood off last night after taking a week off (stuff kept coming up) and started making some progress. I need to go clear across I think and then see if I can get something to give from that side where the wood is in better shape. I am starting to think that bottom aluminum trim may be glued to the wood.


Also note originally it had two sheets of plywood just stapled together.
 

85_Ranger4x4

Forum Staff Member
TRS Event Staff
TRS Forum Moderator
Article Contributor
V8 Engine Swap
OTOTM Winner
TRS Banner 2010-2011
TRS 20th Anniversary
VAGABOND
TRS Event Participant
Joined
Aug 7, 2007
Messages
32,342
Reaction score
17,838
Points
113
Location
SW Iowa
Vehicle Year
1985
Make / Model
Ford
Engine Type
V8
Engine Size
5.0
Transmission
Manual
It is pretty slow going cutting and prying the wood off.


But it is done!


And the strip of wood in the channel remains.


Tried to cut the sealant but that is rough going too.


I notice there is a strip of staples along the top maybe a half inch in roughly 18" apart. Me wonders if there is a similar row inside the trim along the bottom. Next plan is to do an exploratory with my saw below the upper staples and see if I hit and cut thru anything that feels harder than wood.

Part of the problem with this is for the most part the wood is in very good shape, it isn't spongy falling apart crap like what most campers are (and what I expected) I am going to reevaluate going farther. The left side at the back looks great. Right side is twisted up and the bolt clean pulled thru the wood so it will need replaced. I think the front is in pretty good shape.
 

Uncle Gump

Token Old Guy
TRS Event Staff
TRS Forum Moderator
Supporting Member
VAGABOND
TRS Event Participant
Joined
Sep 17, 2018
Messages
13,971
Reaction score
13,463
Points
113
Location
Ottawa IL
Vehicle Year
2006/1986
Make / Model
Ranger/BroncoII
Engine Size
4.0L SOHC/2.9L
2WD / 4WD
4WD
My credo
Lead follow or get out of my way
Just push it outside uncovered for three or four years... that stuff will practically jump right out of there.
 

Sponsored Ad


Sponsored Ad

Staff online

Member & Vendor Upgrades

For a small yearly donation, you can support this forum and receive a 'Supporting Member' banner, or become a 'Supporting Vendor' and promote your products here. Click the banner to find out how.

Latest posts

Truck of The Month


Shran
April Truck of The Month

Recently Featured

Want to see your truck here? Share your photos and details in the forum.

Follow TRS On Instagram

TRS Events

25th Anniversary Sponsors

Check Out The TRS Store


Sponsored Ad


Sponsored Ad

Sponsored Ad


Amazon Deals

Top