So other than 4wd and a 4.0, there was one other thing my truck didn’t come from the factory with that I really wish it had. Cruise Control.
I searched and searched for a good few weeks trying to see if anyone else had added the factory cruise to an 89-94 truck. General consensus, people either have no clue where to start or the wiser and more knowledgeable forum members tell them to forget about it and install an aftermarket system. Since the aftermarket systems look really tacky to me and I didn’t want to be bumbling around in the dark trying to press tiny buttons on the dash, I opted to dive in head first. It took two trips to the junkyard to get everything I needed.
Trip #1 netted me;
-horn pad with cruise buttons
-“clock spring” harness(3 pin vs. 2 pin for non cruise)
-servo and vacuum lines
-cruise control amplifier
-vacuum dump valve and brake pedal lever
Trip #2 netted me the entire dash harness from a ‘92 Ranger with cruise control.
Obviously there are some differences between the dash harness in a ‘92 and a ‘94. Most notably, the ECM location. I would have preferred the harness from a ‘94 but mid 90’s Rangers are getting scarce in the junkyards around me.
So there are two ways to go about adding the factory cruise. You can either find a matching year dash harness and swap it in, plug in the cruise amp and steering wheel controls and be on your merry way or strip all of the cruise control wires out of any harness from 89-94 and wire it in to your existing harness. I decided to tackle the latter of the two and wire it in. I DID NOT remove my dash for this. The only real modification I had to make was drilling a hole in my firewall for the grommet containing the servo wires.
So what needs to be wired in? Every wire on the smaller gray plug, the horn relay(non cruise trucks don’t have a relay) and the connector for the clock spring harness. I chose to work my way from the steering wheel forward so I wired in the clock spring harness and the horn relay first. Non cruise trucks have a round, 3 wire connector for the clock spring whereas cruise trucks have a square, 4 wire connector. The only wire you won’t cut in this harness is the black wire with the pink tracer for the key in chime. That wire can be unpinned from the round connector and added into the square connector. The solid black wire goes to any chassis ground, the solid blue, yel/lt grn and yel/blu wires can be matched up and spliced together. You shouldn’t have to splice the yel/lt grn wire from the horn relay but I got ahead of myself when I gutted my donor dash harness and cut them on accident.
On the gray plug coming from the cruise amplifier;
-blu/blk goes to the clock spring harness(retain factory pin)
-lt green goes to the clutch switch 4th pin(retain factory pin)
-gry/blk is the vss+ and gets pinned into the firewall plug. Reference male side of plug for correct pin location. NOTE: being my harness was from a ‘92, it had a male pin on the vss wires. You will need to change these to female pins. The vss wires to the ecm are already in the male side of the firewall plug.
-pink/orange is the vss- change to female pin and insert in firewall plug. Reference male side of plug for correct pin location
-black goes to ground
-orange is 12 Volts hot in run
I ran the orange and black wires up behind the radio and spliced in there. The cruise control system uses very low voltage so no need to worry about drawing the power from the radio circuit. You will need to add another lt green wire to the clutch switch. This will be pin 3 and gets spliced into the lt green wire coming from the brake pedal switch.
The wires coming from the white plug all run to a grommet in the firewall and pass through to the cruise control servo. I shortened all of these wires There is a hole for this grommet from the factory but I had already used it to pass my cb coax/power wires through as well as the wires for my air horn and the cube lights in my front bumper.
I ran a 1.25” hole saw through the firewall just to the left and slightly above the factory hole.
This also happens to give you a good starting point to run the rest of the wires. All but two of the wires for my cruise control(12-volt switched and ground) are taped together and tucked under the carpet. I have the amplifier tucked up under the center of the dash like so
Steering wheel switches. Be careful here, the 93/94 horn pad seems to be a slightly different shape from the earlier trucks.
Dash torn apart and steering column dropped to ease wiring but mostly to help with getting the vacuum dump valve installed. I guess the dump valve is a kind of back up safety feature and will dump the vacuum in the servo if all else fails. There is an approximately .75” diameter hole in the brake pedal bracket that the valve goes into. It snaps in through a spring collar with fingers on it that snap into groves on the valve. It’s adjustable to meet up with the plastic arm that clips onto the brake pedal arm. (I failed to take a pic of either of these items)
So once the wiring is finished and you get the dump valve installed, the column can be bolted back up and the dash can be put back together.
On to the servo. As far as I know there are two different servos used in this era of rbv’s. The only differences are the wiring harness plug and possibly the cable length. The more common servo has a rectangular connector and the one I got from a ‘94 explorer has a round connector. You can use either one if you are comfortable with splicing the correct plug onto the harness, otherwise make sure you grab the correct servo for your harness. There are also two different mounting brackets for the servo. Explorer and Ranger. The Explorer bracket has a tab on the bottom that gets inserted into a slot in the inner fender and bolts to the fender lip. This bracket puts the servo cable perpendicular to the fender. The Ranger bracket is riveted to the inner fender and puts the cable parallel to the inner fender. I liked the look of the Explorer bracket better so that’s what I grabbed. The hole for this bracket is already in the Ranger fender lip and there is a slot already in the inner fender. Unfortunately I had previously installed a power distribution block in this spot so I simply bent the bracket a little for clearance between the back of the servo and my power block. Obviously the tab on the bottom of the bracket is not inserted in the inner fender.
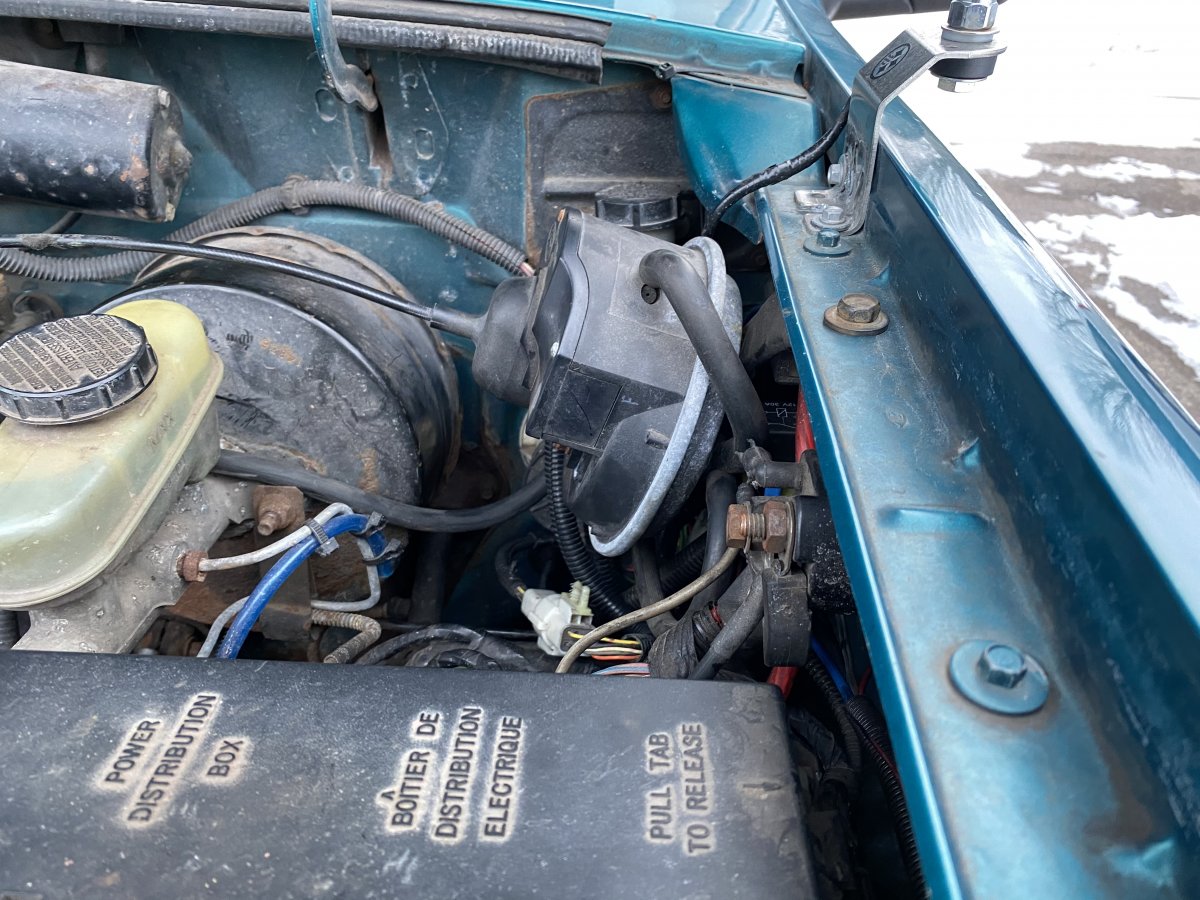
Here is a better shot showing the round white connector.
That’s basically it. Make sure your vacuum lines are connected and take it for a drive. On the first start after the install, I had the vacuum lines connected backward on the servo. Redline for a good time

Make sure your vacuum lines are connected correctly.
So after 26 years, my truck finally has “factory” cruise control and it works flawlessly.
Any questions just ask.