
Introduction
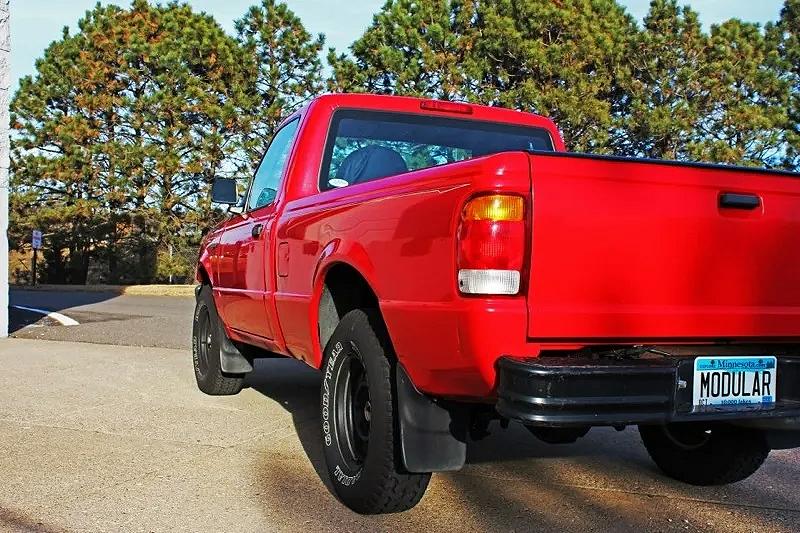
Here is my 1999 Ford Ranger that I swapped a 4.6L V8 into. My number one objective during this swap was to not mod the body or frame in any way. In other words, everything I did to bolt in the 4.6 was using brackets or off the shelf Ford parts so that I could theoretically unbolt this drivetrain and bolt it into another Ranger. When finished, I wanted it to look factory.
My reason for doing a 4.6L swap vs a 302 CID was for a number of reasons, the 4.6 is a modern design, it is lighter, stronger, breathes better and are infinitely easier to work on. The 302 isn’t a bad engine, I have one in my Explorer. it’s just a very old design that Ford kept upgrading until they finally designed the 4.6L as its replacement.
It also makes more power with less displacement then the 302.
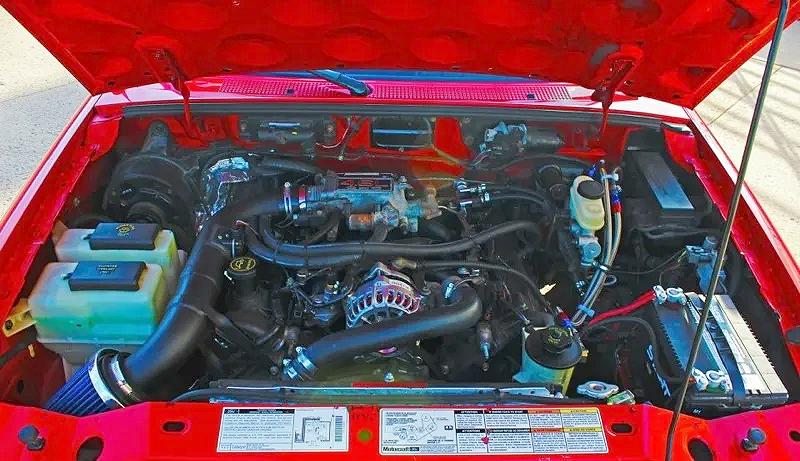
Engine
The engine came from a 2003 Ford Crown Victoria police car (CVPI). It was basically a running core as far as I was concerned because the police beat the snot out of their cars. I paid 300 for it complete minus the accessories and rebuilt it.
Transmission & Clutch
The transmission is a M5OD-R2 from a Ford F-150. It was a rare find as not many 2wd 4.6 F-150’s was made in manual form and the V6 transmission has the small block bolt pattern and is incompatible with the modular motors.
I chose this transmission because it was cheap, had a hydraulic slave cylinder, and the shifter would be in the same location as before.
For the clutch and transmission, I went with a LuK gold clutch from Napa for a Ford F-150. It’s just a stock clutch, but it’s actually bigger than a Mustang clutch and I figure it will hold the power I will be producing.
Starting The Swap
The swap started off with me bolting the transmission and engine together and dropping them an as a unit. Yes this is not only easy but went very smoothly.
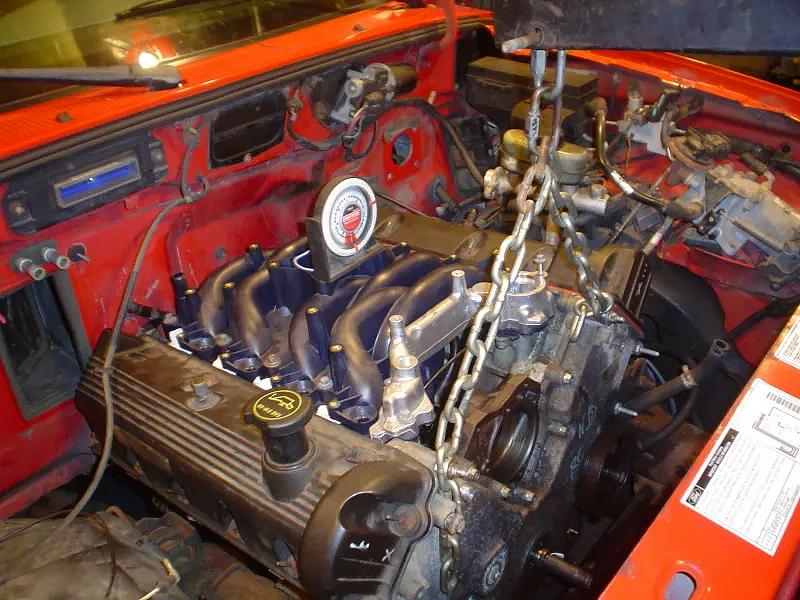
Next, I bolted the transmission to the crossmember using the stock transmission mount and then supported the engine with a cherry picker while I centered it and then used some steel plate to adapt the engine to the stock 4-cylinder engine mounts.
The stock driveshaft was used and bolted right in place and slid right into the transmission.
I had swapped in a Ford 8.8-Inch axle with 4.10 gears and installed a Lock-Rite locker at an earlier date.
I chose to go with a hydrobooster and master cylinder from a Ford Mustang GT to save space and because I like hydroboosted brakes.
To get the Mustang master to connect to the Rangers hydraulic lines I used an adaptor fitting in the front and made a custom steel line for the rear.
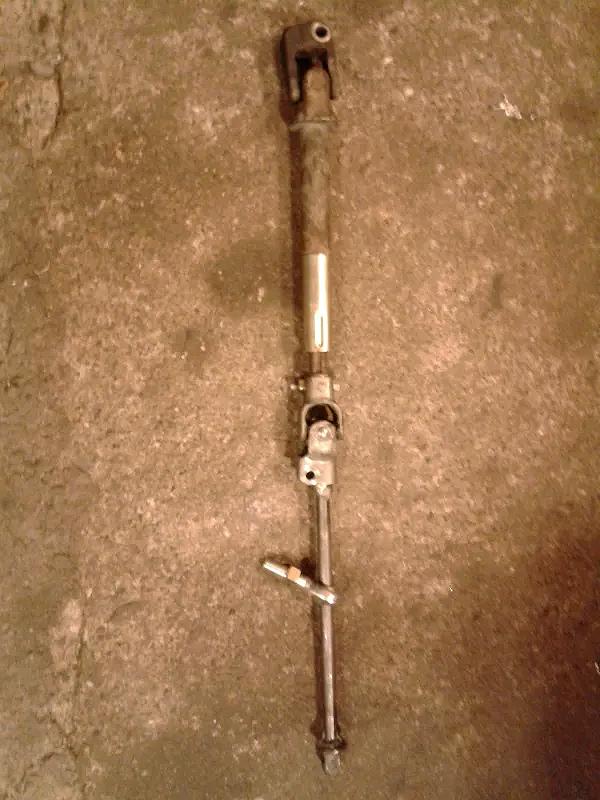
The steering shaft is a semi-custom piece. The lower section is from a Crown Victoria with rack and pinion steering. I then made a custom center shaft with a Heim joint. The U-joints are from a Ford Windstar and are replaceable as the center shaft uses Ford ends on it.
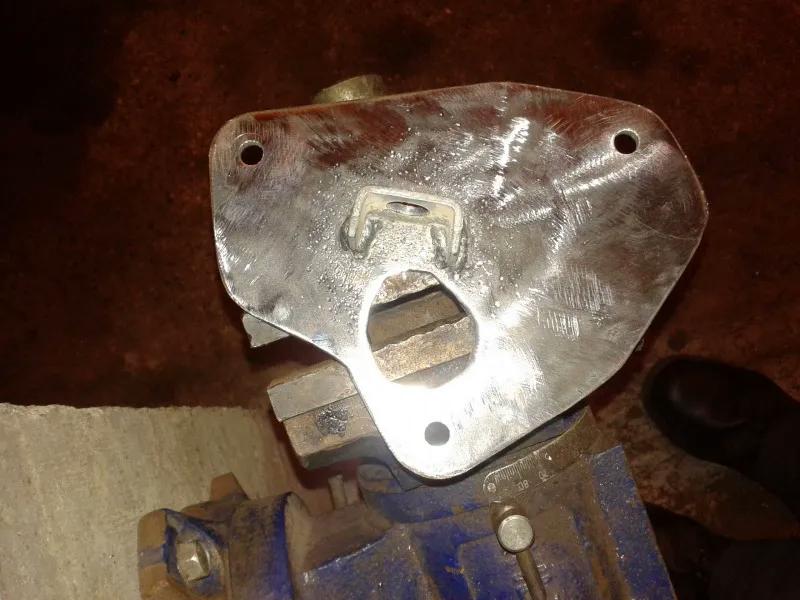
I made a steel plate to bolt to the firewall using the stock holes that the stock shaft boot bolted to in order to mount the Heim joint.
The entire setup only uses three U-joints and are all replaceable using common Ford parts.
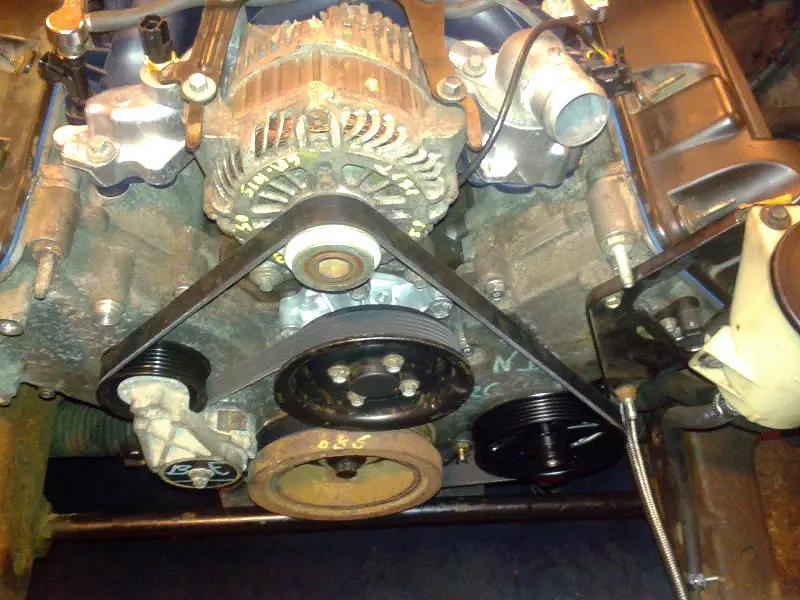
For the Front-End Accessory Drive (FEAD), I used a Crown Victoria power steering pump and bypassed the A/C compressor using a grooved pulley on the tensioner and a shorter belt. It’s a common mod in the Mustang world.
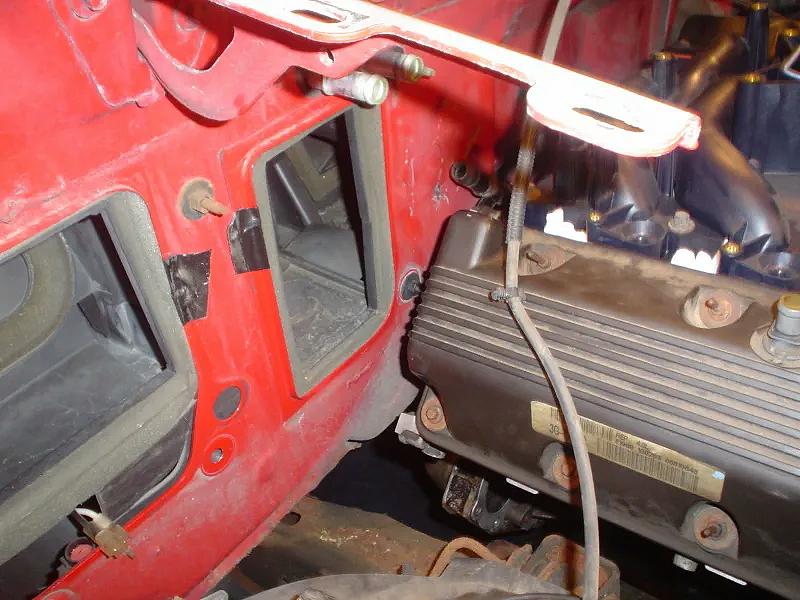
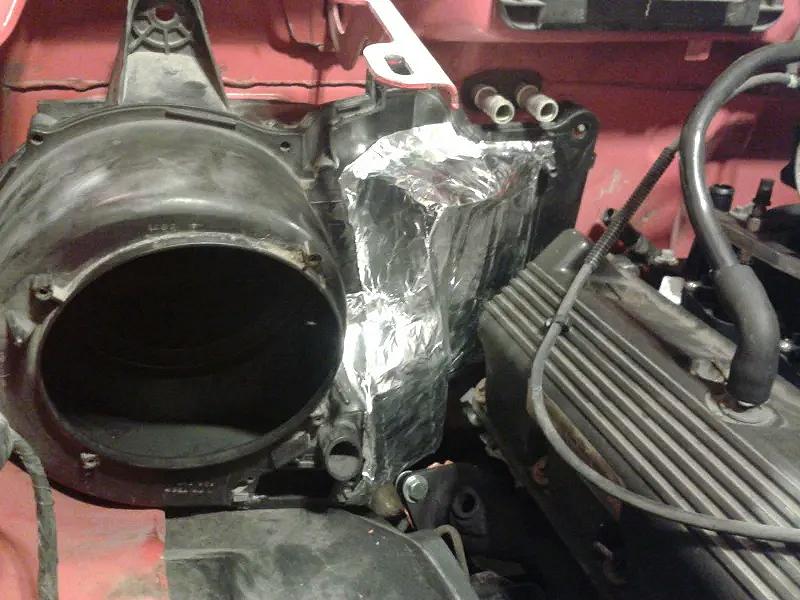
The heater box was an easy modification. I just cut it using a cut off wheel and built it up with duct steel and aluminum tape.
The fuel system is as follows:
- High flow GT supercar fuel pump
- Return style fuel rail
- 39-pound FRPP injectors
I ran a return line using the EVAP fitting on the top of the pump module. I used gates barrier hose that is compatible with alcohol fuels.
The oil filter situation was next. It was obvious that I could not fit a filter in where it was supposed to go. The first option was to use an aftermarket relocation kit. However, I remembered that certain F-150’s and Expeditions had a factory remote oil filter setup on them.
In keeping with using off the shelf Ford parts, I set out to find said setup, but Ford no longer makes that setup anymore, so I had to get it used. I got the filter adaptor and mount for $10 and the engine adaptor for $25. Dorman makes replacement hoses and I got a set for $130 from O’Reillys.
Well, that didn’t fit so I decided to go with a remote mount setup using AN fittings and braided stainless lines.
As a side note: I also tried the high mount setup for the power steering pump that the newer F-150s use where the pump mounts to the head. That didn’t work because the pump hit the left front forward control arm mount. This would have been nice if it had worked because it would have allowed me to use a forward pointing filter mount from a 3-valve 4.6L.
So, I put the Crown Victoria timing cover back on and bought a remote setup.
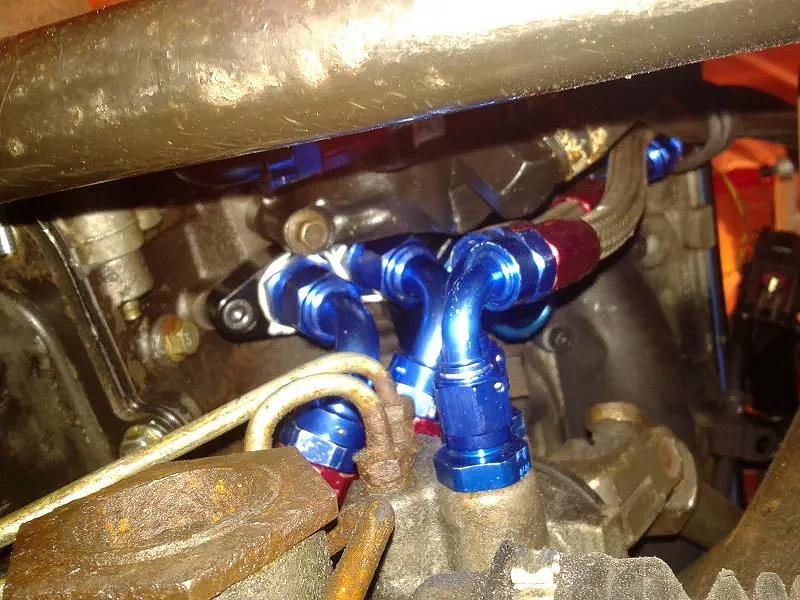
The power steering lines are all -6 AN line / fittings.
The radiator is from a 5.0L Ford Explorer and the fan is a combination of a Crown Vic fan and a 5.0 Explorer shroud.
The PCM controls the fans high speed. Low speed is pointless and not used in my case.
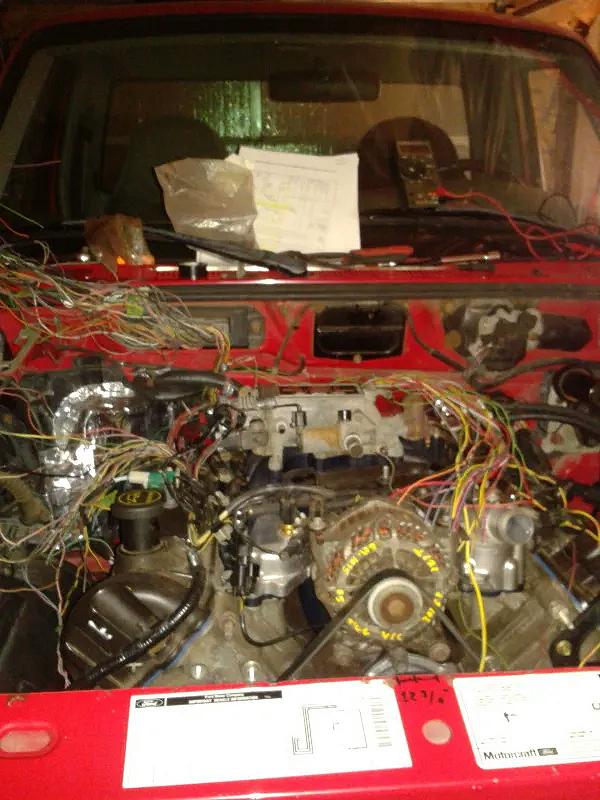
The engine wiring is a combination of a Crown Vic harness, an E-150 harness, and the Ford Rangers harness.
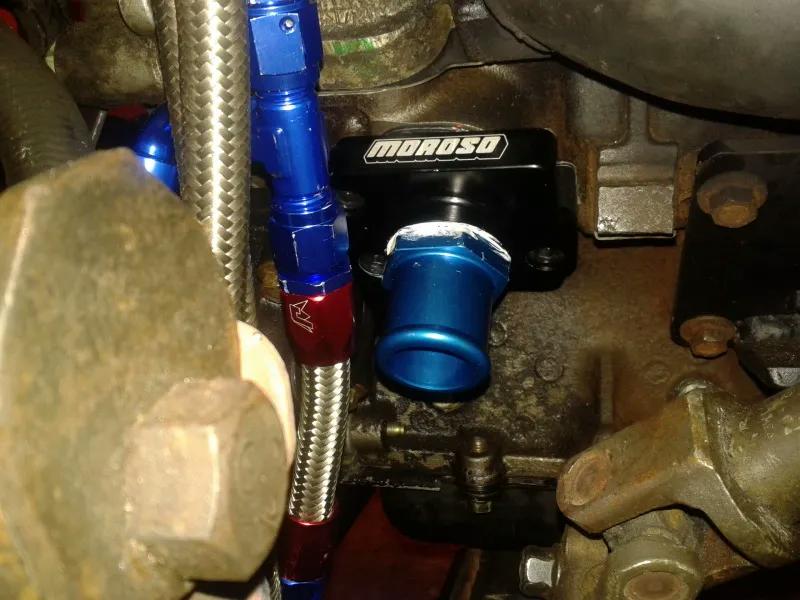
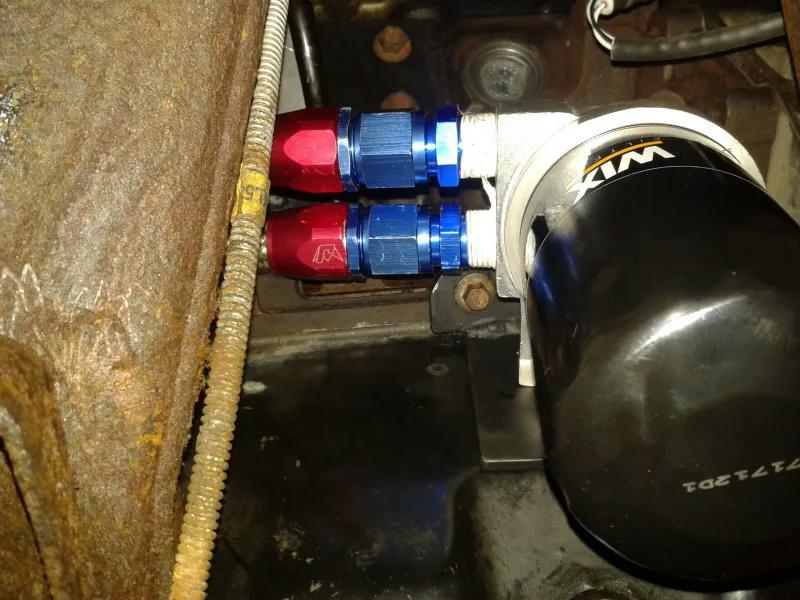
The remote oil filter setup is a combination of a Moroso adaptor plate, a generic remote filter mount, and some AN line. The bracket is custom.
The intake is just some mandrel bent 3-inch exhaust tubing and part of a Ford MAF sensor mount.
Photos
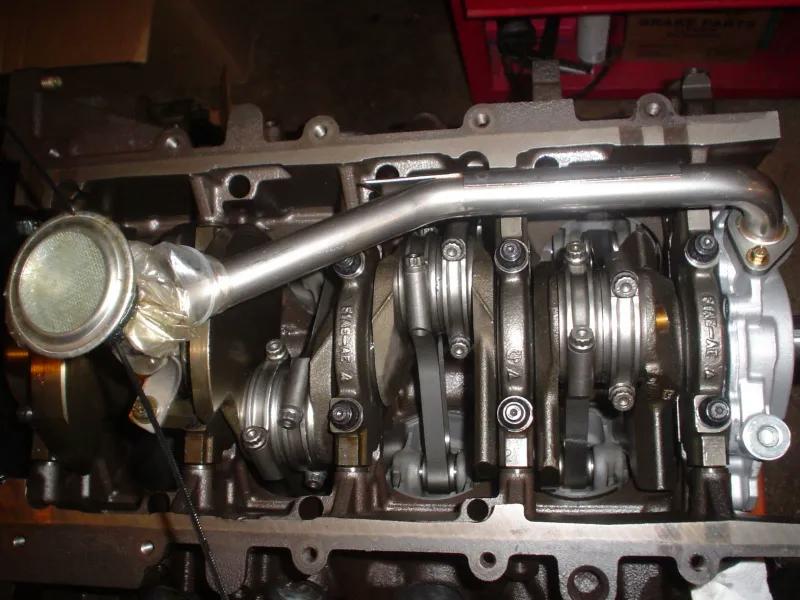
Here is a view of the bottom end after the engine rebuild:
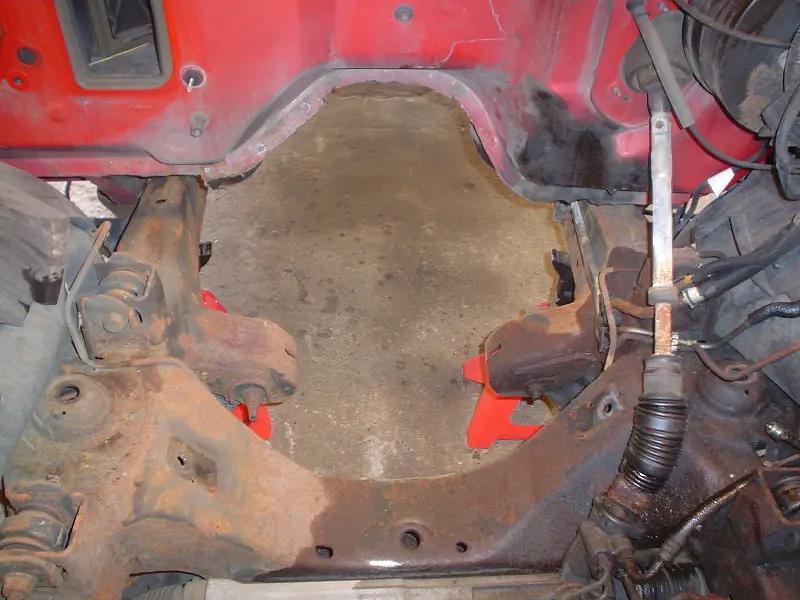
This is the engine bay minus the 2.5L 4-cylinder:
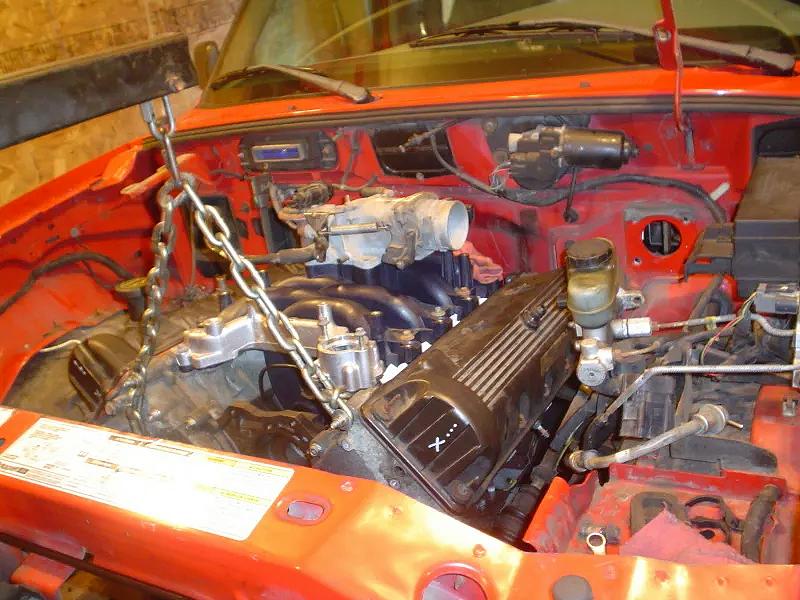
Once I got the engine built back up, I bolted it to the transmission using a stock F150 flywheel/clutch/slave and dropped it into the engine compartment to start building engine mounts:
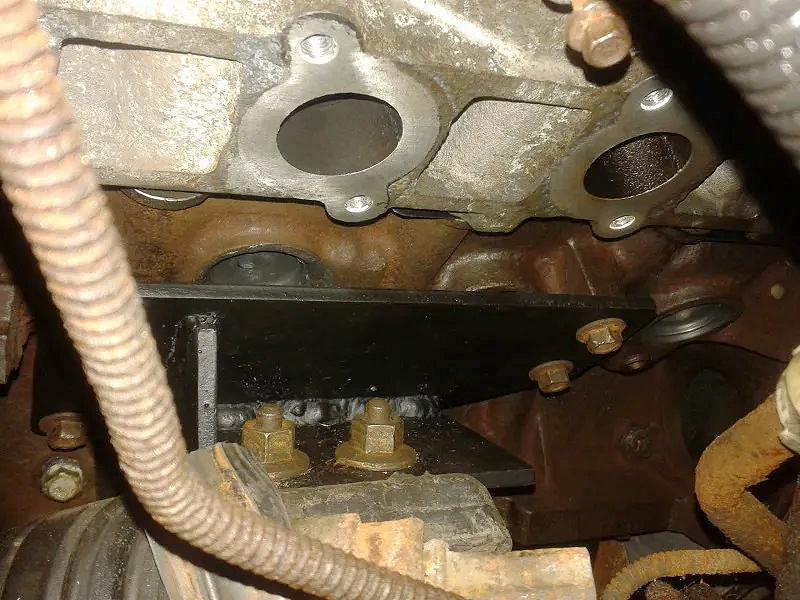
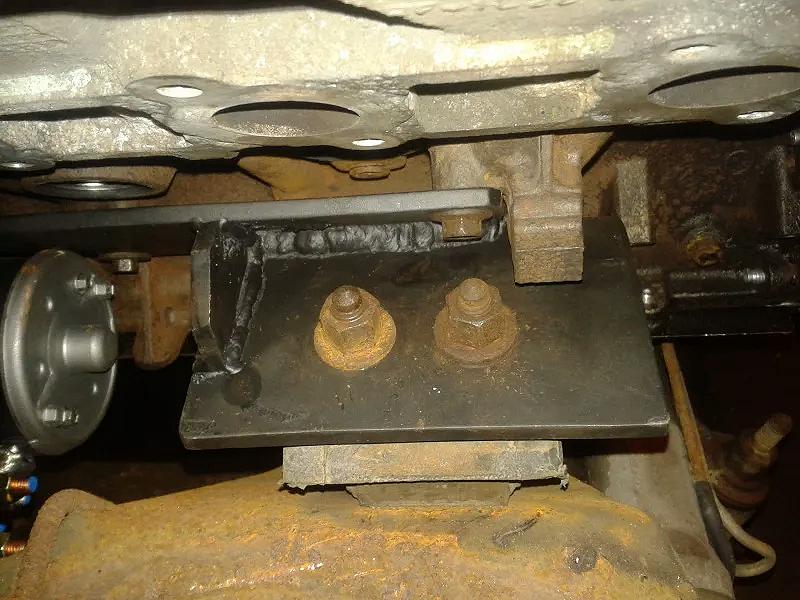
I used the stock M5OD trans mount from the rangers 4 cyl trans and it bolted right to the M5OD from the F150.
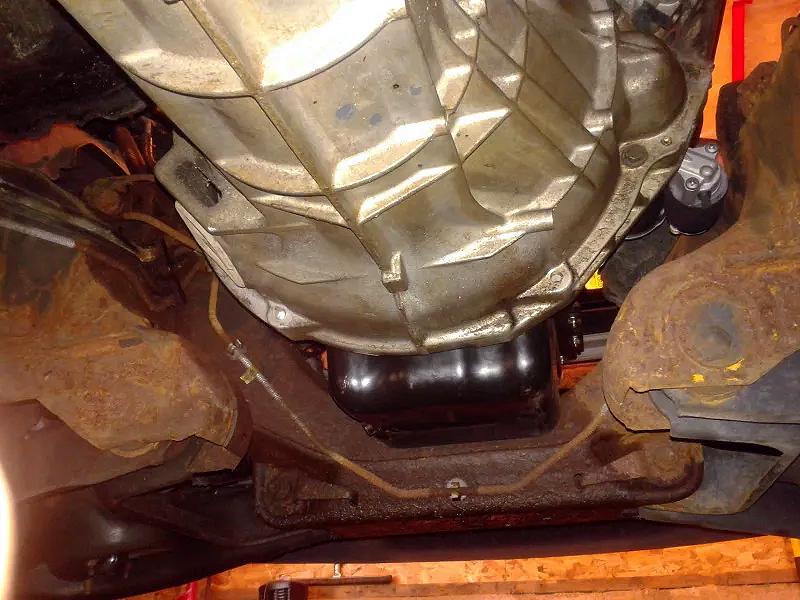
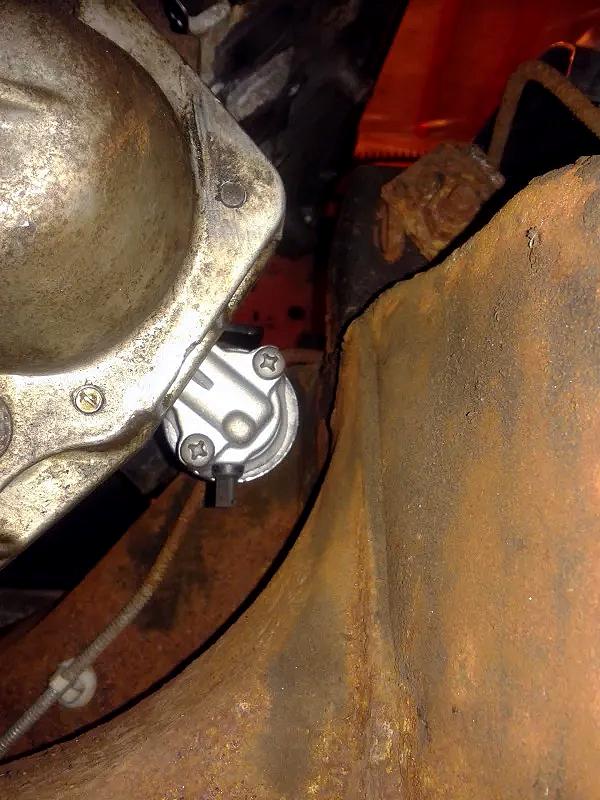
Stock F150 starter fits with plenty of clearance.
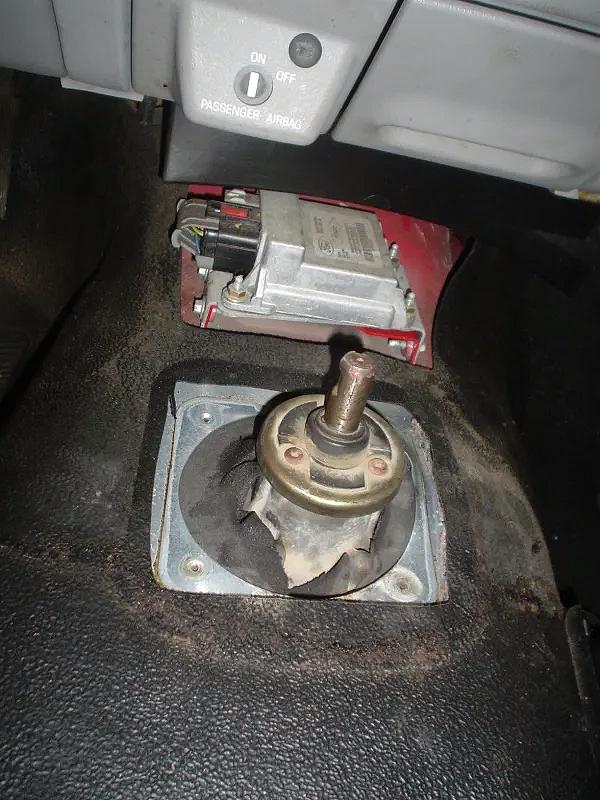
The shifter on the F150 transmission did not fit properly so I simply removed the top from the F150 Transmission and replaced it with one from a M5OD from a V6 F150 (its farther back due to the V6 being shorter).
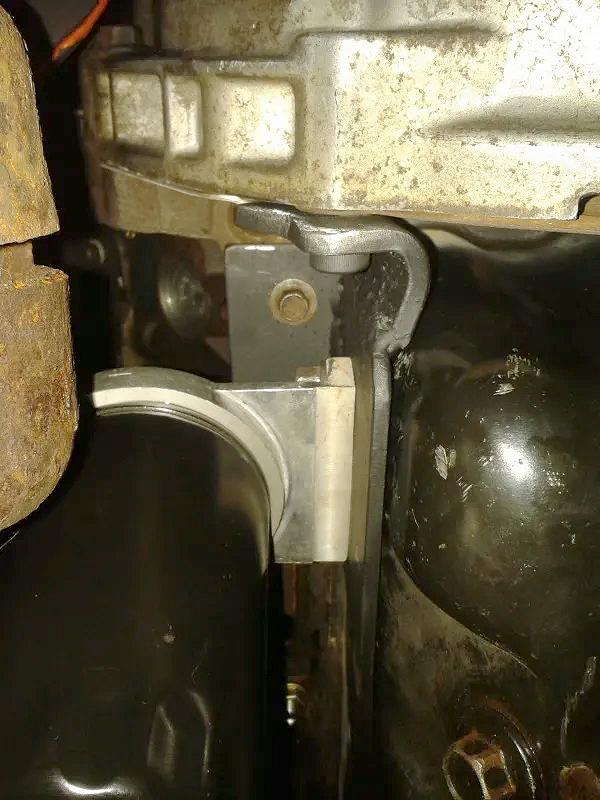
For an oil pan that fit with NO MODS WHATSOEVER, I simply re-used the Crown Vic pan.
With then engine mounted next order of business was the steering… This is the finished product, but I will explain what I had to do to get it to this point. I got a bunch of steering shaft u-joints from a junkyard as well as a few complete shafts and some cold rolled 1/2-inch steel rod and a Heim joint. The lower shaft is from a Crown Vic with a conventional steering setup (not R&P).
This is the plate I made to support the heim joint, this simply bolts to the firewall using the three stock bolts that held the rubber/plastic steering shaft seal/bearing.
The exhaust was next, since there is little room for manifolds and no one makes headers to swap a 4.6 into a ranger I made my own setup. They are not headers and probably sacrifice a small amount of power, but they were easy to build and were cheap, they were made with SOHC 4.6 flanges and exhaust tubing. I them painted the pipe and wrapped most of the Y pipe with fiberglass header wrap.
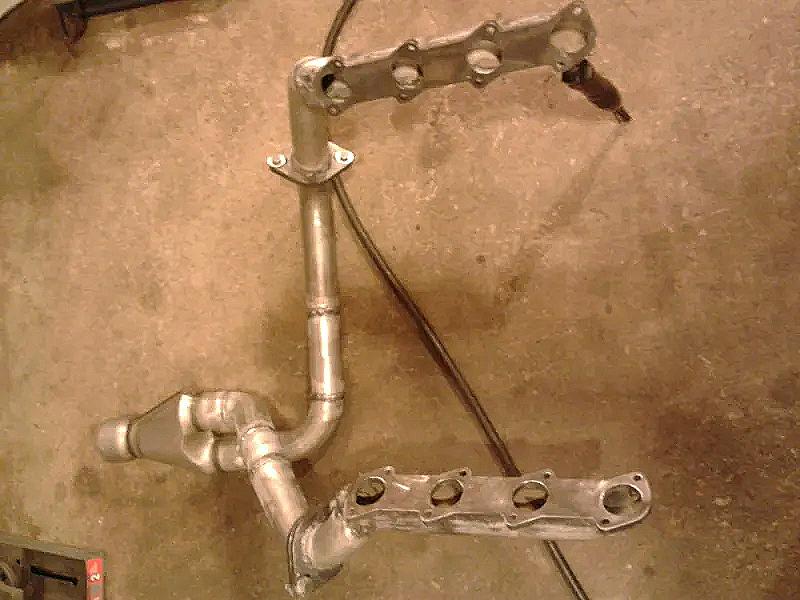
The rest of the exhaust consisted of a straight run of 3-inch pipe to a Flowmaster muffler and then a tail pipe I came across at my local O’Reilly Auto Parts.
There is more then enough room for a radiator and fan.
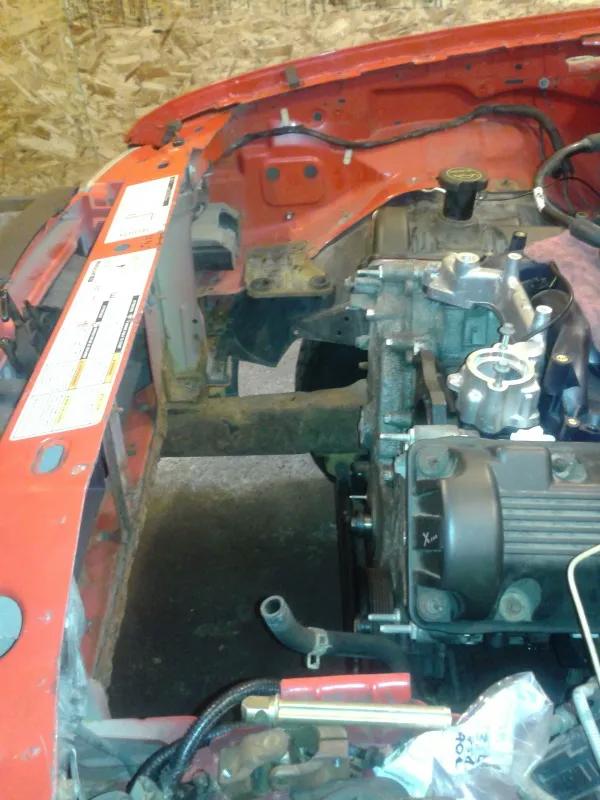
The oil filter would not fit in its normal location, so I bought a Moroso adaptor plate and some SS AN lines and fittings and a remote mount filter fixture. I had to fabricate a bracket to mount it too.
With the oil filter handled I had to modify the heater box, I just cut it up until it fit and used some sheet metal to build it back up and covered that with foil tape.
The fuel system I did not take any pics of as it was not very exciting, however I will list what I did to get it ready to support E85. I used a in tank fuel pump from a Ford GT super car (available from the dealer) And FRPP 39# injectors and a return style fuel rail with a vacuum controlled regulator.
The power brake booster is from a Ford Mustang and 3 out of the 4 studs lined up with the holes on the firewall, I simply had to move one of the studs over an inch or so.
For power steering lines I went with Teflon lined SS lines for the pump to booster and booster to rack, and normal SS lines for the return side. All the fittings are metric to -6 adaptor fittings. I had trouble sealing the adaptor fittings to the rack and pump and what ended up working well was using some 16mm copper drain plug crush washers and some ARP thread sealant. Just an FYI the hydrobooster needs its own separate return line, you CANNOT simply tee into the rack return line or it will partially apply the brakes anytime the engine is running. I just drilled a hole slightly smaller than the brass 90-degree fitting and sealed it with some RTV.
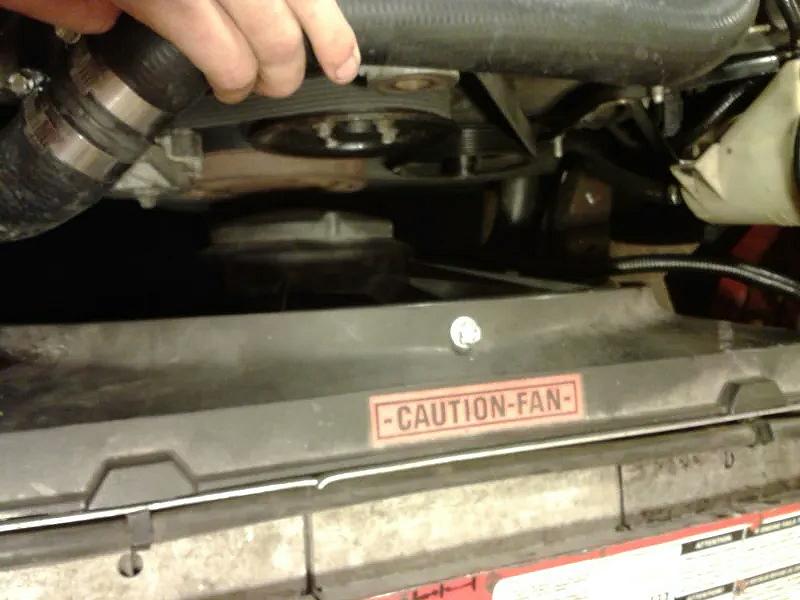
The radiator is a stock unit meant for an Explorer with a 5.0. It bolted into the stock location using the stock mounts. The Fan is a combination of a Crown Vic fan and an Explorer shroud bolted together with washers as a spacer.
The hoses are actually 4 hoses that I cut and spliced together using galvanized pipe and clamps. I originally used regular clamps but then went back and used some heat shrink Gates power clamps for a cleaner look and better sealing. The heater hoses are just bulk hose that I inserted springs into so they would not kink.
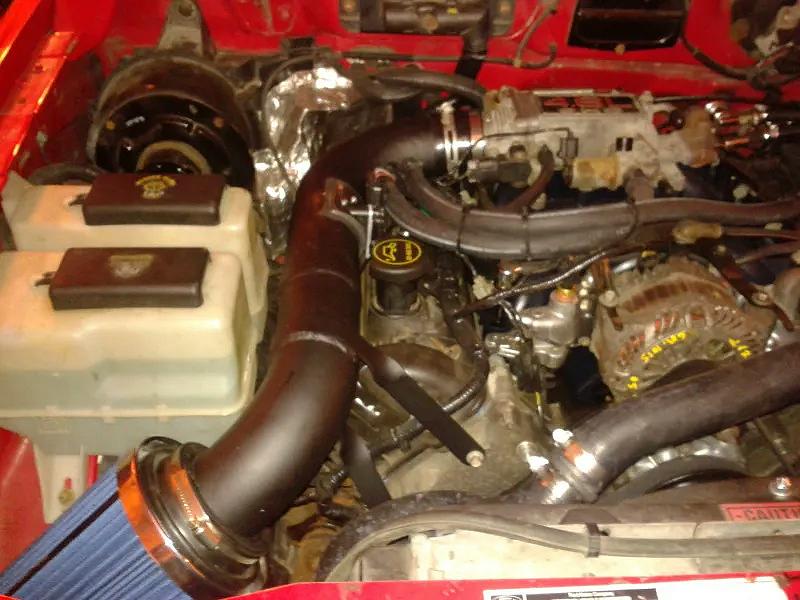
The wiring is a combination of a engine harness from an E150, Vic, and the ranger to body harness. I soldered all the connections and used heat shrink.
The drive belt is simply a shorter belt to bypass the A/C compressor and I installed a grooved pulley in place of the smooth one on the tensioner.
After all was said and done I took it to get tuned and put down 247hp and 291Ft/Lbs or torque to the rear wheels, not too bad for a almost stock 4.6 burning E85!!
Related Articles:
The Ford 4.6L (281 CID) Engine
About The Author
Jim Oaks is the founder of TheRangerStation.com, the longest-running Ford Ranger resource online since 1999. With over 25 years of hands-on experience building and modifying Ford Rangers — including magazine-featured builds like Project Transformer — Jim has become one of the most trusted authorities in the Ford Ranger off-road and enthusiast space.
Since launching TheRangerStation.com, Jim has documented thousands of real-world Ranger builds, technical repairs, drivetrain swaps, suspension modifications, and off-road adventures contributed by owners worldwide. TheRangerStation.com has been referenced in print, video and online by enthusiasts, mechanics, and off-road builders looking for practical, and experience-based information.