
Introduction
Many Ford Ranger enthusiasts have bult their own dual transfer case, transfer case doubler, setups by combining a BW1350 and BW1354 transfer case. This involves cutting the BW1354 case, making an adapter plate, and making a sector shaft that connects the two cases. There’s a lot of fabrication involved to get the job done.
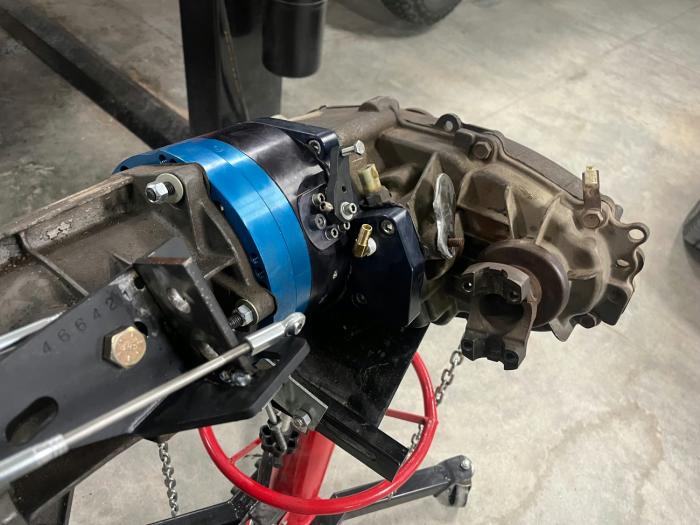
Behemoth Drivetrain offers a ‘Strongbox’ and shaft that allows you to take the gears out of a BW1354, put them into the Strongbox and attach it to a BW1354 transfer case using the included shaft. There’s no fabrication. You just put the parts from the BW1354 into the strongbox.
Let’s take a look into why you would want a doubler and what’s involved in assembling the Behemoth Strongbox.
Why A Doubler
Doublers are typically used by rock crawlers running large tires. As tires get larger, more gear reduction is required to provide enough torque at low speed to turn them. Changing differential gear ratios provides more reduction, but Ford Ranger axles are generally limited to around 5.13 gears (5.38 gears in half ton and one-ton axles) before the pinion gets too small and weak. A doubler multiplies the torque being sent to the tires giving the truck the power it needs to turn them, and the added gear reduction allows the truck to ‘crawl’ at a lower controlled speed over the obstacles.
What Does Behemoth Drivetrain Offer For Doublers
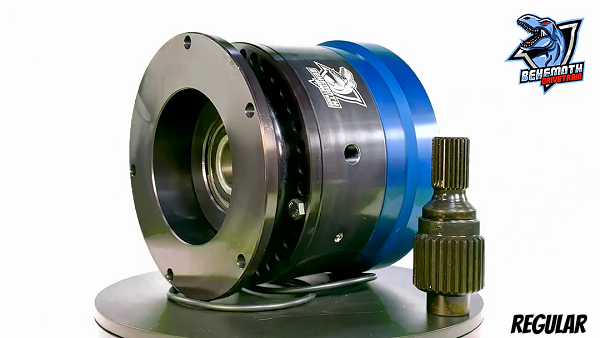
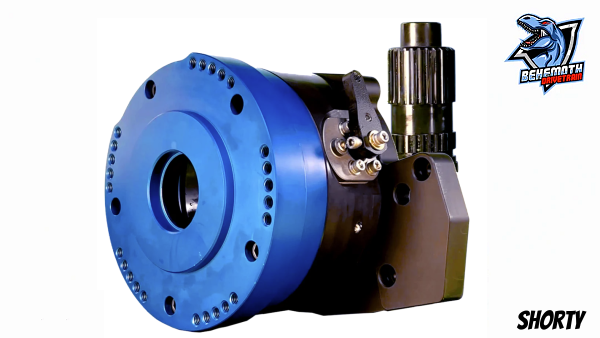
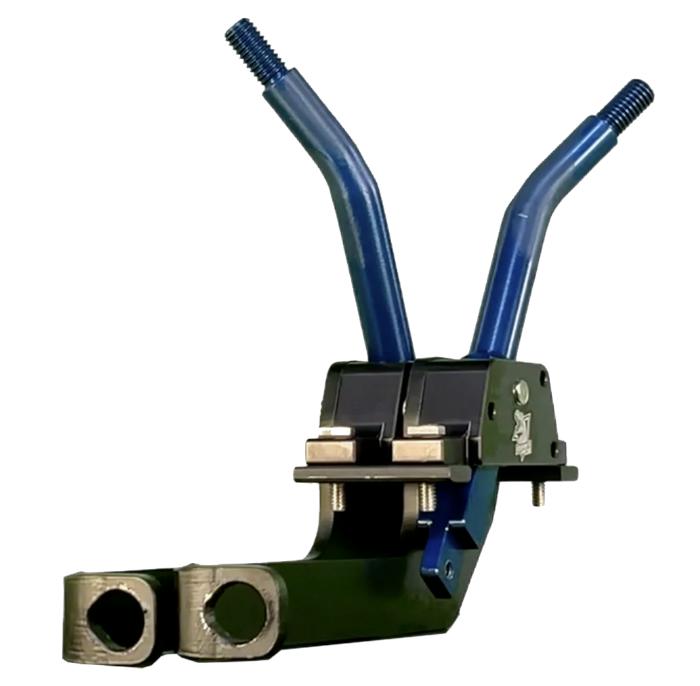
Behemoth offers a ‘Regular’ Strongbox and a ‘Shorty’ strongbox.
Regular Strongbox – Adds 7-inches to the drivetrain length (between the transmission and transfer case)
Shorty Strongbox – Adds 4.4-inches to the drivetrain length. The Shorty only works with the BW1354 mounted behind it.
Make Sure You Have The Right Transfer Case
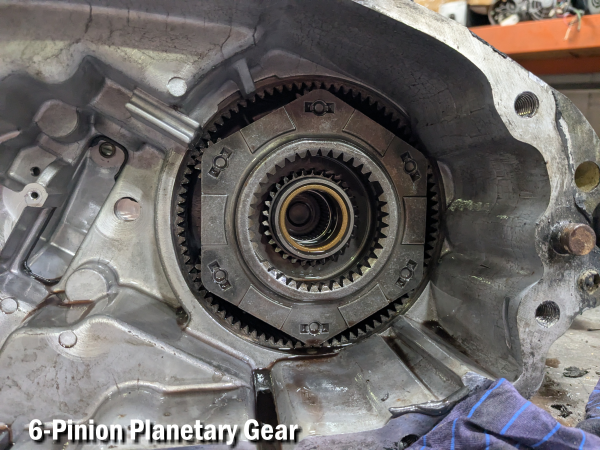
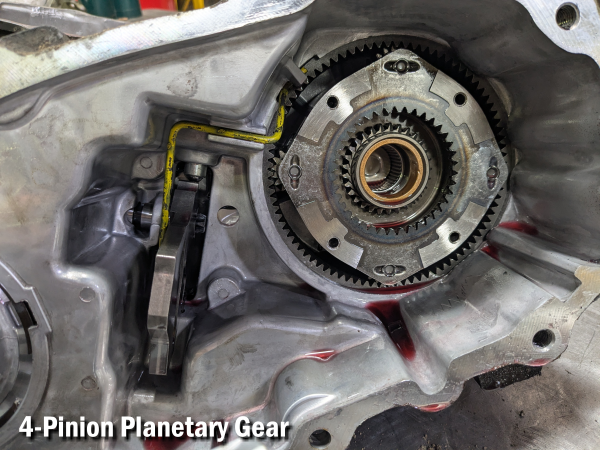
The Behemoth Drivetrain Strongbox uses the gears from a BW1354 transfer case. The strongbox is designed to use the 6-pinion planetary gears found inside the BW1354.
The 1990-1992 BW1354 has the same 4-pinion planetary found in the BW1350. You need to make sure your BW1354 came from a 1993-2011 Ford Ranger.
Removing The BW1354 Gears & Installing Them In The Strongbox
You’ll have to remove the (6) bolts that hold the adapter plate onto the transfer case. When you remove the plate, the planetary gears will be attached to the other side of it.
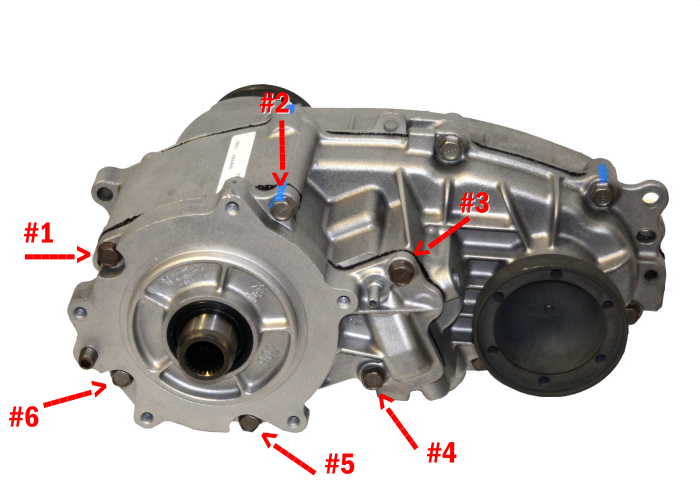
Now remove the remaining bolts that hold the two case halves together and split the case apart.
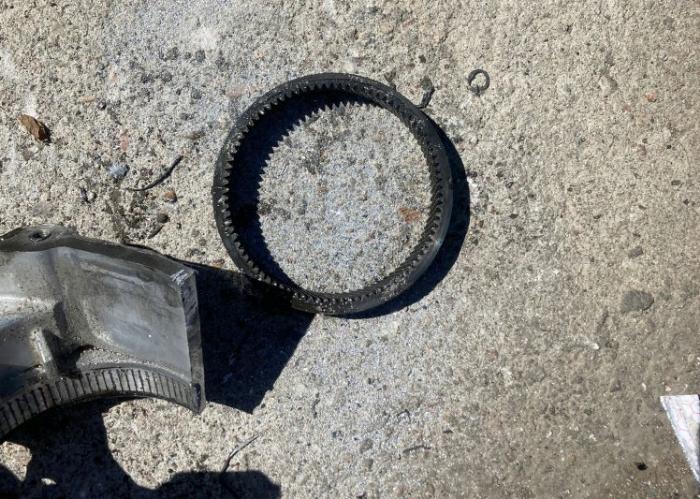
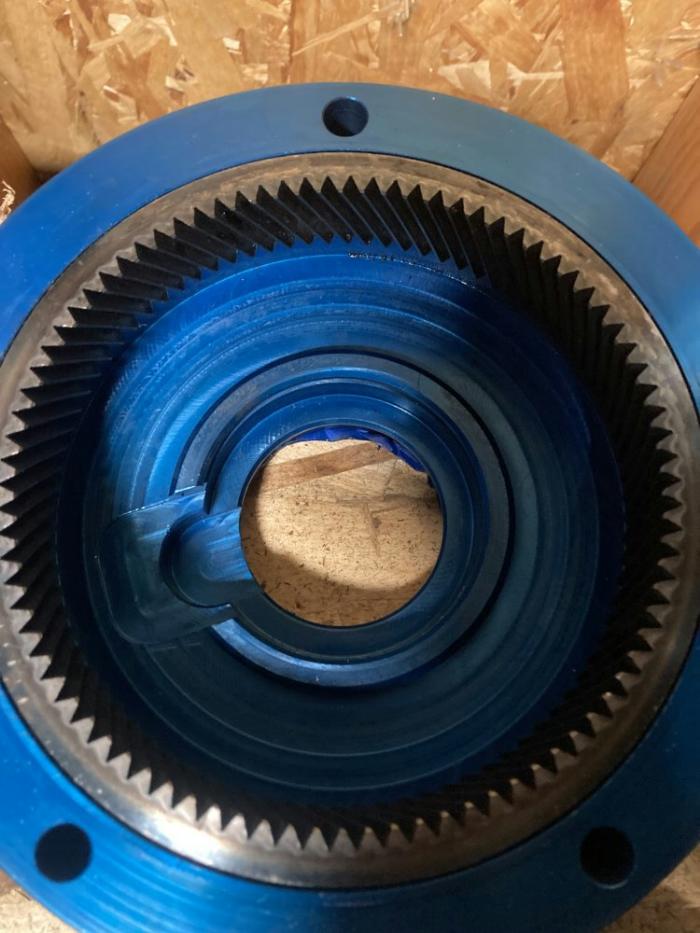
You need to remove the ring gear that the planetary gear sat in. You can remove it by using a press being careful not to damage the teeth.
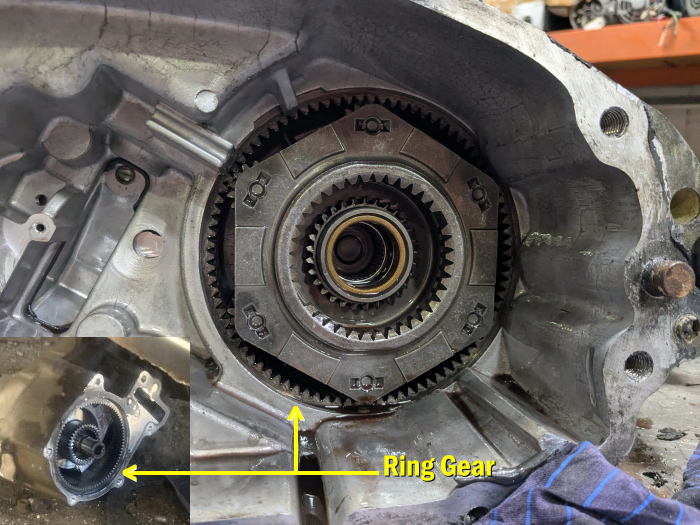
If you don’t have a press or don’t feel comfortable trying to press it out, you can cut the aluminum case in half being careful not to cut the ring gear.
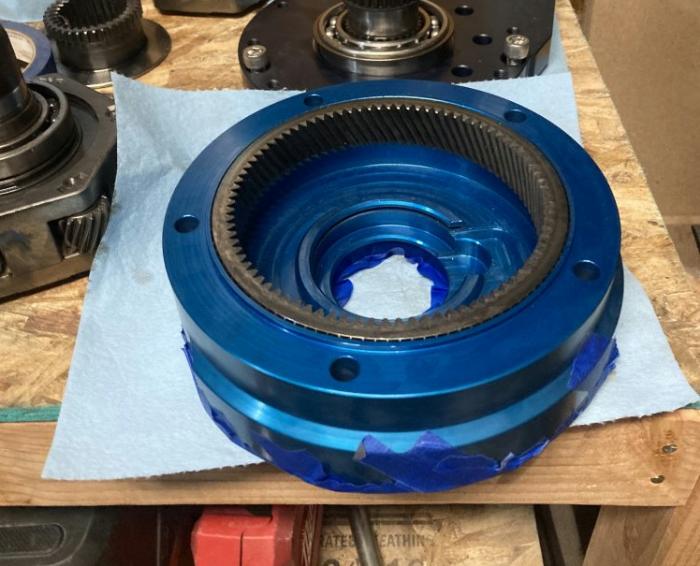
The ring gear needs to be cleaned and then pressed into the Strongbox. Apply some oil to the surface of the Strongbox to help the ring gear slide into place.
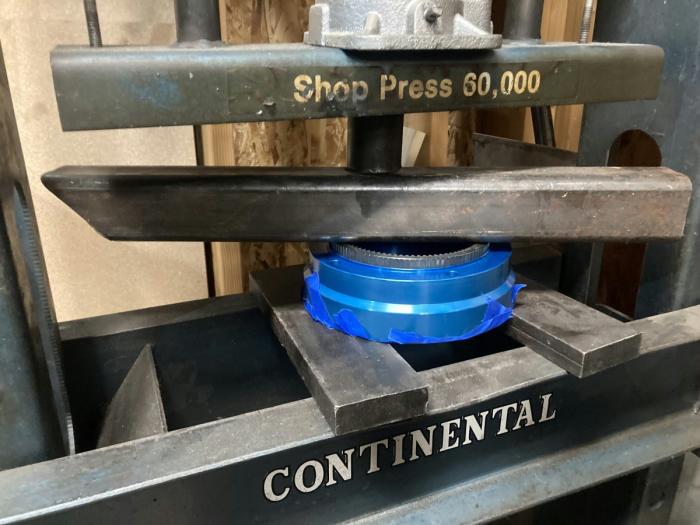
The edge of the ring gear will sit slightly above the raised edge on the housing.
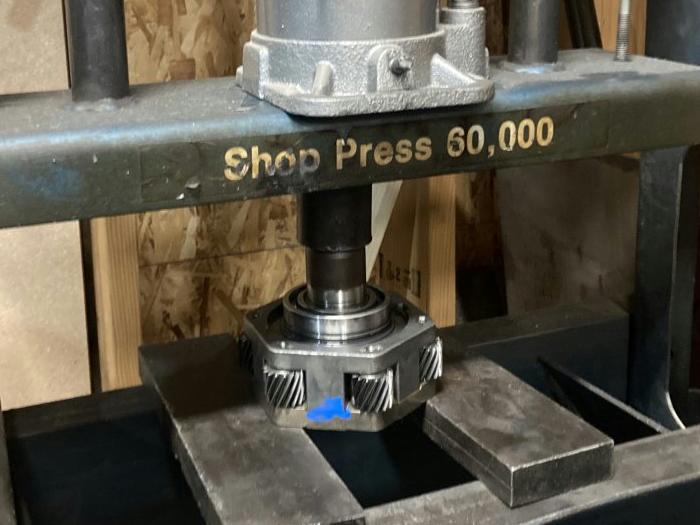
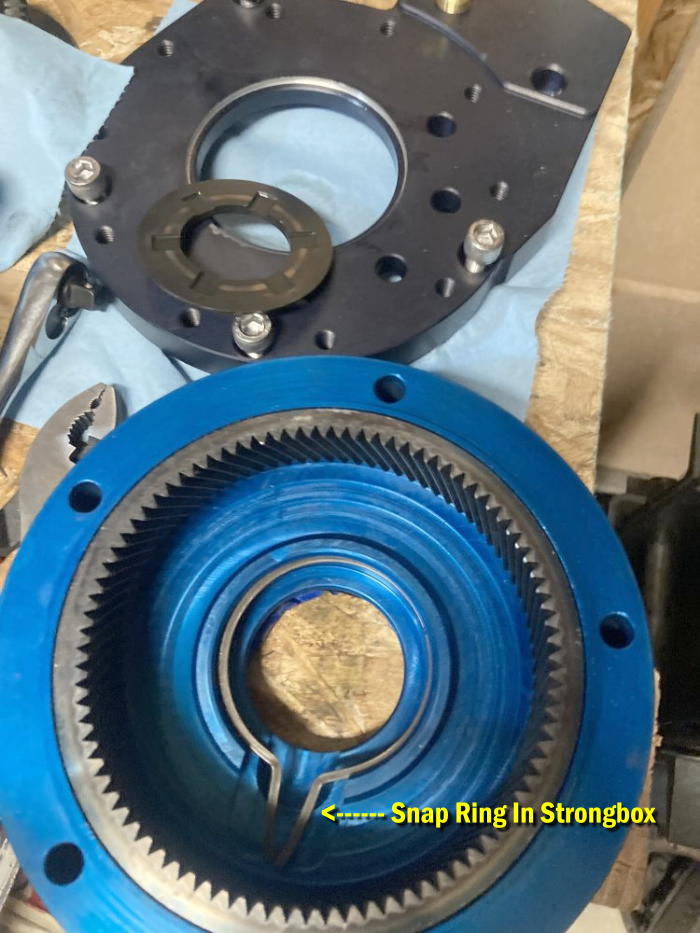
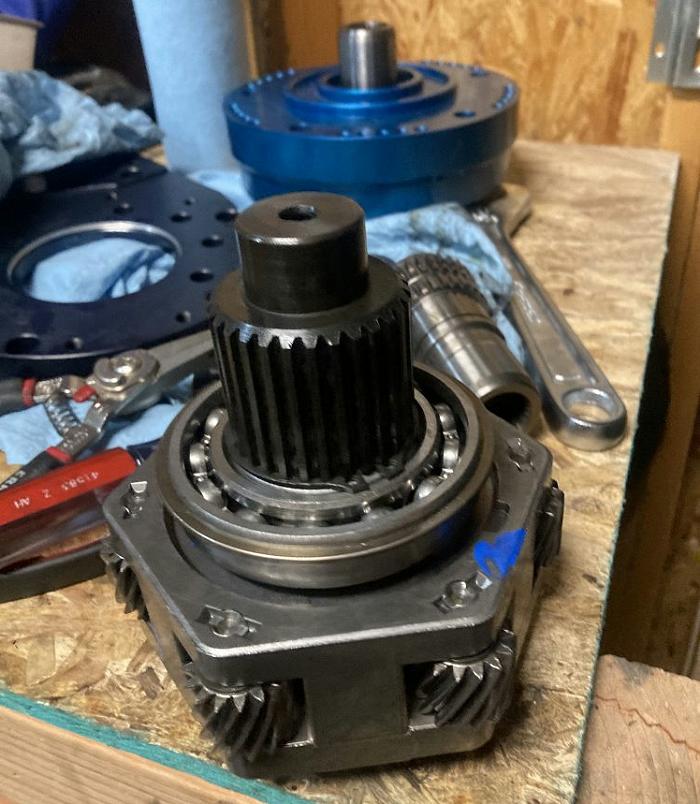
Remove the planetary gear from the adapter plate. It’s held on with a snap ring that you can access under the planetary.

Remove the snap ring just above the bearing and then use a press to press the shaft out of the bearing.
The snap ring will sit in the position below:
Once that clip is in place, you slide in the original bearing. Then, as it was- but now with a new anodized case in the mix- you press the shaft back into the gear set and the bearing. Make sure that the teeth on the shaft are properly aligned with the teeth in the planetary before you start pressing. There is also a thrust washer that goes in between the bearing and planetaries. Lastly, the stubborn little clip goes into place.
![]()
Then a seal is pressed into place over the shaft.
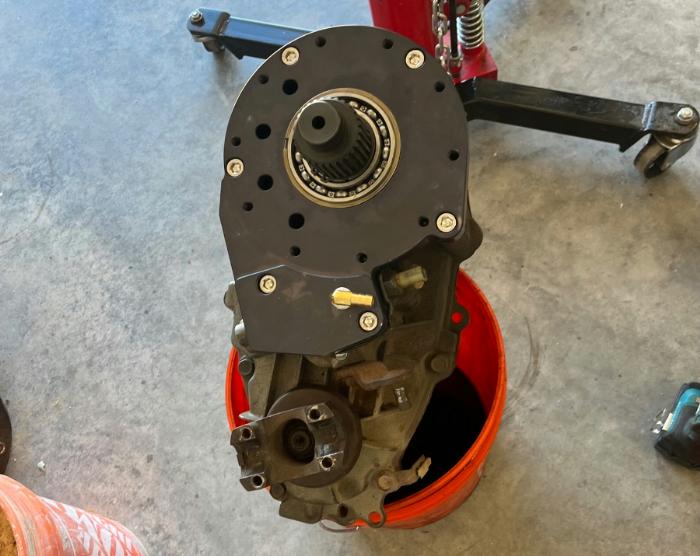
Next, the shift hub from your donor transfer case is inserted into the shifting swivel block.
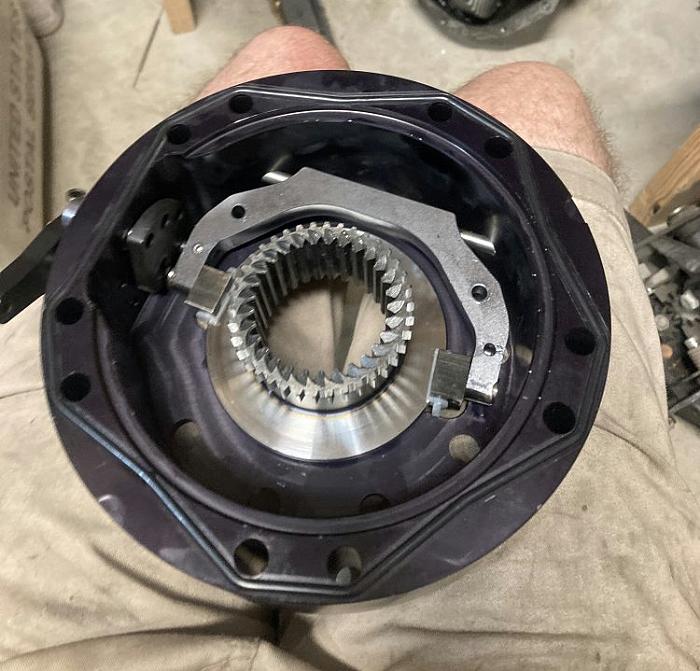
You’re going to remove the adapter plate from the transfer case you’re going to be using, removing that planetary, and installing the new intermediary shaft into that other planetary. Then add the thrust washer, attach the split bushing, install the bearing and then install the snap ring. The vent is installed in the adapter plate, the snap ring is removed from the bearing, and the adapter plate is placed over the bearing, and the snap ring is reinstalled.
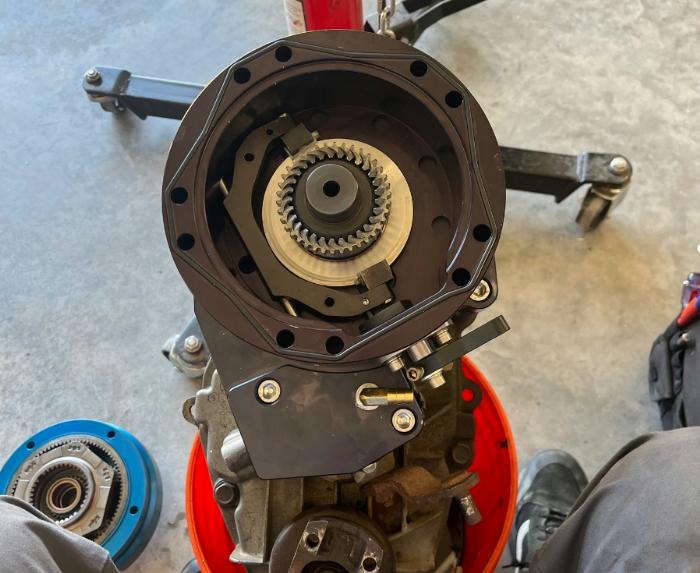
Apply RTV sealant to the outside edge of the transfer case and install the adapter plate using the six socket head cap screws provided with the kit. Torque the bolts to 30 ft lbs.
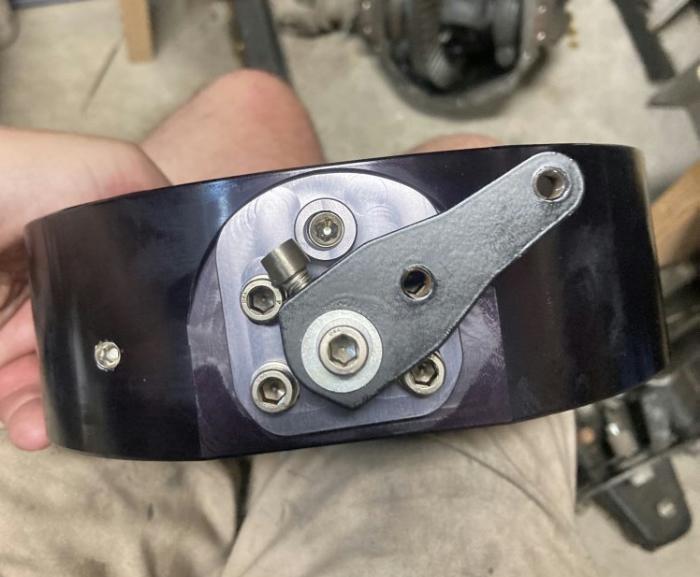
The next step is to add the shifter section. Again, apply RTV sealant to the edge of the shifter section and install the shifter section. This section can be clocked into the position that best fits your setup.
Next install the front section and bolt it all together. The section can be clocked as well.
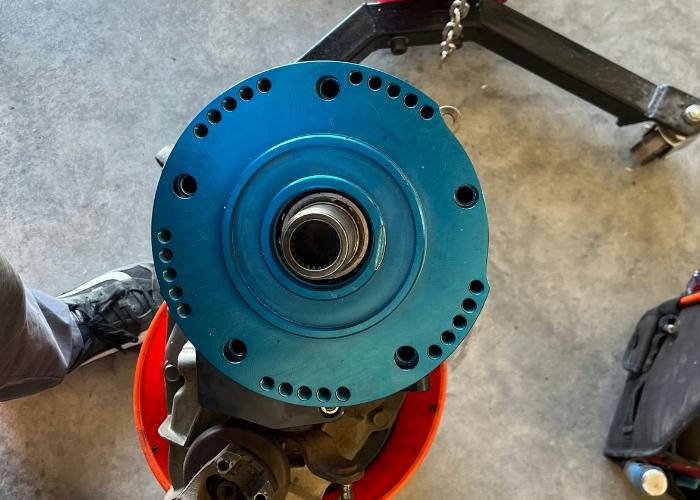
With the doubler complete, you can bolt it to your transmission.
The Behemoth Strongbox does not come with a shifter, but Behemoth offers them as a single, double, and triple if you need one.
Installation Video:
Behemoth Drivetrain has an instructional video on how to put this strongbox together. See it below.
Conclusion
The Strongbox is a great alternative to fabricating and joining two transfer cases together. While the price may seem a little high, it’s really not when you take into consider the quality and craftsmanship of the Strongbox. It’s also $1K or more cheaper than buying an Atlas II transfer case.
See It In Our Forum
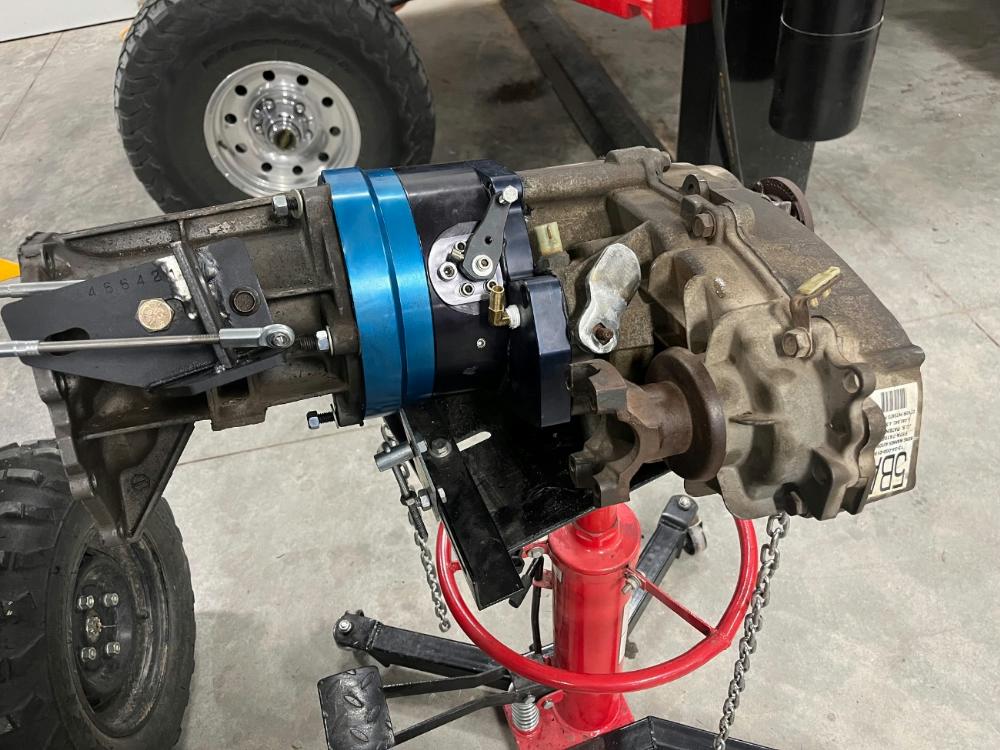
Forum member Kirby installed the Behemoth ‘Shorty’ Strongbox in his 1991 Ford Ranger 4×4.
See ‘Kirbys 1991 Ranger Build Up and Solid Axle Swap‘
These photos actually came from his installation.
Related Articles:
1983-2011 Ford Ranger Transfer Cases
BW1354 Transfer Case Exploded Parts Diagram
D&D Transfer Case Doubler Install
Building a BW1350-1354 Transfer Case Doubler
About The Author
Jim Oaks is the founder of TheRangerStation.com, the longest-running Ford Ranger resource online since 1999. With over 25 years of hands-on experience building and modifying Ford Rangers — including magazine-featured builds like Project Transformer — Jim has become one of the most trusted authorities in the Ford Ranger off-road and enthusiast space.
Since launching TheRangerStation.com, Jim has documented thousands of real-world Ranger builds, technical repairs, drivetrain swaps, suspension modifications, and off-road adventures contributed by owners worldwide. TheRangerStation.com has been referenced in print, video and online by enthusiasts, mechanics, and off-road builders looking for practical, and experience-based information.