
Introduction
This page shows you how to install a Powertrax Lock-Right 1830-LR into a Ford 7.5-Inch rear differential.
What Is A Lock-Right Locker
The POWERTRAX LOCK-RIGHT Locker is the original locking differential that could be easily installed in existing case assemblies without any special tools or setup equipment. It has been widely used in demanding off-road applications around the world requiring extreme traction output and high-strength.
Powertrax Lock-Right performance lockers’ straight-line performance is equal to a solid spool axle, yet they automatically unlock during turns. When extreme traction output and high-strength are required, racers, hot-rodders and muscle car owners chose Lock-Right lockers!
Best suited for extreme off-road to severe on-road use, Powertrax lockers replace the spider gears in your differential carrier without affecting your ring and pinion settings. The whole job can be done in your driveway with common hand tools in a couple of hours. A carrier is not included.
- Brute Force Devices For Rugged Applications
- Replacement Of Differential Case Not Required
- Ring And Pinion Setup Not Altered
- Installs Easily In Front/Rear Or Both
- Proven In Most Demanding Applications
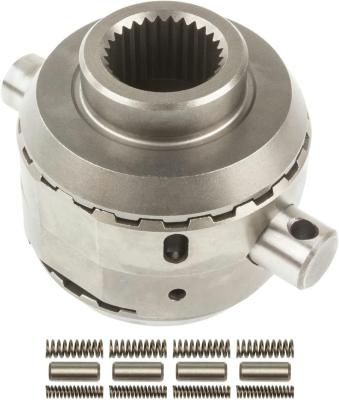
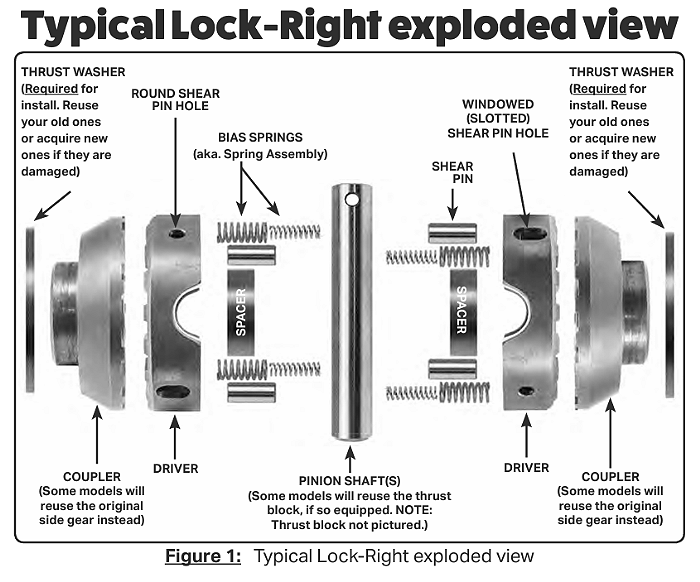
Lock-Right Locker Parts
Installation
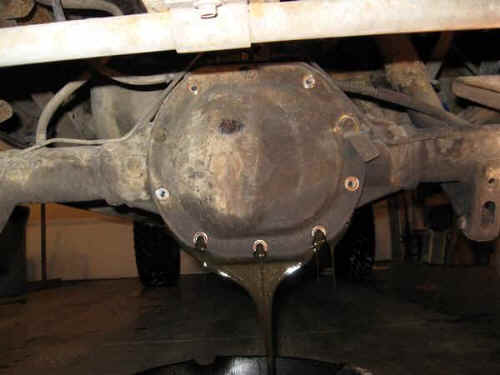
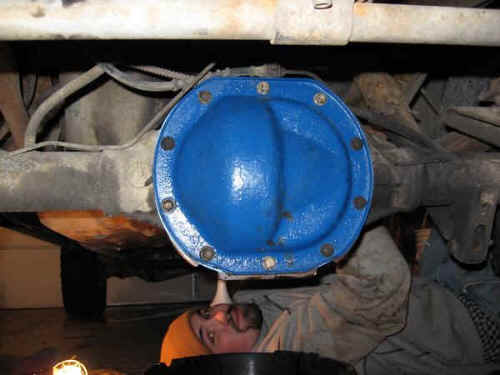
First, take out the spare tire to provide clearance for removing the differential cover.
Next, Jack up the rear of the truck and place securely on jack stands. Don’t forget to chock the front tires!

Next, drain the gear oil out of the differential.
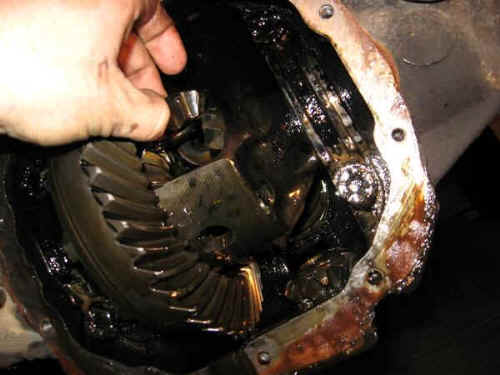
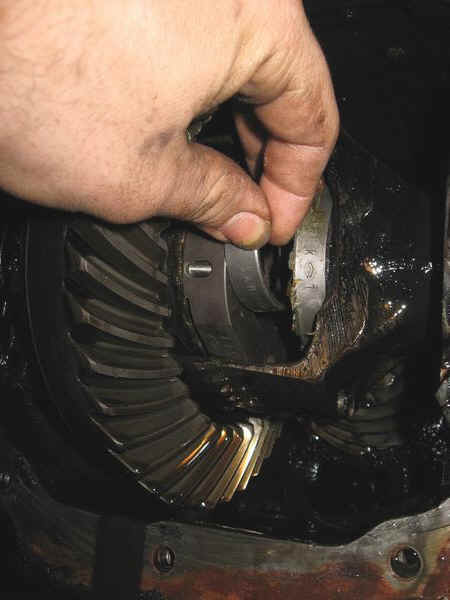
Next, remove the bolt securing the crosspin in place located on the passenger side of the differential carrier.
(hint…rotate the carrier to fit a 1/4″ ratchet between the bolt and the bearing cap)
Note – truck must be in neutral.
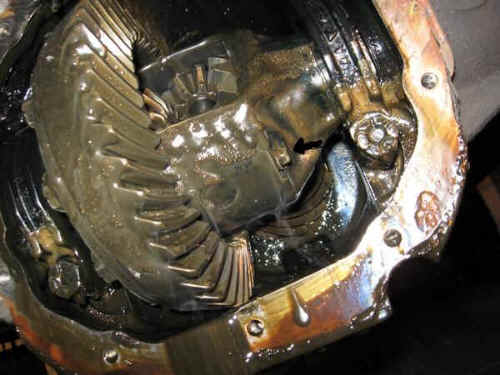
Next, slide out the crosspin then rotate the carrier to remove the spider gears.

With the spiders and crosspin removed you can slide in the axle shaft to remove the C-clips that retain the axleshafts.
(hint… if the axle shaft doesn’t slide in far enough for the C-clips to clear the side gears, try loosening the adjusters on the drum brakes. Worn drums will have a lip on the edge of the pad preventing you to slide the hub and axle shaft inward)
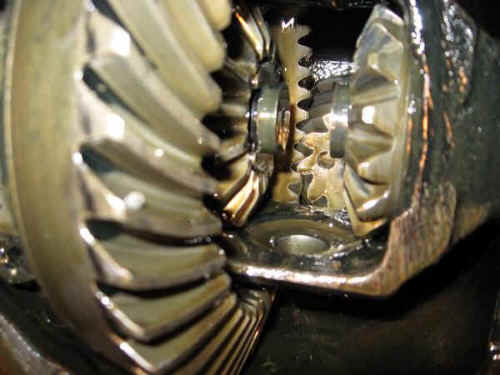
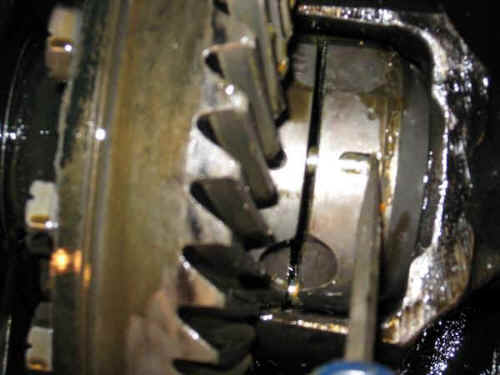
After the C-clips are removed, you can slide the axle shafts out about 4 to 6″ and pull out the side gears.
Note, there are thrust washers located behind the side gears. Don’t mix these up, you will need to install them in the sides they came out of.
Grease up the cogs on both couplers and slide the driver side coupler and slide in the axle shaft.
Install the C-clip with the open end pointing down so it won’t fall off.
Now sharply pull on the driver side tire/hub to seat the C-clip.
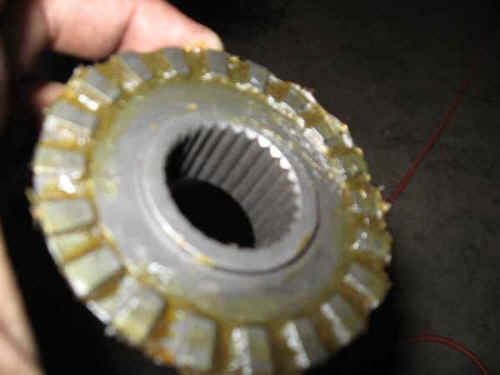
Now install the passenger side coupler and slide in the axle shaft so it is flush with the coupler. Grease up the cogs on both drivers. Apply grease to the shear pins and install into windows of drivers. Place the small diameter springs into the large diameter springs and fill with grease so they won’t separate. Slide a driver onto the driver side driver, seating the cogs and slide the spacer inside the driver and make sure it seats over the C-clip and the shoulder built into the coupler. The grease will hold it in place. Note, notice the flat spots on the outside of the drivers…they allow you to slide the driver into the carrier.

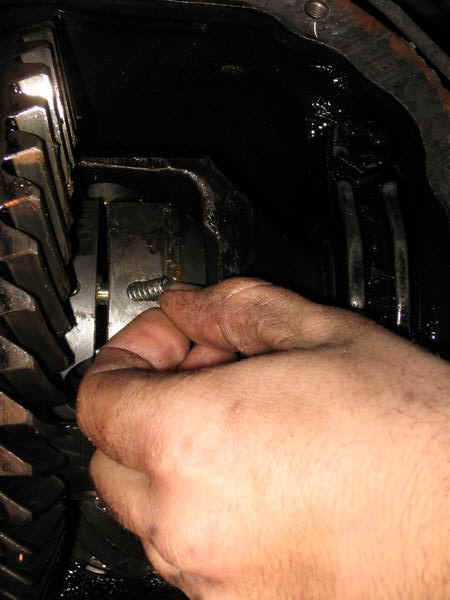
Now slide the other spacer inside the driver and slide it into the case. sit it to the opposite side and now slide in the passenger side axle shaft. There is a recess in the cogs to slide in the C-clip. Pull tire/hub out sharply to seat C-clip again. Line up cogs on passenger side coupler and driver. Use a screwdriver to seat the spacer onto the C-clip. Now you can line up the drivers so the cross-pin holes match and start sliding the shear pins to the opposite driver using a small screwdriver in the windows.
Next install the springs into the windows to secure the pins in place. Make sure the springs are seated all the way back in the window. The installation manual recommended using a small screwdriver to compress the spring, but I had no problem with my fingers then using a screwdriver to seat the spring properly.
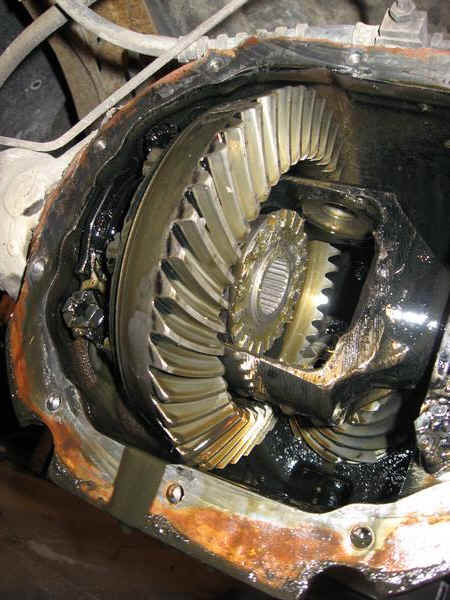
Now rotate the axle shaft so the bolt hole for the cross-pin is facing you and install the cross-pin and retaining bolt.
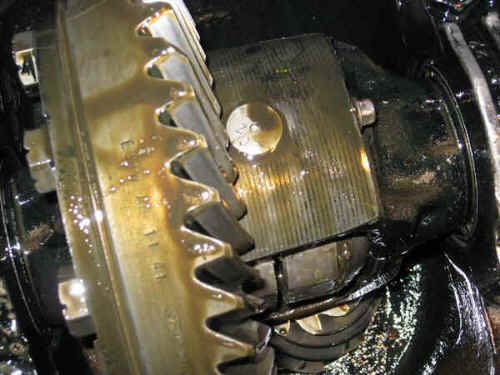
Your Lock-Right is now installed, and you are ready to replace differential cover.
Clean the old gasket off and fill with gear oil. No limited slip friction modifier needed.
Happy wheeling!
Don’t forget that a locker can get you into a lot more trouble than an open differential so, don’t be careless.
This article was contributed by: Josh Lee
Links
Lock-Right Locker Universal Installation Manual.pdf
Lock Right Locker – PowerTrax Website
Related Articles
Installing A Lock-Right Front Locker
Lock Right Locker Installation #1
Lock-Right Locker Ford 8.8 Installation
Cross Pin Clearance – Grinding Gear Teeth
Picking A Differential For Your Ford Ranger
Locker Comparisons – Understanding Differentials/Lockers
Gears and Lockers Installation
Ford Ranger 4×4 Front Axles 1983-1997
1983-2011 Ford Ranger Off-Road Builders Guide
Last Updated:
About The Author
Jim Oaks is the founder of TheRangerStation.com, the longest-running Ford Ranger resource online since 1999. With over 25 years of hands-on experience building and modifying Ford Rangers — including magazine-featured builds like Project Transformer — Jim has become one of the most trusted authorities in the Ford Ranger off-road and enthusiast space.
Since launching TheRangerStation.com, Jim has documented thousands of real-world Ranger builds, technical repairs, drivetrain swaps, suspension modifications, and off-road adventures contributed by owners worldwide. TheRangerStation.com has been referenced in print, video and online by enthusiasts, mechanics, and off-road builders looking for practical, and experience-based information.