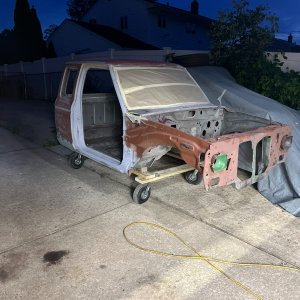
87 Ranger Supercab XLT 4X4, aka: Chaffee


Featured Build Threads

You've no idea


i wouldnt say that.....its why i will use whatever i have to instead of stuff i cant find....

i am lazy like that. often though...i have a powertrain that dictates other options though.
 
i wouldnt say that.....its why i will use whatever i have to instead of stuff i cant find....

i am lazy like that. often though...i have a powertrain that dictates other options though.
That was more in reference to what I've done to keep this truck alive. We haven't gotten to my short block yet XD

Trade work is sacred to me. I put my hands to something that is or will be someone else's and treat it better than all my own possesions. Machine work on engines is a skill to take pride in. You have the chance to deliver the fruits of your pursuit of perfection to someone. You better damn well stride hard to chase that perfection. . . I could've done a better job assembling this short block with a baker's whisk and a baseball bat!

Here's hoping the bores are round, but I have my doubts. I have an inside dia. mic in the mail and will be doing a full review of the "remanufactured" short block MABBco sent me.
 
I think it's time I wrote an update for this thread. Having dug into the short block on noticing that three of the conrods were installed backwards, I found that all the cam bearings were scratched to begeesers and the oil galleries weren't alinged. In the interim of getting an original Ford shop manual, progress has slowed way down on the engine and I've shifted focus for a little bit. Not quite ready to update the engine side of the project, as I still need to read up on some things in the manual, and check ring gaps/fix the backwards conrods, but my lovely lady and I have done some good work on the interior, and I have been tidying up some electrical connections before they become electrical issues.
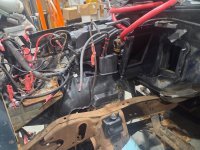
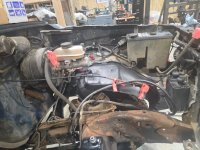
First up I got new battery cables and had a new main hot line made at NAPA. The fuel pump negative wire was sucked into the fan belt at some point in the past and the broken remains of the connector caused a rather interesting failure(story for another time), I tidied it up by crimping in a GM weatherproof connector and crimped new wire directly into the new terminal rather than clamping an open fray to an old crusty terminal like it was:
20260813_153112.jpg20260813_152543.jpg
Cleaned up some various grounds around the negative cable as well, particularly the ones on the core support. Next I added another GM connector to a fog light harness that I had previously built and then partially cut out of the way when I took the truck apart. Next I removed the old rollover switch with its melted plug and unreliable connection that contribited to the previously mentioned failure. I had purchased a switch one model newer(original is obsolete); funny enough the screw pattern ligned up with the original, albeit with the switch mounted backwards, but still upright. The original switch disconected the two wires. The new one is a two way flip flop type deal. Three wires, one positive in, one fuel pump relay out, one other out for the newer trucks, likely going to the computer. I wanted to minimize heat when the circuit was under normal operation, so I un-pinned the "out" wires of the pigtail and swapped them. The smaller gauge wire now is in contact when the switch is tripped. I routed a 16ga wire along the loom to the left hand main plug for the gauge cluster. And am going to find another plug at the junk yard. I will take that pigtail and unpin one wire to splice to the end of mine, and insert it into the positive slot that activates the (currently unused) check engine light. This will then turn the light on if the switch is ever tripped.
20260813_144347.jpg20260813_144537.jpg
Worth noting that you can also set this up as the original two wire set up just fine.
Next up on the floor of the truck, the steel covers for the front cab mounts were disintigrated. Unable to find OE replacements, I found these mid to late 60s mustang covers to be of a convenient size. I drilled some new holes further out from the originals, and made gaskets out of an old inner tube. This arrangement can be seen in the previous pics.
Now for some arts and crafts! Starting off, we peeled off the old saggy blue headliner and foam and replaced it with new in a nice light gray which I think really makes the blue and sparse chrome trim POP:
20260817_154540.jpg20260817_203708.jpg
Once that was done we started on some sound deadening from LMC, using the recommended roller tool and some foil tape to join seams. Alcohol wipe down for optimum adheasion, a red sharpie, tape measure and a straight edge along with a box cutter is all I find is necessary. This is the first time I've done mat like this, I don't find it particularly difficult:
20260820_174913.jpg20260820_174903.jpg20260821_151815.jpg20260821_152048.jpg20260822_173809.jpg20260822_174020.jpg
This and a lot of little things. The only other mod I will note for now is my anti-airfilter housing rodent nest grill, made from some 1/4" hardware cloth:
20260817_152659.jpg20260817_152750.jpg
20260817_152737.jpg
That's all for now, more to come. Just got the last of four NOS cam bearings in the mail :stirthepot:
 
Last edited:
20250509_195336.jpg20260827_161231.jpg
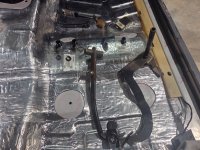
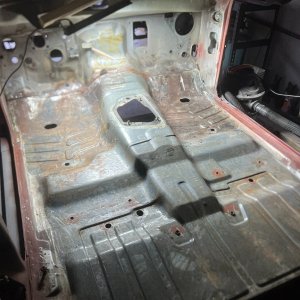
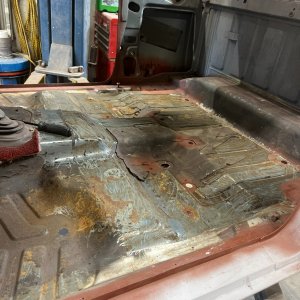
From shoveling debris out of the floorpan to where it is now, Chaffee has come far. With the sound/thermal barrier finished off, I spent some time on the driving experience itself, and removed the brake and clutch pedals. I was originally going to do this with the dash out. It would've been much easier, except for one problem: I forgot. Uppon disassembling I found the clutch side bushing was completely worn through, and in what might be one the most average Ford things ever, due to their design, one bad bushing in the spot that gets the most wear causes both pedals to wobble. With a quick wire wheeling and polish job to the hinge pin, I replaced all of the bushings, including the bushings for the push rods. I also drilled out the spot welds and removed the arm for the clutch pedal safety switch that I could not replace, was inoperable and long since bypassed. Deleting everything to do with the switch actually freed up quite a bit of space behind the dash. With the pedals now ROCK solid, and smoothly traveling, and our brake light switch passing a quick multi meter test, I added a pair of new pedal pads to compliment the new vinyl floor I have yet to install.
87 Ranger Supercab XLT 4X4, aka: Chaffee87 Ranger Supercab XLT 4X4, aka: Chaffee87 Ranger Supercab XLT 4X4, aka: Chaffee87 Ranger Supercab XLT 4X4, aka: Chaffee
Before the floor mat goes in, I've decided to remove the transmission and TC. It will benifit all processes in progress. The sticks will not only be out of the way, but now I can trace the shifter cut out from below. Before I get to that, I need to replace the speedo cable grommet and it has to go on the small end that connects to the TC. In addition the original mount is half gone and causing the whole arrangement to lean to the driver side. It would be difficult to swap out without it mounted to the engine. This is also not conducive to mating to an engine while it dangles from a chain, especially one with a new clutch. . . Nor is it conducive to removing an engine from it. Ask me how I know:temper:

The new plan will be to install it back into the rig AFTER the engine, freshly cleaned with a new mount and a new gasket or three. I'll feel a lot better about the safety of the clutch this way.

On topic of the clutch, I finally had the courage to pull the remains of the original slave out in prep to drop the trans. I had aquired an 88 bell housing and front bearing retainer to upgrade to the 88 and up clutch hydraulics, mostly because I didn't expect the hose to survive. I had already aquired a new 87 slave before I found out that the hose is unobtainium. Fortunately despite the fluid looking like it might've been OEM from 1987, the hose is still flexible, shows no evidence of leakage, and the fittings are spotless. I will flush the existing resevoir and master for reuse, and stick with the 87 system for now. When I put a rebuilt trans/TC in down the road, I will use that 88 bell and retainer, along with all new hydraulics.
 
:shout:The four years I've owned this truck have been a saga of exercises in patience, that is all coming to a head with this project, I swear. . . The only words I have are:
"Holy crap, wtf!"

The floor got put at a stand still. ACC sent my order direct through Bronco Graveyard. All this time later, it turns out that my 86-97 ranger super cab vinyl kit is two front halves of padding from two random trucks, and the vinyl from some other random full size extended cab truck with a massive tranny tunnel. . .

So in the mean time, since I had to fix other people's screw ups in the short block too, I defaulted to putting the engine bay back together. I was going to leave the inner wheel wells out for better access, but the 10 minutes of time it'd save me durring the engine install is currently being sacrificed for the sake of nothing else to do.
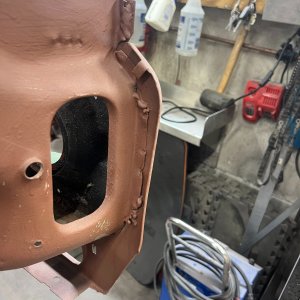
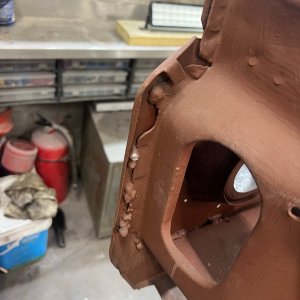
My entire air intake system in front of the butterfly is pretty trashed. The vac resevoir only has one stud left to attach it to the wheel well, the filter box is missing 2/5 of the pressed in nuts, and the intake air heater valve controler is cracked in half. I remedied all these by simply buying the whole chunk out of another truck at one of the local jalopy jungles. A quick bath with some simple green and a dish brush, followed by a wipe down with armorall and it looks good as new. . . Or at least way better than before. In addition to that, the front clip on my truck was pretty messed up from one or more minor colisions that POs had poorly fixed with way too much bondo. This was causing a really bad rub on the passenger side at wheel lock, which not only ate a huge hole in the wheel well, but also ate the end of the front wing. This was somewhat aleviated by the suspension rebuild that included new springs, and I already had a pair of inner wheel wells and a front wing from the junkyard engine donor. The same donor for the new intake ducting I recently pillaged had a pair of very nice front fenders that I also saved; more on that later :stirthepot:
20260904_182827.jpg20260904_182834.jpg
Despite the project progressing in spite of everything thats gone wrong, the list of needed parts is somehow still getting longer. I tired out rock auto for the first time, and after nearly 14 hours of shopping followed by minmaxing over the course of two days, I finally managed a shipping quote I was happy with. The part prices are great, the shipping is what gets you in the end though. . . The goodies are arriving though, and the new shinnys are satisfying!
20260910_173717.jpg
20260911_132658.jpg
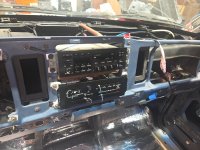
In addition to all that, the lovely lady and I went back to the junk yards. Seems with all the recent bullshizzery the scale finally tipped the other way. We nearly completed a long list of odd small items, and even a handfull of things not even on the list. Several items I had been looking for for a while, like the little XLT badge that goes on the dash, a parking brake pedal assembly that both looks good and works, along with the little plastic end cap that goes on the end of the tonneau cover rod and hooks the clips on the B pillars. Crown jewel of it all came out of a suspiciously clean 89 aerostar that caught my fiancé's eye. I never would've looked at it had she not said something. The interior was one of the cleanest of that vintage I had ever seen, was recently brought to the yard, and low and behold what we might find in the dash but a mint am/fm cassete player:
20260912_192852.jpg
Fits perfectly. I got both pigtails and a good 6-8" length of wire on each. My harness got chopped for the aftermarket unit, but I have some other materials and ideas to add on to this find to include a line output converter, amp and bluetooth along with keeping full original functionality. My fiance is a musician and I've been wanting to add a nice sound system to this truck for her. . But for now, this is going to the back burner, and back in a box where its safe lol
Back at the short block, I took the rotating assembly to Northwest Motor Machine in Caldwell, and they did not disapoint. They were busy, fast, polite, had reasonable prices and got the three rods flipped and my crank polished inside of two days! Now with that stupidity professionally fixed, I began work on the short block. . . Ohhhh but I'm getting a bit ahead of myself. We need to go back to the beginning of this story to an extent. . . More to follow. . .
20260912_181509.jpg20260912_121110.jpg
 
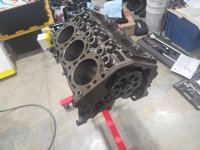
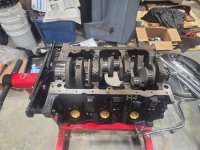
Ahhh the short block. This has almost been its own story, and a full review will be in a separate thread once I've concluded conversing with the shop it came from about it. I don't feel it appropriate to do a proper review untill they've at least had a chance to respond to my findings. Due to the nature of this project, both my intent to thoroughly review this and that it's host is going to be the subject of a book, due to their warranty policy, warranty repair was never going to be an option for this engine.

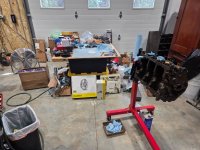
So lets dive in. It arrived, well packed, wrapped in plastic and drenched in oil. I took it off the palate, hung it from the stand, hung the pan by two bolts, wiped the excess oil from the painted surfaces and put the balancer on loose to rotate it.
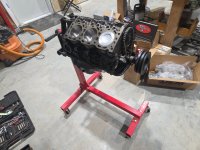
20251230_164150.jpg
The first thing I noticed was that the inside of the area where the filter housing was attached was covered in paint.
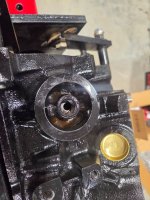
20251230_152446.jpg
I was a little miffed but thought they must've just forgot to tape it off. Stuff happens. Whatever, I figured I'd just float it out with acetone and flush the galleries with brakleen and shop air. On the back of the block one freeze plug wasn't fully flush. I don't know if its sealed tight or not, but even though they used sealant I'll be redoing it for the sake of my own sanity, cuz its behind the flywheel.

The next thing I noticed, was that oil squirters in the con rods were facing the outer sides of the block. I took pause for a minute, and thought that it would make more sense for them to squirt the downward facing side of the cylinders, as the oil would flow from there down. I consaulted the manual, and found nothing. I bought the official Ford service manual, and found nothing. I scouered Sven Pruett's book and eventually found a generalization, that the anti rotation tabs of the rod bearings should all be on the drivers side of the block, aiming the oil squirters to the passenger side for all six pistons. I then googled, and found nothing. I then remembered I had a junkyard engine torn appart and spread across my shop floor. The headgaskets of that engine were 87 dated, and the con rods did indeed all point the squirters and anti rotation tabs as Sven's book describes. This indicated that the three con rods of the left bank were backwards.
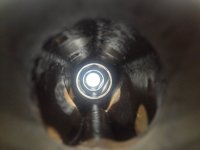
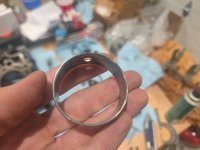
Appart it came, to include the cam. I had a look inside with Snek Cam to check alignment of the oil galleries. Not only, were the #2 and 3 bearing's oil hole not aligned to the head supply galleries AT ALL, but all four were so badly scratched and gouged that the bearings looked like they were plucked out of a bucket of gravel that had been stored in the hopper of a rock processor. I bought a cam bearing in/unstaller tool, and knocked them out to replace with NOS Ford. It wasn't untill I was halfway through installing them that I noticed, that NOT ONLY was all of the above wrong, THE #3 AND #2 BEARINGS THEY USED WERE MISSING TWO OF THE THREE OIL HOLES!!!!!!&#^%@%@
87 Ranger Supercab XLT 4X4, aka: Chaffee

*inhales deeply*

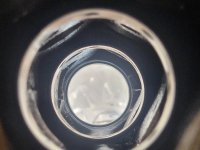
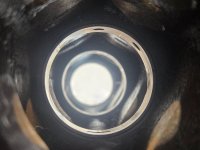
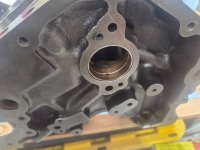
Anyway, I put the new cam bearings in very carefully, absolutely nailing the gallery alignment (snek cam pics later):
87 Ranger Supercab XLT 4X4, aka: Chaffee87 Ranger Supercab XLT 4X4, aka: Chaffee
I set the depth of the #1 bearing to .040
87 Ranger Supercab XLT 4X4, aka: Chaffee
And installed the cam:
87 Ranger Supercab XLT 4X4, aka: Chaffee
It did not turn freely :shout:

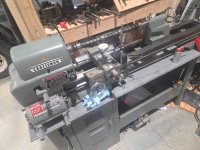
I took the cam back out, wiped it off, and put it in the lathe between centers as shown in the previous post, finding 2.5 thou and 3 thou of runout on bearing journals 2 and 3 respectively. After some research, I noticed that the Ford manual did give a runout spec of no more than 5 thou. I figured it must've been fine. My bore mic doesn't go small enough to get inside of the cam bearings, and my telescoping gauges arent long enough to get to #2 and #3 but the size change from uninstalled to installed on #1 and #4 was identical and put clearances in spec on the very loosest end of the specified range. The middle two bearings measured to do the same before they were installed. I thought perhaps something got in there and caused a bind. I wiped everything clean with acetone and tried again. Slightly better, but no joy. Then it occured to me that I couldn't get to the #2 and #3 bearings themselves with assembly lube. I was relying on what was left on the journals after they had passed through the other bearings. I took my assembly grease and injected it down the oil galleries that supply each head and the cam freed up immediately. I cleared the two galleries with air, and it stayed free. . . Ideal? Who knows. Im open to suggestions, but I'd rather not mess with it further.

Next I plastigauged the crank, its all the way loose in the specified range in the manual, but Mr. Pruett's book says its good to be on the loose side. Took the crank back out, applied assembly grease, and torqued the mains back on for now. I still need to apply sealant to the rear and seat the thrust bearing flush again. Since I had decided to check everything after finding my obliterated cam bearings (and I'm leaving a whole lot out here btw) I had the shop leave the rings off the pistons for me to measure gap. They were all identical, at the widest open end of the spec, and the (iirc) second rings were all 1 thou over spec. . . .

To be continued. . .
 

Attachments

  • 87 Ranger Supercab XLT 4X4, aka: Chaffee
    20260911_192448.jpg
    130.3 KB · Views: 1

Upcoming TRS Events

Sponsored Ad

Featured Ranger Based Vehicle

TRS Latest Video

Official TRS Merchandise

Follow TRS On Instagram

Back
Top