• Welcome Visitor! Please take a few seconds and Register for our forum. Even if you don't want to post, you can still 'Like' and react to posts.

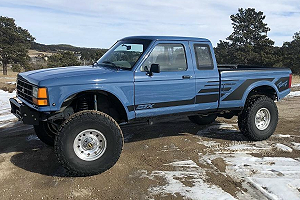
The Road Ranger. 1997 SEMI


pjtoledo

Well-Known Member
Supporting Member
U.S. Military - Veteran
Joined
Oct 5, 2007
Messages
5,727
Reaction score
3,381
Location
Toledo Ohio
Vehicle Year
20002005199
Make / Model
Fords
Engine Size
3.0 2.3
I started working from the nose towards the tail, and I already did everything. I thought I wanted to do up to the back of the cab and I just wrote the list a couple days ago. What’s that drug you can take for a better memory, when you get old?
I used to take that drug, recently I can't seem to remember where I put it.


Rick W

Lil Big Rig
Supporting Member
TRS Event Participant
TRS 25th Anniversary
Joined
May 15, 2020
Messages
3,001
Reaction score
5,203
Age
69
Location
Atlanta
Vehicle Year
1997 1987
Make / Model
Ranger XLT x2
Engine Type
4.0 V6
Engine Size
4.0 & 2.9
Transmission
Manual
2WD / 4WD
4WD
Total Lift
97 stock, 3” on 87
Total Drop
N/A
Tire Size
235/75-15
My credo
Never put off ‘til tomorrow what you can put off indefinitely
In the march to nationsals, I’m trying to be good and work on necessities and not the toys and pretty things first.

When I was coming home last year, I burned the inner bearing on the truck floating axle. The axle was in use on a trailer, so it didn’t cross my feeble mind to check them. Spindle was beat up, but got it fixed on the road enough to get me home,

Lesson learned. Same thought on the two trailer axles. Both of them were in moderate use, but I don’t want to try a trip like this again without going through them. I want to check the front bearings on the truck too.

So thats eight hubs and bearings, what 20 minutes each? Do you know how many I got done yesterday all day? Half of one…..

Turned out I was right on the road fixed one, it was leaking and the new bearing already showed some damage. I cleaned up the axle where the seal rides in about 10 minutes with an oscillating sander, drill, mounted rotary drum sander, a wire brush, and some emery cloth.

I dug in my pile and I had four extra seals. Two double lip, and two spring reinforced. I also had four bearings. On the bearings, I cleaned all four, didn’t trust two, and also found a fifth new one. Ditto on the seals, three of them cleaned up nice and had a good lip on them.

Then I spent the better part of five hours, trying to set the seal into the hub. Over the years I’ve had pretty good luck being patient with a smaller, peen hammer and tapping them and going around in circles. Didn’t work on the first one, and then bent the seal. No worries, I had two more.

I’ll end it there, everything I tried, failed and ended up ruining the seal. The hub is just large enough that I can’t use my 6 inch vise as a press. I could’ve put on my funny hat and cape and waved my hands and wished the seal into the hub and done just as well.

I would have been more upset, but ultimately was very glad I decided to check it out, or I would’ve been fixing it again on the side of the road.

So I ordered four double lip seals online. That’ll be here in a week for $10. Lincoln and I are going to run out and get a couple of spring reinforced seals today (I always found them best for an axle that’s not perfect), and hopefully not beat my head against the wall for eight hours again.

Oh, and with a smile I asked sweet pea if she’d like the T-shirt, and she said she pass.

59 days…
 
Last edited:

Rick W

Lil Big Rig
Supporting Member
TRS Event Participant
TRS 25th Anniversary
Joined
May 15, 2020
Messages
3,001
Reaction score
5,203
Age
69
Location
Atlanta
Vehicle Year
1997 1987
Make / Model
Ranger XLT x2
Engine Type
4.0 V6
Engine Size
4.0 & 2.9
Transmission
Manual
2WD / 4WD
4WD
Total Lift
97 stock, 3” on 87
Total Drop
N/A
Tire Size
235/75-15
My credo
Never put off ‘til tomorrow what you can put off indefinitely
Afterthought, if all else fails, I have two more axles, complete, and/or I have four brand new spindles I could weld in. I really don’t want to do either one…
 

Rick W

Lil Big Rig
Supporting Member
TRS Event Participant
TRS 25th Anniversary
Joined
May 15, 2020
Messages
3,001
Reaction score
5,203
Age
69
Location
Atlanta
Vehicle Year
1997 1987
Make / Model
Ranger XLT x2
Engine Type
4.0 V6
Engine Size
4.0 & 2.9
Transmission
Manual
2WD / 4WD
4WD
Total Lift
97 stock, 3” on 87
Total Drop
N/A
Tire Size
235/75-15
My credo
Never put off ‘til tomorrow what you can put off indefinitely
Soooo, I went past Napa, and they had “repair seals.“ The metal housing is a hair bigger, and they are a double lip seals where the inner seal has a spring reinforcement and is a little bit tighter. Both lips are a little bit tighter than the OEM.

The concept is when you sand and polish your shaft, you’ll take away a little diameter, so these seals are a little tighter. the inner seal will wear down to the right diameter with the spring, and the outer seal is a safety.

I got two, $7.00 each.

A little calmer and cooler than I was yesterday, I had the brainstorm of using my drill press to press the seal in. When I was trying to do it by hand, it would always pop up on one side. I took a 3/16 piece of flat plate about 4 in.²., drilled a hole in it, and put a 7/16 bolt through it. Then I could chuck the bolt in the drill, so the plate would hopefully press evenly. Man, I couldn’t get anywhere.

So I cleaned all the grease out of the hub (again), and I used a little grinding cone on my Dremel to put a little chamfer on the inside the bearing hub. Just about a 16th inch so the seal would start. Man, I couldn’t get anywhere.

So I took the seal, and using my finger as a spindle, on my 8 inch sanding belt, I let it spin on the sandpaper at a little angle, so I created a slight chamfer on the seal. I cleaned it, and re-greased it and tried it again. Man, I couldn’t get anywhere.

So then I got drastic. I put a 1 inch fiber cut off wheel, one of those teeny ones, on my Dremel, and I cut four slots in the outside of the bearing. I only cut them about a 16th of an inch deep. This is with the thought that if I could get the seal to start, then I knew I could push it all the way down.

After cleaning all the grease off everything again, and cleaning it all again, and regreasing it all again, I tried it with the drill press. Man, I couldn’t get anywhere.

I took the whole thing and set it on the workbench directly over one of the legs, so there was no bouncing the table top. I took a piece of three-quarter inch plywood and laid it over the top. That way I had a good visual if it was sitting level. Then I took a 2 pound shorty sledgehammer, and I slammed the crap out of it, and the seal went about a third of the way in, but it was even. After that, I just kept working around in circles with a small dead blow hammer, and I got the whole thing seated where it belongs.

I think the quote from the Navy manual was “if it doesn’t work, get a bigger hammer.” Caveman tactics frequently work with this level of sophisticated repair.

So after a day and a half, I got the one wheel hub done. Woohoo! I painted the inner fenders before I put the tire back on, and touched up a couple other things while I had that satin black out.

That took three things off my list, but I also added one

IMG_2099.jpeg


I also oiled my list, and touched up a little paint on it as well.
 

Rick W

Lil Big Rig
Supporting Member
TRS Event Participant
TRS 25th Anniversary
Joined
May 15, 2020
Messages
3,001
Reaction score
5,203
Age
69
Location
Atlanta
Vehicle Year
1997 1987
Make / Model
Ranger XLT x2
Engine Type
4.0 V6
Engine Size
4.0 & 2.9
Transmission
Manual
2WD / 4WD
4WD
Total Lift
97 stock, 3” on 87
Total Drop
N/A
Tire Size
235/75-15
My credo
Never put off ‘til tomorrow what you can put off indefinitely
Not too long ago, I took apart the five lights over the cab, cleaned them up and sealed them with some silicone. I was getting water under the foot pedals, and assumed that was where it was coming from.

So the middle one burned out. I have to laugh at my luck, and I wish I had a picture of this one, something new every day.

Of course, assumed it was a burned out bulb. I couldn’t see anything from the outside. I took off the top screw, and then I had to use a utility knife to slice through the silicone, and carefully pried it up so I didn’t crack it. The second I got it up, the coffee cup full of water came out. Apparently the top screw was letting water in, and I sealed it well enough on the bottom that it couldn’t get out. And when it was full of water, you couldn’t tell there was any water in it. I don’t drive it much, and the only thing I can think of is it was seeping in slowly, and the bulb wasn’t lit and hot long enough to evaporate it out.

So, changing the bulb turned into changing out the whole light. 10 minute job turned into an hour long job. But it’s done.

& I ordered the 300,000+ mile plate today.
 

RobbieD

2.9l Mafia
Joined
Aug 6, 2007
Messages
4,300
Reaction score
4,058
Location
Georgia
Vehicle Year
1984,1990,1994
Make / Model
Ford
Transmission
Manual
2WD / 4WD
2WD
My credo
Toonces drives a Ranger . . . . just not very well.
So after a day and a half, I got the one wheel hub done.
On your second hub, put the seal in the freezer overnight, let the hub sit in the sun most of day, then try putting it in.

At the transmission plant I just retired from, we'd get transmission cases that had machining tolerances on the tight side, and the equipment had problems getting a QC-passing press of the bearings. We had a regular kitchen chest freezer lineside, at the press, stocked with bearings which were used when we had tight cases.

Sounds crazy, I know, but it worked like a charm.
 

Rick W

Lil Big Rig
Supporting Member
TRS Event Participant
TRS 25th Anniversary
Joined
May 15, 2020
Messages
3,001
Reaction score
5,203
Age
69
Location
Atlanta
Vehicle Year
1997 1987
Make / Model
Ranger XLT x2
Engine Type
4.0 V6
Engine Size
4.0 & 2.9
Transmission
Manual
2WD / 4WD
4WD
Total Lift
97 stock, 3” on 87
Total Drop
N/A
Tire Size
235/75-15
My credo
Never put off ‘til tomorrow what you can put off indefinitely
On your second hub, put the seal in the freezer overnight, let the hub sit in the sun most of day, then try putting it in.

At the transmission plant I just retired from, we'd get transmission cases that had machining tolerances on the tight side, and the equipment had problems getting a QC-passing press of the bearings. We had a regular kitchen chest freezer lineside, at the press, stocked with bearings which were used when we had tight cases.

Sounds crazy, I know, but it worked like a charm.
I love it! I should’ve known that as an engineer…

All through high school and college I worked in Hardware stores and a little bit in the building trades. That was more than 40 years ago, and I routinely say that my education at the Hardware Store was equal to my education in the engineering school. No better smarts then from the guys who actually have to do the stuff! Thank you!
 

Rick W

Lil Big Rig
Supporting Member
TRS Event Participant
TRS 25th Anniversary
Joined
May 15, 2020
Messages
3,001
Reaction score
5,203
Age
69
Location
Atlanta
Vehicle Year
1997 1987
Make / Model
Ranger XLT x2
Engine Type
4.0 V6
Engine Size
4.0 & 2.9
Transmission
Manual
2WD / 4WD
4WD
Total Lift
97 stock, 3” on 87
Total Drop
N/A
Tire Size
235/75-15
My credo
Never put off ‘til tomorrow what you can put off indefinitely
I’ve been working down the list of stuff I want to do before nationals, and once again, I started with about 35 or six items, I’ve done 20+, and now I have 32 items. It never ends, ain’t it great?

I went through the wheel bearings on the truck with the extra axle, and now I’m working on the trailer. Front axle is an idler axle, and the rear axle is a 7 inch brake axle. (remember it was a Coleman pop-up camper at birth). Idler axles just needed a little cleanup, and I put new grease and seals on them.

When I removed drums from the brake axle, the mechanism has surface rust, but was actually in pretty good shape. The friction layer of the brake shoes had popped loose on three of the four shoes, and I’m assuming it’s 3/4 worn down. The drums were very clean, no metal to metal, so I’m assuming the friction surface just popped off from moisture, while the axle was sitting for a few years.

I ordered two new complete brake kits, and an extra set of pads to rebuild the existing brakes.

Question: Does anybody have any wisdom on whether I should put the new brakes on the front axle or on the back axle? The existing brakes will be rebuilt, but I’ll be trusting the new ones a little bit more.

IMG_2200.jpeg
IMG_2199.jpeg
 
Last edited:

Rick W

Lil Big Rig
Supporting Member
TRS Event Participant
TRS 25th Anniversary
Joined
May 15, 2020
Messages
3,001
Reaction score
5,203
Age
69
Location
Atlanta
Vehicle Year
1997 1987
Make / Model
Ranger XLT x2
Engine Type
4.0 V6
Engine Size
4.0 & 2.9
Transmission
Manual
2WD / 4WD
4WD
Total Lift
97 stock, 3” on 87
Total Drop
N/A
Tire Size
235/75-15
My credo
Never put off ‘til tomorrow what you can put off indefinitely
I’ve been working down the list of stuff I want to do before nationals, and once again, I started with about 35 or six items, I’ve done 20+, and now I have 32 items. It never ends, ain’t it great?

I went through the wheel bearings on the truck with the extra axle, and now I’m working on the trailer. Front axle is an idler axle, and the rear axle is a 7 inch brake axle. (remember it was a Coleman pop-up camper at birth). Idler axles just needed a little cleanup, and I put new grease and seals on them.

When I removed drums from the brake axle, the mechanism has surface rust, but was actually in pretty good shape. The friction layer of the brake shoes had popped loose on three of the four shoes, and I’m assuming it’s 3/4 worn down. The drums were very clean, no metal to metal, so I’m assuming the friction surface just popped off from moisture, while the axle was sitting for a few years.

I ordered two new complete brake kits, and an extra set of pads to rebuild the existing brakes.

Question: Does anybody have any wisdom on whether I should put the new brakes on the front axle or on the back axle? The existing brakes will be rebuilt, but I’ll be trusting the new ones a little bit more.

View attachment 112483View attachment 112484
And yes, I know the magnet in that picture is slid on backwards.
 

Rick W

Lil Big Rig
Supporting Member
TRS Event Participant
TRS 25th Anniversary
Joined
May 15, 2020
Messages
3,001
Reaction score
5,203
Age
69
Location
Atlanta
Vehicle Year
1997 1987
Make / Model
Ranger XLT x2
Engine Type
4.0 V6
Engine Size
4.0 & 2.9
Transmission
Manual
2WD / 4WD
4WD
Total Lift
97 stock, 3” on 87
Total Drop
N/A
Tire Size
235/75-15
My credo
Never put off ‘til tomorrow what you can put off indefinitely
IMG_2201.jpeg


The trailer axles are back together with good bearings, a lot of grease and new seals. I don’t really need the brakes if I’m not carrying anything, but if they’re here before, National and I have the time, I’ll do that to.

I finished (before the 95° finished me) by modifying my trailer jack legs to use 10 inch pneumatic casters. I also have static legs for when I just park or show it. These casters don’t look exactly right, but I had to have them for moving it around.

I had the 8 inch solid wheels, but they kept hanging up on the bricks or any twig that was in the driveway. I haven’t pushed it around, but I can already tell it’s going to be infinitely better. All I ever have to do is turn it around in the driveway by hand, but I’m guessing the weight is 6 or 700 pounds or more on those legs. It’s not a tongue weight issue because of the way it sits over the second axle of the truck.

IMG_2202.jpeg


I did some other little things, a bunch of them, not all related to this truck or going to the nationals. These caster wheels are the last “I have to do it“ items. I’ve got 25 more things to do, but they’re all cosmetic upgrades or more toys or whatever.
 

Rick W

Lil Big Rig
Supporting Member
TRS Event Participant
TRS 25th Anniversary
Joined
May 15, 2020
Messages
3,001
Reaction score
5,203
Age
69
Location
Atlanta
Vehicle Year
1997 1987
Make / Model
Ranger XLT x2
Engine Type
4.0 V6
Engine Size
4.0 & 2.9
Transmission
Manual
2WD / 4WD
4WD
Total Lift
97 stock, 3” on 87
Total Drop
N/A
Tire Size
235/75-15
My credo
Never put off ‘til tomorrow what you can put off indefinitely
A lot of little details, it never ends. Lady Gaga and Bennie Goodman helped. Interesting contrast.

I was concerned when those heavy duty pneumatic casters appeared to be under a pretty good strain. Then I realized I had it jacked up so high that I actually had the front axle off the ground! sits much better when you level it out. I also drilled a hole through both of them so I can slide a 1/4–20 bolt through, and I zip tied the bolts to the ear of the caster with a little nylon string so I don’t lose them. I won’t leave them on when I ride down the road, but as I was building it, one of them kept dropping off.

I bought four keyed alike Truckbox locks a while back. I put the lock in the toolbox under the trailer. With time, I’ll change them all out to the same key except the weather guard boxes. Different kind of lock, but both of my weather guards keyed the same. Fewer keys in the pocket.

I also had one lug nut cross threaded and frozen on the stud in the brake axle, the stud would come out with the nut. It probably would’ve held forever, just one of those things that makes me nuts.

IMG_2210.jpeg
IMG_2209.jpeg


I ran a dye over both ends of the stud, problem solved.

I think I’m done with everything on the trailer, remember I finished it the night before I went to nationals last year. Before paint touch up, I checked all my welds. With one exception, I’m sure they’re all strong enough, just not the prettiest. So I did a little more grinding and welding. There was one spot I completely missed on the tongue, that if I didn’t have white hair already, would have turned my hair white! Not really, but I’m glad I caught it.

I flipped over to the truck. I have to wire a few things to match the trailer, like the trailer brake controller. It’s all installed, but the wires either dead end in the toolbox, or I have them hanging in a loop under the frame by the toolbox. That’s the next step.

I also took the time to take the back off a clip-on-the-visor lighted mirror that I’ve had probably since high school, and cut it in a customs shape, so I could slip it under the shift housing. Then I cut a plastic peanut butter jar to the right height, and glued it and screwed it to that plastic plate.

IMG_2212.jpeg

IMG_2213.jpeg

IMG_2214.jpeg


Now it will hold a big gulp, and it’s where I want it within my reach. There is no detail too small to not be rigged.

Probably the best thing I did was put a Big Bad Voodoo Daddy CD in the unit, so I can properly boogie down the road as this thing gets finished up!

The little details will kill you. Baby steps.
 

Rick W

Lil Big Rig
Supporting Member
TRS Event Participant
TRS 25th Anniversary
Joined
May 15, 2020
Messages
3,001
Reaction score
5,203
Age
69
Location
Atlanta
Vehicle Year
1997 1987
Make / Model
Ranger XLT x2
Engine Type
4.0 V6
Engine Size
4.0 & 2.9
Transmission
Manual
2WD / 4WD
4WD
Total Lift
97 stock, 3” on 87
Total Drop
N/A
Tire Size
235/75-15
My credo
Never put off ‘til tomorrow what you can put off indefinitely
Next phase is some wiring, but…

Upstairs air conditioning, where I mostly live, was acting funny and that’s not good in Georgia. I waited until this morning so I could go up into the attic before it was 200°, and fortunately it wasn’t anything serious.

I had to do a couple working for a living things, then it was just too cotton Pickin hot.

I went out about five, and I pulled the radio out to try to figure out why I didn’t have any lights on the radio. I had looked up the wiring schematics before hand. When I opened it up, they were a few wires that went nowhere, and there were a couple of different adapters.

IMG_2237.jpeg
IMG_2236.jpeg
IMG_2239.jpeg


I looked up my “$50 97 ranger OEM AM/FM, cd, cassette,” and it turns out it’s a 2001 head unit. It sounds great and everything works, but the wiring does not go color to color. Everything was working great except the illumination. I did trace down that the illumination wire was broken off of an aftermarket splice.

So I connected it, and it blew a fuse. I almost blew a fuse. I had a Bahama breeze fan blowing right on me and I was still roasting. I went through all the wiring schematics for the 97 truck, and for the 2001 radio, and this little plug that I think was aftermarket that went into the back of the radio, and I finally figured out that the radio ground and the illumination ground were cross wired. I don’t know why a ground isn’t a ground, but when I reversed them and connected them properly, everything worked. I don’t know if I would’ve stuck it out in the heat if it was just the Radio, but when I blew the fuse, I lost all my dash lights.

I also got to mount four more of the high intensity strobes and get them half wired.

Baby steps…
 

Rick W

Lil Big Rig
Supporting Member
TRS Event Participant
TRS 25th Anniversary
Joined
May 15, 2020
Messages
3,001
Reaction score
5,203
Age
69
Location
Atlanta
Vehicle Year
1997 1987
Make / Model
Ranger XLT x2
Engine Type
4.0 V6
Engine Size
4.0 & 2.9
Transmission
Manual
2WD / 4WD
4WD
Total Lift
97 stock, 3” on 87
Total Drop
N/A
Tire Size
235/75-15
My credo
Never put off ‘til tomorrow what you can put off indefinitely
High intensity strobes wired and checked. Low intensity strobes are wired, but they are only on the trailer, and I have to back up to it to check it (but I’m not too worried).
Truck side of trailer brakes are wired. I’m waiting for the new hubs.
 

Rick W

Lil Big Rig
Supporting Member
TRS Event Participant
TRS 25th Anniversary
Joined
May 15, 2020
Messages
3,001
Reaction score
5,203
Age
69
Location
Atlanta
Vehicle Year
1997 1987
Make / Model
Ranger XLT x2
Engine Type
4.0 V6
Engine Size
4.0 & 2.9
Transmission
Manual
2WD / 4WD
4WD
Total Lift
97 stock, 3” on 87
Total Drop
N/A
Tire Size
235/75-15
My credo
Never put off ‘til tomorrow what you can put off indefinitely
I’m sorry if I startled you guys….

I wired the air horns today. Before now they were pretty much eye candy.

IMG_2263.jpeg
IMG_2262.jpeg


I wanted the deep long horn, and the screech of the short horns, but it’s a mismatched set, and I didn’t want five of them up there. The two little air compressors were identical, but I had to use both of them. Yep, it works now!

I used the last corner of that original free truck box to make a housing for inside the toolbox. I had already run the airline from the roof down the back of the cab along the headache rack and I just had to feed these through the bottom

IMG_2254.jpeg
IMG_2255.jpeg


I made a couple cleats for the bottom of the housing to hold it in the toolbox so it won’t get bashed around. One of the biggest pains in the butt was getting the hose in the grommet through the aluminum. The housing is open about 1/8 to 1/4 inch all the way around the edge because I didn’t know how much air these things actually needed.

IMG_2259.jpeg
IMG_2260.jpeg


I had already run the wire from the console with the CB by the rearview mirror, but I had to add a relay. Without the relay, it kind of just went “beep.” With the relay, well, except for the guys on the West Coast, you probably heard it….

IMG_2261.jpeg


When I did the overhead console, I wired a push button micro switch, facing up, under a home made little lever, sticking out the side over the driver (tiny). Somewhere through the decades, I picked up one of those pens on the chain that are stuck to the counter like you see in a bank. I stuck the little pad to the windshield left of the mirror, and hooked the chain on the lever, so it hangs down for an easy grab.

IMG_2266.jpeg


I was thinking of just hanging the chain with a tassel on it, but having done that trick before, it flopped all over the place. This is right where you can grab it to blast someone off the road (not that I would ever do that).
 

sgtsandman

Aircraft Fuel Tank Diver
TRS Forum Moderator
U.S. Military - Active
TRS 20th Anniversary
TRS Event Participant
Ham Radio Operator
GMRS Radio License
TRS 25th Anniversary
Joined
Mar 11, 2017
Messages
13,657
Reaction score
14,210
Location
Aliquippa, PA
Vehicle Year
2011/2019
Make / Model
Ranger XLT/FX4
Engine Size
4.0 SOHC/2.3 Ecoboost
2WD / 4WD
4WD
Total Lift
Pre-2008 lift/Stock
Tire Size
31X10.5R15/265/65R17
Are the zip ties on the roof rack UV resistant? If not, they might last about a year before they get brittle and break.
 

Sponsored Ad


Sponsored Ad

Staff online

Today's birthdays

Member & Vendor Upgrades

For a small yearly donation, you can support this forum and receive a 'Supporting Member' banner, or become a 'Supporting Vendor' and promote your products here. Click the banner to find out how.

Latest posts

Truck of The Month


TexasDuck66
July Truck of The Month

Recently Featured

Want to see your truck here? Share your photos and details in the forum.

25th Anniversary Merch

Follow TRS On Instagram

TRS Events

25th Anniversary Sponsors

Check Out The TRS Store


Sponsored Ad


Sponsored Ad

Sponsored Ad


Amazon Deals

Top