The_Ghost
New Member
- Joined
- Aug 14, 2009
- Messages
- 96
- Reaction score
- 1
- Points
- 0
- Location
- So Cal
- Vehicle Year
- 1994
- Make / Model
- Ford
- Engine Size
- 2.3Lima Twin-Spark
- Transmission
- Manual
Hey guys. I realize it’s been a while, but I’ve made a LOT of changes to the truck in the past few weeks, so I figured it was high time for another photo update. I’m sorry it’s not clean, but whatever.
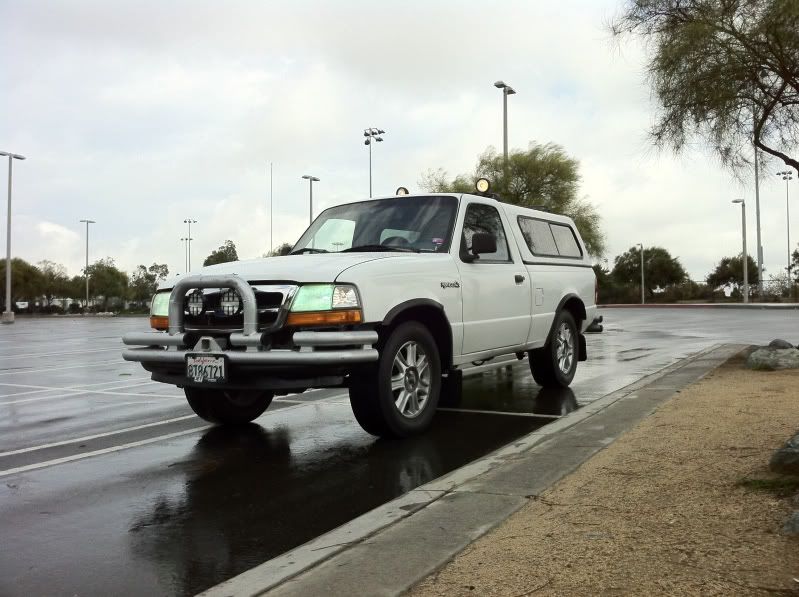
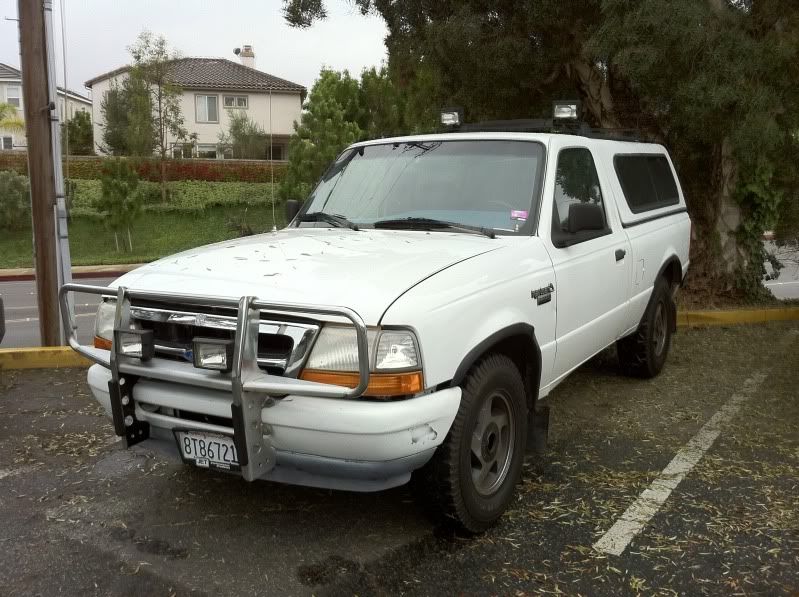
So, my truck is even more of a hodge-podge of parts than ever— it still has 98-00 front lights, 2WD-type chrome Grill and hood on its 94 shortbed single cab fleetside chassis and the interior is blue 89-93 style.
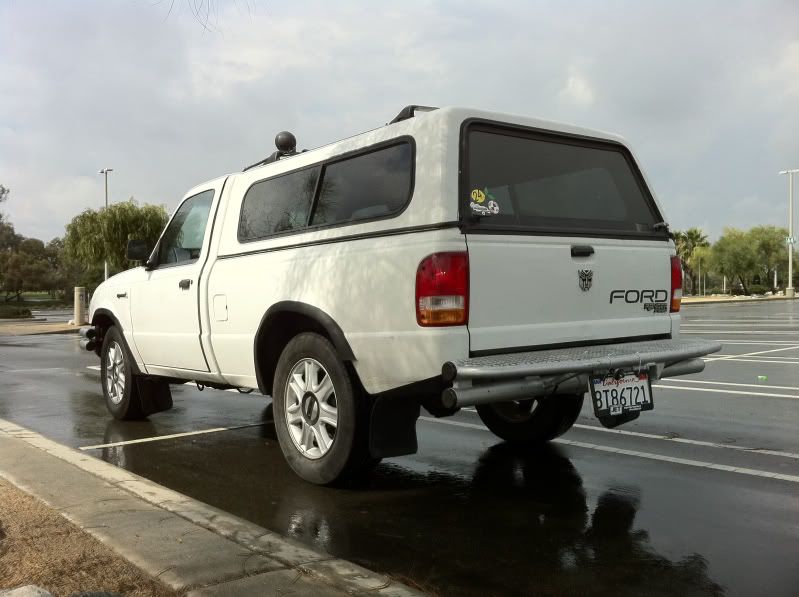
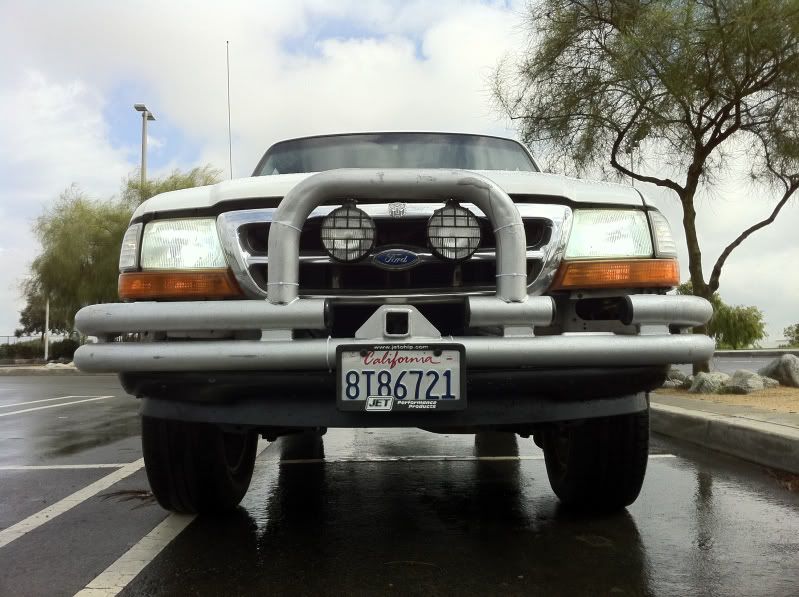
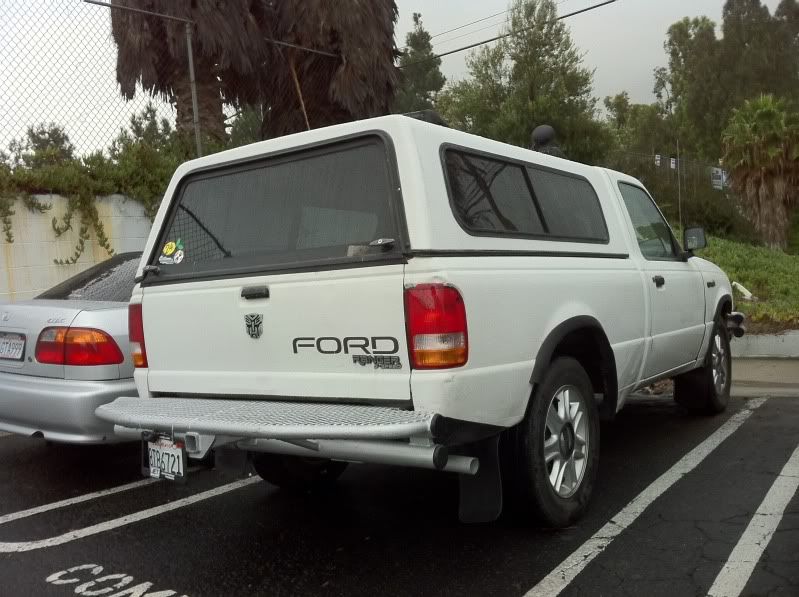
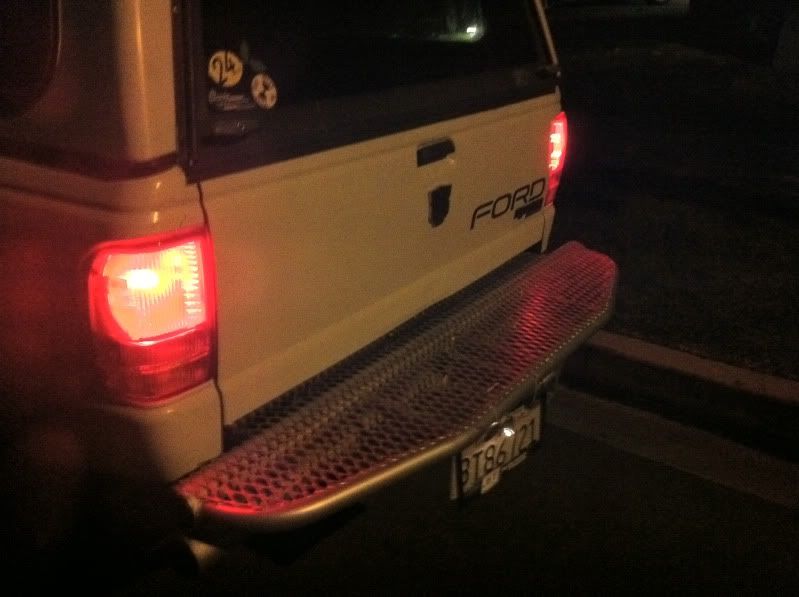
I replaced the original 94 front bumper and 82-93 style grill guard/pushbar and original 94 bumper (both of which were bent) with a set of front and rear bumpers from a 2002-ish San Diego Beach Patrol Ranger. With some convincing and light modifications, I mounted the bumpers without any major issues. I snagged the set for $200 total, a steal considering these things are SERIOUSLY heavy duty construction and pretty well made. Whoever fabricated them knew what they were doing. I figure having a similar set made would cost an arm and a leg.
The front bumper was pretty easy though after installing it, the lower section seemed a bit plain, so I pulled the lower valence and mounted it flush against the bottom tube of the front bumper and pulled some internal bracketry from the original bumper to make some improvised basic skid plates/armor.
With the new round-looking bumpers, my square lights just didn’t seem appropriate anymore, so I replaced the original lighting with two 5-1/2” round lamps on the bumper and two 4” round auxiliary lamps on the roof.
Next up was the wheels. My BF Goodrich All-Terrain T/As were basically bald and not a lot of fun since it’s been wet here in SoCal the past few days. I then replaced the 15” wheels I originally pulled from a ‘94 Eddie Bauer Explorer with a set of big-ol 17” wheels from a Lincoln Aviator and Michelin Pilot LTX’s to get me through the wet winter. I then modified the Aviator center caps and covered the Lincoln lettering and emblems by painting them with the classic Ford Truck (-) symbol and used a holesaw to cut a 2” opening in the front two to allow the hub grease covers to pass through.
The last thing to come is a set of proper fender flares from a correct-gen Ranger 4x4 to replace the early Explorer Sport flare moldings currently covering the wheel arches.
Check out the pics. I’ve included a “before” pic for reference.
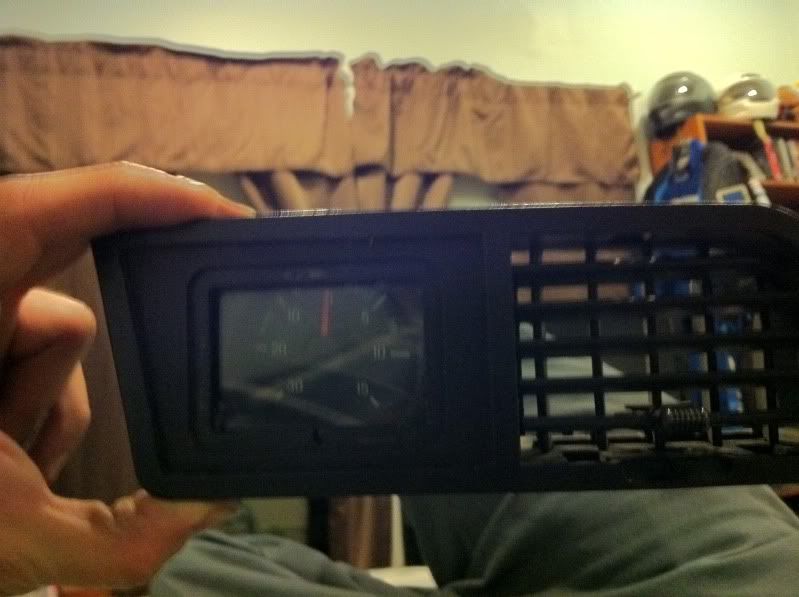
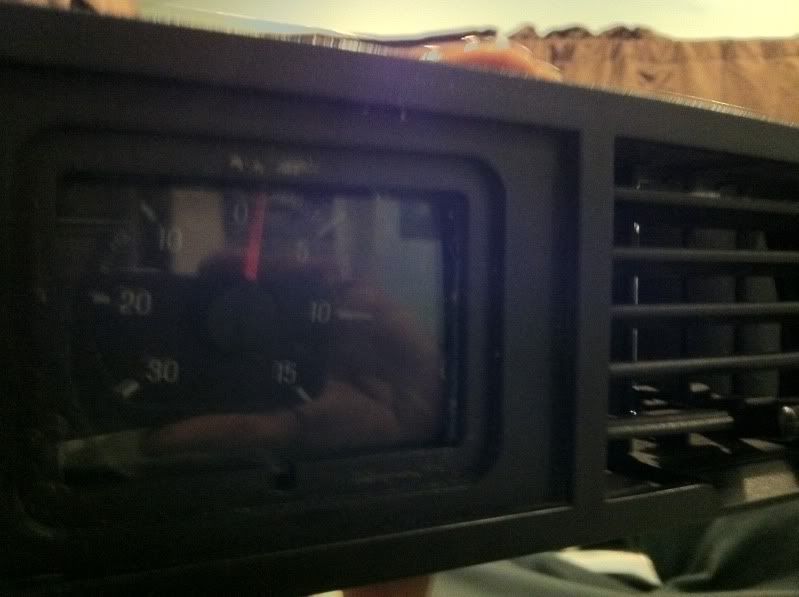
On another note, those of you with 88-93 models remember the fake center dash vent in place of the Explorer’s 4WD button panel? Well, I had some parts from an 89-93 Thunderbird Supercoupe and have modified the Thunderbird SC’s mechanical Vacuum/Boost Gauge to fit where the original 4x4 switch panel insert was. I cut down the original cluster and cluster bezel and cut up a lens (which shattered, the pieces of which I then ground into a uniform square shape) and got it all behind that panel. I then pulled a couple of instrument cluster illumination bulbs and their little twist-in sockets, soldered on positive and negative wires and am getting ready to position those tonight. Once in place, the gauge will light up exactly the same color as the rest of my instrumentation, for a clean OEM look.
The gauge reads 15 PSI boost and 30 in/hg vacuum, which though not useful for boost, is useful for deciding whether or not to downshift when going up hills and it’s a cool extra gauge that should look almost factory once installed.
Thoughts? Comments?

Before:
Vacuum gauge:
Best,
Ghost
So, my truck is even more of a hodge-podge of parts than ever— it still has 98-00 front lights, 2WD-type chrome Grill and hood on its 94 shortbed single cab fleetside chassis and the interior is blue 89-93 style.
I replaced the original 94 front bumper and 82-93 style grill guard/pushbar and original 94 bumper (both of which were bent) with a set of front and rear bumpers from a 2002-ish San Diego Beach Patrol Ranger. With some convincing and light modifications, I mounted the bumpers without any major issues. I snagged the set for $200 total, a steal considering these things are SERIOUSLY heavy duty construction and pretty well made. Whoever fabricated them knew what they were doing. I figure having a similar set made would cost an arm and a leg.
The front bumper was pretty easy though after installing it, the lower section seemed a bit plain, so I pulled the lower valence and mounted it flush against the bottom tube of the front bumper and pulled some internal bracketry from the original bumper to make some improvised basic skid plates/armor.
With the new round-looking bumpers, my square lights just didn’t seem appropriate anymore, so I replaced the original lighting with two 5-1/2” round lamps on the bumper and two 4” round auxiliary lamps on the roof.
Next up was the wheels. My BF Goodrich All-Terrain T/As were basically bald and not a lot of fun since it’s been wet here in SoCal the past few days. I then replaced the 15” wheels I originally pulled from a ‘94 Eddie Bauer Explorer with a set of big-ol 17” wheels from a Lincoln Aviator and Michelin Pilot LTX’s to get me through the wet winter. I then modified the Aviator center caps and covered the Lincoln lettering and emblems by painting them with the classic Ford Truck (-) symbol and used a holesaw to cut a 2” opening in the front two to allow the hub grease covers to pass through.
The last thing to come is a set of proper fender flares from a correct-gen Ranger 4x4 to replace the early Explorer Sport flare moldings currently covering the wheel arches.
Check out the pics. I’ve included a “before” pic for reference.
On another note, those of you with 88-93 models remember the fake center dash vent in place of the Explorer’s 4WD button panel? Well, I had some parts from an 89-93 Thunderbird Supercoupe and have modified the Thunderbird SC’s mechanical Vacuum/Boost Gauge to fit where the original 4x4 switch panel insert was. I cut down the original cluster and cluster bezel and cut up a lens (which shattered, the pieces of which I then ground into a uniform square shape) and got it all behind that panel. I then pulled a couple of instrument cluster illumination bulbs and their little twist-in sockets, soldered on positive and negative wires and am getting ready to position those tonight. Once in place, the gauge will light up exactly the same color as the rest of my instrumentation, for a clean OEM look.
The gauge reads 15 PSI boost and 30 in/hg vacuum, which though not useful for boost, is useful for deciding whether or not to downshift when going up hills and it’s a cool extra gauge that should look almost factory once installed.
Thoughts? Comments?
Before:
Vacuum gauge:
Best,
Ghost
") well, i was also considering spacers.
well, i was also considering spacers.