• Welcome Visitor! Please take a few seconds and Register for our forum. Even if you don't want to post, you can still 'Like' and react to posts.

The Road Ranger. 1997 SEMI


Rick W

Well-Known Member
Supporting Member
TRS Event Participant
Joined
May 15, 2020
Messages
2,406
Reaction score
3,901
Points
113
Age
68
Location
Atlanta
Vehicle Year
1997 1987
Make / Model
Ranger XLT x2
Engine Type
4.0 V6
Engine Size
4.0 & 2.9
Transmission
Manual
2WD / 4WD
4WD
Total Lift
97 stock, 3” on 87
Total Drop
N/A
Tire Size
235/75-15
My credo
Never put off ‘til tomorrow what you can put off indefinitely


alwaysFlOoReD

Forum Staff Member
TRS Forum Moderator
TRS Banner 2012-2015
TRS 20th Anniversary
Joined
Apr 13, 2009
Messages
13,955
Reaction score
5,097
Points
113
Location
Calgary, Canada
Vehicle Year
'91, '80, '06
Make / Model
Ford, GMC,Dodge
Engine Size
4.0,4.0,5.7
Transmission
Manual
2WD / 4WD
4WD
Mount the winch under the deck and run the line thru or beside the 2" receiver tube.
 

Rick W

Well-Known Member
Supporting Member
TRS Event Participant
Joined
May 15, 2020
Messages
2,406
Reaction score
3,901
Points
113
Age
68
Location
Atlanta
Vehicle Year
1997 1987
Make / Model
Ranger XLT x2
Engine Type
4.0 V6
Engine Size
4.0 & 2.9
Transmission
Manual
2WD / 4WD
4WD
Total Lift
97 stock, 3” on 87
Total Drop
N/A
Tire Size
235/75-15
My credo
Never put off ‘til tomorrow what you can put off indefinitely
Finally, The last thing I did before I took sweet pea out of the home for a while, was to weld that balance bar in place. I didn’t realize until I went to do it, but my ground lead was about 15 feet short of where it needed to get to.

I know all you guys have the fancy wire feed welders and such, and I’m working with a 40 year old buzz box stick welder. It has rarely failed me, but that is because I understand all the principles and applications from studying engineering.

If you want good welds, you have to have a good, professional ground. And remember Aluminum conducts electricity better than steel.

The balance bar is not a critical part of the structural safety of the trailer and truck, it’s simply keeps the fat girls in bikinis from toppling off the upper deck. So I opted for the gravity only ground.

IMG_1261.jpeg
IMG_1262.jpeg

IMG_1268.jpeg


If it was a critical part of the safety structure of the rig, I would have zip tied the aluminum pieces together for the best possible ground before I welded it.

Look and learn…
 

Rick W

Well-Known Member
Supporting Member
TRS Event Participant
Joined
May 15, 2020
Messages
2,406
Reaction score
3,901
Points
113
Age
68
Location
Atlanta
Vehicle Year
1997 1987
Make / Model
Ranger XLT x2
Engine Type
4.0 V6
Engine Size
4.0 & 2.9
Transmission
Manual
2WD / 4WD
4WD
Total Lift
97 stock, 3” on 87
Total Drop
N/A
Tire Size
235/75-15
My credo
Never put off ‘til tomorrow what you can put off indefinitely
Mount the winch under the deck and run the line thru or beside the 2" receiver tube.
Long day, my head is swimming, but I think I’m coming to that same conclusion.

After work work tomorrow, I need to go out and start doing some measuring and figuring out where I would mount a pulley if I put the winch underneath. Two issues:

One of the main reasons I had to rebuild this whole part of the trailer was because the “fifth wheel” assembly didn’t clear the back fenders, and I dented both of them. I redid the “fifth wheel,” and solved that problem. There isn’t a lot of room underneath there to do anything and maintain the ability to put the truck at 90° to the trailer without bashing the fenders. But I like that idea if I can make it all clear.

Then there is the whole issue of a hole in the upper deck when wearing high heels, a pulley that somebody could slip on, a cable one could trip on, and the common sense and coordination of the fat chicks I have in mind. If I’m successful at pulling that part off, they may not be the sharpest tools in the shed…
 

sgtsandman

Aircraft Fuel Tank Diver
TRS Forum Moderator
U.S. Military - Active
TRS 20th Anniversary
TRS Event Participant
Ham Radio Operator
GMRS Radio License
Joined
Mar 11, 2017
Messages
12,861
Reaction score
12,651
Points
113
Location
Aliquippa, PA
Vehicle Year
2011/2019
Make / Model
Ranger XLT/FX4
Engine Size
4.0 SOHC/2.3 Ecoboost
2WD / 4WD
4WD
Total Lift
Pre-2008 lift/Stock
Tire Size
31X10.5R15/265/65R17
Long day, my head is swimming, but I think I’m coming to that same conclusion.

After work work tomorrow, I need to go out and start doing some measuring and figuring out where I would mount a pulley if I put the winch underneath. Two issues:

One of the main reasons I had to rebuild this whole part of the trailer was because the “fifth wheel” assembly didn’t clear the back fenders, and I dented both of them. I redid the “fifth wheel,” and solved that problem. There isn’t a lot of room underneath there to do anything and maintain the ability to put the truck at 90° to the trailer without bashing the fenders. But I like that idea if I can make it all clear.

Then there is the whole issue of a hole in the upper deck when wearing high heels, a pulley that somebody could slip on, a cable one could trip on, and the common sense and coordination of the fat chicks I have in mind. If I’m successful at pulling that part off, they may not be the sharpest tools in the shed…
If you go under the deck, you could use a fairlead, roller or solid depending on the type of rope your winch has. Roller for wire rope. Solid for synthetic rope. If you can resolve the clearance issues.
 

Rick W

Well-Known Member
Supporting Member
TRS Event Participant
Joined
May 15, 2020
Messages
2,406
Reaction score
3,901
Points
113
Age
68
Location
Atlanta
Vehicle Year
1997 1987
Make / Model
Ranger XLT x2
Engine Type
4.0 V6
Engine Size
4.0 & 2.9
Transmission
Manual
2WD / 4WD
4WD
Total Lift
97 stock, 3” on 87
Total Drop
N/A
Tire Size
235/75-15
My credo
Never put off ‘til tomorrow what you can put off indefinitely
1/4” stainless cable.

And looky here!!:

IMG_1271.jpeg
IMG_1274.jpeg


Winch is sitting in the OEM propane tray from when this was a pop-up camper. It isn’t strong enough to hold the winch, but the winch only sticks up about 3/4 of an inch above the deck in that location.

Everything else around it, plates, bracing and whatever, I added to provide the strength to the receiver that holds the pin/ball.

IMG_1271.jpeg


The blue circle is a 3/8 inch or half inch steel plate, welded between the two sides of the tongue, and then welded to the Receiver hitch I used underneath. It’s probably the most solid piece on the whole trailer. If I mount the winch to that, it’s not going anywhere.

The yellow circle just shows a deep open space between the plate and the propane tray, deep enough to mount the winch, so it doesn’t interfere with the deck.

If I mount a pulley or roller further forward, the yellow circle, and I put a roller on the edge of the upper deck like @sgtsandman suggested, I’ll be pulling from far enough forward that I won’t interfere with the hook up on the riser wall. With a little trap door, the whole thing would be concealed underneath.

When can you guys come down and put it in?
 
Last edited:

Rick W

Well-Known Member
Supporting Member
TRS Event Participant
Joined
May 15, 2020
Messages
2,406
Reaction score
3,901
Points
113
Age
68
Location
Atlanta
Vehicle Year
1997 1987
Make / Model
Ranger XLT x2
Engine Type
4.0 V6
Engine Size
4.0 & 2.9
Transmission
Manual
2WD / 4WD
4WD
Total Lift
97 stock, 3” on 87
Total Drop
N/A
Tire Size
235/75-15
My credo
Never put off ‘til tomorrow what you can put off indefinitely
Ok, forget everything I’ve been talking about. Problem solved. I appreciate all the input, and I’m sorry to shift gears, but when I was climbing on it today, I had the epiphany.

I have these two winches, brand new in the box (Paid $50 for both of them along with a basket full of cables and straps and hooks, etc., all brand new);

IMG_1277.jpeg
IMG_1275.jpeg


I was going to use the 2500 pound winch. It mounts to a mounting plate and gets bolted in permanently. Part of my interest was the “it looks cool“ factor.

The 2000 pound winch, I believe is made for pulling boats up onto their trailers, but it’s made by the same people, and it’s almost the identical mechanism, it just looks different. It’s portable. You can bolt it down permanently, but the way it comes in the box there is an eye plate (??? see box cover) that hooks over a hook or post. You can work it directly, you can work it remotely, you can even winch it by hand. It comes with a couple of clamps like battery jumper cables.

Instead of mounting the winch directly on the very tip of the front of the trailer on the upper deck, all I have to do is put a pin, or a post, or a hook there, and then I can hook this winch on, and run it from the battery that’s in the truck toolbox 3 feet away.

I’ll be amazed if I ever use it more than three or four times a year. 99% of the time I will go for the cool factor, but I was worried about leaving the winch out in the open both for the weather, and also for vandalism or theft.

When this portable winch is hooked on the front of the trailer, it will look like a little turtle up front on top of the deck, and the cable can run over the top of everything. It’s also a quarter inch stainless braided cable.

once I figured out that game plan, how to finish up the the decking on the upper deck, and the supports underneath all made sense. I got about a third done and ran out of daylight.
 

Rick W

Well-Known Member
Supporting Member
TRS Event Participant
Joined
May 15, 2020
Messages
2,406
Reaction score
3,901
Points
113
Age
68
Location
Atlanta
Vehicle Year
1997 1987
Make / Model
Ranger XLT x2
Engine Type
4.0 V6
Engine Size
4.0 & 2.9
Transmission
Manual
2WD / 4WD
4WD
Total Lift
97 stock, 3” on 87
Total Drop
N/A
Tire Size
235/75-15
My credo
Never put off ‘til tomorrow what you can put off indefinitely
Btw, I think the heaviest thing I will ever winch up on the trailer will be the proposed a Raith Kasket Kitchen. Even with the casket full of drinks, I’d be amazed if it tips 1000 pounds. And I won’t be lifting it, I’ll be rolling it up ramps.
 
Last edited:

Rick W

Well-Known Member
Supporting Member
TRS Event Participant
Joined
May 15, 2020
Messages
2,406
Reaction score
3,901
Points
113
Age
68
Location
Atlanta
Vehicle Year
1997 1987
Make / Model
Ranger XLT x2
Engine Type
4.0 V6
Engine Size
4.0 & 2.9
Transmission
Manual
2WD / 4WD
4WD
Total Lift
97 stock, 3” on 87
Total Drop
N/A
Tire Size
235/75-15
My credo
Never put off ‘til tomorrow what you can put off indefinitely
Monsoons in Atlanta again, with more scheduled for tomorrow through lunch, so not much progress.

In between the raindrops, I did take out the scratch pad, and scratched my head at the same time, and I think I figured out what kind of aluminum structure I can build underneath the upper deck that will be light enough to flip it up and down easily, but strong enough for that portable winch, and to operate it safely. And of course, it all has to be done with stuff that’s already in the shed of miracles.

My heart is shifting to working on the Raith Kasket Kitchen, and I was thinking a lot about cutting that aluminum. I know I bought that Dewalt saw around 90 or 91, and I think it’s only the second blade I’ve had on it, a carbide tipped cross cut blade for framing and such. So, Lincoln and I went down to Harbor Freight today, and I bought a high tooth count finishing blade just for the Aluminum:

IMG_1286.png


$10, woo hoo! It’s a lot more teeth than the crosscut blade I was using, and, of course, all the teeth will be sharp. I’m hoping it will clean up my cuts. And BTW, I’m going to use the channel with the open side facing out. The cuts are all on the flat side, so they’ll be concealed. If anything is exposed, I will send it down flat.

My bandsaw has been doing fine on the smaller pieces, and the chopsaw is doing fine on pieces 10 foot or less, and my tablesaw is doing fine cutting things lengthwise, but a lot of the channel work will be out in the driveway on sawhorses. I have a feeling it’s going to be a very effective $10 investment.

I come and go by my back door, the shed of miracles is out behind the house, and the truck is parked between the two. When I got back from nationals, I lowered the front of the lower deck, a couple inches, and now I have squared up the upper deck, even though it’s not finished. It looks like it is supposed to light ok now. When I come out of the house and look at it from that three-quarter side back angle, I’m pretty excited about getting it back on the road again soon.
 

Rick W

Well-Known Member
Supporting Member
TRS Event Participant
Joined
May 15, 2020
Messages
2,406
Reaction score
3,901
Points
113
Age
68
Location
Atlanta
Vehicle Year
1997 1987
Make / Model
Ranger XLT x2
Engine Type
4.0 V6
Engine Size
4.0 & 2.9
Transmission
Manual
2WD / 4WD
4WD
Total Lift
97 stock, 3” on 87
Total Drop
N/A
Tire Size
235/75-15
My credo
Never put off ‘til tomorrow what you can put off indefinitely
The rain tapered off about 3 PM, and I went out between the raindrops determined to get that upper deck put back together. I got 90% of the way home.

The biggest issue was my own sloppiness when I cut the trailer section, and stepped it up (36 hours before the Truck Nationals). I used the drops from the axle frame to make the risers, and I didn’t realize they were different lengths by 3/4”. Remember, I built the tongue upside down, and then flipped it over and welded it to the front of the remaining trailer. So now I have had to go to great lengths (yuk yuk) to level out the deck on top. Done, I just have to clean it up cosmetically on either side.

In the process, I got rid of all of the pressure treated temporary stuff, and I used all kinds of my salvaged Aluminum. The center line, that will carry the load of the winch, is a piece of the 4“ x 1 1/2“ channel. Either side of that I used some 1 1/2 inch aluminum, the rectangular stuff with a slot in it that you use to hang curtains in a hospital room. It’s fairly stout, but mostly it was the right dimension to keep the deck level. I did cut some small one and a half in.² square pressure treated blocks to slide inside that aluminum at the pressure points. It’s both functional and a tribute to the original pressure treated lumber. And I preserved the original one and a half in.² tubing on both sides.

IMG_1289.jpeg
IMG_1288.jpeg


My concern with the winch was either pulling in the front end, or having the whole deck flip up as whatever I was pulling up on the main deck passed the horizontal point of the cable pulling it.

Using the aluminum channel down the middle strengthened the whole center section lengthwise, so I’m no longer afraid of crushing it lengthwise. As regards having the deck flipping up, I ended up drilling and tapping the steel arrow point part of the frame (that doesn’t tilt up, that supports everything), so I could put a half inch eyebolt through the deck into the steel frame. The steel at that point was only about 3/16 thick, so I threaded a nut onto the eyebolt, and threaded the eyebolt into the hole, ran the nut down snug, and then I welded the nut to the plate. That gives me about 3/4 of an inch of thread on that plate that is just a few inches from the frame on either side.

With a steel washer on the eyebolt, it holds the upper deck down at the point the table would be pulling on it. I don’t plan on ever using the winch at any significant angle to the sides, or up and down, so the loading on this eyebolt is minimal. I won’t run the cable through the eye, but rather I will attach the cable to the eye with a double shackle. That will allow more than adequate side to side or up and down leeway, while still holding the deck down firmly. The deck is also held down at several other points with removable pins.

IMG_1290.jpeg


I had one like this the right size in the shed of miracles. I can pull the outside pin, so I can thread the eyebolt through the deck, and then run the cable through the outer shackle part. That way I don’t have to leave the eye bolt in the deck all the time.

In the first picture, I put a little piece of scrap wood behind the eye, to make it easier to see. The portable winch is just sitting on the deck right now. In this picture, though, you can see the toolbox on the back of the truck, where the second battery resides. It’s a marine battery with the threaded terminals. If I get ambitious, I will get a male/female connector that I can run through the side of the toolbox, but most likely I will just use it with the clamps that came with it.

The only thing remaining is to put a pin/bolt through the trailer to hold the winch. The winch can be permanently mounted with three 3/8 inch bolts. I like the idea of being able to remove it and keep it in the toolbox. The cleat that comes with it is designed to slip over a Trailer Ball (3/4” bolt) so I am envisioning a three-quarter inch bolt through the tip of the trailer, with a sufficient steel plate on the bottom side to spread the load across the channel, and to hold it all firmly through the upper deck.

I was surprised myself that I actually had a three-quarter inch bolt, nut, lock washer and washers in the shed of miracles, but it wasn’t long enough. I want to get a longer bolt, make a steel frame underneath the tongue that straddles the four-inch channel, and run it up through the bottom. On the top side, I want a nut to simply snug the bolt to the front of the deck, with about 2 inches of the bolt sticking up. Then I can slip the winch clevis over that, I’ll make an oversized washer, a second nut above that, and drill the bolt with a clevis pin above, on the slim chance the top nut would back off if I was distracted when winching.

A lot of tedious detail, but I’ve spent the last two weeks taking my trailer with an upper deck, and making it into a trailer with an upper deck! It was a ton of details to make it straight, level and capable of my insanity.

You can also see the front end of the casket in the pictures. Now picture that atop an aluminum frame that’s about 24 inches above the main deck. I can’t wait….
 

Rick W

Well-Known Member
Supporting Member
TRS Event Participant
Joined
May 15, 2020
Messages
2,406
Reaction score
3,901
Points
113
Age
68
Location
Atlanta
Vehicle Year
1997 1987
Make / Model
Ranger XLT x2
Engine Type
4.0 V6
Engine Size
4.0 & 2.9
Transmission
Manual
2WD / 4WD
4WD
Total Lift
97 stock, 3” on 87
Total Drop
N/A
Tire Size
235/75-15
My credo
Never put off ‘til tomorrow what you can put off indefinitely
Afterthought, but when I was climbing all over it to do these things, I realized it’s totally capable of three fat chicks dancing…

You guys dating the sharp looking gals have to step up at the Truck Nationals next year, get them to bring their wingmen….
 

sgtsandman

Aircraft Fuel Tank Diver
TRS Forum Moderator
U.S. Military - Active
TRS 20th Anniversary
TRS Event Participant
Ham Radio Operator
GMRS Radio License
Joined
Mar 11, 2017
Messages
12,861
Reaction score
12,651
Points
113
Location
Aliquippa, PA
Vehicle Year
2011/2019
Make / Model
Ranger XLT/FX4
Engine Size
4.0 SOHC/2.3 Ecoboost
2WD / 4WD
4WD
Total Lift
Pre-2008 lift/Stock
Tire Size
31X10.5R15/265/65R17
The rain tapered off about 3 PM, and I went out between the raindrops determined to get that upper deck put back together. I got 90% of the way home.

The biggest issue was my own sloppiness when I cut the trailer section, and stepped it up (36 hours before the Truck Nationals). I used the drops from the axle frame to make the risers, and I didn’t realize they were different lengths by 3/4”. Remember, I built the tongue upside down, and then flipped it over and welded it to the front of the remaining trailer. So now I have had to go to great lengths (yuk yuk) to level out the deck on top. Done, I just have to clean it up cosmetically on either side.

In the process, I got rid of all of the pressure treated temporary stuff, and I used all kinds of my salvaged Aluminum. The center line, that will carry the load of the winch, is a piece of the 4“ x 1 1/2“ channel. Either side of that I used some 1 1/2 inch aluminum, the rectangular stuff with a slot in it that you use to hang curtains in a hospital room. It’s fairly stout, but mostly it was the right dimension to keep the deck level. I did cut some small one and a half in.² square pressure treated blocks to slide inside that aluminum at the pressure points. It’s both functional and a tribute to the original pressure treated lumber. And I preserved the original one and a half in.² tubing on both sides.

View attachment 107125View attachment 107126

My concern with the winch was either pulling in the front end, or having the whole deck flip up as whatever I was pulling up on the main deck passed the horizontal point of the cable pulling it.

Using the aluminum channel down the middle strengthened the whole center section lengthwise, so I’m no longer afraid of crushing it lengthwise. As regards having the deck flipping up, I ended up drilling and tapping the steel arrow point part of the frame (that doesn’t tilt up, that supports everything), so I could put a half inch eyebolt through the deck into the steel frame. The steel at that point was only about 3/16 thick, so I threaded a nut onto the eyebolt, and threaded the eyebolt into the hole, ran the nut down snug, and then I welded the nut to the plate. That gives me about 3/4 of an inch of thread on that plate that is just a few inches from the frame on either side.

With a steel washer on the eyebolt, it holds the upper deck down at the point the table would be pulling on it. I don’t plan on ever using the winch at any significant angle to the sides, or up and down, so the loading on this eyebolt is minimal. I won’t run the cable through the eye, but rather I will attach the cable to the eye with a double shackle. That will allow more than adequate side to side or up and down leeway, while still holding the deck down firmly. The deck is also held down at several other points with removable pins.

View attachment 107127

I had one like this the right size in the shed of miracles. I can pull the outside pin, so I can thread the eyebolt through the deck, and then run the cable through the outer shackle part. That way I don’t have to leave the eye bolt in the deck all the time.

In the first picture, I put a little piece of scrap wood behind the eye, to make it easier to see. The portable winch is just sitting on the deck right now. In this picture, though, you can see the toolbox on the back of the truck, where the second battery resides. It’s a marine battery with the threaded terminals. If I get ambitious, I will get a male/female connector that I can run through the side of the toolbox, but most likely I will just use it with the clamps that came with it.

The only thing remaining is to put a pin/bolt through the trailer to hold the winch. The winch can be permanently mounted with three 3/8 inch bolts. I like the idea of being able to remove it and keep it in the toolbox. The cleat that comes with it is designed to slip over a Trailer Ball (3/4” bolt) so I am envisioning a three-quarter inch bolt through the tip of the trailer, with a sufficient steel plate on the bottom side to spread the load across the channel, and to hold it all firmly through the upper deck.

I was surprised myself that I actually had a three-quarter inch bolt, nut, lock washer and washers in the shed of miracles, but it wasn’t long enough. I want to get a longer bolt, make a steel frame underneath the tongue that straddles the four-inch channel, and run it up through the bottom. On the top side, I want a nut to simply snug the bolt to the front of the deck, with about 2 inches of the bolt sticking up. Then I can slip the winch clevis over that, I’ll make an oversized washer, a second nut above that, and drill the bolt with a clevis pin above, on the slim chance the top nut would back off if I was distracted when winching.

A lot of tedious detail, but I’ve spent the last two weeks taking my trailer with an upper deck, and making it into a trailer with an upper deck! It was a ton of details to make it straight, level and capable of my insanity.

You can also see the front end of the casket in the pictures. Now picture that atop an aluminum frame that’s about 24 inches above the main deck. I can’t wait….
Is that eye bolt in the picture a rated one or is it not expected to take a load?

I've had non-rated ones pull right open with very little load. The rated ones are a solid ring and have a work load rating right on the ring.
 

Rick W

Well-Known Member
Supporting Member
TRS Event Participant
Joined
May 15, 2020
Messages
2,406
Reaction score
3,901
Points
113
Age
68
Location
Atlanta
Vehicle Year
1997 1987
Make / Model
Ranger XLT x2
Engine Type
4.0 V6
Engine Size
4.0 & 2.9
Transmission
Manual
2WD / 4WD
4WD
Total Lift
97 stock, 3” on 87
Total Drop
N/A
Tire Size
235/75-15
My credo
Never put off ‘til tomorrow what you can put off indefinitely
The one in the picture is not rated, but it is not the one I’m going to use, mostly because it is too short, I just had it in the shed of miracles. It’s only grabbing about half the threads on the steel tongue underneath the diamond plate. I want one long enough to go all the way through the threads in the tongue, but also have threads up near the eye so from the top down, there would be the eye, a nut, a washer, the diamond plate/4” channel deck, and then full threads through the nut welded onto and extending the threaded steel plate of the tongue.

Having said all that, I’m not too worried about getting a rated eye bolt. The primary purpose is actually to anchor the diamond plate deck to the steel tongue of the trailer so it doesn’t flip up. The eye feature is a target of opportunity to keep the cable aligned, tame it a little bit in case something comes loose (and I’ll still use a cable blanket), and even hold the winch from flying on the slim chance that it may come loose. Again, 90% for cool appearance.

I think the double axle, 14 inch wheel ‘Raith trailer will be less than 1000 pounds even when loaded. I haven’t done the math, but if the ramps are 5 1/2 foot working length for a 30” inch rise, I can’t imagine the load on the cable would ever be more than than 2-300 pounds, if even that much. From similar harebrained schemes before, I think you and I could push the trailer on top of this flatbed. Hence, the lateral or up-and-down pull on that eye would be far less than that.

Having said all that, you inspired me a little bit, because if I get just a regular eye, I’ll probably tack weld the loop closed. You have to know by now that I will paint it red or yellow or something like that anyway.
 

Rick W

Well-Known Member
Supporting Member
TRS Event Participant
Joined
May 15, 2020
Messages
2,406
Reaction score
3,901
Points
113
Age
68
Location
Atlanta
Vehicle Year
1997 1987
Make / Model
Ranger XLT x2
Engine Type
4.0 V6
Engine Size
4.0 & 2.9
Transmission
Manual
2WD / 4WD
4WD
Total Lift
97 stock, 3” on 87
Total Drop
N/A
Tire Size
235/75-15
My credo
Never put off ‘til tomorrow what you can put off indefinitely
Now, this is a bolt!

IMG_1303.jpeg


I plan on making a combination winch hold down plate/tie down eyes when I put this in. I don’t have any hold down points on the upper deck yet. However…

Other than putting the cab interior back together, and continuing the wiring, I’m going to hold up on these final details on the trailer. They may be affected by the ‘Raith Kasket Kitchen trailer. The original thought was that the ‘Raith would fit entirely on the lower deck, but, with the expanded concept, it will be overlapping the upper deck.

I’ll probably be starting the ‘Raith build thread this weekend, starting with a bunch of questions, looking for input.
 

Rick W

Well-Known Member
Supporting Member
TRS Event Participant
Joined
May 15, 2020
Messages
2,406
Reaction score
3,901
Points
113
Age
68
Location
Atlanta
Vehicle Year
1997 1987
Make / Model
Ranger XLT x2
Engine Type
4.0 V6
Engine Size
4.0 & 2.9
Transmission
Manual
2WD / 4WD
4WD
Total Lift
97 stock, 3” on 87
Total Drop
N/A
Tire Size
235/75-15
My credo
Never put off ‘til tomorrow what you can put off indefinitely
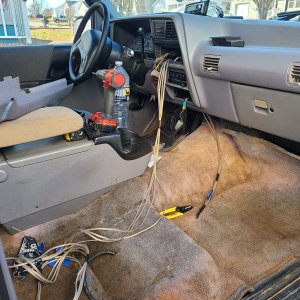
Trying to be disciplined, and not start more projects before I finish up some that are open, I finished putting the interior back together in The Road Ranger.

New carpet, I got the brake controller mounted just off the stick shift, and put the new seat covers on. It really looks good if I do say so myself.

IMG_1319.jpeg
IMG_1313.jpeg


Always something more to do, but now I can drive it while I tinker. I was going to play musical vehicles in the driveway, and I don’t know what I did, but it was dead as a doornail, so it’s sitting on the charger now.
 

Sponsored Ad


Sponsored Ad

Staff online

Member & Vendor Upgrades

For a small yearly donation, you can support this forum and receive a 'Supporting Member' banner, or become a 'Supporting Vendor' and promote your products here. Click the banner to find out how.

Latest posts

Truck of The Month


Shran
April Truck of The Month

Recently Featured

Want to see your truck here? Share your photos and details in the forum.

Follow TRS On Instagram

TRS Events

25th Anniversary Sponsors

Check Out The TRS Store


Sponsored Ad


Sponsored Ad

Sponsored Ad


Amazon Deals

Top