• Welcome Visitor! Please take a few seconds and Register for our forum. Even if you don't want to post, you can still 'Like' and react to posts.

"The Night Ranger"


2trux

Member
Supporting Member
TRS 20th Anniversary
Joined
Oct 22, 2014
Messages
181
Reaction score
16
Points
18
Location
Albuquerque NM
Vehicle Year
1989
Make / Model
Ranger
Engine Size
2.9 L
Transmission
Manual
Sorry about the name, but that is what my son's friends have named it.
Starting a thread to keep track of what is being done.

The Basics:
1989 Ranger XLT extended cab 4X4
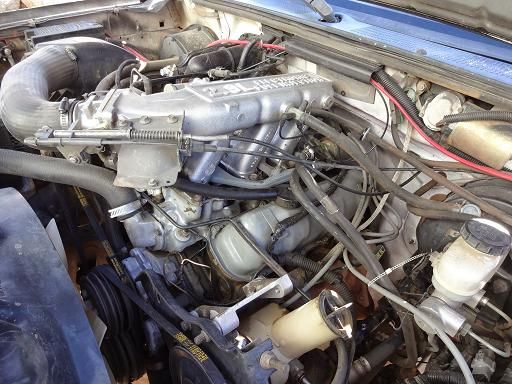
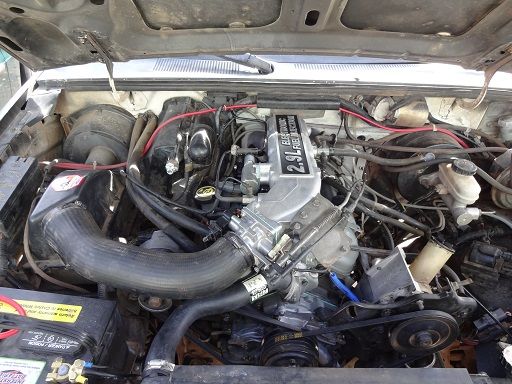
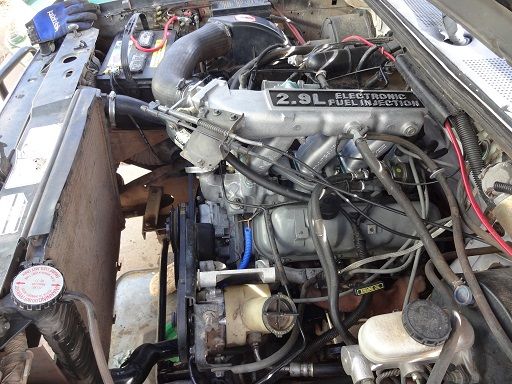
2.9L V6
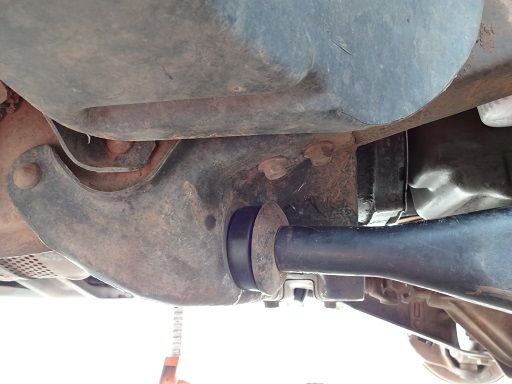
Dana 28 TTB in front
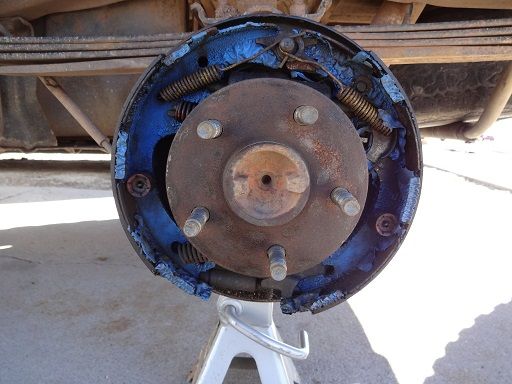
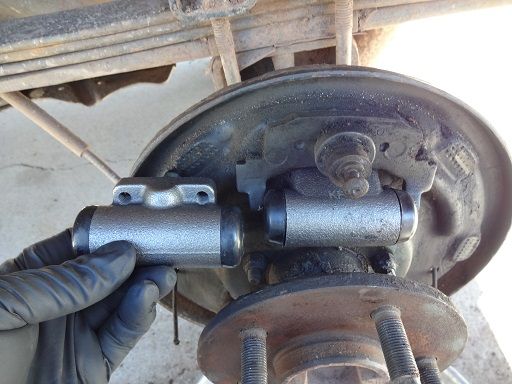
7.5 in back w/10" drums
5 speed manual transmission
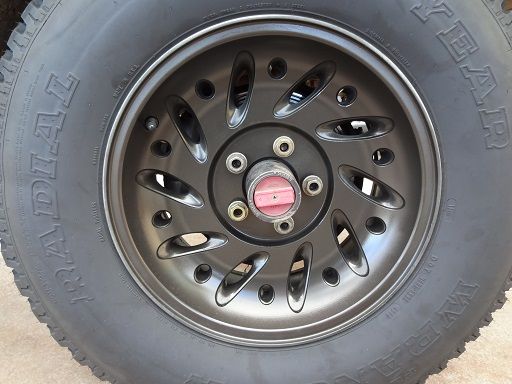
30x9.5x15 tires

I bought this truck Oct 2014 for $1200. The money drain started right away as it needed a new battery. A tune up was next to pass emissions. The TPS was bad and was replaced.
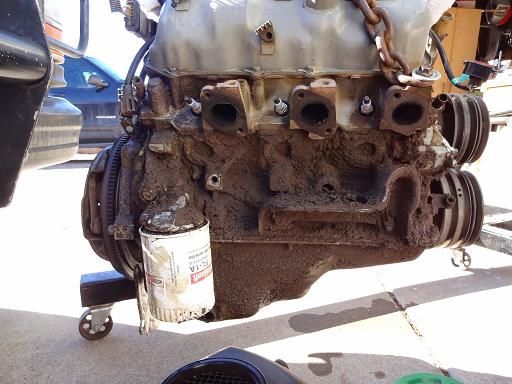
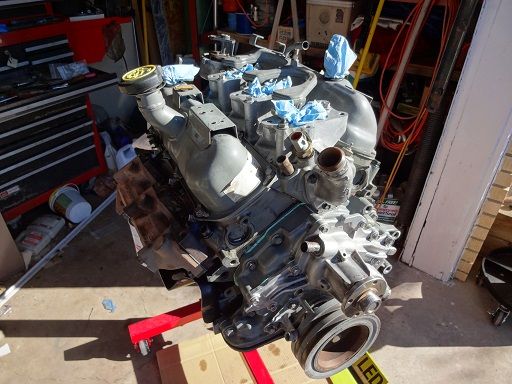
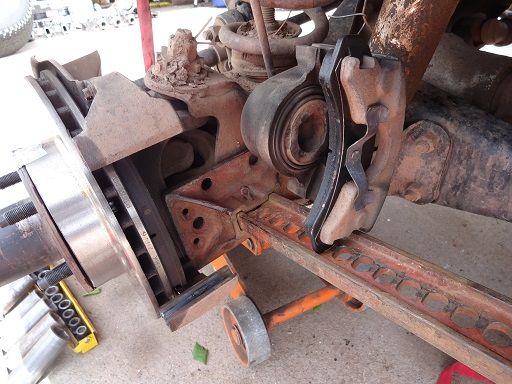
It passed emissions but had extreme valve ticking. Over the next couple months I decided it was way under powered, and leaked like a sieve, so it was time for a rebuild.

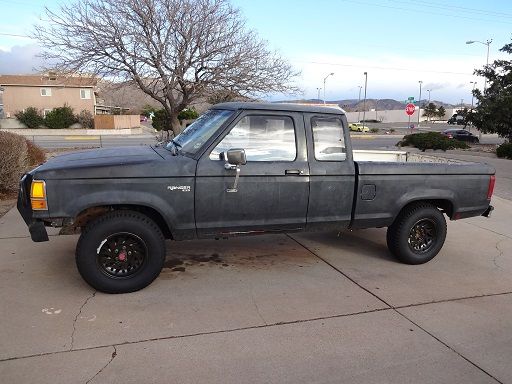
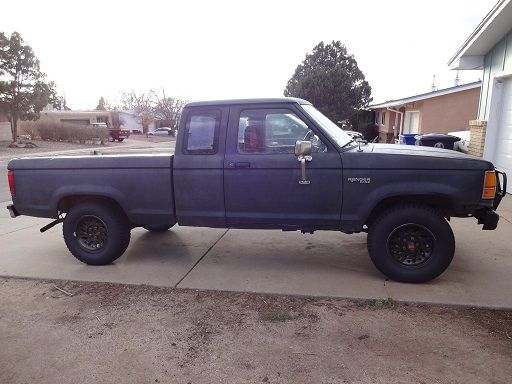
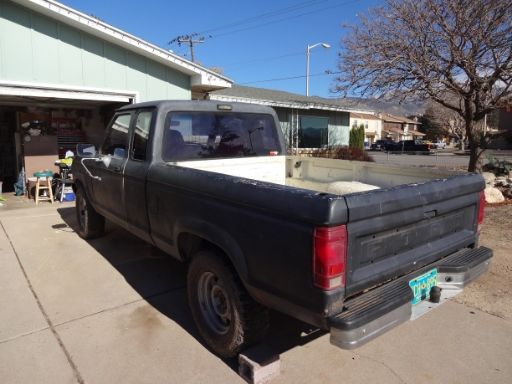
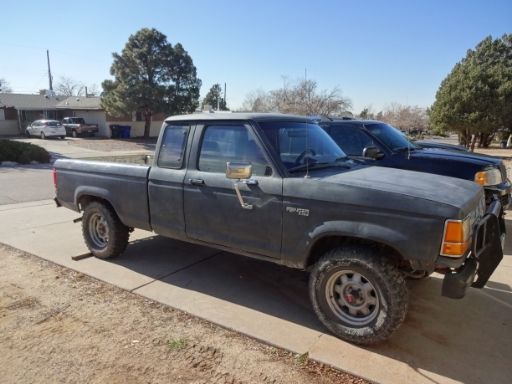
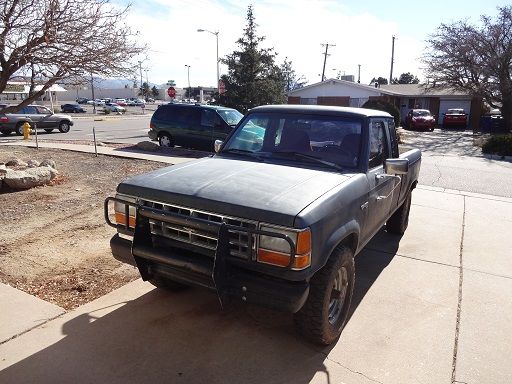
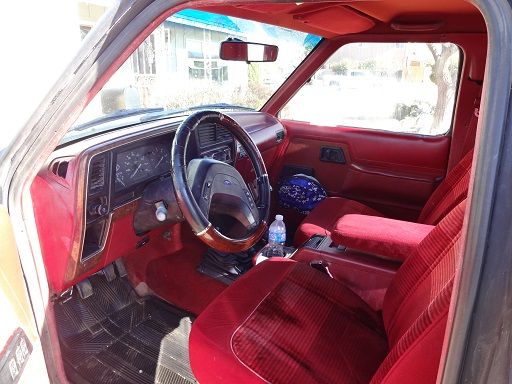
Here is the truck when it still had an engine.


(Photobucket is pooping out tonight. I will continue later)
 
Last edited:


2trux

Member
Supporting Member
TRS 20th Anniversary
Joined
Oct 22, 2014
Messages
181
Reaction score
16
Points
18
Location
Albuquerque NM
Vehicle Year
1989
Make / Model
Ranger
Engine Size
2.9 L
Transmission
Manual
Rebuild time

The day came to pull the engine to do a refresh. I had considered used engines or larger engines but they have their disadvantages.
When buying a used 2.9 for a truck this old you are taking a shot in the dark on how long it will last. Swapping for a newer larger motor worried me because of the small axle size and causing more problems than I solved.

The engine looked nice and clean from the top, what a joke.


This is what bathing your engine in oil really gets you.


The bellhousing makes a great catch basin for gunk.


What fun to start with a scraper on the outside of the engine.

As I started tear down I saw the inside looked pretty clean, perhaps running a high detergent additive in the oil for the 1000mi before I started this helped.


After teardown and parts inspection I found that the crankshaft thrust surface on the 3rd main was wasted and needed to be welded to build it back up.

I also discovered why one of the exhaust manifold bolts was missing.


It turn out that both heads were shot. The broken ear on this side and a totally wasted valve seat on the other side. A trip to the U-Pull-it and I had a pair of useable heads.
The block and crank went off to the machine shop.

I will continue with the reassembly when I have time.
 

2trux

Member
Supporting Member
TRS 20th Anniversary
Joined
Oct 22, 2014
Messages
181
Reaction score
16
Points
18
Location
Albuquerque NM
Vehicle Year
1989
Make / Model
Ranger
Engine Size
2.9 L
Transmission
Manual
I thought I'd write a little blurb on refreshing my injectors. I bought a rebuild kit on-line for $25.

This is what they looked like after removal.


After cleanup the internal filter is removed. This is done by running a screw into the inlet side of the injector and pulling out the filter.


The filter.


I pressed in the new filter by setting it on the bench and pressing the injector down on it.


The hardest part was removing the pintle cap. I removed the rubber O -ring then heated the cap with a heat gun. Using an unserrated needlenose pliers I was able to pop it off.


Be careful you don't damage the pintle on the injection end.


After putting the new O-rings and pintle cap on it injector is ready to go back on.

The final product.


TexasRebel

Member
U.S. Military - Active
Joined
Mar 27, 2014
Messages
319
Reaction score
5
Points
18
Age
28
Location
Texas
Vehicle Year
1990, 2006
Make / Model
Ford, Nissan
Engine Size
4.0 in both
Transmission
Automatic
My credo
You live every day, you only die once...
Made any more progress? Seems like it's going good so far. What's the plans for the rest of the truck?
 

96Indyram

Member
Joined
May 3, 2013
Messages
349
Reaction score
15
Points
18
Location
Clearwater Ks
Vehicle Year
1984, 1987
Make / Model
Ford
Engine Size
2.8, 2.9
Transmission
Manual
That little fuelinjector blurb needs to be in a tech article section!
great write up.
 

TexasRebel

Member
U.S. Military - Active
Joined
Mar 27, 2014
Messages
319
Reaction score
5
Points
18
Age
28
Location
Texas
Vehicle Year
1990, 2006
Make / Model
Ford, Nissan
Engine Size
4.0 in both
Transmission
Automatic
My credo
You live every day, you only die once...
That little fuelinjector blurb needs to be in a tech article section!
great write up.
Agreed!

Sent from my Samsung Galaxy S3 using Tapatalk.
 

2trux

Member
Supporting Member
TRS 20th Anniversary
Joined
Oct 22, 2014
Messages
181
Reaction score
16
Points
18
Location
Albuquerque NM
Vehicle Year
1989
Make / Model
Ranger
Engine Size
2.9 L
Transmission
Manual
Made any more progress? Seems like it's going good so far. What's the plans for the rest of the truck?
I got the engine back in but it ran terrible. After a week of testing the hard things, (injectors, IAC, etc.), I pulled the dist cap and discovered the rotor was almost to #4 when it was at TDC. How it timed at all and still ran is beyond me. After pulling the dist and moving it the truck is running great. It is nice to be able to park on the driveway without having to clean off oil spots.

I will add some pics when I have time.
 

2trux

Member
Supporting Member
TRS 20th Anniversary
Joined
Oct 22, 2014
Messages
181
Reaction score
16
Points
18
Location
Albuquerque NM
Vehicle Year
1989
Make / Model
Ranger
Engine Size
2.9 L
Transmission
Manual
That little fuelinjector blurb needs to be in a tech article section!
great write up.
I'll see if I can flesh it out a bit and submit it.
 

2trux

Member
Supporting Member
TRS 20th Anniversary
Joined
Oct 22, 2014
Messages
181
Reaction score
16
Points
18
Location
Albuquerque NM
Vehicle Year
1989
Make / Model
Ranger
Engine Size
2.9 L
Transmission
Manual
So I finally have some time to update this thread.

Putting the engine back together is much more satisfying than taking it apart. It also happens to be much more time consuming.

Here it is after the bottom end was together and the heads were installed. It's much cleaner than before.


Here it is ready to be installed in the truck.


Here it is installed in the truck, front view.


Side view.


When I was ready to test drive it I remembered that I had to do the brakes because my son drove it with the emergency on. He almost caught the wheel on fire. Toasted the shoes and caused the wheel cylinder to leak.

How hot does it need to be to do this to the paint?


The wheel cylinder I bought didn't fit to good, turns out it was for 9" brakes.

Here is the difference between 9" & 10" cylinders (the 9 is installed )


I also found a fan at the u-pull-it to replace this. I was always worried it would disintegrate and trash my radiator.


My son bought a 1990 B2 with tiny tires and decided to take the 30" tires off mine. When I was at u-pull-it I found these from a 94 Mounty. The finish was shot so I am in the process of cleaning them up and painting them black.

Fresh from the JY.


After a go with the wire wheel.


Some self etching primer and they will be ready for paint tomorrow.


That's all for now.
 

2trux

Member
Supporting Member
TRS 20th Anniversary
Joined
Oct 22, 2014
Messages
181
Reaction score
16
Points
18
Location
Albuquerque NM
Vehicle Year
1989
Make / Model
Ranger
Engine Size
2.9 L
Transmission
Manual
Well I got my wheels painted and I think they came out pretty good. Picked up some Goodyear Wrangler Radials to put on them and the truck looks much better.


The truck with new tires/wheels.


I also put on the new hub/rotor since mine were shot. Bought new bearings and seals for it. I wonder why they put the races in the hubs and don't send the bearings, it just adds a step for popping them out.
While taking the old ones off I discovered the outer nut on both sides were less than finger tight. The drivers side bearing was a little loose. Good thing I bought new parts. It was also nice to just grease the new parts and not have to clean the old stuff.

As usual while working on that I noticed the shocks had oil coming out of the top, my next project I guess.
 

2trux

Member
Supporting Member
TRS 20th Anniversary
Joined
Oct 22, 2014
Messages
181
Reaction score
16
Points
18
Location
Albuquerque NM
Vehicle Year
1989
Make / Model
Ranger
Engine Size
2.9 L
Transmission
Manual
It's been awhile since I updated this.
My last project on this was to replace the radius arm bushings. The truck has been clunking when going over bumps and the old bushings looked loose and not in very good shape.
After reading the various methods to do this I decided to jack my axles forward rather than cut the rivets off the mounts. This is just trading one pain for another.
After taking off the nuts that hold the rear I used my HiLift jack to push the axle forward.

Here is where the bottom of the jack went.


The lift end of the jack.


I also strapped the ends of the arms together to keep them from moving too much. As it turned out this was not needed.


While I was in there I replaced the shocks as they were puking oil out past the shaft.

Shiny new shock installed.


The old bushing.


New installed bushings.


I had previously installed new rotors/hubs/bearings and brake pads to the front as you can see the un-rusted rotors in the first picture. The old ones looked like a topo map of the mountains.

That's all for now.

After we get my son's B2 engine back together an in the truck the next project will be building winch bumpers for both our trucks.
 
Last edited:

pickupman6

New Member
Joined
Jan 8, 2012
Messages
6
Reaction score
0
Points
0
Location
Jack, Al
Vehicle Year
1987
Make / Model
Ford
Engine Size
2.9
Transmission
Manual
Your leaking wheel cylinder is what caused the paint to bubble. Brake fluid and paint are never a good combination.
 

2trux

Member
Supporting Member
TRS 20th Anniversary
Joined
Oct 22, 2014
Messages
181
Reaction score
16
Points
18
Location
Albuquerque NM
Vehicle Year
1989
Make / Model
Ranger
Engine Size
2.9 L
Transmission
Manual
Well I have working on rebuilding the engine on my sons '90 B2 and haven't had much time for my truck.
I was able to get a couple things done to my truck over the weekend.

First, I took out the radio it came with because it was a piece o junk. I bought a new one and got it installed so now I have some tunes.

Second, I wanted a keyless entry system so I wouldn't have to do the key in the door to unlock the truck. I found a unit on e-bay for $15. After a couple hours of head scratching and looking at wiring diagrams I got it installed and now it is "FOBulus". Everything was able to install in the passenger door which made the wiring much easier.

Next project: I ordered an "automatic headlight conversion kit". Since all my other trucks have auto headlights I sometimes forget to turn on the lights when I should. It was only $35 so it is worth the risk for the convenience.
 

2trux

Member
Supporting Member
TRS 20th Anniversary
Joined
Oct 22, 2014
Messages
181
Reaction score
16
Points
18
Location
Albuquerque NM
Vehicle Year
1989
Make / Model
Ranger
Engine Size
2.9 L
Transmission
Manual
Adding winch

I bought one of the Badland 12,000 lb winch a few months ago when it was on sale.
Over the Christmas break I had the time to get it on the truck.

This is where I started.. I don't believe the bumper is the factory one but it fit pretty good and was thick enough to be reused.


View from the top.


After removing the bumper you can see there are non factory mounts welded to the frame.


I knocked these off the frame and was able to use them to attach to the winch mount to re attach the bumper.

I bought a plasma cutter because the prices have dropped and it is a lot cleaner/easier than using the torch.

The main part of the mount was made with 1/4" thick by 6" wide plate I bought.

This was my first cut with the plasma cutter. I used a thin piece of wood for a guide. The piece has been turned over so the slag is on the top. The slag knocks quite easily with a slag hammer.


I also decided to weld this together using stick instead of my wire feed since it burns in better on thicker metal. I haven't welded with my stick welder for over 20 years, but it came out looking not too bad.


The basic design is a U bolted to the frame.


I used 1 1/2" and 2 7/16" grade 8 bolts on each side. Since the top bolt hole in the frame was slotted toward the back, where torque from the winch might cause the mount to rotate to the back, I welded the washer to the frame.


While I had the bumper off I decided to put on the tow hooks I had previously removed from an Expedition. I just drilled a couple holes and installed using the factory hardware.


After slotting the bumper, installing the rollers, and mounting the winch to the plate, the bumper was put back on.


It was time to mount the solenoid pack. These come with brackets to mount to the top of the winch. Since I had no room for it on top I mounted it behind the grill. I just used the bolts that were used to attach the original mounting brackets and drilled holes through the front sheet metal.


After putting the grill back on I drilled a hole in the top plastic for the control handle connector.


I put the breaker pack and cables on the battery and it was ready to go.


Semi-hidden winch, time to go get stuck!


swynx

Active Member
Joined
Mar 26, 2008
Messages
2,401
Reaction score
9
Points
38
Age
31
Location
lewiston idaho
Vehicle Year
1994
Make / Model
Mazda
Engine Size
4.0
Transmission
Manual
i like how clean the interior is. i remember when i got my first 1992 ranger, it had an interior clean like that, only blue. feels like home, i suppose. perhaps that picture could be used for inspiration to revert to a nice interior. rather than one without carpet, and stain with dirt everywhere.

keep it up, i like where this is going. your doing a nice job.
 

Sponsored Ad


Sponsored Ad

Staff online

Member & Vendor Upgrades

For a small yearly donation, you can support this forum and receive a 'Supporting Member' banner, or become a 'Supporting Vendor' and promote your products here. Click the banner to find out how.

Latest posts

Truck of The Month


Shran
April Truck of The Month

Recently Featured

Want to see your truck here? Share your photos and details in the forum.

Follow TRS On Instagram

TRS Events

25th Anniversary Sponsors

Check Out The TRS Store


Sponsored Ad


Sponsored Ad

Sponsored Ad


Amazon Deals

Top