Peter Griffin
Well-Known Member
- Joined
- Jan 30, 2023
- Messages
- 224
- Reaction score
- 365
- Points
- 63
- Location
- Quahog
- Vehicle Year
- 1988
- Make / Model
- Ford Bronco II
- Engine Type
- 2.9 V6
- Transmission
- Automatic
- 2WD / 4WD
- 4WD
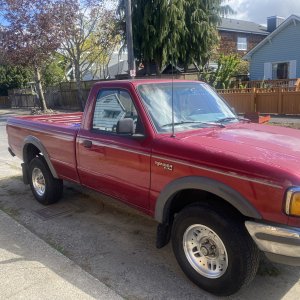
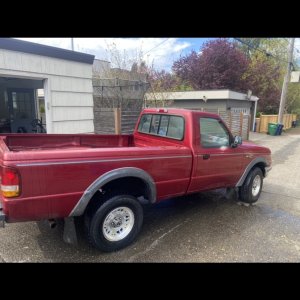
Yes Sir, here y'all go!Can you get a picture of the coverlay dash cover? I'm curious how well it fits around the vents.
I said this before about the Coverlay; if you want perfect...keep looking! But if your dash was like mine and looks like an axe murderer had at it, for $135 shipped from Bronco Graveyard it's an excellent option and in keeping with my theme, a 90%+ improvement over what I had. Since I bought their door panels I knew that they would match each other and compliment my interior desert color scheme of tan, saddle, camel, brown and black...
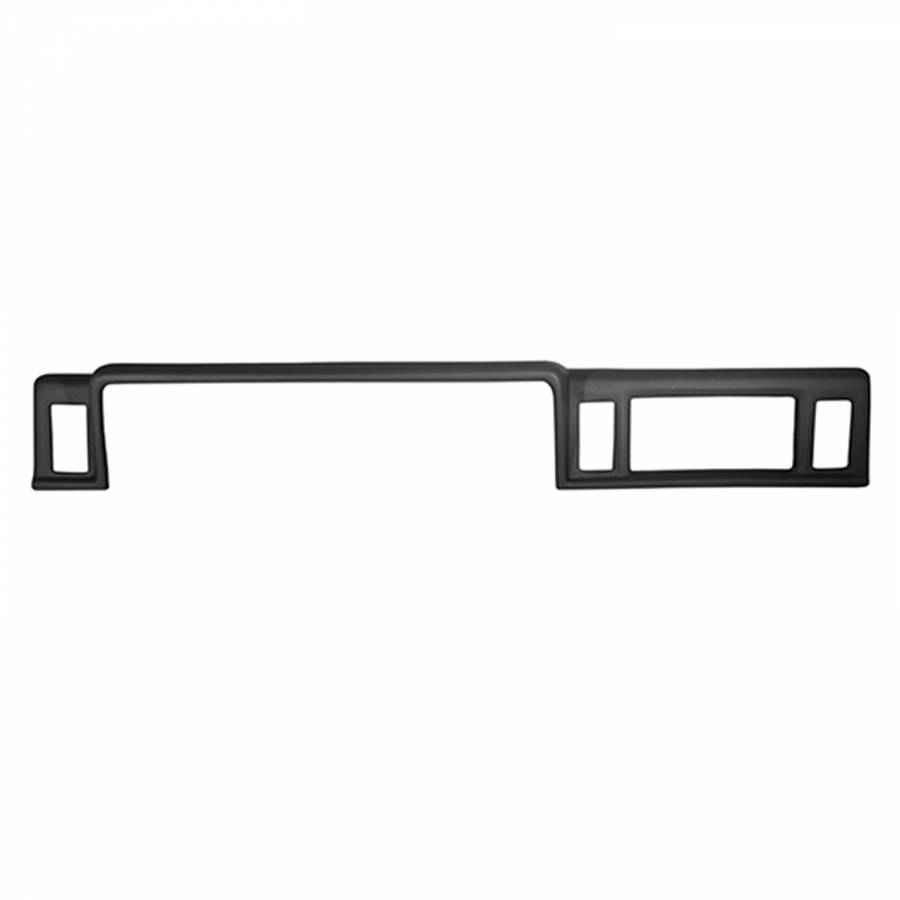
Bronco II & Ranger Dash Pad Cover-Broncograveyard.com
1984-88 Ford Bronco II & 1982-88 Ford Ranger Coverlay Dash Cover Exact Color Match NOT Guaranteed To Request Color Swatches Call 1(800)633-7090 Rejuvenate the life of your vehicle by enhancing its interior. Coverlay dash covers are vacuum-molded from the original dash to give an original...
shop.broncograveyard.com
You'll notice some paint missing above one of the vents and that's what happens when you use Gorilla tape to hold the dash in place while the silicone adhesive sets and it's 115 out...! I knew almost immediately after I did it that it was a bad idea and I'm lucky that's the worst of it.
There was one corner of the overlay next to the HVAC controls that was REALLY problematic and would not stay put. I ended up using a heavy duty storage tote with a handy dandy CrossFit certified 1.5 pood (52.9 pounds) kettlebell on top of it, leaning up against the dash overlay. That did the trick and held it in place while the adhesive was setting/curing.
Last edited: