• Welcome Visitor! Please take a few seconds and Register for our forum. Even if you don't want to post, you can still 'Like' and react to posts.

I bought a High Rider...


This build is awesome and it's one of the only reasons I still visit this site. I'm Rangerless again, so what else is there for me to do but live vicariously through people building some of my favorite trucks?

There's always tomorrow, you could buy another one!!!

Glad you have enjoyed the build and have stuck around.
 
Back under the knife. I am installing a 3" Duff lift in the front, hoping for better tire clearance. I had Explorer springs and Daystar spacers before and IIRC that got me roughly 1.5"-2" of lift vs a normal stock 4x4 Ranger. If I get 3" I will be happy, I am pretty sure I did some measuring when this lift was in a different truck and it was more like a 4" lift so that would be OK too. All I care about at this point is the tires not rubbing the fenders like they are now.

KIMG1562.JPG
 
Lift is in, I gained 2" over where I was before, so I think it's roughly 3.5"-4" taller than a stock 1st gen 4x4 in the front. Shocks are too short, I have some Bilsteins on the way.

Kinda tempted to cut some spacers on the plasma table and lift it just a little more before I got spend money on an alignment. Another inch or so would be cool.

KIMG1564.JPG
 
Bronco Graveyard sells 1/4" thick coil spacers that are intended for levelling a truck that sags on one side or just to provide some lift in general... I bought some for my Explorer and had one left over to measure. Couple quick CAD drawings later and a couple test cuts... I'm in business. Not quite as nice quality as a water jet but it'll certainly work.

312167109_430440555911719_7657555488835754691_n.jpg
 
Ended up using three of the spacers I cut per side. Tape measure says I gained an inch (started at 33-1/4 from the floor to the top of the wheel opening) and was right at 35" after the Duff lift... now I'm at 36". I imagine I will lose a bit of that when I have it aligned, my eyeball measurement says my camber is a degree or so positive on both front wheels. Think I'll be happy with it either way, tires shouldn't rub anymore and the front will only be about an inch lower than the rear as opposed to 4" lower.
 
I had it aligned today and as I suspected I lost 1/4" in the front from the camber and toe correction. Really pleased with how it looks. Drives nice too, I will have to get some Bilsteins for rear, they made a huge difference in the front.

N1gjc3b.jpg

DQC3bG7.jpg

6nKy10N.jpg
 
Hunting season sucked away all my truck time in November and I am just now getting back into working on stuff in the garage... but I am pleased to announce that three deer, four grouse, one pheasant, three rabbits, one coyote and one dirty three legged raccoon will no longer be walking out in front of your vehicles at night. You're welcome.

I made some progress sanding runs out of the clear coat. Not quite proud enough with my results to take pictures yet, I need to polish a little more but it's looking better. Also buffing the hood. I am going to put a different hood on it but in the meantime I want the current one to look better.

More importantly, I now have some tunes. Took me a while to find suitable speaker options, the second gen dash doesn't have any in it and I don't want to cut holes in my new door panels. I found these nice little 6x9 boxes at a local audio store for 50 bucks, a set of Polk audio speakers at Walmart on clearance for 60 bucks, and a Sony head unit for 80 bucks. Wired everything up last night and it works great. Need to play with the equalizer a bit still but I am very happy with how it looks and how the speaker boxes fit behind the seats.

KIMG1627.JPG

KIMG1626.JPG
 
I had it aligned today and as I suspected I lost 1/4" in the front from the camber and toe correction. Really pleased with how it looks. Drives nice too, I will have to get some Bilsteins for rear, they made a huge difference in the front.

N1gjc3b.jpg

DQC3bG7.jpg

6nKy10N.jpg
Looks awesome!
 
Bumper time... in staying with my '80s theme, I am going with round tube. I had some 2.5" exhaust tube that looked about the right size so I went looking for 3" heavy wall and ended up with 3" pipe... probably overkill but the price was right.

I cut one piece to 58" (the width of the widest part of the box at the bottom, the "steps". I am going to stack another shorter tube that matches the width of the outside of the box above the steps. Not totally sold on it yet... I need to look at it for a few more hours to get it right.

It'll go here (upper tube not cut to length yet.)
CX6NbjK.jpg


The ends of the bottom tube bug me. It's either too wide or needs something so it doesn't look quite so much like a big heavy clunky tube thing. I am thinking about rounding the ends of the bottom tubes only, like this so it matches the contour of the step in front of it:
Ci1sArs.jpg


More to come.
 
Maybe cut both tunes the same length. Cap both tunes with the same piece of 3 inch flat steel. Then weld a flat step to the cap that matches the box.
 
I messed with it for a few hours yesterday and couldn't come up with anything I liked better so I went ahead and made the cuts on the bottom tube and capped both.

This was a real pain to cut - ended up using a portaband.

.
320223108_1309567263191464_9163843800723200718_n.jpg


mcBDQSr.jpg

smdZJw7.jpg


It's growing on me. I'm pretty happy with how it turned out and I think it will look better once I've got a receiver tube mounted to the bottom and a license plate on it.
 

Attachments

  • 320223108_1309567263191464_9163843800723200718_n.jpg
    320223108_1309567263191464_9163843800723200718_n.jpg
    92.4 KB · Views: 89
I like that. I think it fits the style of that era.
 
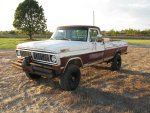
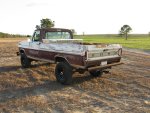
I like it, reminds me of what dad did on my F-100 back in the day. These were from a coupl eof years ago, but he built them 25-30 years ago. Back then it also had a home built hitch receiver attached to the bottom of the back bumper, now it kind of needs a second tube to fill the gap.

IMG_0881.jpg

IMG_0882.jpg

Yours is much better executed. I haven't decided if I'm going to keep this style but rebuilt stronger, or go rear step bumper and warn type front when I start restoring.
 
what's the sidewall on the tubing? I'd hate to see you do all this work and have it be .120mm wall (about 1/16") and bend on the 1st bump.

IMO, .250 would be best but .180 would work. (about 1/4", 1/8" respectively)
 
Last edited:
I did a repair on a stainless bumper on a kenworth. Tube diameter is about 5". The metal thickness is about the same as a cereal box!....
 
Last edited:

Sponsored Ad


Sponsored Ad

TRS Events

Member & Vendor Upgrades

For a small yearly donation, you can support this forum and receive a 'Supporting Member' banner, or become a 'Supporting Vendor' and promote your products here. Click the banner to find out how.

Recently Featured

Want to see your truck here? Share your photos and details in the forum.

Ranger Adventure Video

TRS Merchandise

Follow TRS On Instagram

TRS Sponsors


Sponsored Ad


Sponsored Ad


Amazon Deals

Sponsored Ad

Back
Top