
By Sean Shaw ’94rangeroffroad’
Application: 1994 Ford Ranger 4.0 V6 Super Cab.
Other applications can vary, but mostly the same for the body style.
Parts used:
3” two core aluminum radiator, GM size 19”x21” Plenty efficient for cooling the 4.0!
40 feet of 1.5” aluminized exhaust pipe. You can find this at any exhaust shop in town.
Hose clamps, you will need as many of these for as many angle connections you have. (Example: My truck had 15 angle connections, and that takes 2 hose clamps per connection, so I used 30 hose clamps.) You can see them in every picture I posted here.
Radiator hose’s from AutoZone for the angles. (Part # 1000-L) There are about 5 angles on those hose’s. Just cut the angled parts of the hose.
Water Pump. I replaced my water pump at this time, good to have a nice new one for the flow! (The stock water pump is capable of moving the extra coolant without any problems!)
Flex-o-lite Black Magic fan, this fan has a lot of cfm for the job needed! 2800cfm. You don’t have to use the same fan I did, if you have a fan now that’s working just fine, use that one! If you’re not in the market for an electric fan, I would not suggest you do this mod. An electric fan is necessary to this mod!
Summit Coolant Overflow Catch Can. (Part # SUM-G1474) Can be connected to the radiator to recover lost coolant.
[Picture 1]
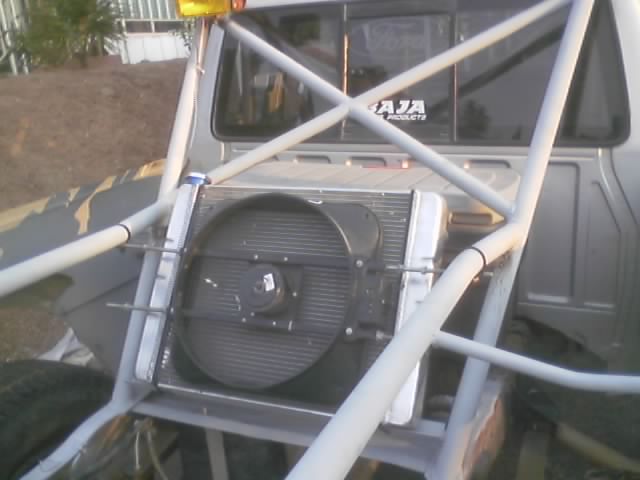
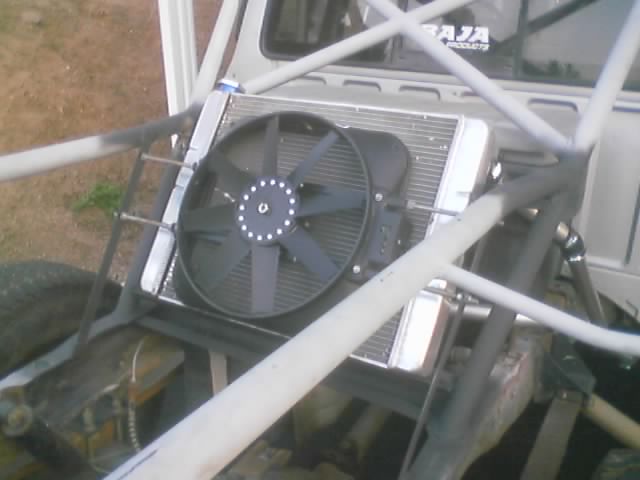
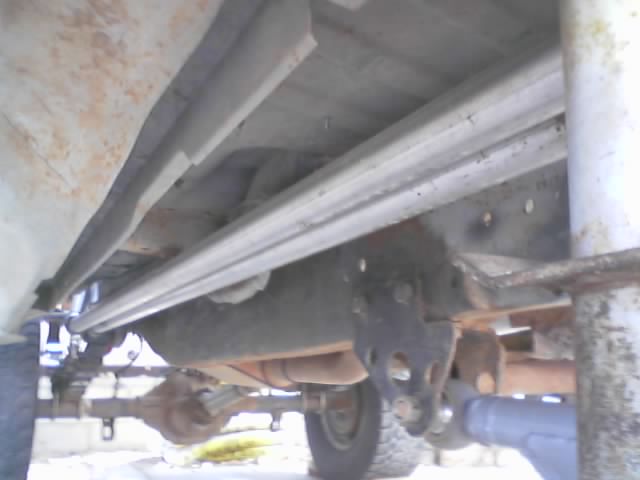
First off you need to set yourself a plan. Deciding where to mount your radiator is a key issue. In “picture1” you can see I chose to mount mine on my cage behind the cab of my truck. Once you have a possible place to mount your radiator, you need to sit down and draw a map of where your going to run your water lines. I ran mine under the cab, along the outside of the frame. (As shown in “picture2”)
[Picture 2]
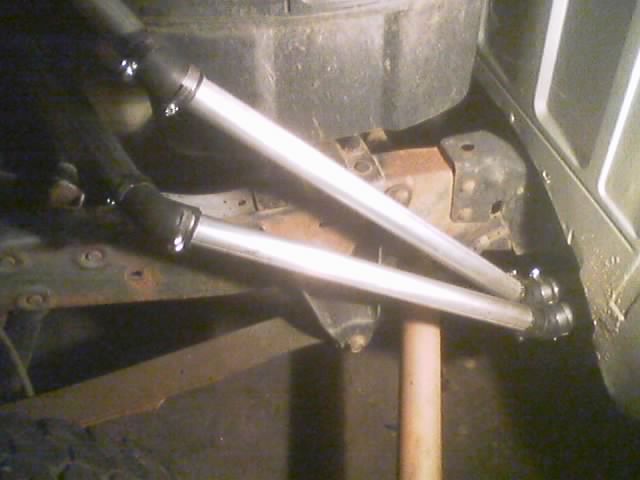
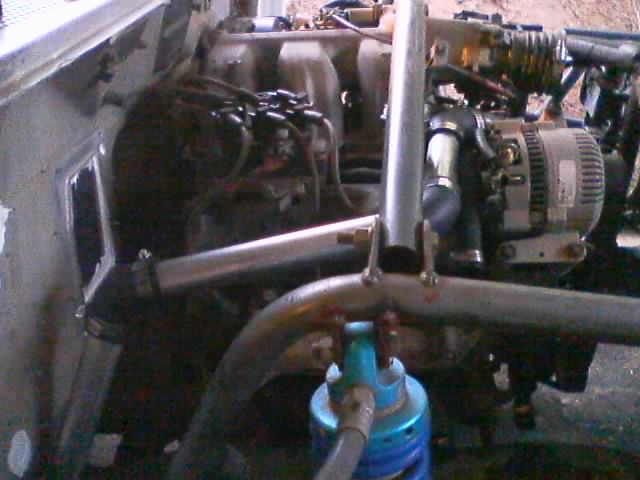
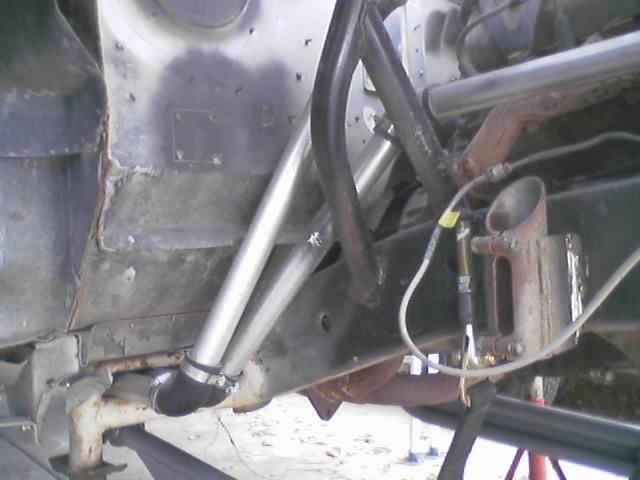
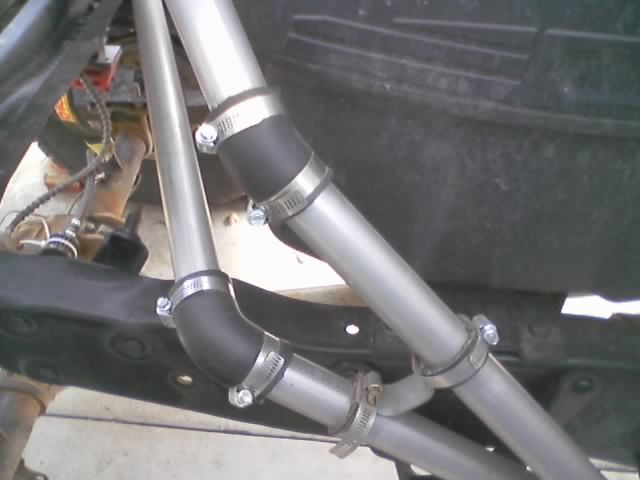
After you have a plan made out, and you have a clear idea of where your water lines and radiator are going. You can now start to hard mount your radiator, and run the water lines. (Picture3 and picture4 show how I mounted, and connected my water lines) As you cut the length of pipe you need, you can use the angles cut from the hose from AutoZone. Once you have your radiator and water lines ran under the cab up to the engine room, you need to remove your old setup to make room for the new lines. (Picture5 shows where my lines come up from the frame.)
[Picture 3]
[Picture 4]
[Picture 5]
[Picture 6]
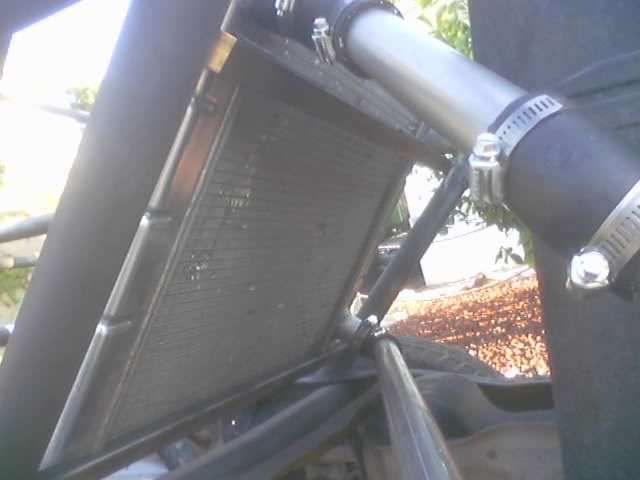
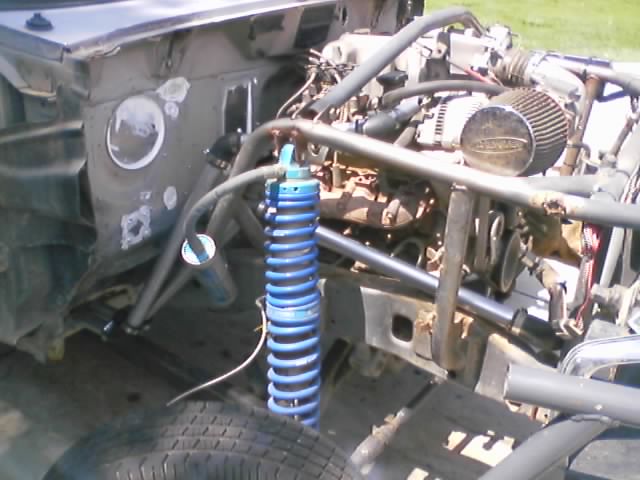
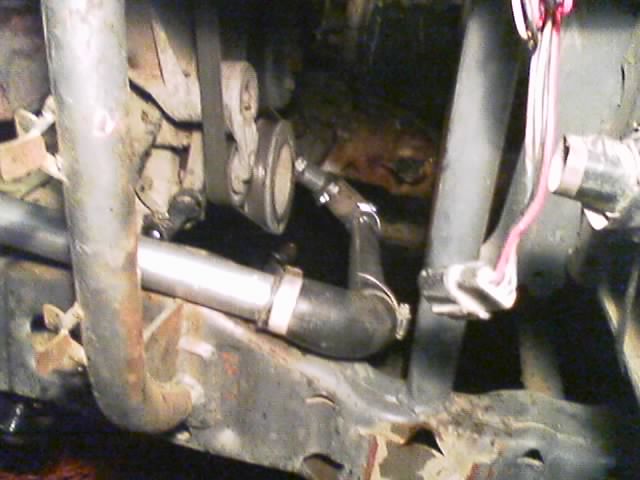
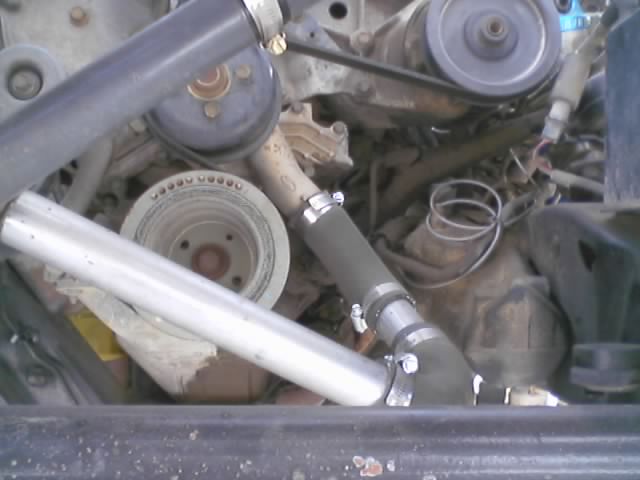
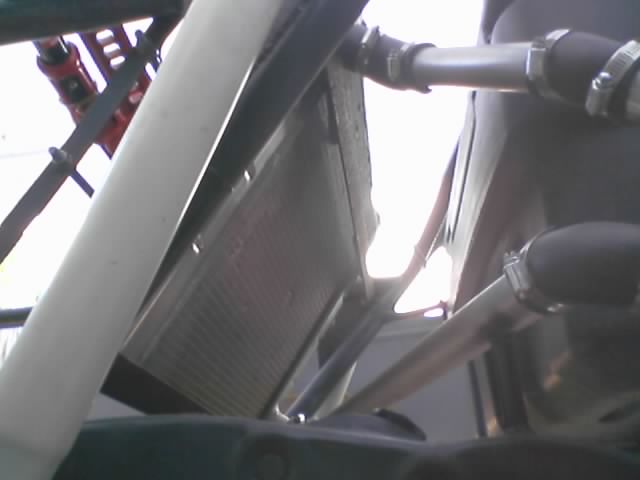
In the engine room, you need to save and reuse the lower radiator hose for the extreme angles it has. You can see why I reused that hose in “picture6” From there all I did was cut the pipe to a size where I needed a bend, then use a bit of hose for the bend. As you go along you will need to support your metal pipes, that’s pretty much just rule of thumb. If you’re a fabricator, this should be pretty easy. Be sure to make them as removable supports just in case you need to replace, or re-do some pipe. In “picture7” shows how I did the upper line from the thermostat. All my connections were supported by my cage most of the way. You could do something different per your truck.
[Picture 7]
[Picture 8]
Ok “picture8” shows my finished product. I used the Black Magic electric fan for the flow I needed to keep me cool. That fan runs 2800 cfm, and has no problems keeping my 4.0 cool. Im sure you can reuse the stock radiator. (Though I have not tried that) If you have an electric that can support your cooling system now, I don’t see why I cant with the radiator relocated elsewhere. With the way I set mine up, it never has gone over 210 degrees! Even in the hot desert sun, running the engine hard, all day!
One thing you will need to do, (I learned the hard way) because the lines I set up go under the cab, and then back up to the radiator, an air pocket is developed in the engine. To help purge this unwanted air, you need to have two people. (If you’re alone, there is another way.) Have one person with your coolant back by the radiator, and one person up at the upper radiator line on the engine side. As one pours in the coolant, the other loosens a connection on the upper line to let out air, as the coolant fills the system. (Be sure you’re at the highest point!) When you see a steady stream of coolant come from that connection, with no more air, tighten her down, and put on your radiator cap! If you don’t have one, I recommend a coolant catch! So when your coolant gets hot and expands, it can be reused when it cools and contracts!
The one man method is to use your garden hose stuck in the radiator, tuned on, and you bleed the air from the system. Once the air is gone, tighten your connection and turn off the hose. Now you’re ready to go wheeling without destroying your radiator! I hope this article helps you build your own system! Any questions, feel free to ask!
[Connection To Water Pump – Lower]

[Routing Water Lines Next To The Engine]
[Water Lines Coming From Under The Cab To The Engine Bay]
[Water Lines Under The Cab]
[Water Lines Going Up To The Bed Area]
[Water Lines Going To Radiator]
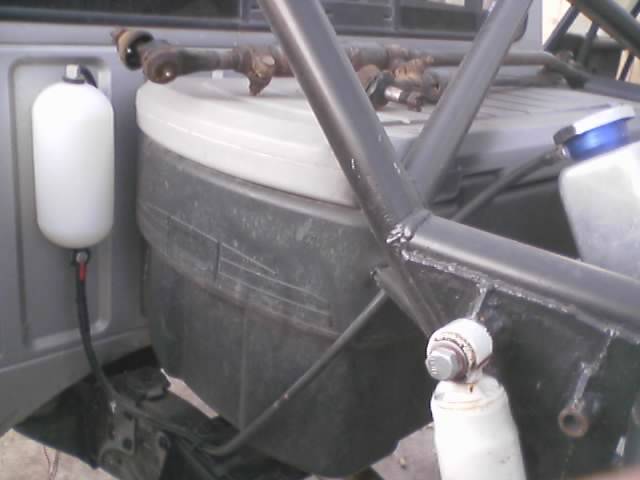
[Overflow Canister From Radiator]
About The Author
Jim Oaks is the founder of TheRangerStation.com, the longest-running Ford Ranger resource online since 1999. With over 25 years of hands-on experience building and modifying Ford Rangers — including magazine-featured builds like Project Transformer — Jim has become one of the most trusted authorities in the Ford Ranger off-road and enthusiast space.
Since launching TheRangerStation.com, Jim has documented thousands of real-world Ranger builds, technical repairs, drivetrain swaps, suspension modifications, and off-road adventures contributed by owners worldwide. TheRangerStation.com has been referenced in print, video and online by enthusiasts, mechanics, and off-road builders looking for practical, and experience-based information.