Building a Truck For The Trail & Everyday Use
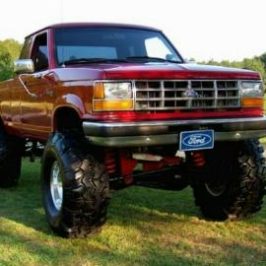
A few months ago, Jim Oaks sent out a request for ideas on a no-holds-barred Ranger build-up. Toward this end I decided to take a look at my truck and see what improvements would make it, for me, into the perfect vehicle.
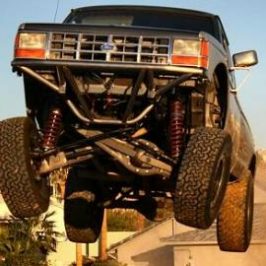
First, lets look at the Ranger’s inherent qualities. It’s Twin Traction Beam (TTB) suspension with it’s long axle beams allows a respectable amount of wheel travel, even in stock form. I have measured 4” of down-travel on my stock truck, which is about twice the travel I measured on an IFS Nissan truck. The Ranger is compact which assists in its off-road maneuverability but can also haul a decent sized payload with ease. For those desiring a little more performance, the Ranger is a fairly simple vehicle to work on with its open-section frame and conventional construction. It’s good aftermarket support and high degree of interchangeability with other Ford vehicles enables the builder to assemble a tough truck without requiring custom components.
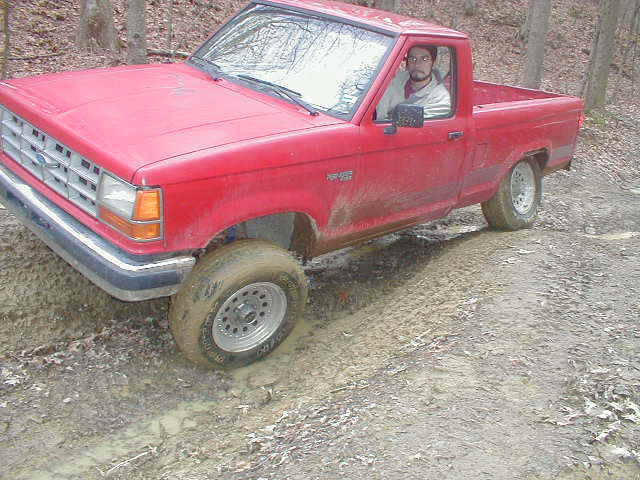
When planning the build up of my truck, I wanted the best of both worlds: maintaining the functionality of my truck as a truck while increasing its off road performance. My truck sees a fairly hard life. I burn about 3 cords of wood each winter and all of it is cut and hauled by me. This involves climbing and descending steeps hills and bouncing through fields with a half ton or more of wood in the bed. Additionally, I pull my 16’ travel trailer around a four-state area and even occasionally hook a car trailer to my truck. As my daily driver the truck has to dependably see me through about 30 miles per day in rain sun and snow. And: it has to survive the trail.
The trail I frequent is a 2 mile section of road that the county stopped maintaining in 1953. It has one large rocky hill, huge ruts and drop-offs, numerous streams crossing it and lots of frame bending gullies to traverse. It is the gullies that are the problem. They must be crossed at angle because the entrance and departure angles are excessive for hitting them head on. This means that a very flexible suspension is the primary improvement I require. Running a close second is simple ground clearance under the axles. My wheelbase is short enough that a skid plate or rocker strike is very rare, but there are occasions where the front differential axle beam drags along the ground if one side of the truck is riding in a rut.
With these criteria in mind I involved myself in a number of discussions in the TRS forums and eventually came up with an idea of what I required.
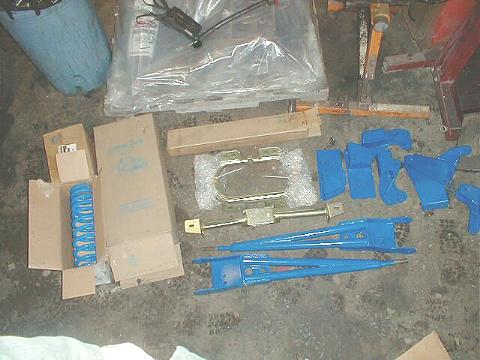
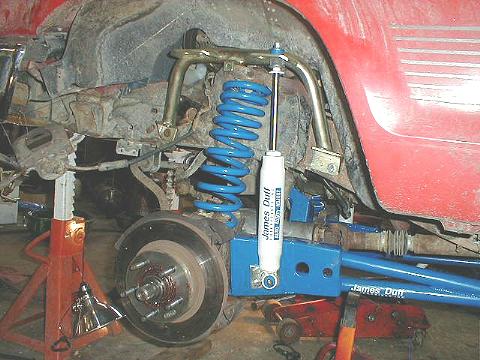
First, I needed something very strong because driving hard across frozen plow furrows with a load in the truck gives the suspension a major beating. Next I needed something with good wheel travel which means softer springs and extended radius arms. Since I would still be towing a big box at highway speeds I felt that as low a center of gravity as possible should be retained while still enabling the next larger tire size. And also with an eye toward towing stability, I wanted to install dual shocks on the front. With these desired features in mind, I selected a James Duff Stage II 3” lift.
The James Duff kit comes with progressive-rate front coils, heavy-duty drop brackets, a dual front shock kit, front and rear shocks, extended radius arms, a new transmission crossover for mounting the radius arms and a rear leaf to add to the existing spring pack. I would have preferred that the kit include extended bump-stops and a drop pitman arm as well. These issues may need to be addressed later.
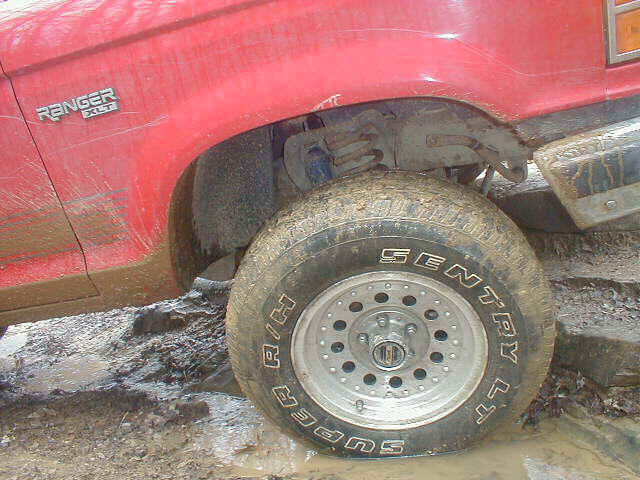
With the additional clearance afforded by a lift it will now be possible to run a taller 31” tire. It is tempting to think that a mud terrain tire is the way to go with this truck, and it certainly would help. Many is the time I have been pulled from a field by a tractor because my road-friendly tread had filled with muck. Also, in the woods, especially on hills covered with wet leaves, my all-season tires have done a fairly poor job of feeling through the leaves and finding something below to grab onto. The installation of a rear locker has helped, but it has not ended the problem. For towing though, the flexible sidewalls on a tire designed to be aired down might not be as stable. I use light truck tires that can be aired up to 40-50 psi and have rigid carcasses to keep them from squishing around under load. Lastly, I live in a state that has all four seasons so I needed to make sure my tires could do reasonable well in any weather. So what tire can give me the best compromise between off-road grip, high load stability and all weather traction? Perhaps it would be more cost effective to simply add a front locker and continue to use all-season tires? Back to the forums!
The 4.0 liter engine is an excellent engine for crawling along off-road. I have had people think my truck was equipped with an automatic transmission because it will idle up about any slope with only occasional nudges on the throttle to hop over rocks. If this truck were used only off-road, I probably would not change the axle gearing to install 31″ tires. However, moving from the original 215/75-15’s with their 28” height to 31” tires will result in a 10% loss of torque at the ground. For towing this means more shifting on hills, more wear on the drivetrain and probably worse fuel economy. A switch from 3.55s to 4.10s in the axles will do a little more than make up for the tire change and make creeping up hills off-road a little easier.
So, starting with the basics (lift, tires, gears), over the next few editions of the TRS magazine you can expect to see this build-up take shape.
James Duff Stage 2 Lift Install
As promised in the last issue of TRS Magazine, we are starting our build-up of the TRS project truck. First in line, naturally, is the suspension lift. If you’ll remember back to the first issue, we discussed my need for more wheel travel while maintaining the strength of the suspension. This truck is no toy, it has to survive a pounding. I picked the Duff Stage 2 suspension kit which came with add-a-leafs to raise the rear.
Early one Friday morning, I piled the suspension parts into my truck, along with my 4.10 Yukon gears and headed out on a 400 mile drive to Steinbinder’s Service in Negley, Ohio where Jim Oaks and I were to install the lift and shoot the story. While we did the lift John Steinbinder was on hand to do the gear set-up and offered a little pro bono technical assistance when we became bogged down.
Fortunately, though I had blasted the bottom of the truck with a pressure washer the day before, it snowed the entire drive. Instead of just a simple lift install, be now had the opportunity for a true character-building experience.
We ran the slushy, salt encrusted, ice packed truck into the warm shop and put it up on stands; we would spend 36 hours over the next 2 days mopping up the freezing brine with our cover-alls.
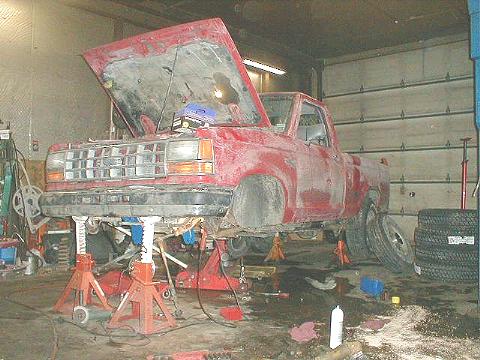
Putting the stands near the ends of the frame keeps them out of the way while working on the suspension. With the suspension hanging freely on both ends we burped the lugnuts off with the impact and removed the tires. The tires out of the way, we started on the front end removing the lock-outs, axle spacers, retaining rings, wheel bearing adjuster and locknuts. We knocked the pins out of the brake calipers and swung them forward to wire them up away from the suspension parts. After removing the spindle nuts, a slide hammer made quick work of jerking off the spindles. With the spindles off we removed the axle shafts by simply pulling them out, remembering to remove one of the Keystone clamps from the boot on the right axle. Next we removed the nuts from the tie-rod ends and tapped the ends out of the knuckles. With the ends of the axle beams free, we removed the bolts from the axle pivots and the nuts from the ends of the radius arms and got a jack under the beams to facilitate removing them. Removing them is a simple matter of pulling the axle down out of the pivot and sliding it forward out of the radius arm bracket. With the axle assemblies out we were ready to dismantle them.
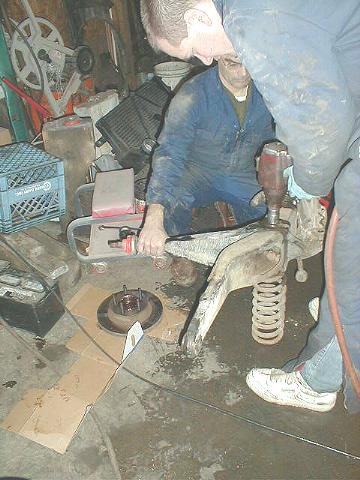
A huge impact wrench is a big plus here and we had a 3/4″ drive unit available. With a deep socket and an extension we reached down through the coil springs and ran the nuts off, removing the retaining washer, spring and spring seat. Now it gets a little tougher. The bottom bolts are easily removed with a big impact but if you are using a breaker bar its best to remove these with the axle still bolted to the truck. The top bolts are a different story because they are actually long studs. Too long, in fact, for even a deep-well socket. For these we used a combination wrench with a cheater on the end and a lot of heat. After the bolts were out we knocked off the radius arms and removed the differential from the left beam. After handing the differential over to the shop for the gear set-up we got to work getting the factory drop brackets out and replacing them with the new brackets.
Installing the new left bracket (mounted on the right side) was a simple matter of unbolting the old and bolting on the new in its place. The only change in its mounting from the factory bracket was that the Duff bracket has a tab that wraps around to the outside of the frame and bolts through an existing hole: one that it will share with the new shock hoop. The right drop bracket (mounted on the left side) is a bit harder to install.
The factory bracket is connected to the engine crossover with large rivets. There isn’t a lot of room to drill here so a long appointment with the angle grinder is usually required to get these rivets off. Fortunately, we had a torch on hand and it was only a matter of minutes before the rivet heads were laying smoking on the floor. With the heads off, we ground the remaining metal slag off of the rivet and then knocked them through with a punch. Then we installed the new bracket with the provided hardware. The gear set-up was nearing completion at this point so we decided to turn our attention to the new transmission mount in preparation to reinstalling the front axle beams.
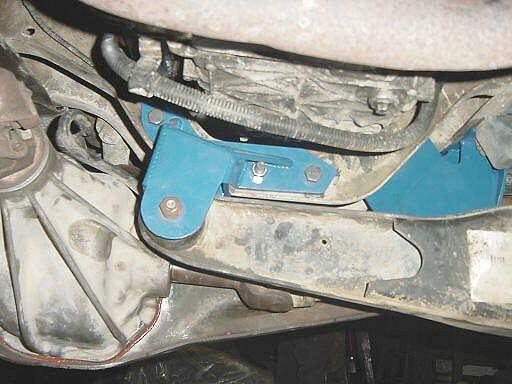
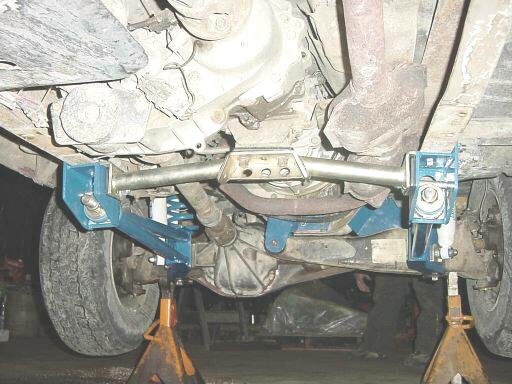
The Duff transmission mount provides lateral support for their extended radius arm brackets. The brackets themselves are bolted through existing holes in the sides of the frame. Once the brackets are bolted in, new holes are drilled through the bracket into the top of the frame and the transmission mount is bolted through these new holes. When the new mount was in place and the differential handed back to us, we turned our attention to reassembling the axle beams.
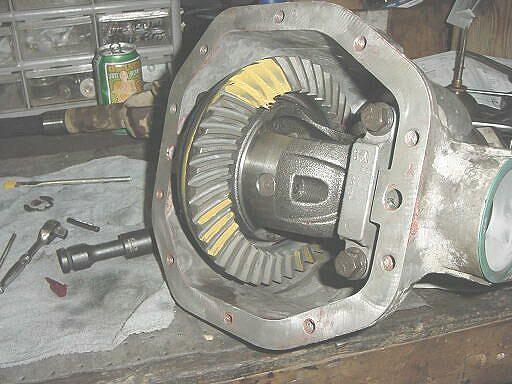
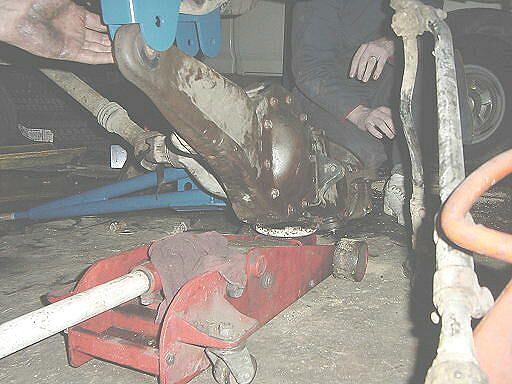
With the left beam cleaned up and ready for the differential, we ran a bead of silicon around the seam, allowed it to set-up, and then dropped the differential straight down onto the beam and installed the bolts. We did not replace the pinch-bolt onto the carrier because it makes it difficult to remove the differential housing without pulling off the radius arm. With the housing bolts torqued we turned out attention to the installation of the new extended radius arms.
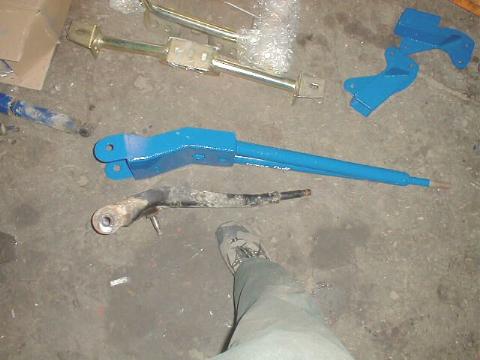
Saying that the new radius arms were difficult to get on is an understatement: they were a bear. The method that ended up working best for this was clamping the axle beam in a huge vise, inserting one of the bolts and running it in a few turns. Then we had someone lift up on the radius arm and another person to pry the top of the arm over while the third got the bolt started. It took a while but we got it. Just don’t tighten the bolts until the radius arms and axle pivot bolts are lined up back on the truck. With the radius arms on the beams we were ready to get the assembled beams back on the truck.

The beams are installed just as they were removed. We put a jack under them, assembled the bushings on the ends of the radius arms, pushed the radius arms into the new brackets and then swung the axle ends back into the pivots. The outer radius arm bushing washer were installed and then the nuts were torqued on. That done, we torqued the axle pivot bolts and then tightened the bolts that hold the radius arms onto the axle beams.
With the top stud tightened we dropped spring seat, spring and washer down on the stud and tightened the nuts. That done, we jacked up each axle beam and popped the springs up into their top mounts. Now we were ready to tackle the Duff shock hoops.
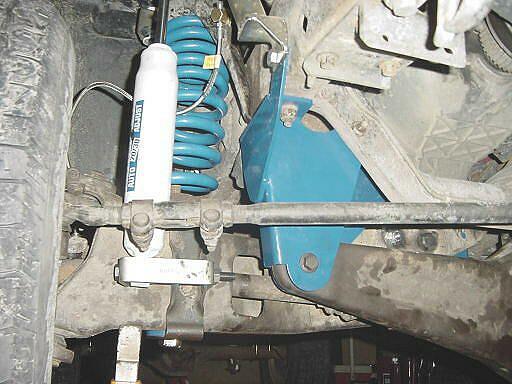
The dual shock kit takes a little figuring to get it on. The top of the shocks are fastened to a hoop that fits around behind the coil bucket and bolts to the frame on either side of it. The fronts of the hoops using existing holes: one shares a hole with the new axle drop bracket and the other with the steering box. The backs of the hoops require holes to be drilled. Once the hoops were in place the bottom shock mounts had to be fitted. The rear shock mounts were bolted to the radius arms. The front mounts utilized the sway bar bracket and required a bit of thinking to get them together. With the front lift on it was obvious that we could not let the suspension droop without stretching out the stock brake hoses so we broke out the new set and went about installing them.
The brake hoses are fastened to the top of the coil buckets by clips that have to be pushed out and then the hoses unscrewed from the fittings. It’s a tough job and we had to remove the air box and the battery to be able to get at the right side. The new set is held on with a large nut and was much easier to deal with. Once the lines were on we gravity-bled the front brakes and then reassembled the axle ends. Now it was time to move on the the rear suspension.
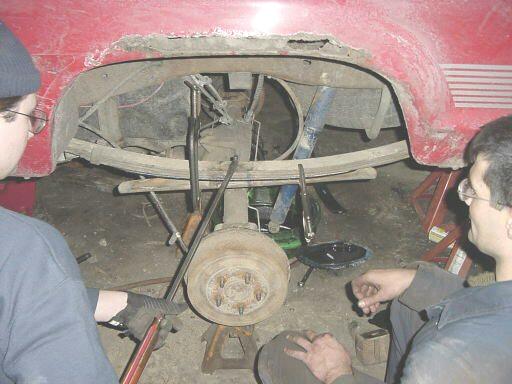
This particular Duff kit uses a short, thick leaf added to each rear pack. We rested the rear axle housing on stands and removed the U-bolts with a deep socket. After that we were able to lower the axle housing away from the springs, which were still held together by the center-bolt. The top clamp and spacer block also came free with the removal of the U-bolts. We used the angle grinder to remove the heads on the center-bolts and then separated the springs.
We installed the new spring above the load-stopper spring and using large C-clamps, squeezed the pack tightly together. My truck is worked hard and this became evident when we were clamping the springs back together. The old springs have lost quite a bit of curvature along the center third of their length and clamping on the new spring forced them back into shape. Eventually I expect they will find a happy existence somewhere in between. With the pack tightened together, we verified that the center holes were aligned and then ran the new center-bolt through the springs and tightened it down. Next, we cut all but the last two threads from the center bolt and then mashed those down with a hammer to prevent their loosening when the springs shift around. We now jacked the axle housing back up to the springs, replaced the blocks and top clamps and installed the new U-bolts.
The big C-clamps really came in handy here as we were able to use them to squeeze the U-bolts together in order to line them up more easily. With the bolts on we partially tightened the nuts and then tapped the bottoms in line with a hammer before torquing them.
The last things to be done were replacing the rear shocks and having the gears installed in the rear axle. The rear shocks are simply longer replacements for the stock ones and require no thought. Held on by nuts and studs on the top and nuts and bolts on the bottoms we had them replaced in moments.
With the shocks done, we set about getting the rear axle ready for the shop to do the gears. To drain the rear axle we removed the cover bolts and then pried it loose to let the fluid drain. Once the fluid was out, we pulled the cover free and cleaned the housing and cover while John did the gear set-up and rebuilt the axle. Then the axle cover went back on and we filled the front and rear differentials with gear oil.
The only complaints we had with the Duff kit were that the instructions are very incomplete and that they skimped on the length of the U-bolts. We spent a good deal of time trying to figure out how the shock hoops went on and even after I got it home, I ended up removing them again and changing a few things around. There were no instructions included for the radius arm/ transmission crossover. Considering the amount of time they must have spent engineering this suspension kit, how much more time would it have added to include decent instructions?
As to the rear U-bolts: the darn things were simply too short. Through huge effort we were able to get them on far enough to hold, but there is absolutely no thread sticking up past the nuts. It is likely that since my truck has the GVW package on it my spring pack is a little thicker than Duff was counting on, but it would have been easy for them to have made the U-bolts an inch longer. This would make assembling them much easier as well.

After we finished admiring our handy work, I jumped in my truck at 3AM Sunday morning and drove home. It snowed the whole way home. The truck pulled a little and I was a little anxious about driving 400 miles across Ohio and half of Indiana on my new gears. But they were perfectly quiet and the gear oil was clear when I changed it. Steinbinder’s Service does good work.
So, the first step in the TRS Project Truck is complete. Next issue we will discuss tire selection, doing the initial alignment and then we will take the TRS Project Truck out for a real-world drive to compare it to the previously measured stock wheel travel.
Suspension–Stock Versus James Duff
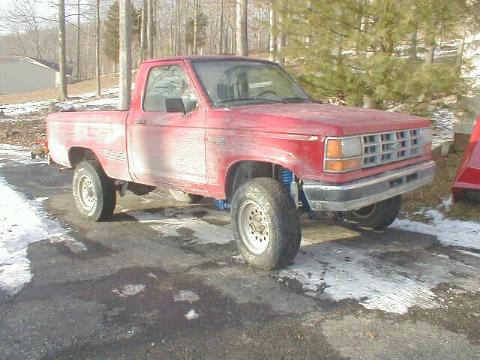
Last issue we covered the installation of James Duff’s 3″ Class 2 suspension lift and gears on my 1991 Ford Ranger. This issue, I completed the article for the installation of the front locker–the truck was already equipped with a rear one. Also, I had mud tires put on the truck. Though the truck performed really well at the Spring Round-Up, I had still not done a direct comparison between the stock truck and the modified truck.
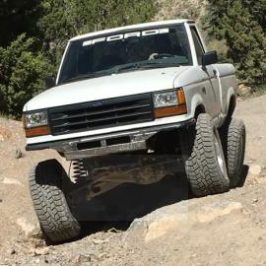
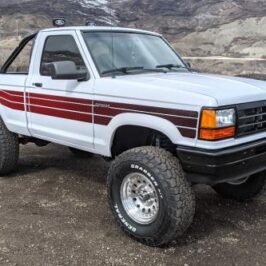
Before I could do that, the urge to own a vehicle with more than 2.5 seats struck me and I bought a Ford Bronco II. I quickly transferred the parts from the Ranger to the Bronco II: locked Dana 35 and 8.8″ axles with 4.10s, Duff suspension, and 31″ Kumho Venture MTs. Now, with the new vehicle completed I could finally get it out on the same trails that I tested the Ranger on and do a direct comparison between stock and modified. In the pictures that follow, both trucks have the sway bars removed.
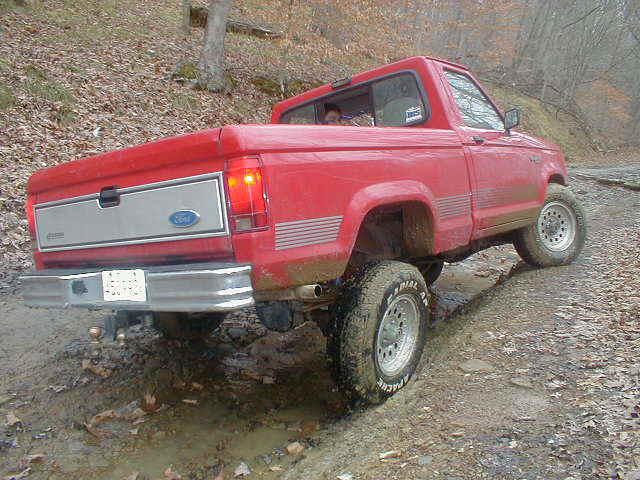
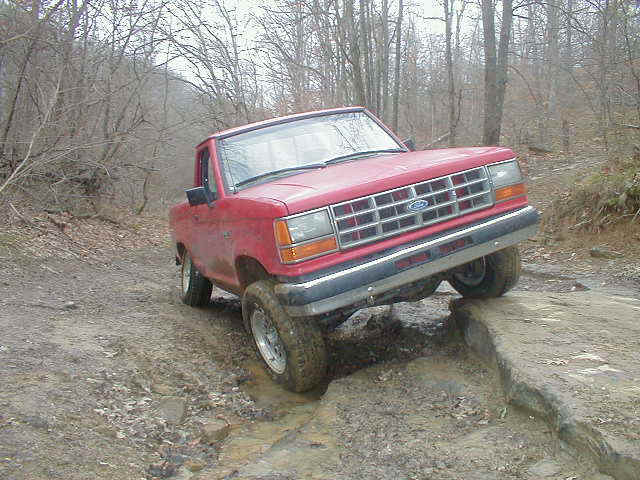
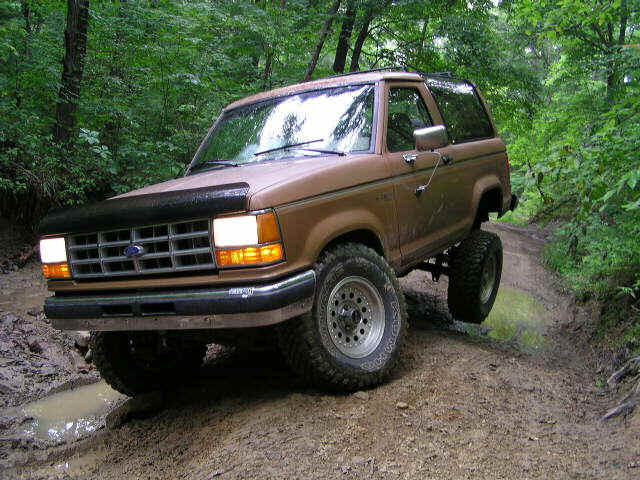
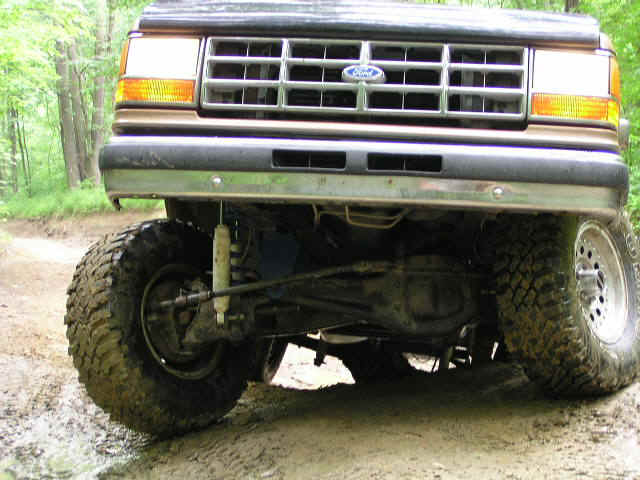
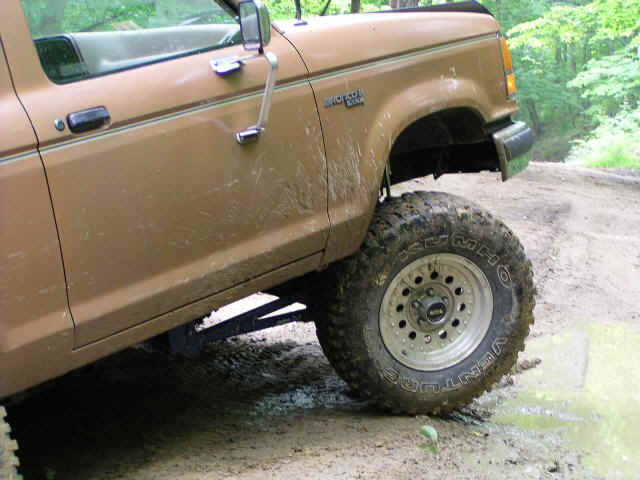
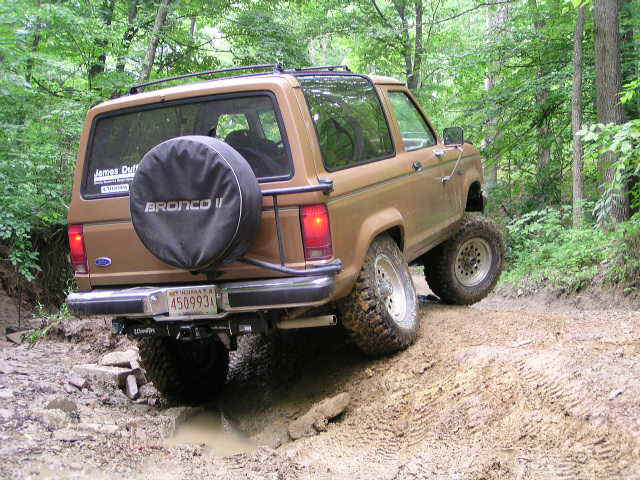
There is no question, but the James Duff suspension has a ton more travel than the stock stuff. The Duff travel is limited by the shocks being about 1.5″ too short. The stock suspension was limited first by the radius arms and then by the shocks and springs. The stock suspension travel in these pictures was measured at 9″ in the front and 17″ in the rear. I was hoping to gain 3″ of front travel and I believe I have easily done that. I did not have a tape measure with me for the modified test, but I think there is 13-14″ in the front. As far as the rear goes, the stock Bronco II springs were used, and they seem to be less stiff than the Ranger springs. The 31″ tires on the Bronco II were rubbing when the tires stuffed, but I think about 20″ of travel is present. With the Duff suspension, the truck crawled over everything like a spider, and I had to work at it to lift a tire. With the stock suspension, three on the ground was about the norm. I will say that even with only a 3″ lift and 31″ tires, the Bronco II is way more tippy than the Ranger was with the same parts on it. I am pretty sure that I will eventually put a Ranger cab on the B2 chassis when I get something else to haul kids in.
But the best gains were actually in drivability on the road. The Duff dual shock set-up gives the truck great control on the worst of roads. I think that since the powerful shocks actually absorb the energy from a bumps and sways and release it as heat rather than storing it and unloading it, the truck is much more stable. The Duff suspension is definitely a suspension that is made to be driven: driven anywhere.
About The Author
Jim Oaks is the founder of TheRangerStation.com, the longest-running Ford Ranger resource online since 1999. With over 25 years of hands-on experience building and modifying Ford Rangers — including magazine-featured builds like Project Transformer — Jim has become one of the most trusted authorities in the Ford Ranger off-road and enthusiast space.
Since launching TheRangerStation.com, Jim has documented thousands of real-world Ranger builds, technical repairs, drivetrain swaps, suspension modifications, and off-road adventures contributed by owners worldwide. TheRangerStation.com has been referenced in print, video and online by enthusiasts, mechanics, and off-road builders looking for practical, and experience-based information.