
Introduction
If you’ve lifted your 1998-2011 Ford Ranger with torsion bars, you may have noticed limitations with ride quality, ground clearance, and suspension travel. A coilover conversion replaces your stock torsion bars with adjustable coil-over shocks, offering improved ride comfort, better handling, and the ability to fine-tune suspension height for off-road performance or daily driving.
This guide covers everything you need to know about converting a torsion bar suspension to coil-overs on a 1998-2011 Ford Ranger, including:
- How coil-over shocks work and why they are better for lifted Rangers.
- Eliminating low-hanging torsion bars that can snag on rocks or obstacles.
- Selecting the correct coil-over shocks and springs for your weight and lift.
- Installing upper and lower mounting brackets, extended eyelets, bump stops, and longer brake lines.
- Tips for ride height adjustments, safety, and alignment after conversion.
Whether you’re building a high-clearance off-road Ranger or simply want a smoother, more responsive ride, this coilover conversion guide walks you step-by-step through the process and explains which parts and components work best for lifted Ford Rangers.
Overview
This article shows you how to replace your Ford Ranger torsion bars with coil-overs.
Contents
- Overview
- What’s a Coil-Over?
- Why Use Coil-Overs?
- Low Hanging Torsion Bars
- To Get a Smoother Ride
- Conversion History
- Installation & Brackets
- Choosing Coil-Over Shocks
- Extended Eyelets
- Coil-Over Springs
- Longer Brake Hoses
- Bump Stops
- Limiting Straps
- Where to Buy
- Related Articles
First Of All, What’s A Coil-Over?
“Coil-over” is short for “coil spring over shock”. It consists of a shock absorber with a coil spring encircling it. Many of today’s vehicles are built with struts instead of springs. The strut acts as the shock, as well as the spring that holds the vehicle up. The real difference between coil-overs and struts is that coil-overs are adjustable, and struts are not. Also, in some cases the strut itself can act as the upper control arm.
Why Would I Need Coil-Overs?
There are two main reasons to justify a coil-over conversion on a torsion bar equipped Ford Ranger:
- To get rid of low hanging torsion bars on a lifted Ranger
- To get a smoother ride
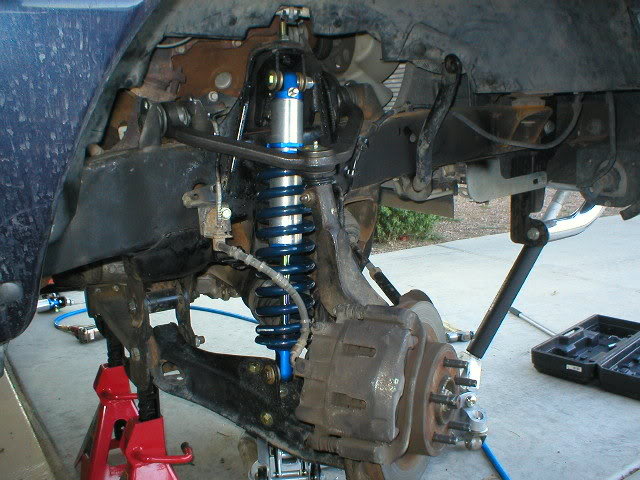
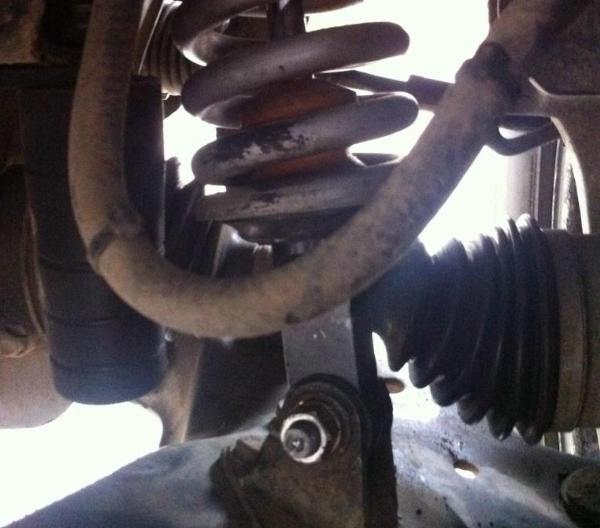
Low Hanging Torsion Bars
If you perform a 4-inch suspension lift on your 1998-2011 Ford Ranger, you’ll also have to lower the mounting point of the torsion bars. These hang further down than the radius arms on earlier Rangers. Dragging torsion bars over obstacles can lead to suspension failure. A coil-over conversion removes torsion bars and mounts, reducing the risk and providing more ground clearance.

To Get a Smoother Ride
This is subjective. Some conversions improve ride quality if the stock torsion bars and shocks are worn or if the owner has cranked torsion bars for lift without upgrading shocks to match.
Is This a New Idea?
The idea of swapping torsion bars for coil-overs has been around for a while. RCD Suspension offered a 5-inch lift for 1998-2002 Ford Rangers with coil-overs. Modern DIY kits and custom setups are based on those old designs. After RCD stopped producing kits, Superlift remained the main manufacturer offering bolt-on suspension lifts.
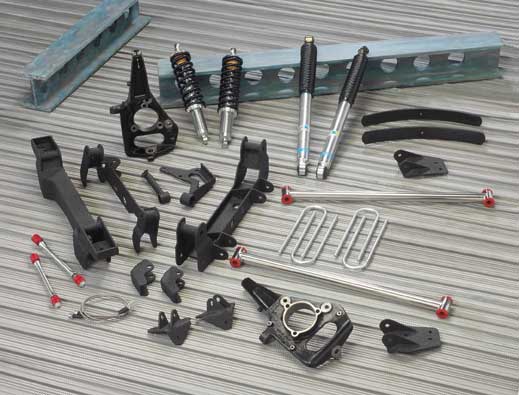
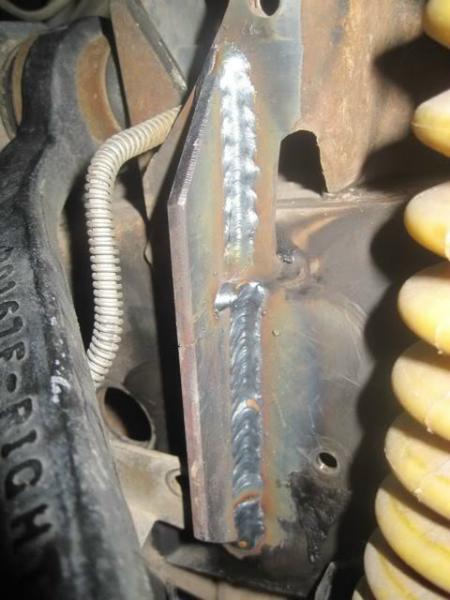
Installation & Brackets
These conversions usually require welding to reinforce the upper shock mount using gussets. Upper and lower mounting brackets can be purchased online or custom fabricated.
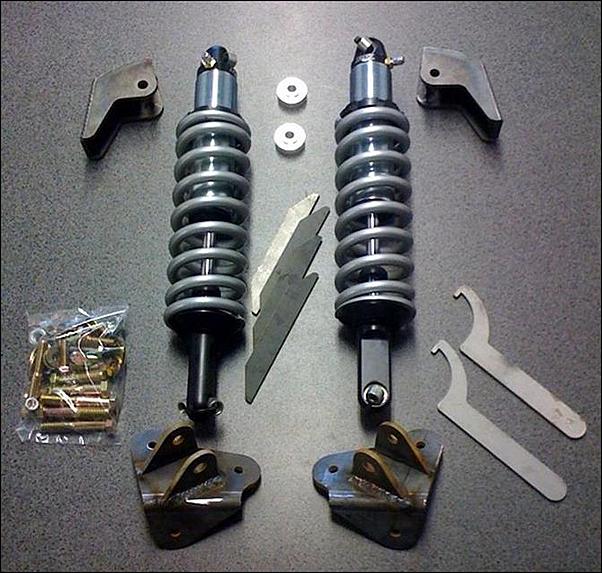
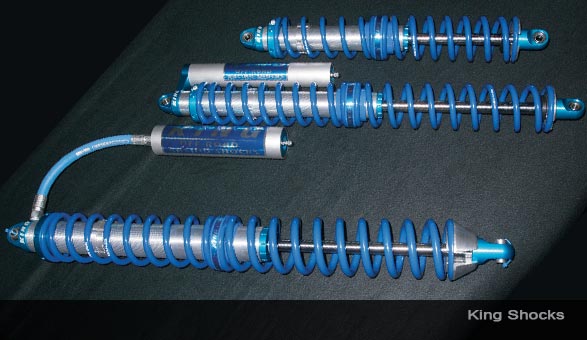
Choose the Right Coil-Over Shocks
Three types of coil-over shocks exist: Emulsion, Piggyback, and Remote Reservoir. Most applications will work fine with 2.0 emulsion shocks. Upgrades from Superlift or Rough Country kits will require longer coil-overs. See instructions linked below for exact dimensions.
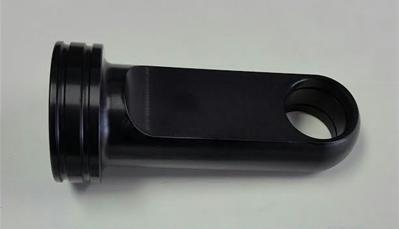
Extended Eyelets
All lifted trucks require extended eyelets to prevent the shock body from contacting CV boots. Do NOT use these on stock height Rangers.
Choose the Right Coil-Over Springs
Stock RCD kits used 650lb springs. Extended cabs or heavy front accessories may require 750–800lb springs. Spring length depends on conversion type: 12″ for Superlift 4-inch lifts, 10″ for stock or leveled trucks.
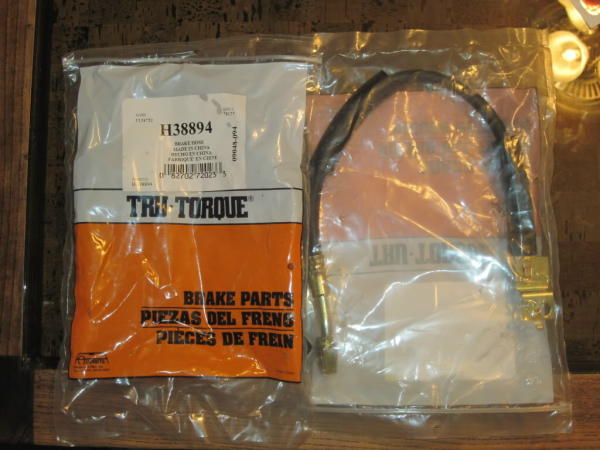
Adding Longer Brake Hoses
Dorman H38894 hydraulic brake hoses fit directly for this conversion, replacing stock lines that may interfere with coil-over brackets.
Bump Stops
Factory bump stops must be trimmed to fit coil-overs. Use Eibach Micro Cellular Foam Shaft bump stops to prevent deflection and CV damage.
Limiting Straps
Required to protect CV joints and shocks from overextension. Later Superlift kits include these straps, which can be reused.
Where Should I Buy Coil-Overs and Brackets?
- Down South Motorsports – Coil-over shocks and springs with spanner wrenches.
- Ricks Rangerz – Upper & lower coil-over brackets.
- North Peak 4×4 – Coil-over conversion brackets.
Related Articles
- Installing a Superlift Kit – 2001 Ford Ranger
- Ford Ranger Torsion Bar / Key Removal & Installation
- Torsion Bar Removal Without a Special Tool
- 1998–2011 Ford Ranger IFS Suspension Modification Guide
- 1983-2011 Ford Ranger Off-Road Builders Guide
- Mr Bossley’s 2008 Ford Ranger Overlander – A Living Example
Last Updated:
About The Author
Jim Oaks is the founder of TheRangerStation.com, the longest-running Ford Ranger resource online since 1999. With over 25 years of hands-on experience building and modifying Ford Rangers — including magazine-featured builds like Project Transformer — Jim has become one of the most trusted authorities in the Ford Ranger off-road and enthusiast space.
Since launching TheRangerStation.com, Jim has documented thousands of real-world Ranger builds, technical repairs, drivetrain swaps, suspension modifications, and off-road adventures contributed by owners worldwide. TheRangerStation.com has been referenced in print, video and online by enthusiasts, mechanics, and off-road builders looking for practical, and experience-based information.