• Welcome Visitor! Please take a few seconds and Register for our forum. Even if you don't want to post, you can still 'Like' and react to posts.

One more 2wd 98 coil spring 5.0 swap.


Jbrown1238

Member
Joined
Sep 3, 2010
Messages
691
Reaction score
6
Points
18
Location
Largo, Fl
Vehicle Year
2003
Make / Model
Ford
Engine Size
306
Transmission
Manual
My credo
None
I don’t have much to report this week or many new photos to add. I did purchase the new AC related items and did get them installed on the Ranger. I spent several days sorting out a few glitches on that system but finally did get the AC evacuated and charged with new refrigerant.


After I installed the Ranger condenser pictured above with the Explorer 5.0 hoses, Evaporator, Compressor, and Accumulator I found that the connections were slightly different on the Ranger condenser although they looked identical to the Explorer piece. A quick trip to Advance Auto Parts and the correct piece was secured.


The AC consumed the majority of last weekend and a few evenings during the work week but I had a couple minutes to test fit the new leather on the passenger seat. The seat has not been assembled; it is only set together for photo purposes. It still needs the seat warmers installed and some “adjustment” to the top section. The bottom fit very nice and tight, but the top will need some TLC.


I didn’t realize when I unpacked the kit that it was for front bucket seats and not the 60/40 split front seat option I ordered. At first I had intended to have the error corrected but after “sleeping” on it over night I decided to go ahead with front bucket seats. The passenger side steel seat pan and seat foam are both bisymmetrical and can be used on the driver or passenger side. The driver side lower seat frame will need to be cut to accept the bucket seat pan (remove the lower center section). I plan to source the passenger side seat pan and lower seat foam from my 98 Ranger (I will replace that later) and use it with the modified driver side seat frame from the 99 Ranger to build a driver side bucket seat. There will be no arm rest or center console, the center section will remain open between the seats. This will help make the cab “feel” a little larger as that area will “spill” into the section behind the two seats.

I am off work this weekend so I am going to try to get the bed removed and painted and then reinstalled before Monday morning. Keep your fingers crossed that the weather holds out. The forecast calls for 50% rain chances. With a little luck I will be back Sunday night with a few new photos.
 
Last edited:

Jbrown1238

Member
Joined
Sep 3, 2010
Messages
691
Reaction score
6
Points
18
Location
Largo, Fl
Vehicle Year
2003
Make / Model
Ford
Engine Size
306
Transmission
Manual
My credo
None
I got an early start this morning taking advantage of my two days off from work. I removed the bed from the truck and set it up on saw horses to begin the paint work. The first step was positioning it right side up so the top surfaces could be washed with soap and water. Once that step was complete the top surfaces were wet sanded with 400 grit paper and then followed by a scotchbrite pad.


I flipped the bed over on the saw horses and proceeded with drilling out the rivets on the two heat shields that will be removed.


After that task was complete I washed the underside of the bed with soap and water and followed up with wet sanding with 400 grit paper and chasing the panel with a scotchbrite pad. The scotchbrite pad helps hit all of the hard to reach places much better than standard sand paper.


The bottom edge of the tailgate jamb had a little bit of damage and needed to be slightly straightened. Part of this damage was related to years of wear and tear from “truck use” and some of it was created by myself when I removed the spare tire lock assembly. At the time I didn’t have a key for the lock and it needed to be removed at the last minute when the truck went out for exhaust work.


Once the tailgate jamb area was straight I flipped the bed over and sprayed the entire bottom of the bed with Dark Shadow Grey basecoat I had left over from my 03 Cobra. This is the same color I used on the underside of the Ranger cab a couple years ago. I also sprayed the sides with the same DSG color before trimming the wheel wells and the corners of the box with Tuxedo Black Metallic basecoat.


The bed was turned over once again, right side up, and the inside of the box and corners were sprayed with Tuxedo Black Metallic basecoat.


Tomorrow I will final sand the tailgate jamb section and lay down two fresh coats of Tuxedo Black Metallic basecoat before top coating that area with two coats of clear. The remainder of the bed will be left in basecoat as it is all covered by quarter panels and a bed liner.
 

Jbrown1238

Member
Joined
Sep 3, 2010
Messages
691
Reaction score
6
Points
18
Location
Largo, Fl
Vehicle Year
2003
Make / Model
Ford
Engine Size
306
Transmission
Manual
My credo
None
Another early morning, up about 6:00am and outside around 7:00am getting ready to finish up the Ranger flareside bed. I wet sanded the repaired area with 400 grit paper and feathered the blended edge out on to yesterdays fresh paint. Because the bed was painted yesterday, less than 24 hours ago, it is not necessary to scuff the fresh paint with 400 grit paper. The paint sprayed today can go right over the top with little preparation.


I mixed up some Tuxedo Black Metallic basecoat and shot the tailgate jamb, covering the repaired section. Once the two coats of color were down I followed up with two coats of Shopline 630 Urethane Clear.


While the fresh paint was drying in the hot Florida sunshine I washed the rear half of the Ranger preparing it to accept the bed for the last time. I also finished a few tasks that could be easier accomplished while the bed is removed. I attempted to chase down a non-functioning fuel gauge issue but was unsuccessful; the wiring appears to be intact and complete. It will probably turn out to be a float problem inside the tank. I also pulled the rear harness through the frame and completed the connections for the tail lights and tag lights. Finally I hung the full size 17 inch spare tire in the stock location.


This is the first chance I have had to look at the exhaust system closely from the top. I thought I better grab a few photos as it will probably be covered for a long time. That is unless I have to get back into the fuel tank to fix that damn gauge down the road. I am still hoping it turns out to be a ground splice that is still unplugged somewhere along the harness.


willy

New Member
U.S. Military - Veteran
V8 Engine Swap
Joined
Feb 9, 2011
Messages
277
Reaction score
2
Points
0
Location
cedar lake, in
Vehicle Year
2000
Make / Model
Ford
Engine Size
5.0 explorer
Transmission
Automatic
Looking nice bud i look at your swap and think well shit i have to actually paint mine now rattle can aint gonna do it
 

Jbrown1238

Member
Joined
Sep 3, 2010
Messages
691
Reaction score
6
Points
18
Location
Largo, Fl
Vehicle Year
2003
Make / Model
Ford
Engine Size
306
Transmission
Manual
My credo
None
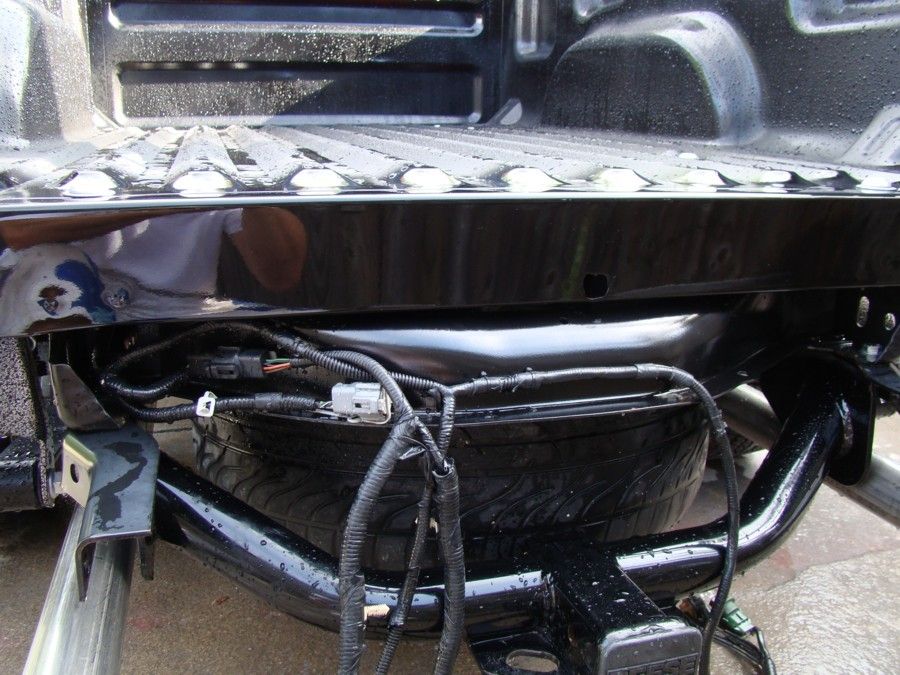
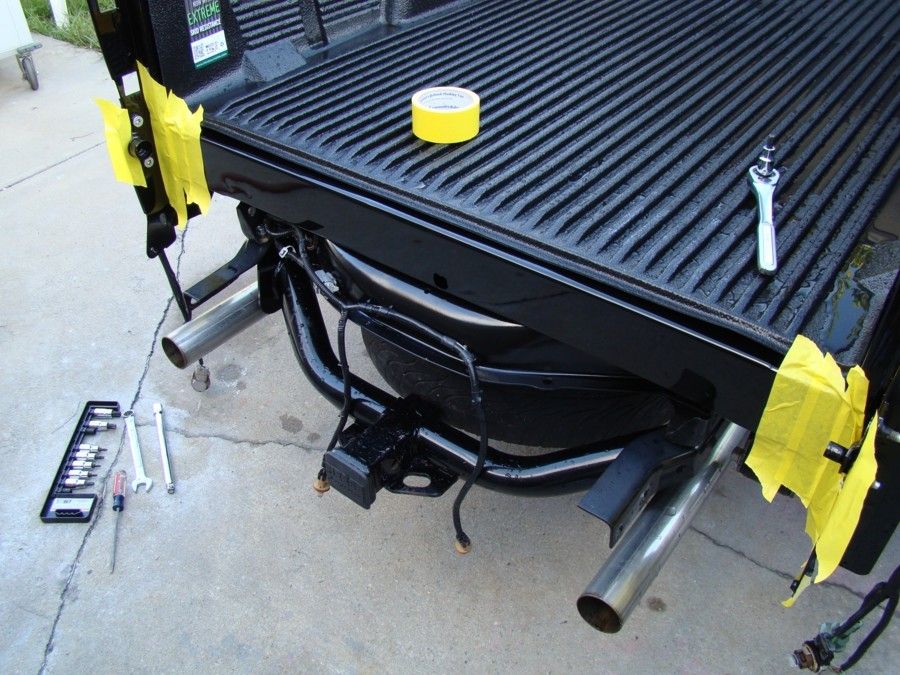
I spent every night this week working on the truck, sorting out a few issues here and there and moving forward with installing the bed. Once all of the wiring was pulled and set aside, I carefully moved the bed into its final resting position.


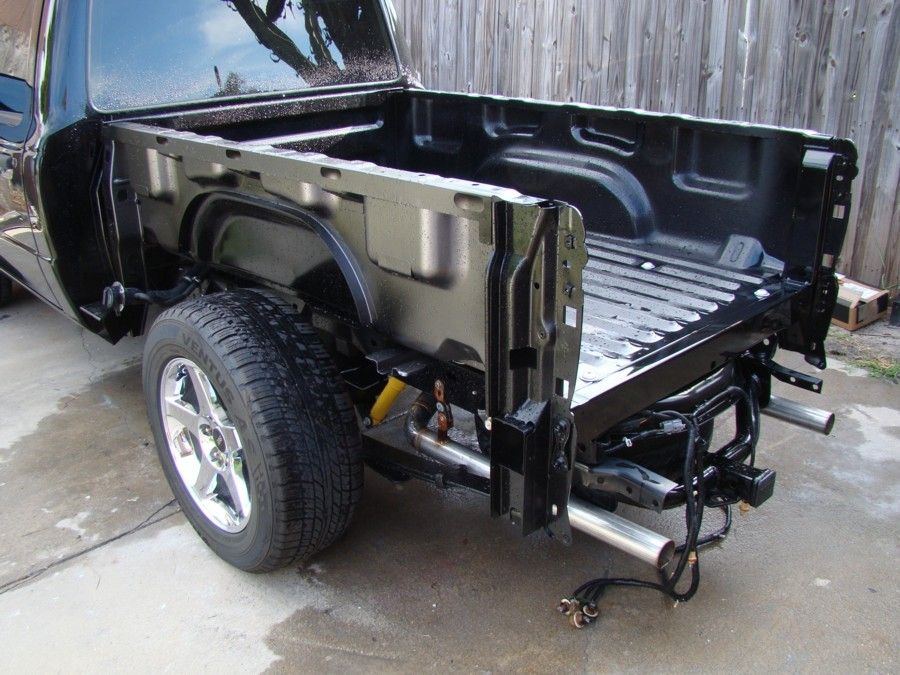
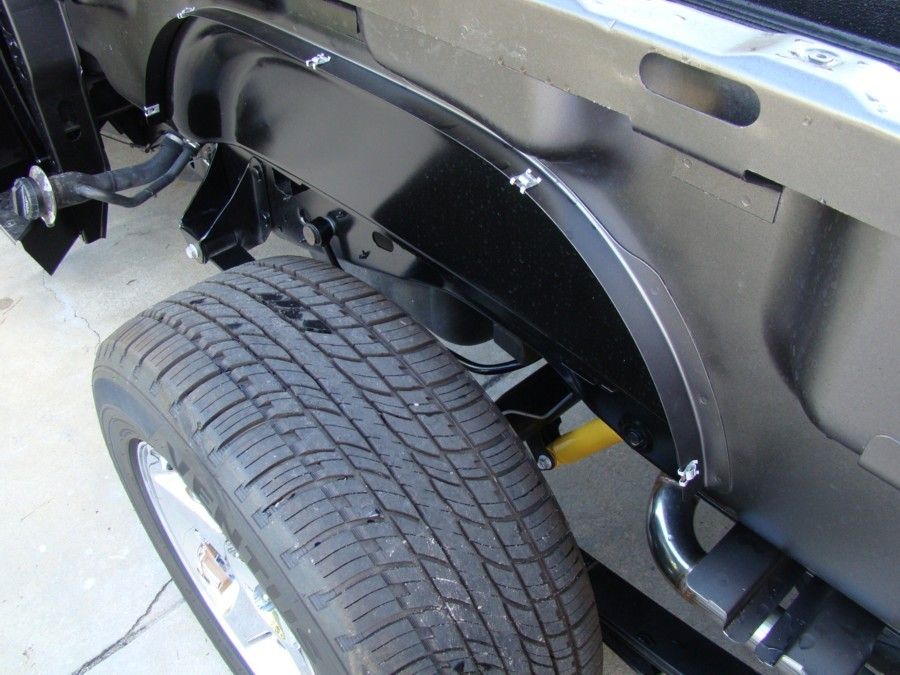
I wish I could say I replaced all of the quarter panel clips with new pieces but the fact is I simply dusted them with a little aluminum spray paint and left it at that.


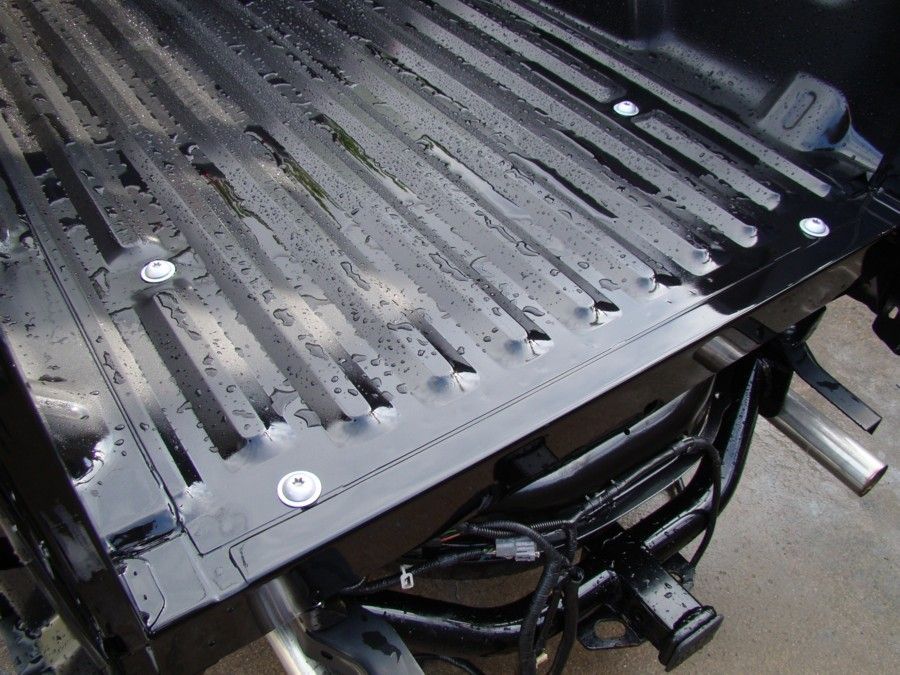
The same trick worked just as well on the bed/frame bolts. Even though they will be covered by the bed liner I couldn’t help touching them up a bit.


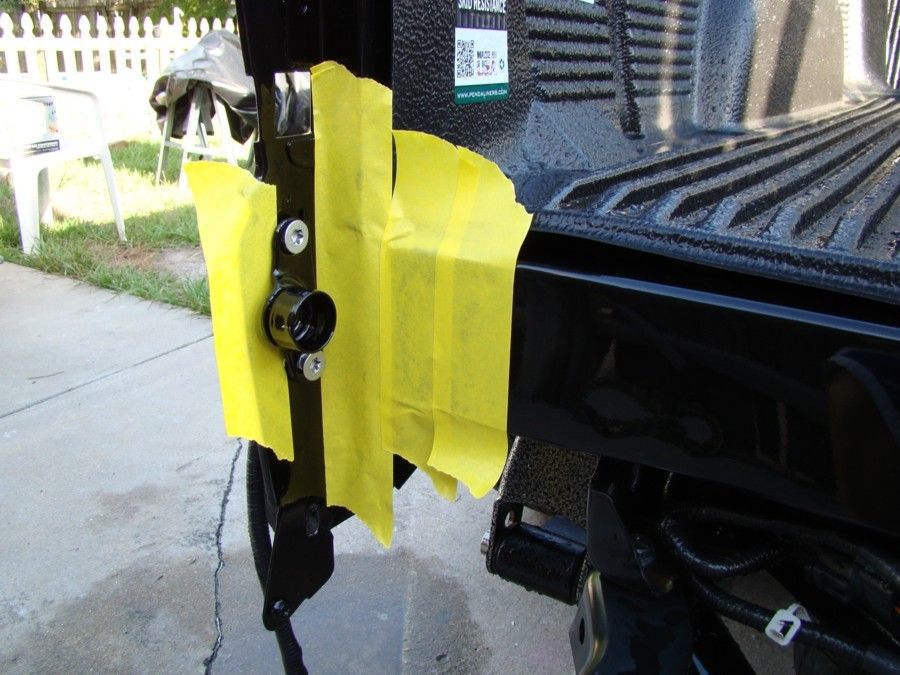
Just a quick shot of the fresh paint on the tailgate jamb.


Once all the initial work was complete I went ahead and set the bed liner in place and taped up the jamb so the tailgate hinges could be installed.


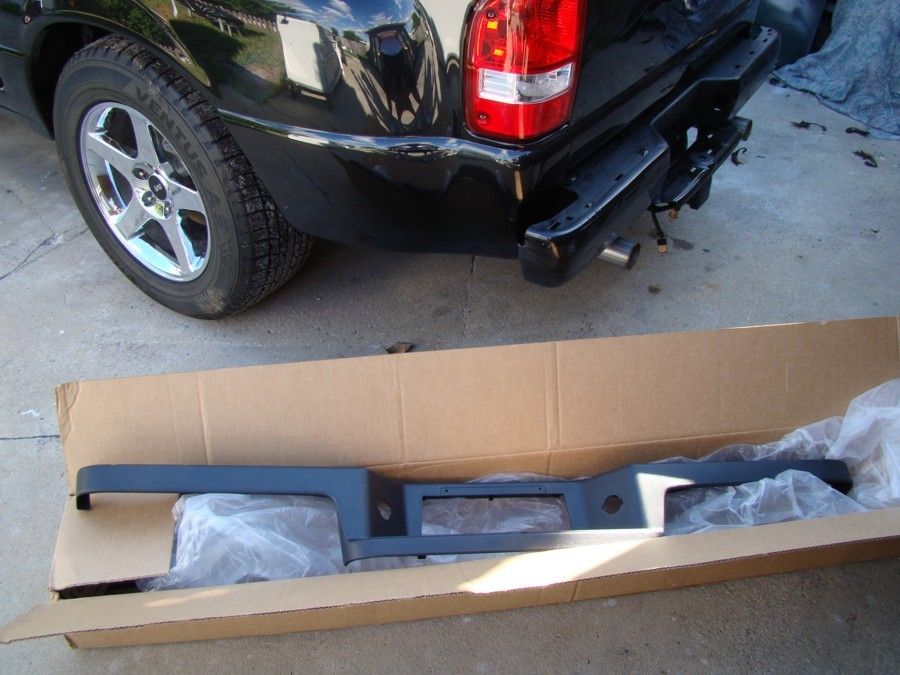
I installed the inner fender liners, quarter panels, tailgate, tail lights, and rear bumper before digging out the new rear bumper step pad I had purchased a while back.


Finally the rear of the truck is complete. The only thing missing now is that new Florida License Plate!


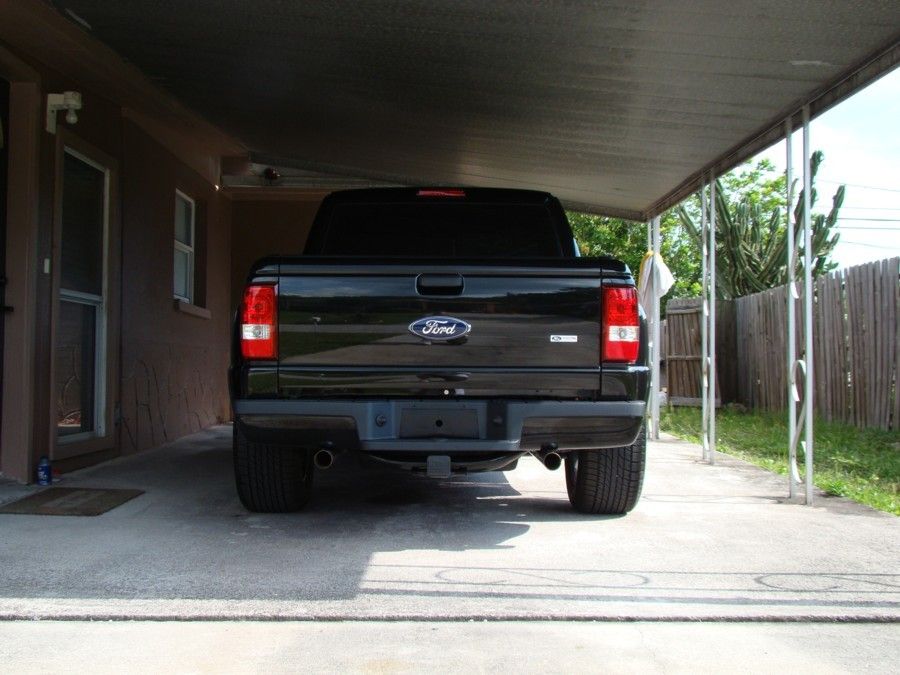
Now the focus will shift to the interior of the truck. I will first start with converting the head light switch from the 1999 model year over to the newer 2011 style. After that is done I will start painting interior panels to match the new seats.
 

oddball101

New Member
Joined
Jun 8, 2010
Messages
138
Reaction score
0
Points
0
Location
Columbia SC
Vehicle Year
01
Make / Model
Ranger
Engine Size
5.0
Transmission
Automatic
I'd be interested to know if the 2002 year explorer gauge cluster can be adapted to the rangers. I like the cleaner look and feel of them. Do you know of a way to obtain stock leather seat covers? I see seats in the yards all day long but non of them are in decent condition.

She's lookin good!
 

JakeF

New Member
Joined
Jun 10, 2015
Messages
26
Reaction score
0
Points
0
Vehicle Year
2002
Make / Model
Ford
Transmission
Automatic
Love this build you are doing an awesome job. I have just started a build very similar but I won't be using as many new parts the budget will not allow for it I am hoping to finish by August the title of my build is 2002 coil spring 5.0 ranger build I have been having a hard time uploading photos from my phone.
 

Jbrown1238

Member
Joined
Sep 3, 2010
Messages
691
Reaction score
6
Points
18
Location
Largo, Fl
Vehicle Year
2003
Make / Model
Ford
Engine Size
306
Transmission
Manual
My credo
None
I'd be interested to know if the 2002 year explorer gauge cluster can be adapted to the rangers. I like the cleaner look and feel of them. Do you know of a way to obtain stock leather seat covers? I see seats in the yards all day long but non of them are in decent condition.

She's lookin good!
I see OEM Ranger leather seat covers on eBay often. However, they are for 2006 and up Rangers which means a seat change for our model years. They are fairly expensive as well, around $400.00 for a good set. That price along with another $300.00 or $400.00 for seats makes it pretty expensive.

I am not sure about the 2002 Explorer gauge cluster. But anything is possible!
 

Jbrown1238

Member
Joined
Sep 3, 2010
Messages
691
Reaction score
6
Points
18
Location
Largo, Fl
Vehicle Year
2003
Make / Model
Ford
Engine Size
306
Transmission
Manual
My credo
None
Love this build you are doing an awesome job. I have just started a build very similar but I won't be using as many new parts the budget will not allow for it I am hoping to finish by August the title of my build is 2002 coil spring 5.0 ranger build I have been having a hard time uploading photos from my phone.
Thank you for stopping by. I did see your thread and will look forward to the updates and photos. I understand about the new parts, to be honest it doesn't make a lot of sense to go the direction I did. You end up over-invested with no hope of ever recouping the cost of the build. The only way I could partially justify it was because of my age and accepting that it was the last big build of my life. This one I will be keeping.
 

JakeF

New Member
Joined
Jun 10, 2015
Messages
26
Reaction score
0
Points
0
Vehicle Year
2002
Make / Model
Ford
Transmission
Automatic
Thank you for stopping by. I did see your thread and will look forward to the updates and photos. I understand about the new parts, to be honest it doesn't make a lot of sense to go the direction I did. You end up over-invested with no hope of ever recouping the cost of the build. The only way I could partially justify it was because of my age and accepting that it was the last big build of my life. This one I will be keeping.
I don't blame you that truck is far too nice to let go of.
 

willy

New Member
U.S. Military - Veteran
V8 Engine Swap
Joined
Feb 9, 2011
Messages
277
Reaction score
2
Points
0
Location
cedar lake, in
Vehicle Year
2000
Make / Model
Ford
Engine Size
5.0 explorer
Transmission
Automatic
Thank you for stopping by. I did see your thread and will look forward to the updates and photos. I understand about the new parts, to be honest it doesn't make a lot of sense to go the direction I did. You end up over-invested with no hope of ever recouping the cost of the build. The only way I could partially justify it was because of my age and accepting that it was the last big build of my life. This one I will be keeping.
Yea spending 10 to 20k on a 1500 dollar truck only ranger people will under stand looks dam nice tho
 

Jbrown1238

Member
Joined
Sep 3, 2010
Messages
691
Reaction score
6
Points
18
Location
Largo, Fl
Vehicle Year
2003
Make / Model
Ford
Engine Size
306
Transmission
Manual
My credo
None
Yea spending 10 to 20k on a 1500 dollar truck only ranger people will under stand looks dam nice tho
LOL!!, $1500.00? Yep, after I sold the engine, trans, and rear end that is about what it cost. Thanks man, that was funny!
 

gsp

New Member
Joined
Sep 14, 2010
Messages
217
Reaction score
1
Points
0
Vehicle Year
1993
Make / Model
Ranger
Transmission
Manual
May I ask how much?
My guess is $23.5K
 

Jbrown1238

Member
Joined
Sep 3, 2010
Messages
691
Reaction score
6
Points
18
Location
Largo, Fl
Vehicle Year
2003
Make / Model
Ford
Engine Size
306
Transmission
Manual
My credo
None
May I ask how much?
My guess is $23.5K
I honestly have no idea. I intentionally never kept track. If a receipt didn't have a core value or wasn't needed for warranty purposes I tossed it right away.
 

Sponsored Ad


Sponsored Ad

Staff online

Member & Vendor Upgrades

For a small yearly donation, you can support this forum and receive a 'Supporting Member' banner, or become a 'Supporting Vendor' and promote your products here. Click the banner to find out how.

Truck of The Month


Shran
April Truck of The Month

Recently Featured

Want to see your truck here? Share your photos and details in the forum.

Follow TRS On Instagram

TRS Events

25th Anniversary Sponsors

Check Out The TRS Store


Sponsored Ad


Sponsored Ad

Sponsored Ad


Amazon Deals

Top