
By Joel Haywood
Changing the bearings in the Warn Manual locking hubs that replace the auto locking ones is probably one of the most overlooked parts to the front-end workings. This is something that I would consider to be on a service list of when you repack your bearings every spring and fall, right? You do that, don’t you?? I do, and now that I know that this bearing is in the hub this will be added to my list. I found this to only take about 15-20 min depending on your mechanical skills.
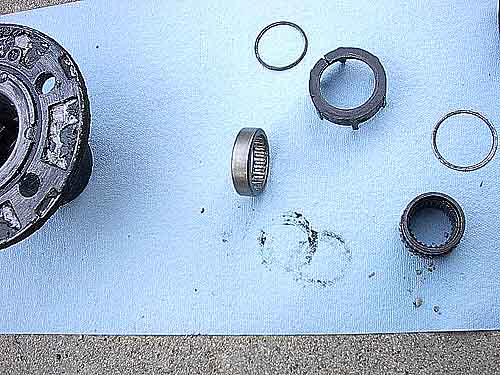
The bearing controls the free wheel in the hub and also supports the outer stub shaft at the tip. When you think about it this bearing is spinning whenever the hub is unlocked. It is very similar to the wheel bearings. When the stub shaft is not turning then the splines on the end of it are locked to a collar, which this bearing freewheels on. Contrary to belief this bearing does wear out. I have contacted Warn to find out if there is a rebuild kit or a bearing kit out there for them. Well, there is nothing available for these hubs. If that bearing goes then you’re stuck getting new hubs, until now that is.
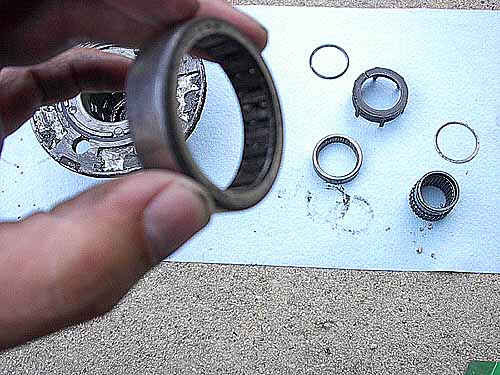
I took it upon myself to find a bearing to replace the one that I know was fragged in my hubs. Once upon a time I disassembled the hub and took a few measurements of the bearing surfaces. I then went online and found a number for the bearing at a very good website www.qbcbearings.com. The online catalog was very helpful. I then took that number and called a couple of local bearing supply stores to see if they can cross reference the number to something they have. The Number SCE-248. Was the number that most recognized. This is a needle roller bearing with an internal cage. This bearing has to be caged for it to take the high speeds.
Now that the history of the problem has been established, it is now time to get on with replacing the bearings. This is a very simple task; no special tools are needed. Two medium sized common head (flat) screw drivers are the major tools needed.
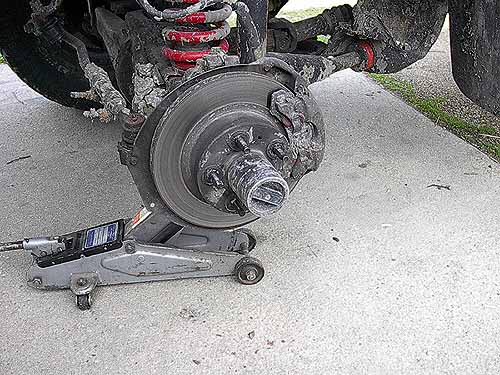
Jack the truck up and place the axle beams on jack stands to support the truck. The first picture I snapped before I got the stands under so don’t drill me about it, I know!
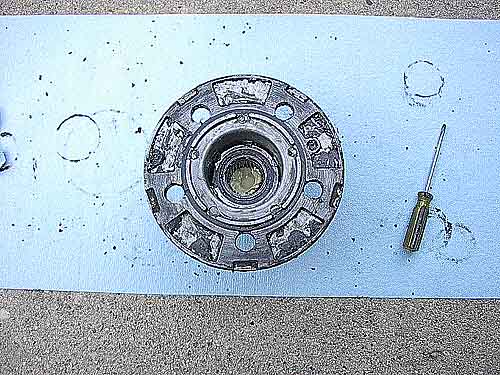
Now the tire and wheel can come off, exposing the hub. Slide the hub off on the wheel studs exposing the spindle nuts. Clean any excess grease off the nuts and now would be a good time to check the torque on them to make sure they are still to spec.
Clean out some of the grease in the hub itself, it makes for finding the parts a lot easier.
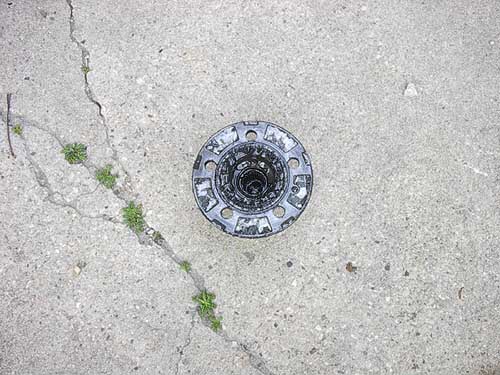
Once clean there is a snap ring that needs to come out. With one of the flat screwdrivers work the clip loose and slip it out. Do not pry too hard on it, it is only a spring clip and try not to damage the tabs that the clip locks under. With the clip out take the screwdriver and wiggle the locking mechanism out working all sides. There is a spring behind that will add some pressure to help it out. Don’t be afraid, nothing is going to go flying sky high on you. With the mechanism out you can inspect the splines and teeth for any chips or marks that don’t look right. I found that WD-40 will clean out the grease pretty good.
If you want to take it further apart then under the Warn decal on the lock, there is a Phillips screw that comes out, and the lock will come apart. Again, there is nothing in there that will come flying out. This is not necessary, but it will give you a better look at things. I would suggest doing this if and only if you notice any damage to the outer splines on the locking mechanism.
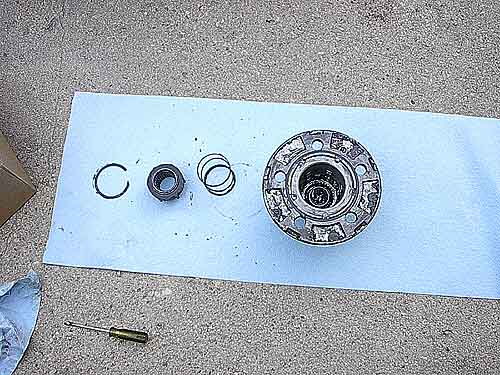
The bearing that is going to be replaced is in the locking mechanism that was pulled out earlier. There is another locking ring on top of the plastic housing, once the top is clean you will see it. All it is, is a flat coil type spring clip. This clip you should be able to get a fingernail under one end and like a coil it will unravel from the groove. If you no longer have fingernails then a smaller flat screwdriver will work. Be care full not to damage this clip also because these will be reused. With the clip out you can then remove the plastic centering housing to expose the bearing. Don’t worry about it there is supposed to be a gap in the plastic housing this allows it to spring out and force itself to the outer wall of the hub housing. If the bearings were as bad as mine, then you may have to pop the bearing off the locking spline. Be careful with this also you do not want to damage the splines on the lock, as this is not a serviceable item. We’re out to fix the hub, not break it more. With the bearing off watch out for a thin thrust washer again this is another piece to be retained. Another thing I found useful is a plastic ice-cream pail with some paint thinner and an old toothbrush for scrubbing the parts clean, for further inspection. With the locking splines in hand, you may notice some pitting or heat marks on the bearing surface. Not to worry with a little bit of steel wool or a Scotch Brite pad you will be able to shine it up a bit. Clean all the parts up good and then start to re assemble the hub with the new bearing. You can use a liberal amount of grease in the hubs; this prevents water from getting in and eventually wrecking other parts.
Point of note, that with the inside of the hub clean, you will see grooves in the hub housing that the teeth from the plastic collar of the locking mechanism slide it to. You may need a bit of force to get this to slide in. While holding it down, you can then get the snap ring back in the grooves. Don’t force it too hard in, because if it’s not quite aligned it will jam in and it’s a PITA to work out. I know that for a fact, so take my word for it. For a reference note, now that the hub is clean you can inspect the rubber O-ring that is on the flange of the hub. Inspect it to see if there are any pinch marks or tears in it. Apparently, there is an O-ring out there that will fit but I have not searched too hard for this, because mine are still in good shape. As far as I know these are the only two major serviceable parts to the hub. Other than the snap rings and the thrust washer. Everything else is all Warn specific parts that are not available.
With the hub back together a little bit of grease in the bottom of the hub and then it’s ready to go back on the truck, for further abuse!
About The Author
Jim Oaks is the founder of TheRangerStation.com, the longest-running Ford Ranger resource online since 1999. With over 25 years of hands-on experience building and modifying Ford Rangers — including magazine-featured builds like Project Transformer — Jim has become one of the most trusted authorities in the Ford Ranger off-road and enthusiast space.
Since launching TheRangerStation.com, Jim has documented thousands of real-world Ranger builds, technical repairs, drivetrain swaps, suspension modifications, and off-road adventures contributed by owners worldwide. TheRangerStation.com has been referenced in print, video and online by enthusiasts, mechanics, and off-road builders looking for practical, and experience-based information.