
By Jason E. Fountain
The look of a lowered truck is coveted by many street enthusiasts. For the ford ranger, DJM is the most popular company. I will be discussing the installation of DJM’s 3” front I Beams, and 4” rear flip kit and shocks. First you will see my notes, and then DJM’s instructions afterwards.
I suggest installing the rear flip kit first. It took me two hours to drop the rear of my truck, and seven for the front. The rear flip kit includes two brackets; that’s it. First, I supported the rear of the truck by the frame using jacks, jack stands, and wooden blocks. You can never be too safe!
Application: 83-97 Ford Ranger
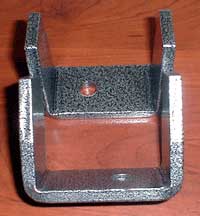
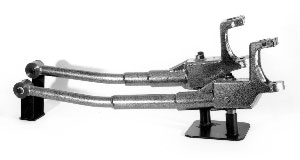
The kit: two brackets pictured below, two shocks DJM Part #TS1900(2 required; not pictured), and for extended cabs you will need a carrier bearing kit DJM Part# CB31 in order to realign your drive shaft.
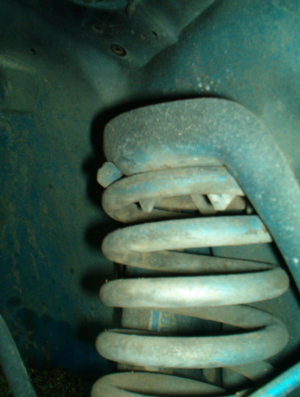
With the rear axle hanging loosely, yet slightly supported by a jack, I removed the shocks first. There are only two bolts holding each in, but make sure the axle is supported while removing.
Now that the shocks are removed, unbolt the two U-bolts and brackets holding the leaf springs to the rear axle.
I then removed the leaf springs completely. DJM claims you can remove the leafs on one side and still install easily, but I removed them completely to make sure I had good control over what I was doing. It’s easier to work on parts outside of the truck in my opinion.
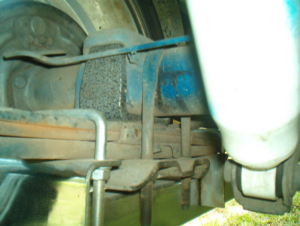
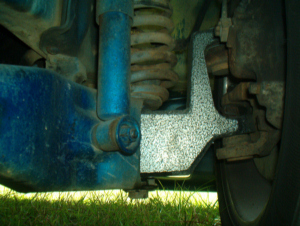
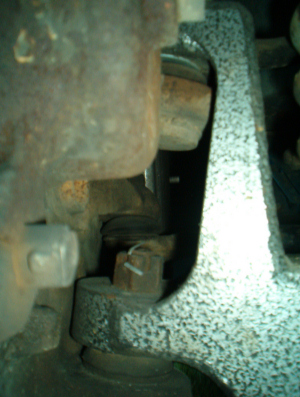
Now that the leafs are out, undo the bolt holding the springs together, then reinstall in the opposite direction. Reinstall the leafs in the rear only, and place the flip kit brackets over the flipped bolt via DJM instructions. Slide the front of the leaf slowly into place, and make sure the flip kit brackets go where they are supposed to line up. See picture below. Notice the bracket is located in front of the brake line.
Driver’s side….
Passenger’s Side….
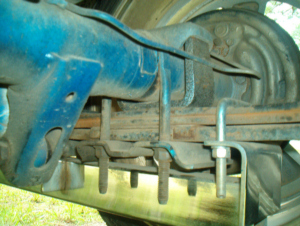
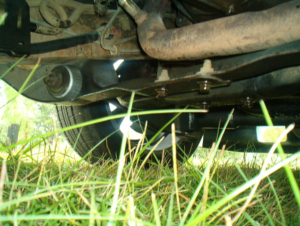
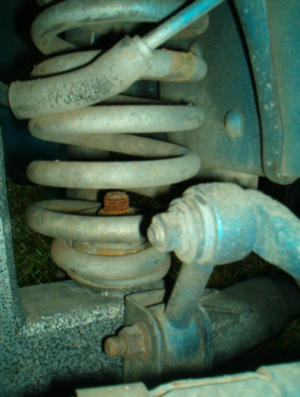
With the leafs installed, reattach the U bolts and brackets to secure in place; but this time upside down. Make sure you have the U bolt bracket turned the right way, (note the “M“ shape the bracket makes when looking at it in the above picture), or you will have unwanted squeaking and grinding from your rear suspension.
With everything bolted up tight, reinstall your shocks. Double check everything. Take her out for a test drive at SLOW speeds and test stopping and take off. If you don’t hear any unusual sounds, or feel anything unusual, you are probably set! That’s it for the rear!
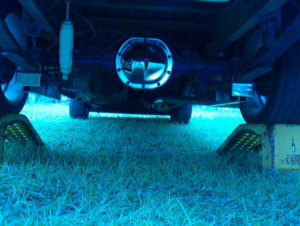
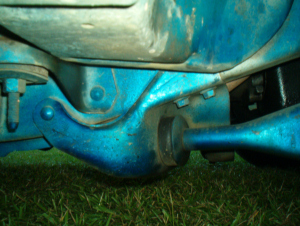
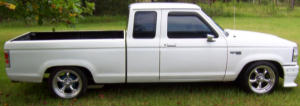
Finished Picture…..
DJM INSTALLATION INSTRUCTIONS: 4” rear flip kit
Application: 89-97 Ford Ranger
The kit: two 3” drop I beams, you will also need 2.5 eccentrics to align your tires correctly. You can buy the eccentrics from NAPA or any auto parts store for +/- $30.
*Side Note: These are the dream beams. Some rumors have been circulating that these things are weak and bend easily. I have had no problems. They are very durable. If you have air bags, hydraulics, or intend to have them in the future; I still do not think you will have problems with them. I cannot guarantee they will hold up since I do not have air bags yet.
I recommend doing one side at a time completely.
First, raise the front of the truck with it supported by the frame. Remember to be safe always. Remove the front wheels. Undo the tie rods from where they mount to the brake assembly.
There is a pin in the bottom bolt holding the caliper to the I beam. Cut it, and replace it when installing the new I beams. Never reuse clips or pins.
Unbolt and remove the calipers from stock I beams. You must remove your brake lines and tie them out of the way. Replace the seals when reinstalling the brake lines.
The radius arms need to be undone from the frame at this time. You will need to unbolt them from the I beams later. I found it easier to remove the radius arms from the I beams outside of the truck. Since I was removing my radius arms, I replaced the radius arm bushings and installed new heat shields.
Rear shot of the center where both I beams meet.

Rear shot of the passenger side I beam installed.
New rear radius arm bushings and heat shields installed.
New front radius arm bushings installed.
The coil springs have to be removed also. The top of the spring must be removed before you can unbolt the coil from the I Beam. I used a big pipe wrench. I put the wrench in side ways, then turned it to grip the coil. With the wrench, I then pulled the coil counter clockwise and detached the top of the coil from the mount. Use a long extension to unbolt them from the I beams. The sway bar bolt that attaches to the bracket on the I beams also has to be removed.
Here is the pin you need to remove and replace. The two bolts also have to be taken out to remove the caliper assembly.
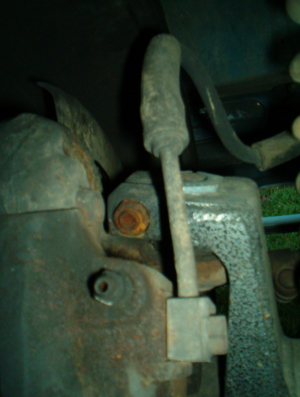
The brake lines and that little “rusted bolt” have to be removed. The kit comes with a new bolt and nut.
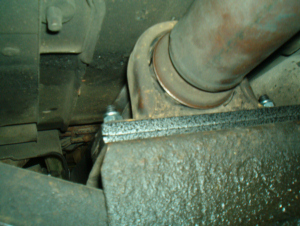
If you have a dual drive shaft vehicle, such as the extended or super cab rangers, a carrier bearing kit is recommended to realign it. This prevents vibrations, and even breakage in the long run.
Carrier bearing kit installed. The two brackets just slide underneath the carrier bearing and attach using the two included bolts, nuts, and washers. The carrier bearing is located in the middle of the two drive shafts. This prevents vibration at slow speeds in extended cab rangers.

DJM INSTALLATION INSTRUCTIONS: 4” rear flip kit
DJM INSTALLATION INSTRUCTIONS: 3” Dream Beams
About The Author
Jim Oaks is the founder of TheRangerStation.com, the longest-running Ford Ranger resource online since 1999. With over 25 years of hands-on experience building and modifying Ford Rangers — including magazine-featured builds like Project Transformer — Jim has become one of the most trusted authorities in the Ford Ranger off-road and enthusiast space.
Since launching TheRangerStation.com, Jim has documented thousands of real-world Ranger builds, technical repairs, drivetrain swaps, suspension modifications, and off-road adventures contributed by owners worldwide. TheRangerStation.com has been referenced in print, video and online by enthusiasts, mechanics, and off-road builders looking for practical, and experience-based information.