
Introduction
Removing torsion bars on a 1998-2011 Ford Ranger 4×4 is typically done with a torsion bar tool, but it can also be accomplished safely without one. This guide walks you through how to remove the torsion bar and torsion key (adjuster) using basic tools and careful control arm movement. Whether you are performing maintenance, replacing torsion keys, or lifting your Ranger, this method allows you to get the job done without expensive equipment.
Why Remove Torsion Bars Without a Special Tool?
- Save money by avoiding the purchase of a torsion bar tool.
- Allows torsion bar removal with only basic hand tools.
- Useful for DIY maintenance, suspension lifts, or Pre-Key modifications.
- Provides a step-by-step method for safely lowering the control arm and torsion bar key.
Safety Precautions
- Always wear eye protection and gloves when working with torsion bars.
- Use jack stands and block wheels before lifting the vehicle.
- Support the control arm properly before relieving torsion bar tension.
- Mark the torsion bar and adjuster for proper reinstallation.
- Check alignment after reinstalling torsion bars and keys.
Quick Summary
This guide shows you how to remove torsion bars and keys on a 1998-2011 Ford Ranger 4×4 safely without a torsion bar tool. By supporting the control arm, lowering the key, and sliding the bar out, you can perform DIY maintenance, suspension lifts, or Pre-Key modifications without expensive tools. Always follow safety precautions and check alignment after installation.
Removing Ford Ranger Torsion Bars Without a Torsion Bar Tool
By Fx4wannabe01
(See actual discussion HERE.)
Question- How hard is it to change these things? Can it be done without the tool?
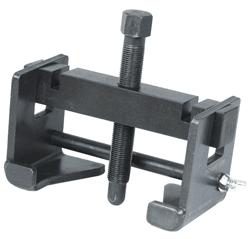
Answer – It CAN be done without that torsion bar tool. Here’s how:
Step-by-Step Instructions
- Get the truck up in the air at full droop.
- Remove the tires.
- Place a jack under a lower control arm and put some pressure on it.
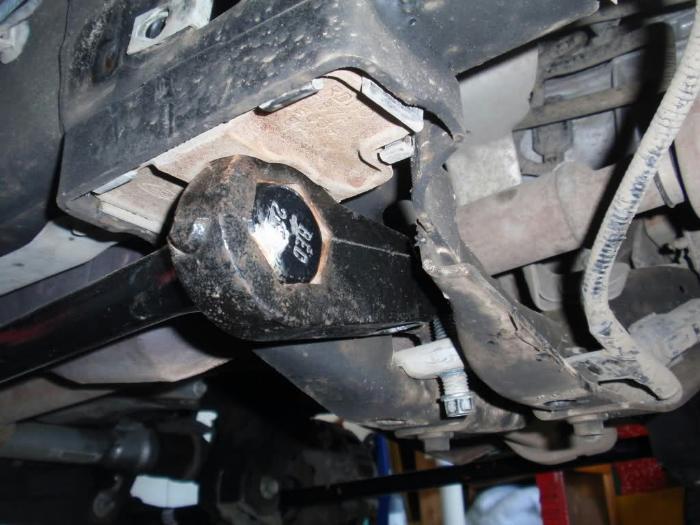
- Remove the torsion bar cover.
- Loosen the torsion bar adjustment bolt almost all the way.
- Unbolt the top of the shock.
- Unbolt the sway bar endlinks.
- Pop off the tie rod end.
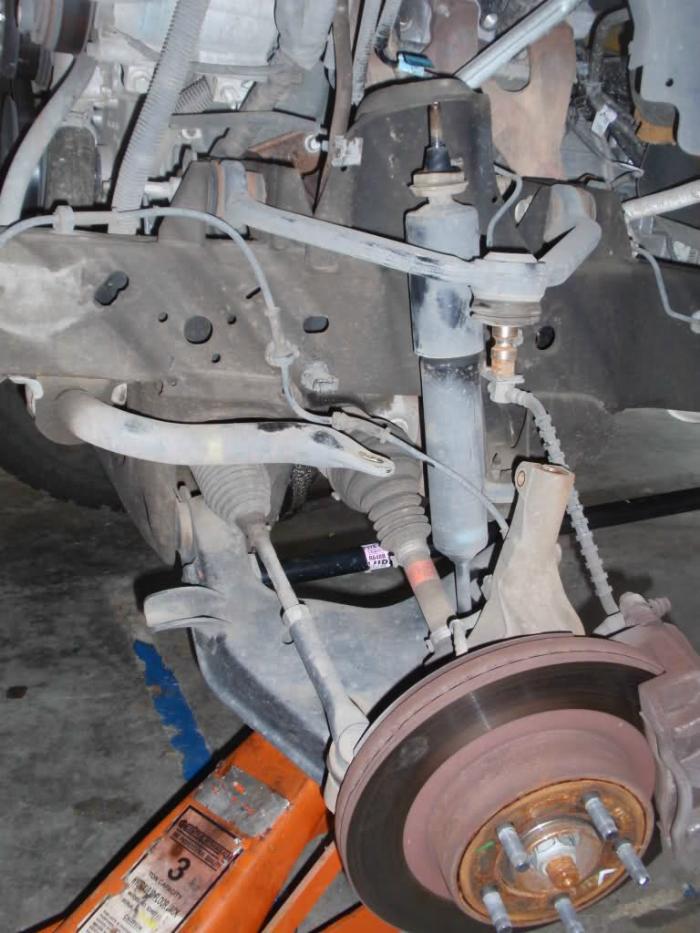
- Unbolt the upper balljoint from the knuckle, hammer it out, then lower the control arm.
That will give you plenty of down travel to get the ‘keeper block’ out of its holes. The ‘keeper block’ is what the torsion adjustment bolt threads into. Once it is out, simply lower the key with the bar and slide the bar out of the lower control arm (LCA).
Install is reverse. You may or may not want to remove the CV shaft from the hub. On my truck and my friend’s truck, I didn’t have to do that to get enough droop. You may or may not want to unbolt the caliper as well. The soft line was almost tight when I did it on mine.
Should look something like this…
Additional Resources
Be sure to check out our 4×4 Suspension Forum for discussion, tips, and other DIY suspension modifications.
Last Updated:
About The Author
Jim Oaks is the founder of TheRangerStation.com, the longest-running Ford Ranger resource online since 1999. With over 25 years of hands-on experience building and modifying Ford Rangers — including magazine-featured builds like Project Transformer — Jim has become one of the most trusted authorities in the Ford Ranger off-road and enthusiast space.
Since launching TheRangerStation.com, Jim has documented thousands of real-world Ranger builds, technical repairs, drivetrain swaps, suspension modifications, and off-road adventures contributed by owners worldwide. TheRangerStation.com has been referenced in print, video and online by enthusiasts, mechanics, and off-road builders looking for practical, and experience-based information.