
Introduction
When you start looking for information on how to get more horsepower for your Ford Ranger 4.0 OHV V6 you’ll hear people say that the best bang for your bucket and the easiest way of adding power is to dump the engine and do a Ford 5.0 swap. But some people don’t follow the herd and head off on their own path. Follow along and see how forum member holyford86 added an Eaton M62 supercharger to the 4.0 V6 in his Ford Ranger.
From here, I’m going to use holyford86’s own words for this write up.
Finding A Supercharger
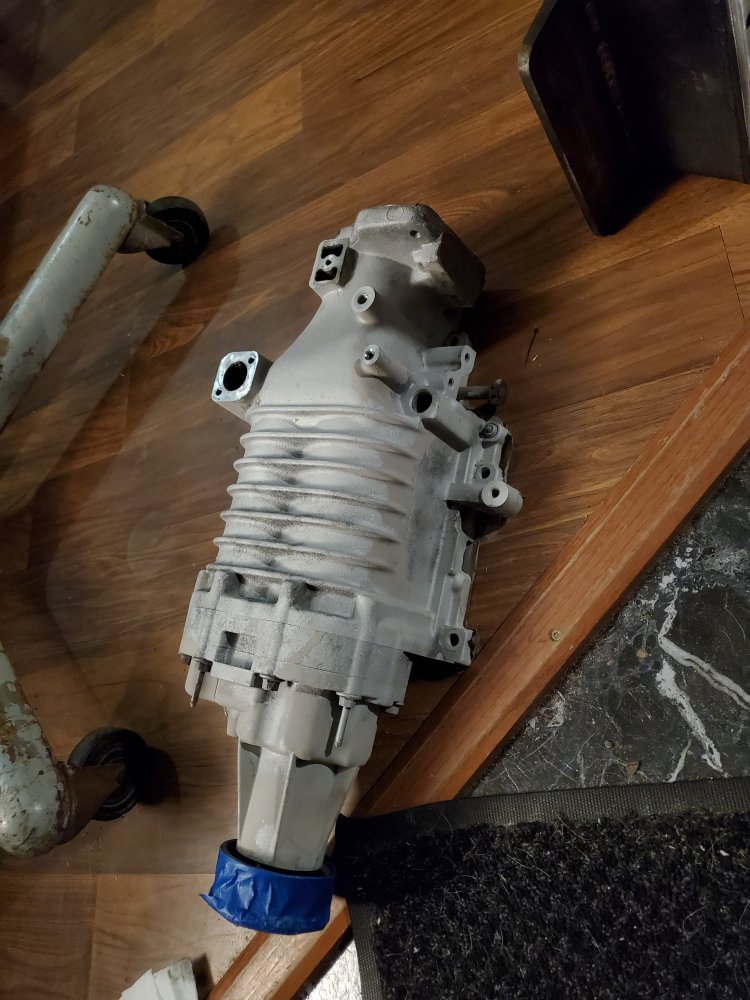
I did some research and decided on (3) options readily available in my area in junkyards. The Nissan M62, and the GM M62 and M90. A Supercoupe M90 would have been ideal but they are impossible to find near me so that was out. The Nissan unit has an intake that points in the opposite direction than I needed it to go, it suffers from poor aftermarket support as far as pulley options go too, so that was out. The GM M90 is quite common around here but they’re too long. Yes, I could have cut it down, but I wanted to be able to buy replacement parts without needing to modify them excessively. This leaves the GM M62, I found one on a 1995 Buick Riviera with under 100k miles and it had signs of being rebuilt at one point too, so it seemed like a good candidate.
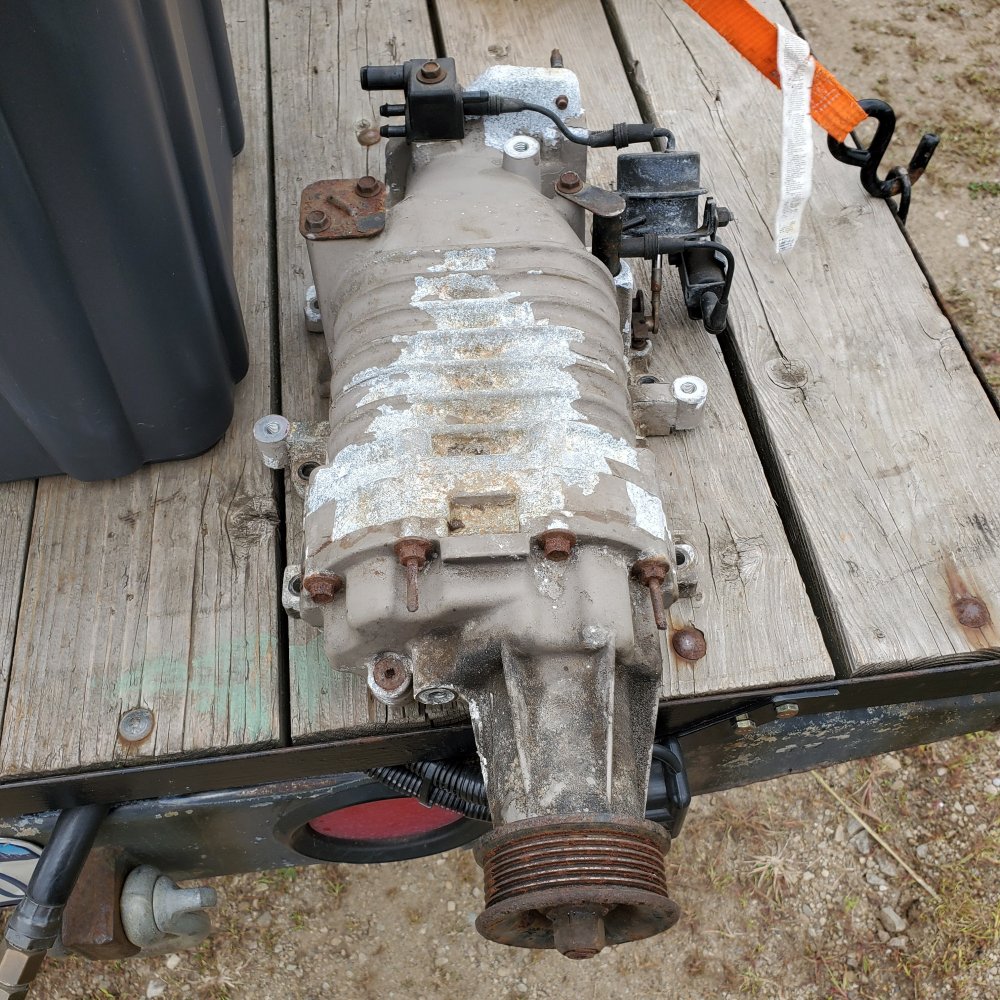
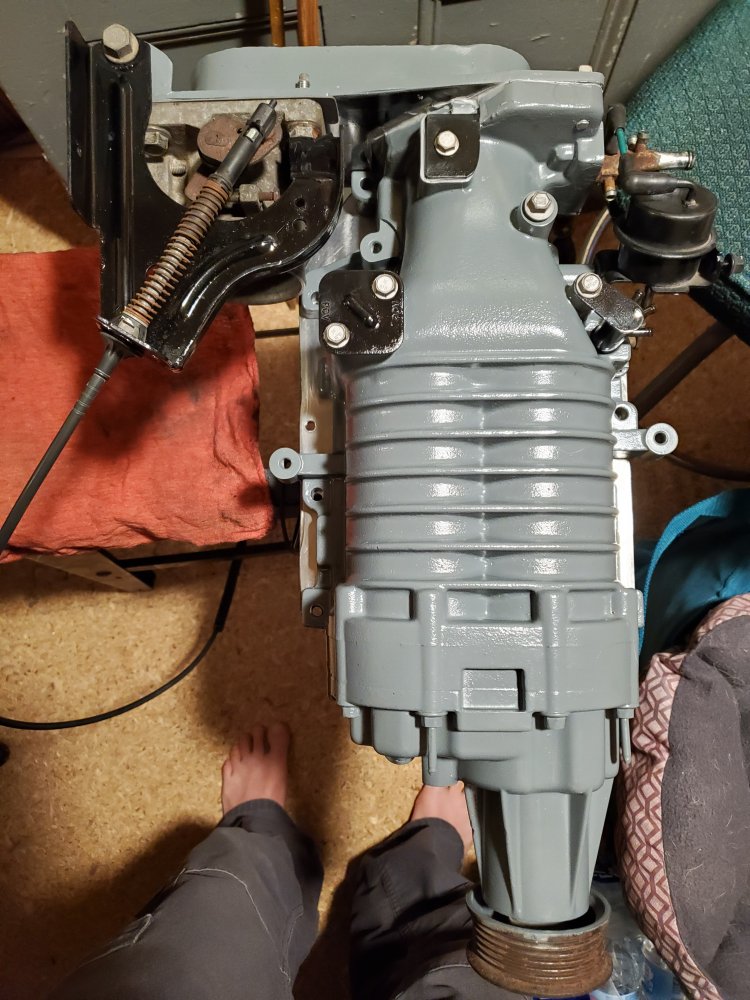
Here is the supercharger the day I pulled it off the car:
Mocking It Up On The Engine
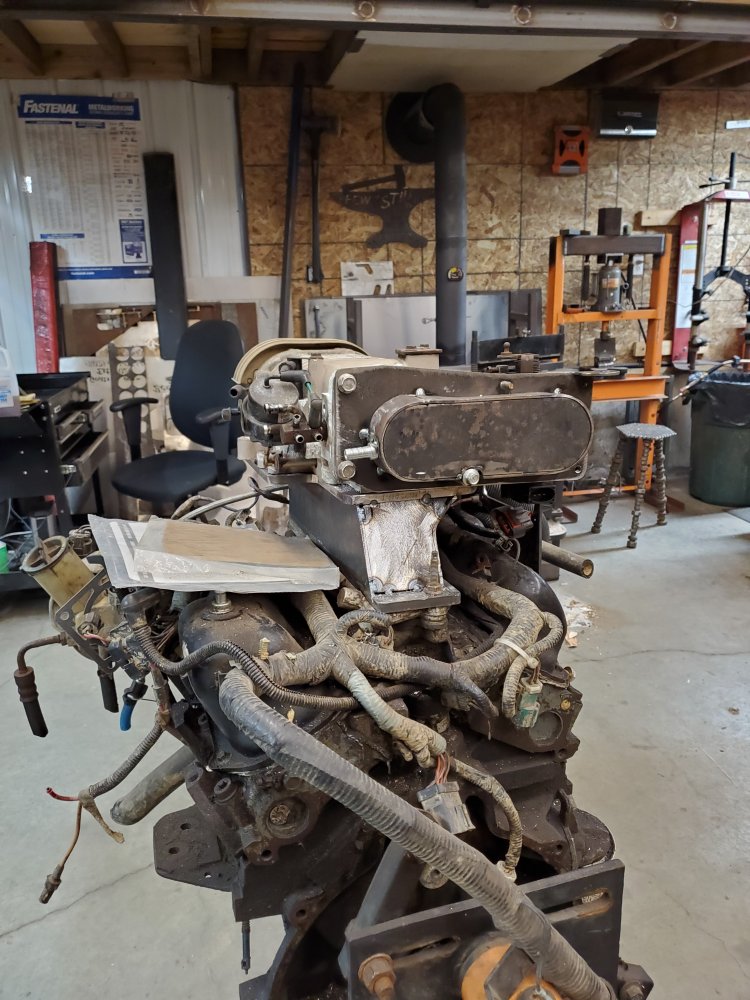
Now I had some other things that I needed to figure out, like how I was going to attach it, what I was going to use for a throttle body and how I was going to plumb it all together. I’m on good terms with the people who own this particular junkyard, and they allowed me to borrow a blown-up engine for mockup which made this process much easier to accomplish.
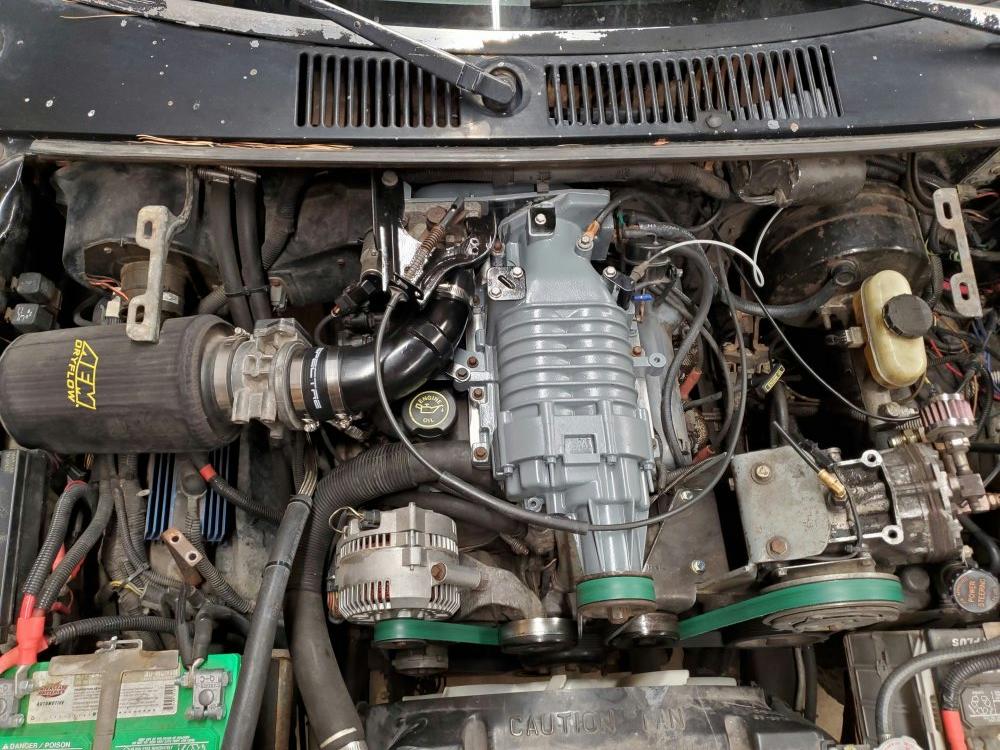
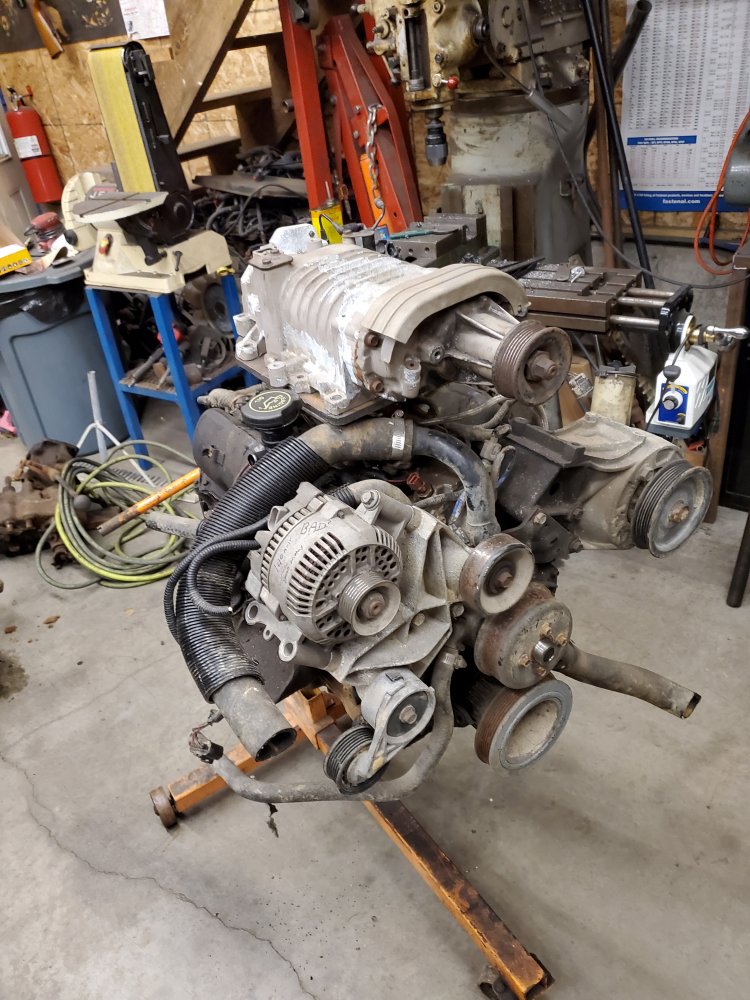
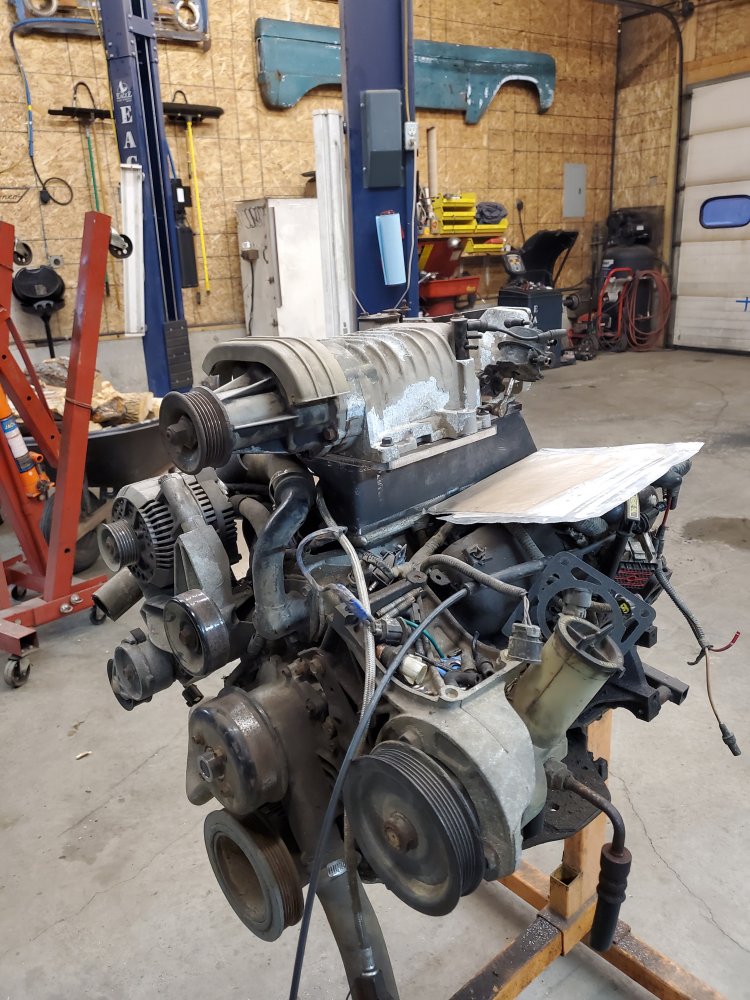
Here’s a very early mockup of the supercharger where it’s roughly going to sit.
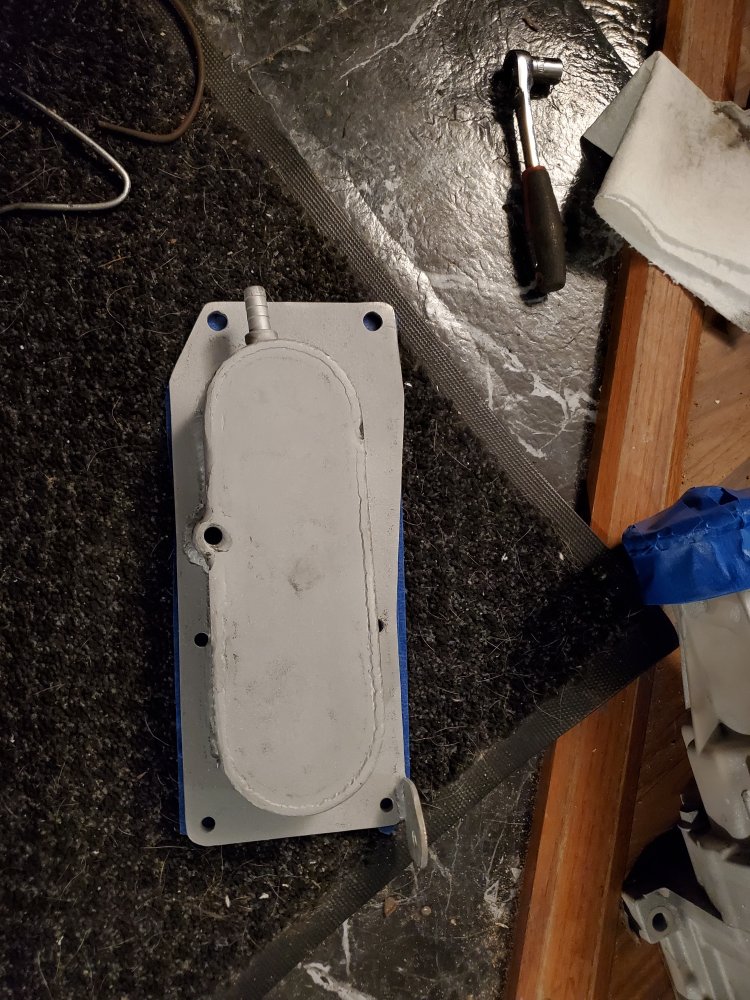
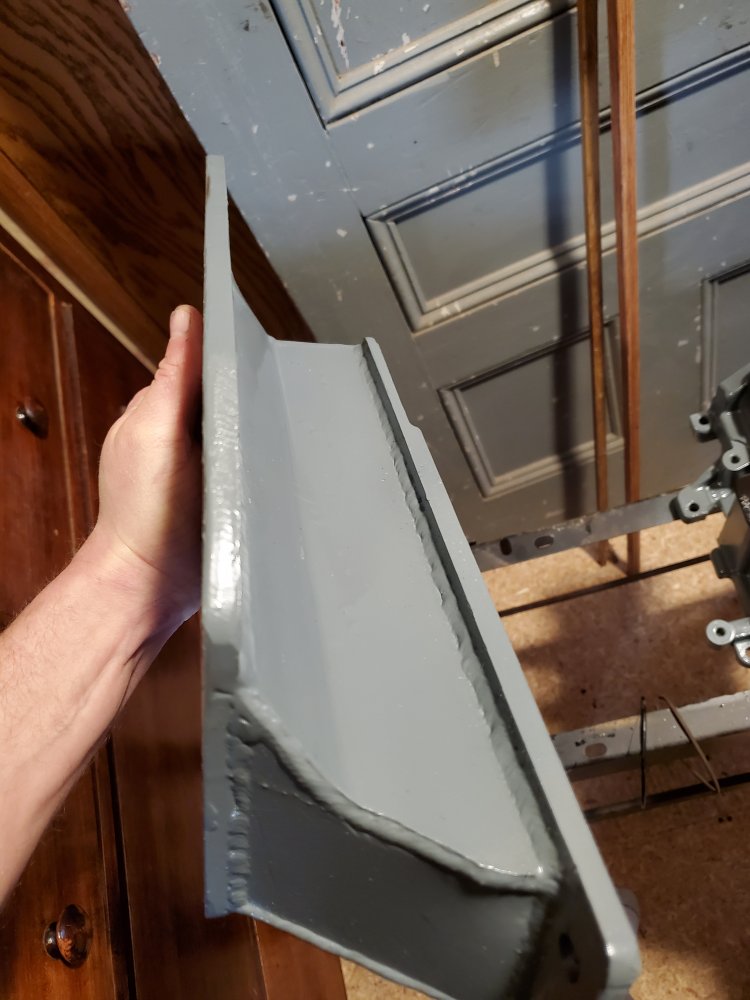
I don’t have too many good pics of the process we used to make the main intake adapter, but I’ll do my best to explain it.
Where the upper intake mounts to the lower, it is square to the accessory drive, so it helped in making the mount/adapter a bit easier.
- We cut out a supercharger mounting plate and intake plate from 3/8 steel plate.
- Then we drilled and tapped holes in the plate to bolt the supercharger to.
- Then we squared the two plates horizontally and vertically to the accessory drive.
- Then used a couple pieces of round bar to lock in that orientation and boxed it in with 1/8 plate.
- The finish welding on everything was done with TIG and the plates were welded to a table to minimize warpage.
Once the intake was all welded, a threaded bung was added for the intake air temp sensor in roughly the factory location on the driver side. Even with being careful to try to prevent warpage, the top plate still warped quite significantly on the driver side, so we stuck it in the press and bent it back most of the way before sending the adapter off to the machine shop to be milled flat.
Throttle Body, IAC, TPS, PCV Valve
Now, the fun part, figuring out how I was going to put a throttle body on this thing.
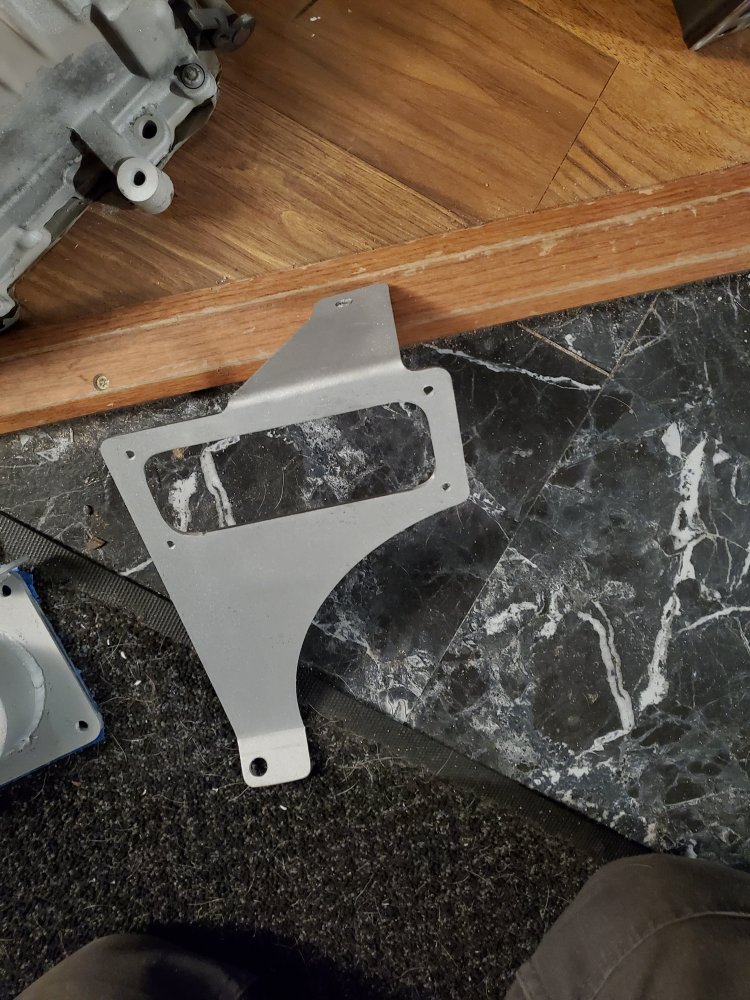
This Eaton M62 is off of a front wheel drive car, so I didn’t have enough room to bolt a throttle body directly to the back of it. I thought I would have enough room to make a flange and attach a piece of 3-inch mandrel bend to the back of it and then attach a flange for a throttle body. Unfortunately, that only leaves about 2-inches to spare, so that wasn’t going to happen.
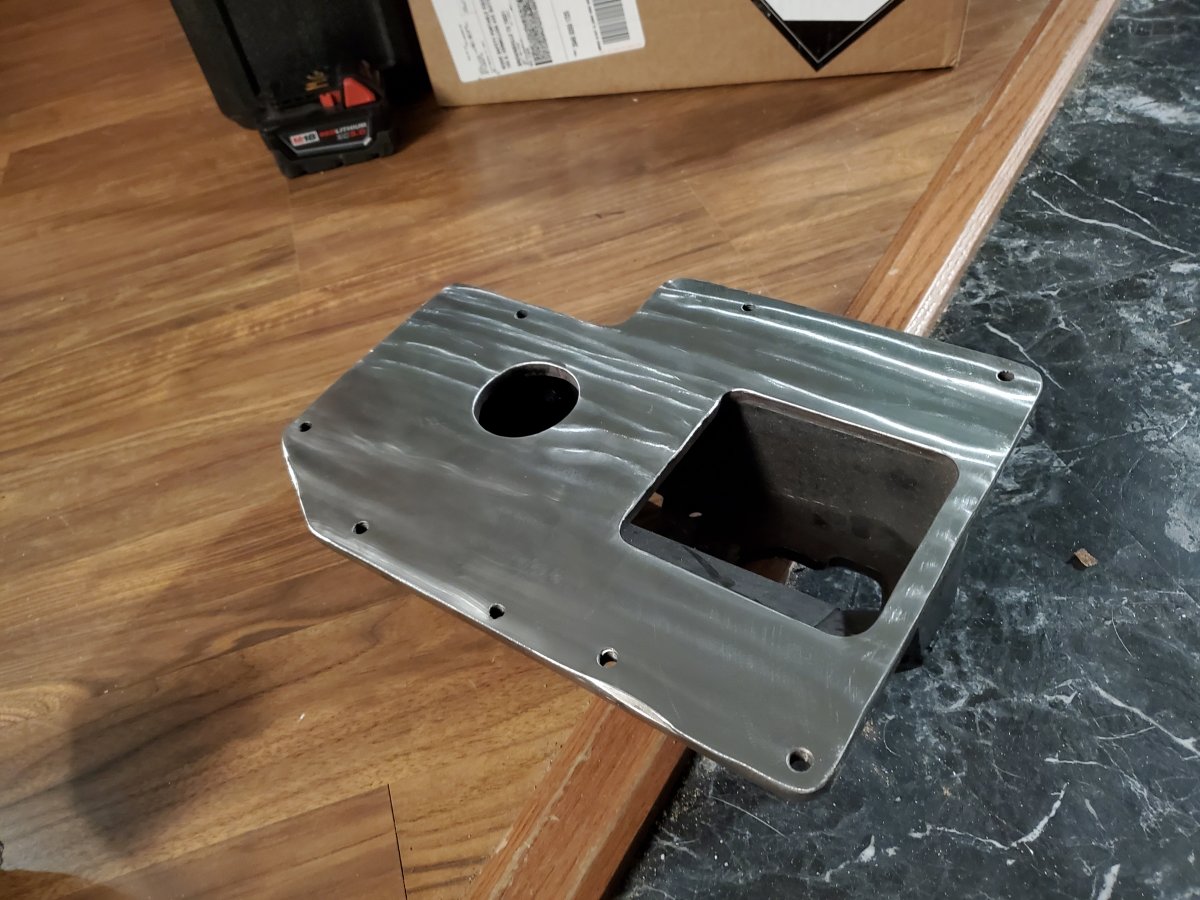
After some staring and thinking, we decided that we could cut a plate that bolted to the back of the supercharger and also bolted to the throttle body.
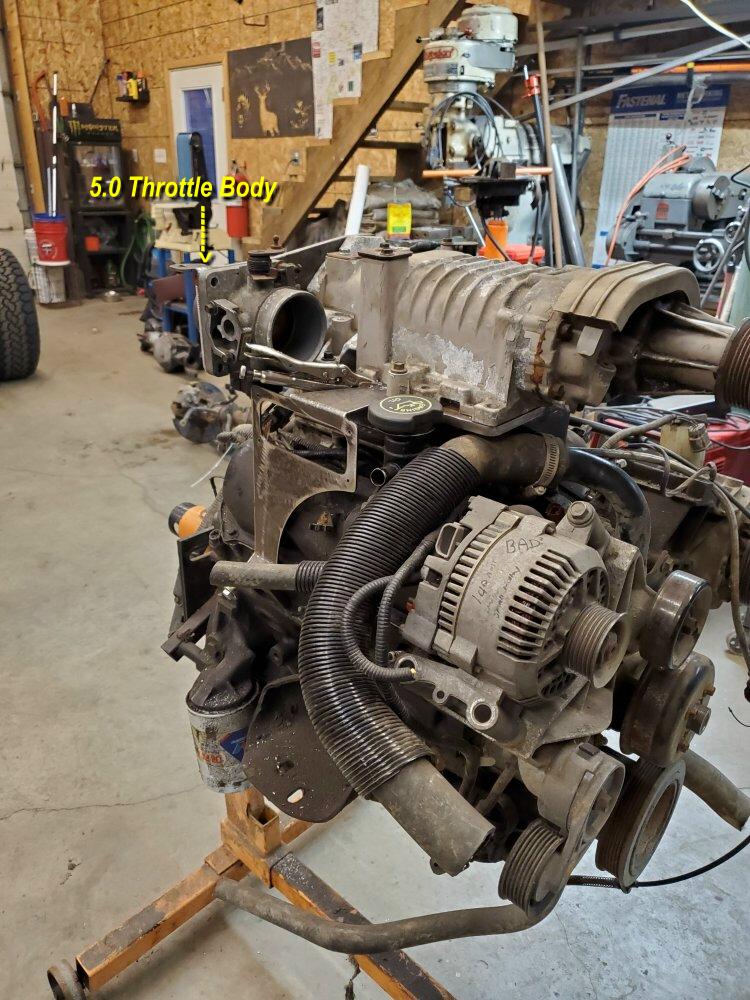
Speaking of throttle body; I could have used the 4.0 OHV unit, but since the IAC is mounted in a different spot, that would have added some more complexity that I didn’t really feel like dealing with if I didn’t need to.
I went back to the junkyard and grabbed a throttle body off of a half disassembled 2001 5.0 Ford Explorer, along with the throttle cable and bracket. This throttle body allows the IAC to bolt directly to it, but the throttle position sensor (TPS) isn’t compatible with EEC-IV. The 4.0 TPS will attach to it, but it rotates in the opposite direction, so that wasn’t going to work. I looked at a bunch of pics of different configurations and a TPS off of a 1988 2.9 seemed to rotate in the direction that I needed and has the added benefit of using the exact same connector as the 4.0.
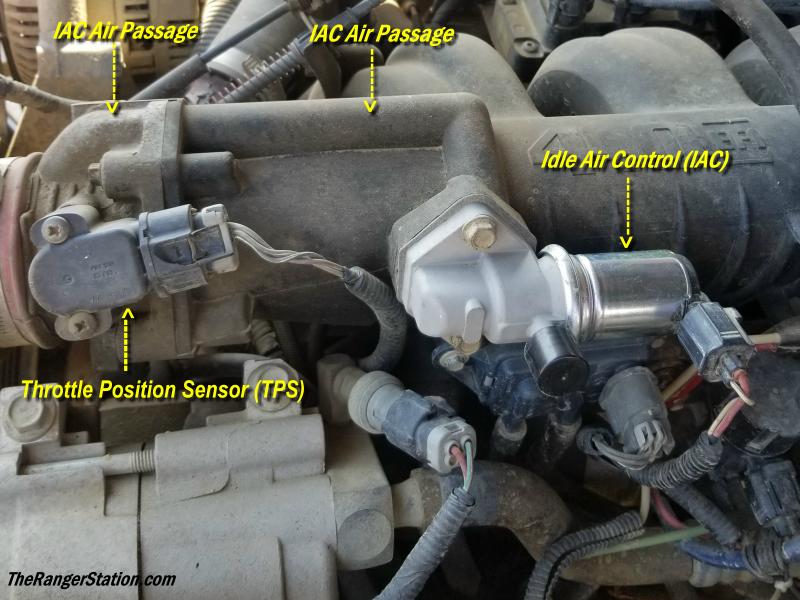
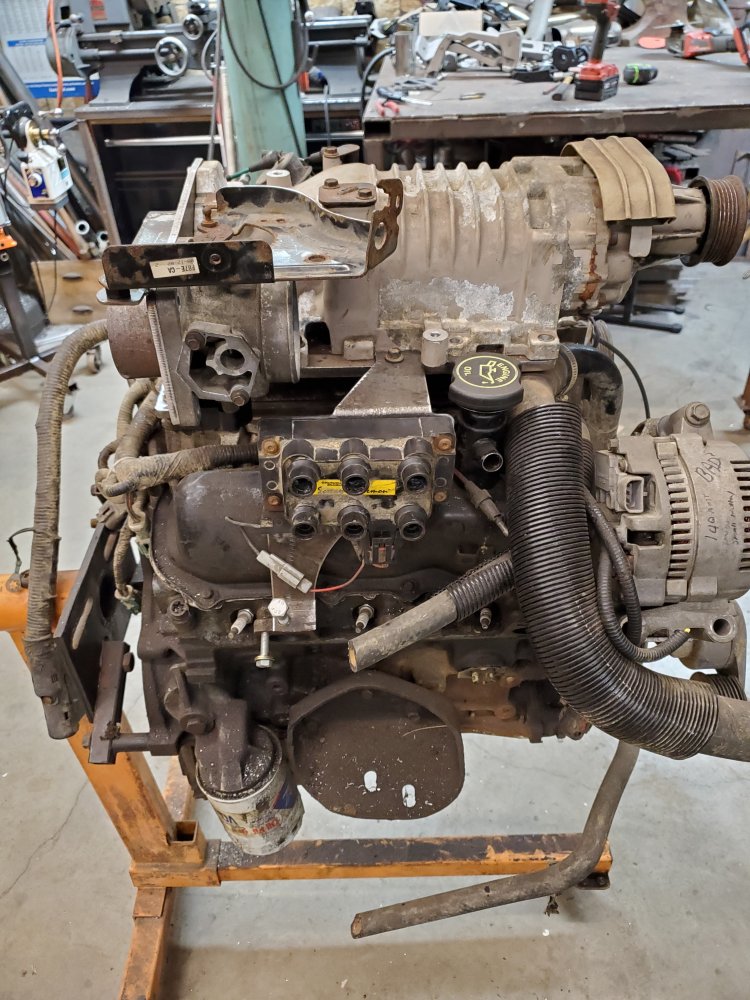
For clarification, here’s the IAC and TPS in the factory positions:
I cleaned the throttle body, installed the TPS, and plugged it in place of the one on my engine.
I used my Snap On MT2500 scan tool, went into live data, monitored the throttle position voltage on the 4.0, unplugged the connector and plugged it into the 2.9 sensor while it was installed on the 5.0 throttle body and adjusted the screw until the voltage was exactly the same as the 4.0 reading. It would be possible to back probe the center pin and monitor with a voltmeter then adjust accordingly to make the new setup the same as well. If the base setting on the 4.0 hasn’t been messed and/or the idle is fine, it should be good to go.
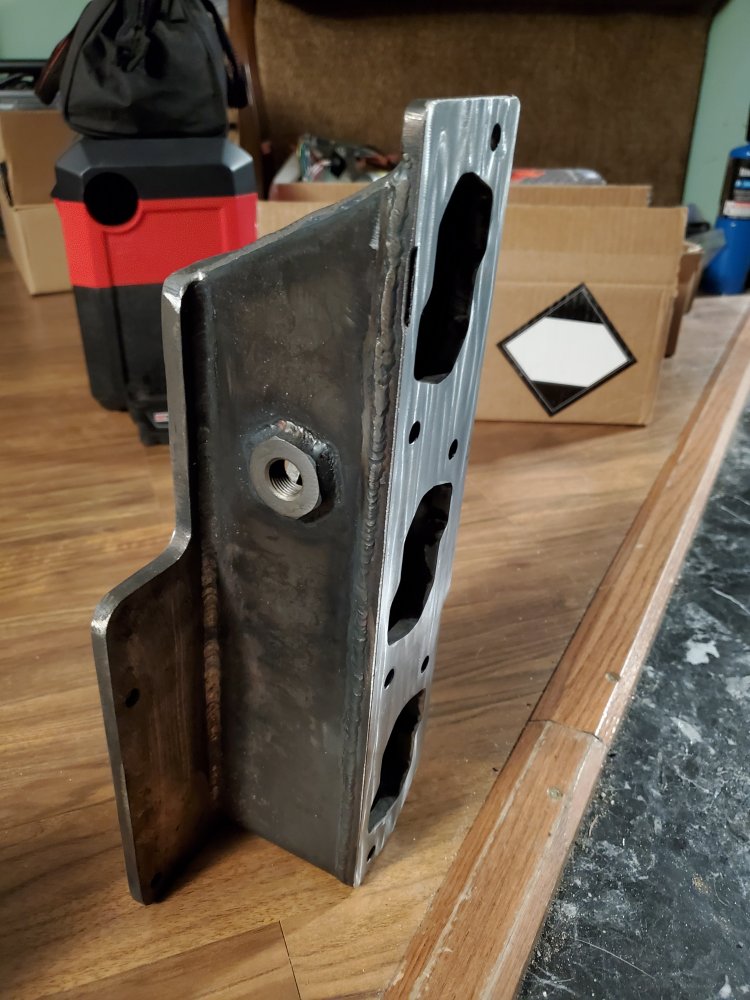
The PCV valve connection and the vacuum tree proved to be easy. A barb fitting was attached to the side of the throttle body adapter for the PCV valve connection. The supercharger has a port that was originally used for an EGR valve, it’s the right size to be tapped 3/8 NPT and the factory vacuum tree was swapped over.
Here’s a couple pics of some more mockup where you can see what I just explained:
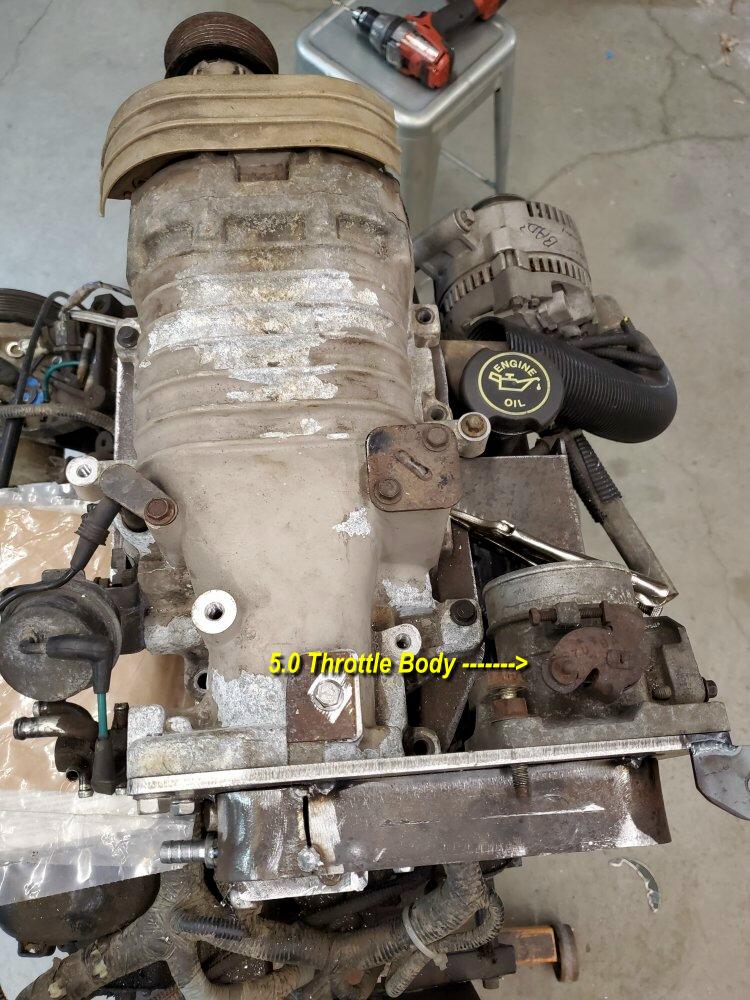
Coil Pack & Throttle Cable Bracket
The coil pack was kept in roughly the same position, just rotated 90 degrees and a bracket was made for it, no wiring modification needed to be done to move it. I did use the later style radio noise capacitor that bolts under one of the coil pack bolts instead of the earlier one that uses a separate screw, it uses the same connector, just one less hole to drill and tap. The 5.0 Throttle body was also rotated 90 degrees, the throttle cable bracket had one mounting ear trimmed off and the whole setup was attached to the intake adapter with the factory Explorer hardware. It should be noted that this throttle cable bracket hits the hood, just barely, with a 1-inch body lift, we added a 2-inch cowl to the factory hood to account for this (I hate it, I want to do something different, in time I suppose).
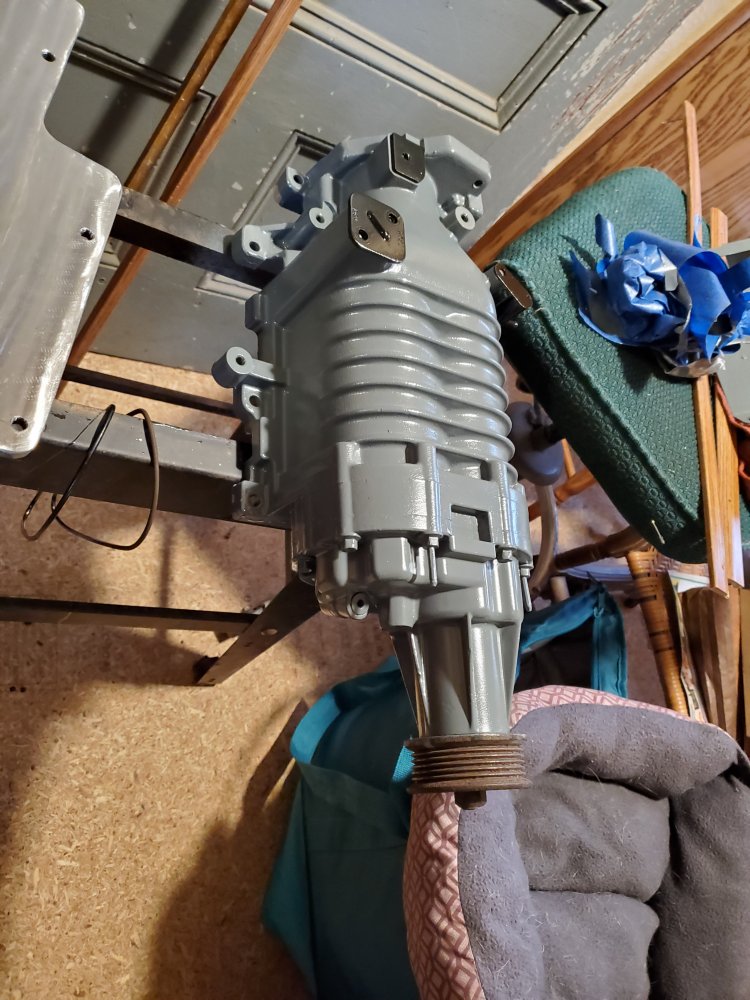
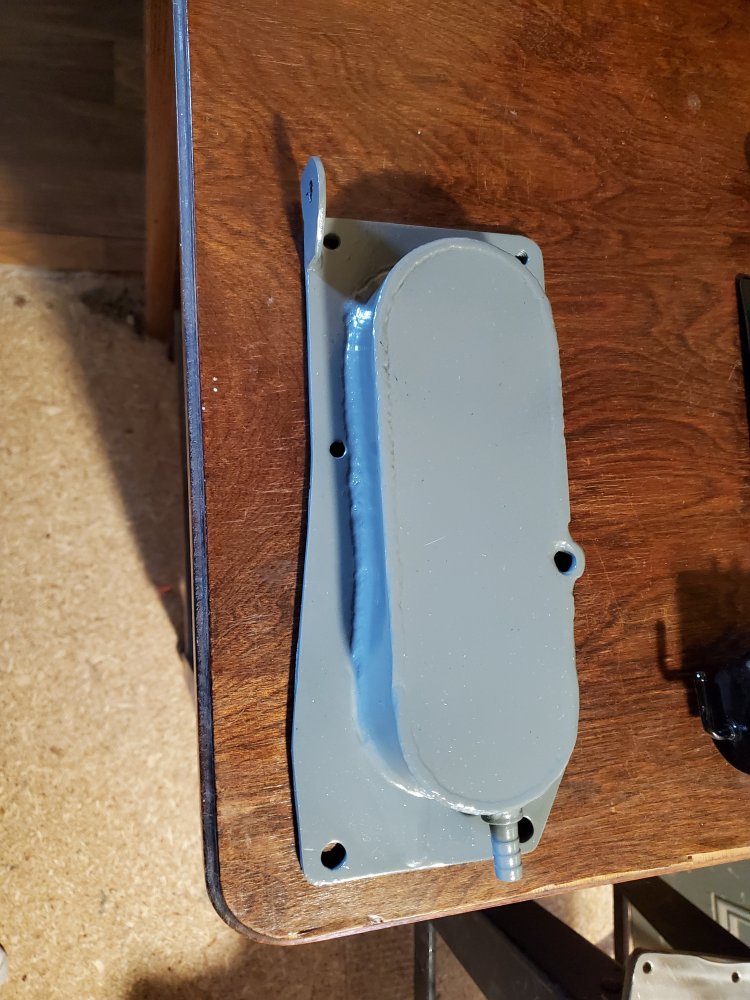
Cleaning & Paint
Now that most of the main parts have been completed, I duct taped up all the important parts and tossed them all in the blast cabinet, carefully cleaned the sand out as best I could, then painted them all Ford gray. Some of the pics may show how the parts were made a bit better.
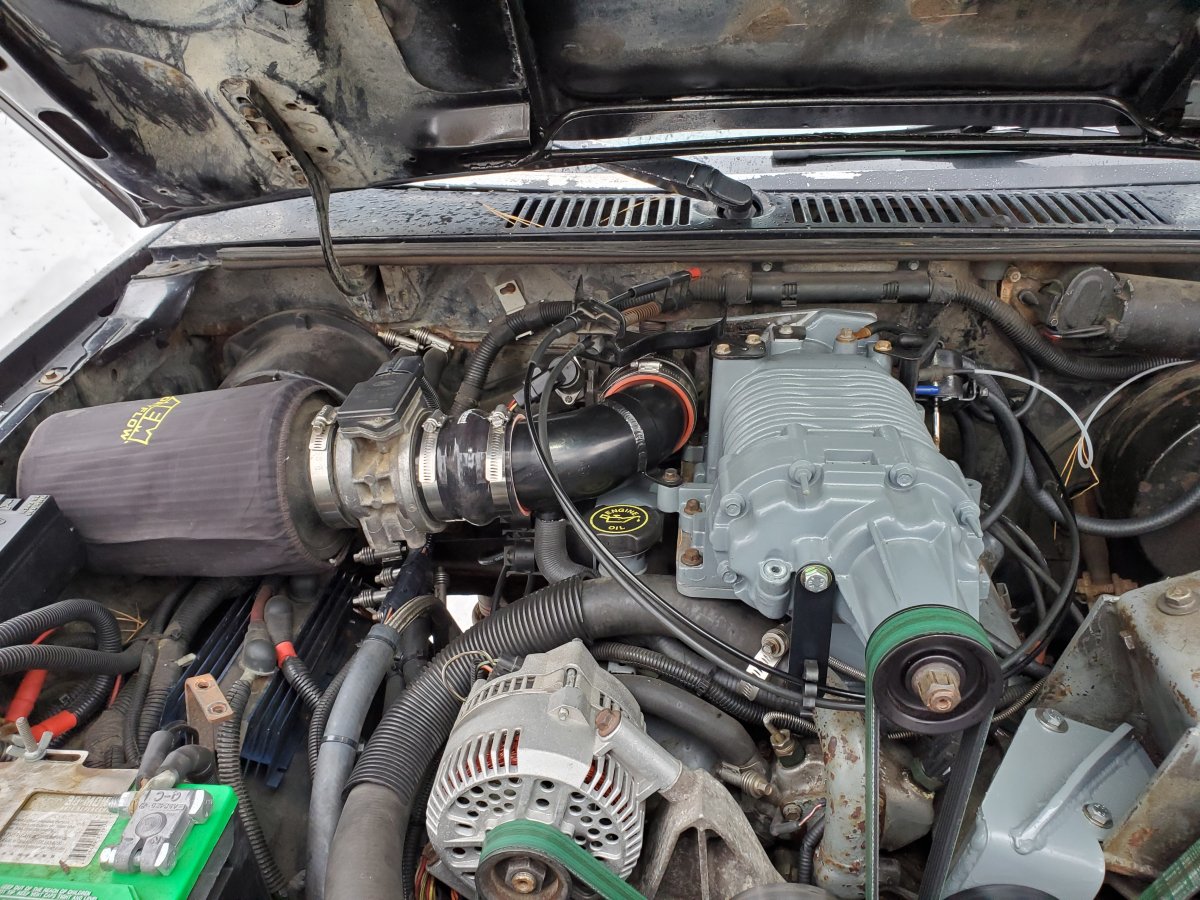
Installation
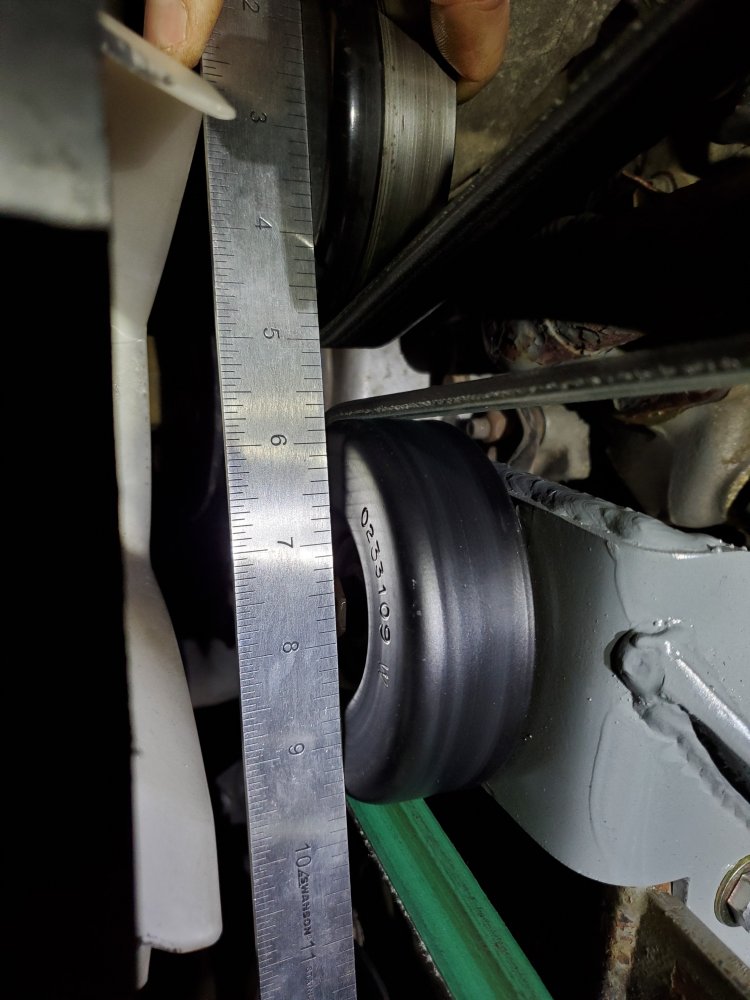
Now it’s time to install it into my truck and finish up the rest of the parts to complete the installation. I had previously installed a York compressor for on board air so that made belt routing a bit different than it would be in a stock application. I opted to add an additional idler pulley in order to have a good amount of belt wrap on both the supercharger and alternator pulleys, rather than rerouting like I have seen some kits do. We first figured out roughly what length of belt would work and sourced a length close to that, it ended up being a 117.7-inch belt meant for a 2013 ish Duramax powered Chevy Express van. We then made an idler pulley mount to work with that belt length, with a little bit of room to move the pulley around should I decide to swap to a smaller supercharger pulley (I did end up swapping to a smaller one)
Here you can see roughly where the pulley mount is going to go:

We thought that a bent piece of 1/4-inch plate would be more than enough to mount an idler to, it flexed like nothing, so some gusseting was added later, here you can see how flexed the idler is if you look closely.
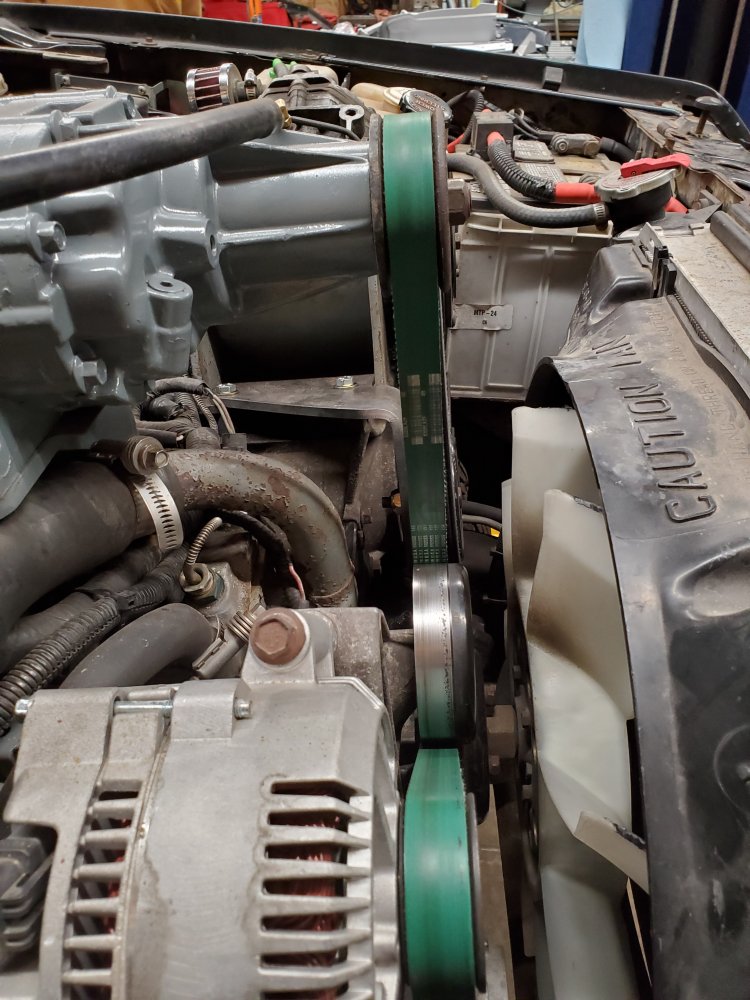
Here’s a couple more views of the finished routing, you can also see how I routed throttle cables and the intake.
Here you can see my slight whoops with the idler alignment, slotting one of the mounting holes and pivoting it around a bit corrected this issue. (don’t pay any attention to my professional painting job here, haha.
The fuel pressure regulator is hooked into one of the ports receiving boost, I haven’t checked to see if boost pressure makes the fuel pressure go above the factory max of 40psi.
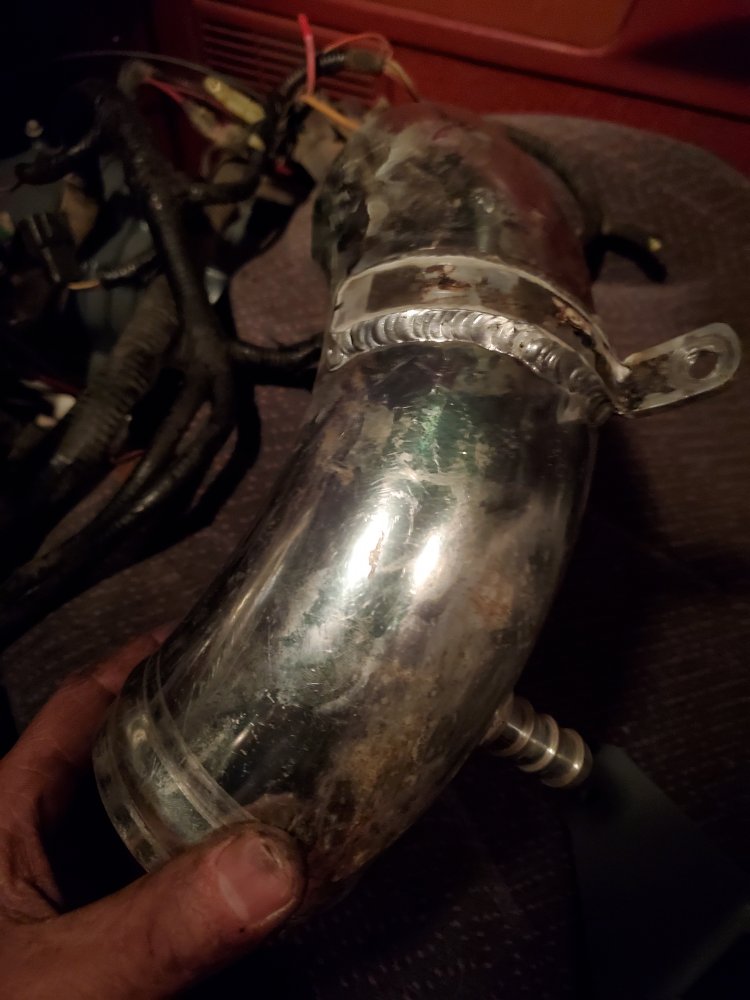
Next step was making an intake elbow from the MAF to the throttle body, We added a barbed fitting to the tube for the crankcase vent. The intake was made from aluminum intake tubing found in a random car at the junkyard and the fitting came from Summit, a mount was welded onto the side, and it was sandblasted, cleaned, and painted.
Now it was finally time for a test drive, the stock GM 2.85-inch pulley proved to produce less than 1 psi of boost, I did a little bit of math and figured out the smallest pulley I could run would be 2.2 inches so I did what any smart person would do and installed that one. It builds about 6 psi with this pulley installed which is about where the math told me I would be.
This started as a 4.0 OHV swap in an older Ford Ranger. The computer I used was from a 1994 Ford Ranger. The MAF is also from a 1994 Ford Ranger and the AFR (Air Fuel Ratio) stays consistent around 14.6 to 14.8 under light to medium throttle and will stay around 13.4 to 13.6 under heavy to full throttle.
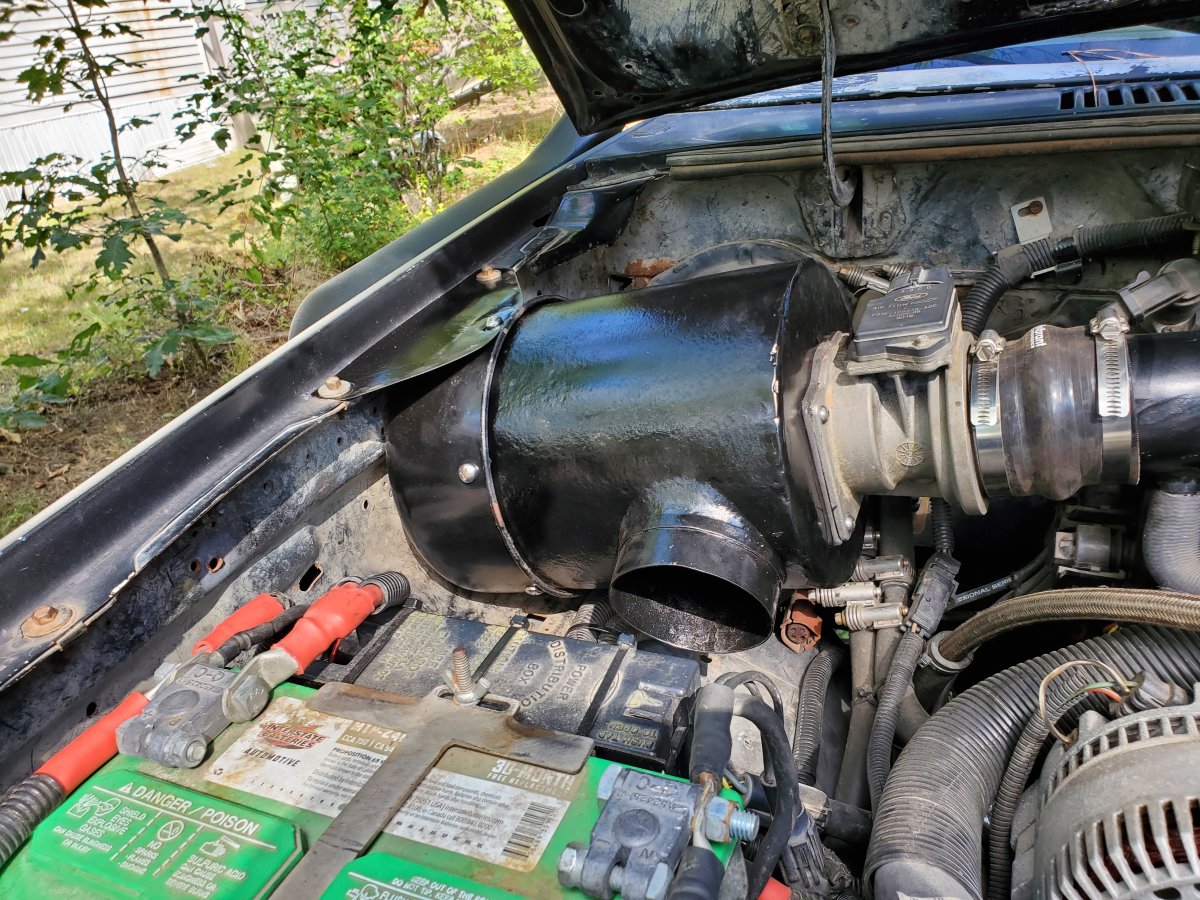
The last issue I found was the intake I had installed was making the whole setup run too hot because it was drawing under hood air, in 90-degree weather I would lose 2 to 3 psi because the air density was so bad.

So, I added a snorkel.

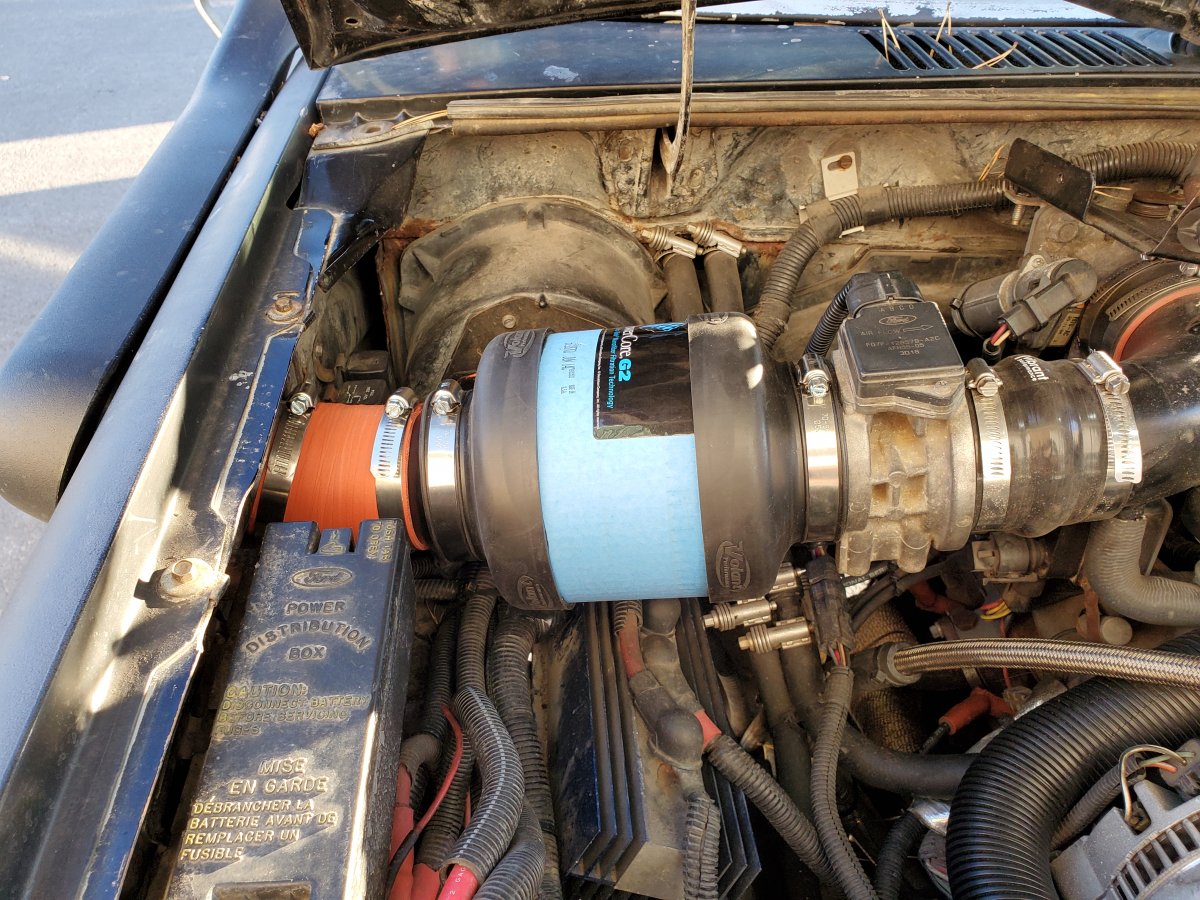
I had originally intended to box in the pod filter and connect that to the snorkel, that proved to be too much of a pain to do. Then I thought I’d make a box for a flat panel filter, which would be doable but would be too much work for not much benefit. I had then been looking at in line air filter setups but I’m not a huge fan of cotton gauze filters so I was reluctant to use them. then I found that Volant makes an in line filter that uses a Donaldson Power Core element, it isn’t the most free flowing unit but it does the job, it appears to be for an obsolete application though so I’ll source an extra to have should I ever need it down the road. It isn’t the prettiest setup but it’s functional and flows well enough.
My goals with this project were never to run big boost numbers, I wanted reasonable reliability, relatively easy to source parts, and a moderate boost in power. I’ve been running this setup for a little over 5,000 miles so far and I haven’t really had any issues. I am running premium fuel, stock injectors, copper plugs two heat ranges colder (gapped to .035) and no tuning currently (the guy I found to tune it ghosted me) it runs well enough, but I know I could get more out of it if tuned properly. The AFR has been staying in a decent spot and I watch them pretty steadily (if anyone knows anyone you would recommend for tuning, please pm me). This is a swap that anyone could tackle but it would take some time with basic fabrication tools. I am fortunate to have a friend who is an excellent fabricator with a home shop more well equipped than some custom fab shops. Between the two of us we have probably 20 hours into this swap, and I’ve got under $1000 into it as far as parts go.
1-Year Update
Roughly a one year and 4500-mile update, the volant filter is gone, I was consistently losing 2 or 3 psi and it was making my AFR quite unstable, I disconnected it from the snorkel just to see if it made a difference and gained a psi of boost and the AFR stabilized out quite considerably. I temporarily reinstalled the pod filter again and all of the issues went way completely. After some trial and error, I settled on using a heavily modified air filter housing from a loader with a slightly smaller pod filter inside of it. I have zero loss of boost with this setup and AFR is stable under load as well. This setup is about 80 percent done, I plan on using the factory air intake location in the grill and the snorkel to get enough airflow in everyday driving. For low-speed driving in dusty conditions or in deep water I will close the diverter meant for the heat riser and only use the snorkel. I have the ducting I just need to adapt it to the housing, for now it’s just open under the hood. I just need to find a vacuum valve that is constant duty, I’m going to try one for an EGR valve and see how that holds up.
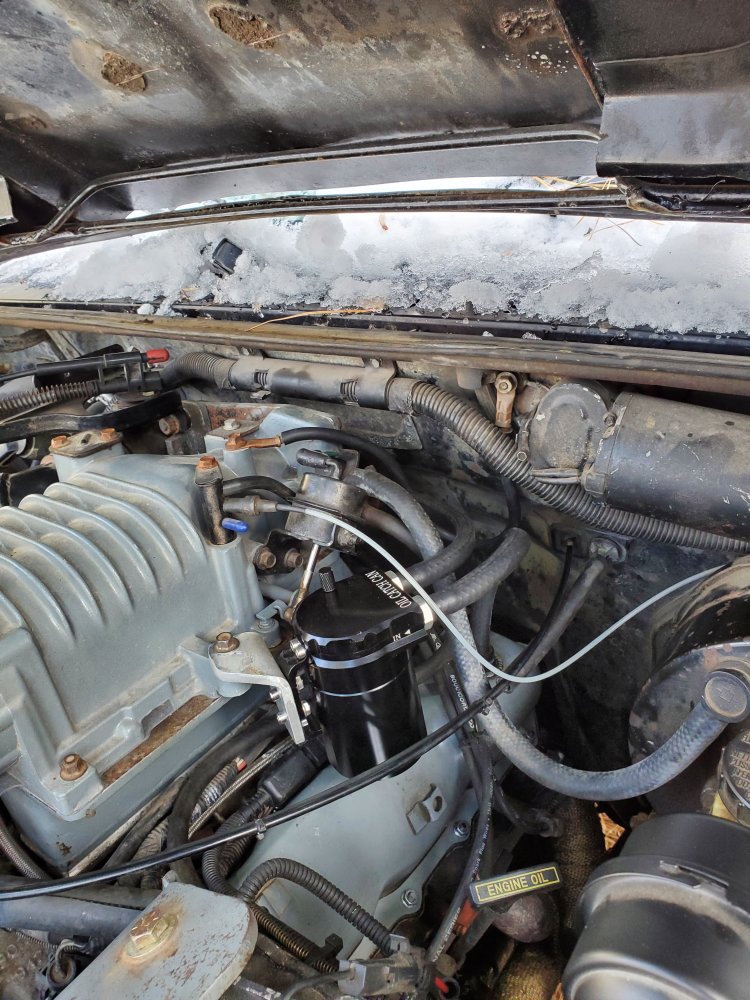
Oil Catch Can
I got around to pulling the supercharger off and doing the valve cover gaskets last weekend, there were no mechanical issues at all, or at least any that I could see. Installed the copper washers under the bolt heads and torqued it all down to spec, it is about as easy to remove as pulling an upper intake on a stock engine, minus the belt of course. I did discover much more oil in the adapter than I would like though, and installed a cheap catch can in line with the PCV valve, hopefully it helps a bit at least.
Pulley Size Change
The 1995 Buick sourced M62 supercharger installed on my truck had a 2.85 pulley from the factory. The smaller 2.2 inch I ended up with (and the 2.4 inch I tried before that) were sourced from www.pulleyboys.com (Atkins rotary) they offer different supercharger pulleys for many applications.
The new 2.2-inch pulley maxes the blower rpm rating at redline and I’m getting between 5 and 6.5 depending on air temps and density now.
2-Year Update
Well, a little more than another year and about 5k has passed and not much has changed. Truck is still running around 5 to 6 psi of boost reliably and nothing related to this setup is causing problems as of yet. I’d like to get the charger gone through but don’t know who I should trust (does anyone have any input?) I’ve also toyed with seeing if it’s possible to swap the Nissan rotor pack into my housing but can’t find a solid answer on if it’s possible. I’ve wheeled it a bit this year and with a hand throttle for easier modulation of the throttle it’s great and almost impossible to stall at low speeds. boost starts right off idle at 1200 rpm which has proven to be quite handy. Hopefully the air intake will be finished up this spring and I’ll post some updates, I decided to go with a simple but (hopefully) elegant idea.
Credit & Thanks
I can’t say it was all me, I thought up the idea, collected all the parts and did all of the homework on it. My fabrication skills are mediocre at best though, Destroyer000 supplied the warm shop, the welding ability, the CNC plasma table, and the ability to entertain my stupid ideas, haha. I’ve probably got 10k on this swap and it’s been pretty decent overall, the power increase isn’t a blow the doors off difference, but it tows a heavy trailer much more easily and pulls big hills without running out of steam. Much like a stock 4.0 OHV, 5k rpm is still the end of the world power wise also.
Questions & Link
If you want to know more about the modification or see the original forum posts visit:
Sticking GM parts onto my 4.0 swapped 86 (M62 supercharger install) | The Ranger Station
Related Articles:
Eaton M62, M90 & M112 Superchargers
Moddbox 4.0L SOHC Supercharger Installation
Ford Ranger 4.0 OHV Vortec Supercharger Installation Manual
Related Articles:
Co-Author
Forum member holyford86 performed this modification supercharging his Ford 4.0 OHV engine and documenting it in our forum. Holyford86 submitted the article to the author so that it could be shared with other Ford Ranger owners. This is a proven 4.0 OHV supercharger build that works and was built on a budget.
About The Author
Jim Oaks is the founder of TheRangerStation.com, the longest-running Ford Ranger resource online since 1999. With over 25 years of hands-on experience building and modifying Ford Rangers — including magazine-featured builds like Project Transformer — Jim has become one of the most trusted authorities in the Ford Ranger off-road and enthusiast space.
Since launching TheRangerStation.com, Jim has documented thousands of real-world Ranger builds, technical repairs, drivetrain swaps, suspension modifications, and off-road adventures contributed by owners worldwide. TheRangerStation.com has been referenced in print, video and online by enthusiasts, mechanics, and off-road builders looking for practical, and experience-based information.