
– Using a Non-York Style Compressor –
Written / Pictures by: Tony Carricaburu
Getting Started:
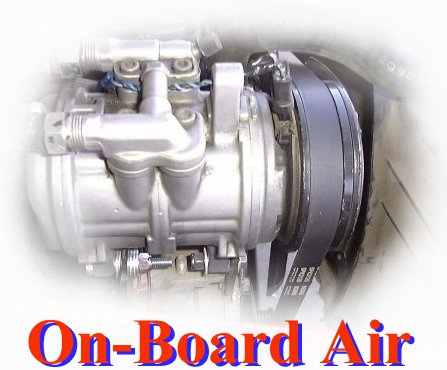
Are you sick of driving to the nearest gas station to fill up your tires after an off-roading trip? Or using the cheap electric “30-40 minutes-a-tire” compressor? Well then, you need to use the alternative conversion – taking your OEM-style air-conditioning compressor and converting it into a powerful multi-purpose air compressor. It enables you to fill your tires in minutes or run air tools anywhere you want.
After reading several write-ups about other guys installing an On-Board Air setup in their Jeeps, it seemed that everyone was leaning towards the York style compressor because of its internal oil reservoir. This style compressor lubricates itself and doesn’t need the lubricants that freon produces. One of the disadvantages is the size. These compressors are very large, double the size and weight of a standard (non-York) compressor. From my experience, they are harder to mount and usually need custom fabricated mounting brackets. Another big disadvantage was the pulley. Instead of being a serpentine-style belt, most of the Yorks I looked at were V-belt. This would mean some custom work, and probably some special machine-shop work would be required. I figured it would be easier to just use an OEM factory compressor (non-York).
Unfortunately, my 1990 Jeep Wrangler wasn’t equipped with factory air conditioning. This meant I had to either find a factory Jeep Wrangler compressor or find a compressor with similar mounts. At first, I tried finding a factory OEM Jeep compressor. I soon realized that most wrecking yards seemed to think these compressors were made of gold. With prices ranging anywhere from $75.00 to $100.00, I decided that it was time to look for another alternative. I’m sure some of your thinking that isn’t much. You’re right, but the compressor should be one of the cheapest parts of the conversion (plus I wanted to do this conversion with a low budget kept in mind.) After a few more trips to wrecking yards, I convinced one guy to let me just look at what he had to offer, because I wasn’t sure what donor vehicle I was getting the compressor from. He showed me a garage with probably 300 compressors hanging from mounts like clothes on hangers. I knew I’d find something here. I found one that looked like it would work and was pretty similar to a Jeep OEM compressor. The label on the side stated that the donor vehicle was a Ford Mustang V-8. I brought it up to the front counter and asked how much he wanted for it. He said “well…. how’z about 20 bucks”? Without hesitating I said, “Sure – I’m going to go out to my car and hook the clutch to my battery.”
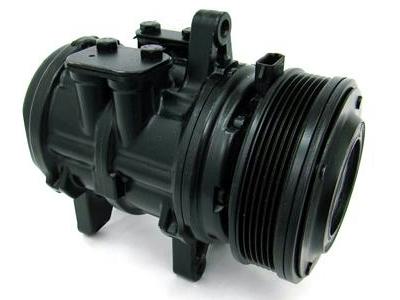
(Ford Air Conditioning Compressor)
This is how you check to see if the clutch is working. This can be done by touching one wire to the (+) positive side of your battery and the other to the (-) ground. Voila! – it worked. I gave the guy $20 bucks and took it home. The first thing I did was clean it up. Then I wrote out a list of the hardware I was going to need. I got this information from other write-up pages I had previously read and printed out.
For mounting, I was going to have to make some simple mounting brackets. There are two mounts on the compressor and both of them need to be firm and tight without any movement. I used a piece of 1/4″ thick 2″x2″ angle iron about 6″ long for the rear mount. For the front mounting bracket, I used a 1/4″ thick, 2″ flat piece of steel approx. 6″ long. After you’ve mounted your compressor, the hardest part of the conversion is done. Now it’s just a matter of hooking up the plumbing and performing a few final adjustments.
Parts Used:
- 1/4″ Threaded Barbed Fittings for 3/8″ hose
- 50′ of 3/8″ hose
- Tool Oiler
- Oil/Air Separator
- Air filter from a Lawnmower
- (2) 4-hole manifolds
- Adapter to fit the two manifolds together
- 25 hose clamps (estimated)
- (3) 1/4″ Air tool coupler male/female
- Thread sealing tape
Other Parts Used:
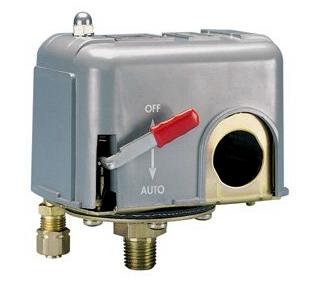
- Pressure Switch P/N 16151
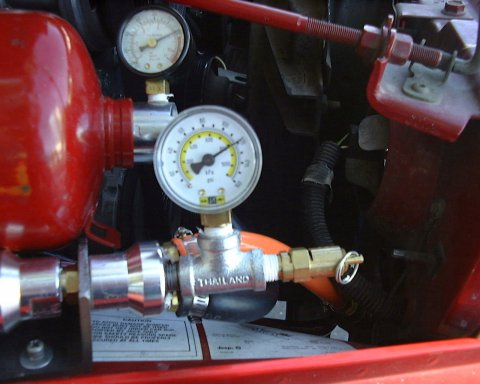
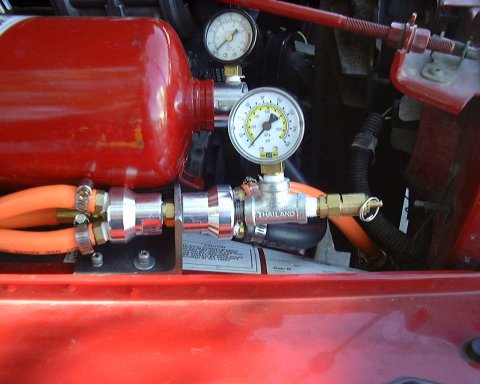
- (3) 0-200 psi pressure gauges
- 1-foot of 1″ hose
- 150psi. Safety Pop off valve
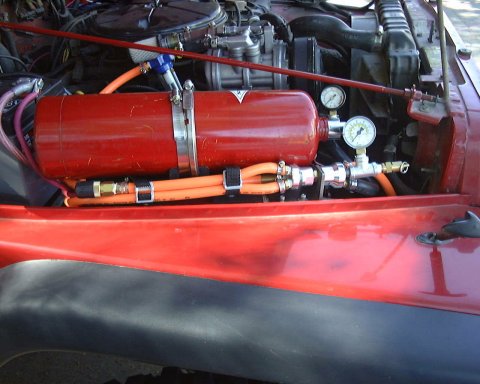
From what I’ve read, everyone suggests using an air-tank with at least a 2-gallon capacity. I used a Fire Extinguisher Tank. Unfortunately, mine only holds about 1.3 gallons. Personally, I have never come across a situation where my compressor and air-tank weren’t able to provide a continuous amount of pressure. Sun Performance offers a very nice air tank, and I believe it holds 2.3 gallons. It has a very slim design and would work perfect to mount above the rear differential on a Jeep Wrangler. I’ve even seen them mounted on the fenderwells between the rollbars as well.
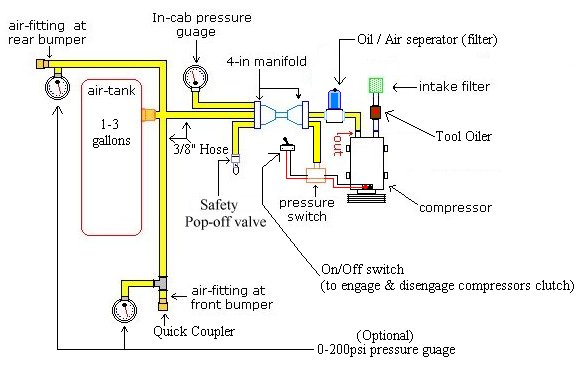
Photos of Air Tank & Manifold Setup:

Performance:
I’m not sure what CFM (cubic-feet-per minute) my compressor pumps out, but to give you an example of the performance: I currently run 35×12.5×15 BFGoodrich Mud terrain tires on my Jeep. When I go offroading I usually air down to about 12psi. My compressor will fill one tire to 32psi. in approximately 30 seconds at about 2000 rpm’s. Be careful you don’t overheat your compressor. There is alot of friction going on and after about 10-15 min of continuous running at about 2000 rpms, mine gets a little hot. I usually let it sit for about 10 minutes before next use. I also use my compressor for running air tools.
Resources:
This article was posted at off-road.com in December 2000. TRS linked to it until the link was no longer any good, and then the article was found at the internet archive and preserved here.
About The Author
Jim Oaks is the founder of TheRangerStation.com, the longest-running Ford Ranger resource online since 1999. With over 25 years of hands-on experience building and modifying Ford Rangers — including magazine-featured builds like Project Transformer — Jim has become one of the most trusted authorities in the Ford Ranger off-road and enthusiast space.
Since launching TheRangerStation.com, Jim has documented thousands of real-world Ranger builds, technical repairs, drivetrain swaps, suspension modifications, and off-road adventures contributed by owners worldwide. TheRangerStation.com has been referenced in print, video and online by enthusiasts, mechanics, and off-road builders looking for practical, and experience-based information.