
By: Chris Emmons
Remove the brake caliper/hardware, then the nuts/washers etc, that hold the rotor on.
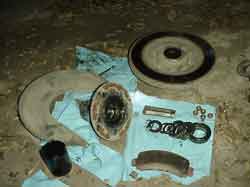
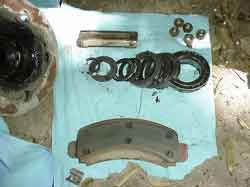
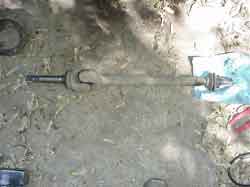
You should now have a similar sized pile of parts.

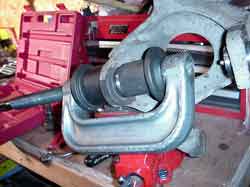
Now, the fun part! Bang on the spindle with a wooden block, and a BIG hammer.
Don’t use a hammer directly on the spindle!
Use a star pattern and wedge a hard chisel in between for leverage once you get it moving.
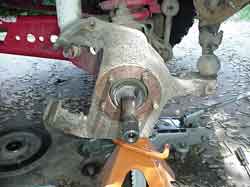
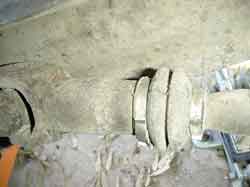
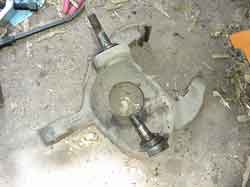
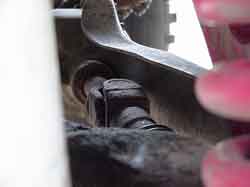
This is what all your hard work will get you!
The spindle is now gone, and you can pull the axle shaft right out.
On the passenger side, you need to remove the clamp on the axle boot. Clean the bore once the axle is out.
The spindle will be really corroded. Clean it and smooth out any burrs you may have made in taking it apart.
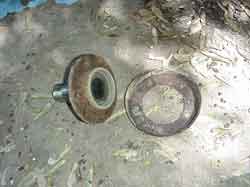
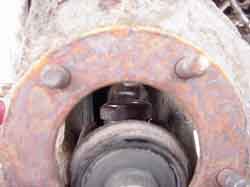
Now is a good time to inspect the little roller bearings.

Closer look inside says, “REPLACE ME!” It’s worth it to do this now, cause its cheap.
Apply anti-seize to the back of the spindle and the bore on the knuckle (AFTER you do the joints!). This will make the spindle come off easier later.
This is the boot that needs to be released from the inner axle u-joint.
Passenger Side (long) shaft.
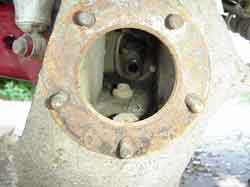
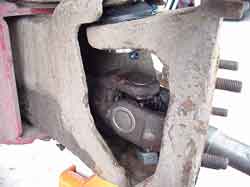
This is a close up of the bore in the knuckle. You need to remove the upper and lower bolt attaching the ball joint.
Now you need to use a pickle fork for the ball joint, or a lot of hammering. Take your pick.
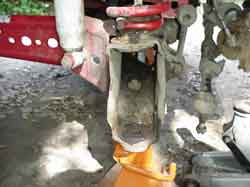
WOW! Where’s the tire go!
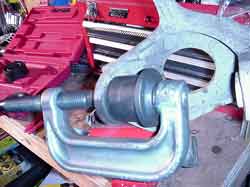
Go to www.harborfreight.com and get one of these. You can also rent them at parts stores.
Follow the directions, and it’s pretty easy.
You start with the lower one. Set the receiver cup to let the press push the joint out.

another view
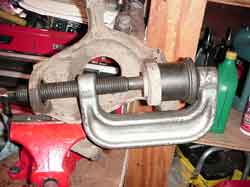
do the same with the upper, running the screw through the hole left by the lower one.
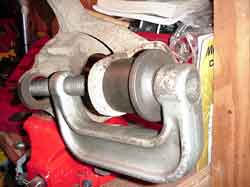
Installation is similar to removal, but you use a smaller cup to press the new joint in.
The lead screw is against a cup that is not visible.
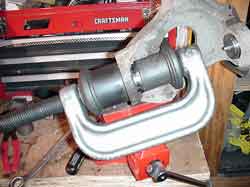
With the upper in place, and the clip installed (if applicable), Install the lower joint.
The same arrangement of the press is used.
The fruits of your labor
Install the knuckle and torque to specs. Be careful to align the axle joints on the passenger side.
You want the joints to be in “phase” with each other, so they don’t bind and break. (they do anyway!)
I like to square the top of the inner joint and sight down the axle to align it while installing the passenger axle.
Grease the joints, and have your truck aligned. The camber will be off if the joints were worn.
Remember this stuff? Well, put it back where you found it!
About The Author
Jim Oaks is the founder of TheRangerStation.com, the longest-running Ford Ranger resource online since 1999. With over 25 years of hands-on experience building and modifying Ford Rangers — including magazine-featured builds like Project Transformer — Jim has become one of the most trusted authorities in the Ford Ranger off-road and enthusiast space.
Since launching TheRangerStation.com, Jim has documented thousands of real-world Ranger builds, technical repairs, drivetrain swaps, suspension modifications, and off-road adventures contributed by owners worldwide. TheRangerStation.com has been referenced in print, video and online by enthusiasts, mechanics, and off-road builders looking for practical, and experience-based information.