
Introduction
I decided to go with DUALS AM/FM/CD/MP3/WMA Receiver with I plug interface cable 200-watt 50×4 that my brother got for me from Kragens. Installation was done in a 1995 Ford Ranger using a Metra Installation Kit.

This took me about 45 minutes to complete.
Parts Needed
Here’s the part numbers, they may help, they may not…
- AT-586FT stereo installation kit (1995-2006 Ford)
- CK-WHFD2 Wire harness adapter
- CK-FDRT OEM radio removal tools
Installation kits can be found at most parts stores and electronics stores like Circuit City.
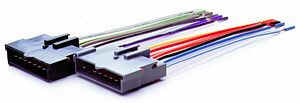
(CK-WHFD2 Wire Harness Adapter)
Installation
First, you’re going to take off the middle dash by taking out (2) screws that are right above the heater controls then just pull it out.
then you will need to use the OEM radio removal tools. Just insert into the holes on the sides give it a couple tugs in different directions, and it should pull right out.

(CK-FDRT OEM radio removal tool – Some people cut and bend 2 pieces of coat hanger)
This may look complicated but ITS NOT!!! just match up the colors and your good. Splice ends of adapter harness to new receiver wires, individually isolate with tape, heat shrink tubing, etc. There are some wires that were not used as you can see in the first picture those just won’t be there on the new CD deck receiver.
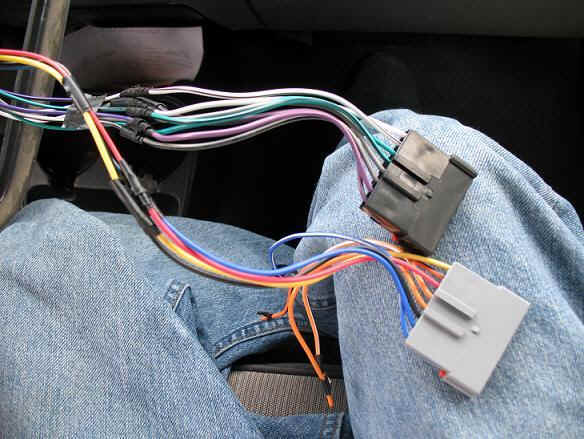
The receiver came with its own wire harness that matches up to the METRA Autoworks harness. This makes wiring the deck up really easy.
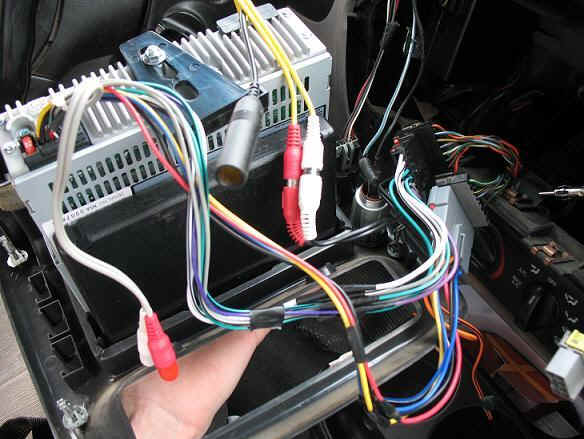
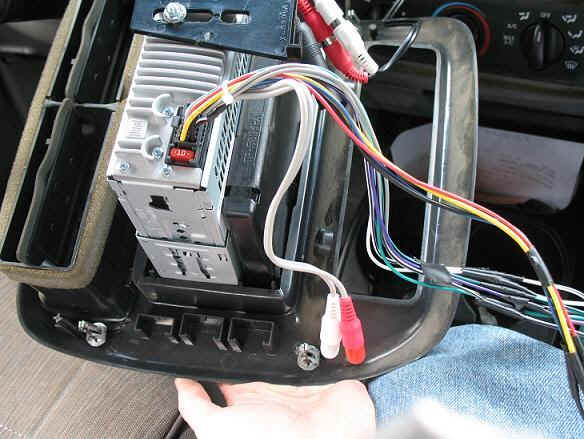
OK now I messed up by putting the deck in before thinking about pictures but here’s what it should like now. There’s (2) sets of RCA plugs on this deck. The yellow set goes to the I plug interface. The gray set goes to your subwoofer amplifier that I don’t have. Also, that big black plug is for your FM/AM radio. Just plug it in.
The STEREO INSTALLATION KIT is that part that you’ll need to fill the gap that the old OEM receiver left. Make sure the CD holder gap is on the bottom then just push it into the dash face until it clicks in. It’s that simple.
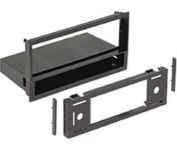
(Installation Kit)
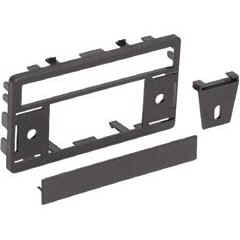
(Other Installation Kits)
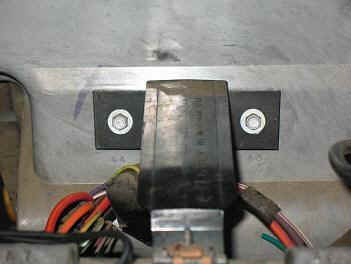
Next, you’re going to add your rear support for the new CD deck receiver.
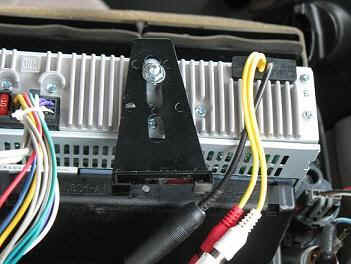
Don’t tighten all the way because you’re going to have to adjust it to the level of the support built onto the truck.
Once you have done that you can now put in your CD decks slip in shell then bend the tabs so that the deck is firmly mounted when placed in.
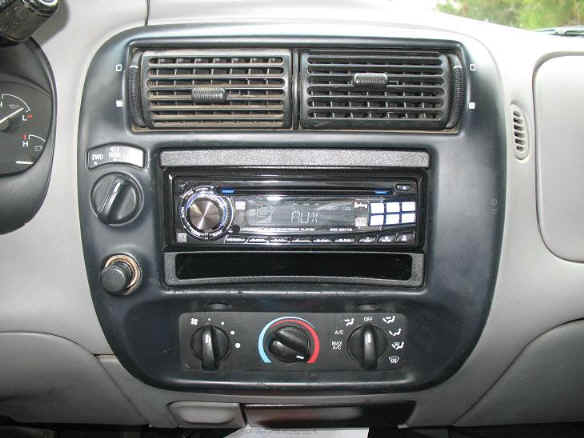
Then place in the deck, plug your 2 wire harnesses together and put the middle dash back together and you should come up with something like this.
Contributor
This procedure was performed and photographed by TRS forum member 4byRANGER who submitted the information to the author to be published at The Ranger Station to help other Ford Ranger owners.
About The Author
Jim Oaks is the founder of TheRangerStation.com, the longest-running Ford Ranger resource online since 1999. With over 25 years of hands-on experience building and modifying Ford Rangers — including magazine-featured builds like Project Transformer — Jim has become one of the most trusted authorities in the Ford Ranger off-road and enthusiast space.
Since launching TheRangerStation.com, Jim has documented thousands of real-world Ranger builds, technical repairs, drivetrain swaps, suspension modifications, and off-road adventures contributed by owners worldwide. TheRangerStation.com has been referenced in print, video and online by enthusiasts, mechanics, and off-road builders looking for practical, and experience-based information.