SenorNoob
Speaks to bots
💻 TRS Socials
TRS Event Participant
TRS 25th Anniversary
GMRS Radio License
- Joined
- Oct 24, 2012
- Messages
- 6,556
- Points
- 1,601
- Age
- 36
- City
- Lafayette
- State - Country
- TN - USA
- Other
- 1978 Honda XL350 12v & Electronic Ignition Swapped
- Vehicle Year
- 1988
- Vehicle
- Ford Ranger
- Drive
- 4WD
- Engine
- 4.0 V6
- Transmission
- Manual
- Total Lift
- 4"
- Tire Size
- 245-70-R16
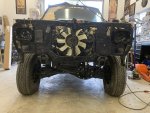
Finally fixed the gaping hole in the floorboard.

Edit: I can't believe it's been nearly 2 years since I posted here.
Edit: I can't believe it's been nearly 2 years since I posted here.
Last edited: