Kirbys 1991 Ranger Build Up and Solid Axle Swap


Here are some more pictures of the shocks mounted and traveling. The limiting straps look too long in these pictures- the only time they actually get utilized is when both wheels are drooped out at the same time- like when catching some air.

shock flex 1.jpg
shock flex 2.jpg
shock flex 3.jpg
shock flex 4.jpg


The compressed shock uses almost all of its compression travel. With a little more weight or speed it would completely use it. When I set it up, it didn't have the tent or the bad cage on- so I thought I had plenty of compression. once the weight was added it is getting pretty close to running out. I have considered doing something to bring the rear up a little because it does sag with the bed cage and the tent on- that would give me back some more compression. So far it is working well though. Also- the tire does not contact the shock on the top when articulated- it gets close.

shock flex 5.jpg

I also dig how it looks in the wheel wells at ride height

Kirbys 1991 Ranger Build Up and Solid Axle Swap
 
And...


The behemoth strongbox arrived a few weeks ago! I am stoked to start working on it. I hope to have some time to gather junk yard parts in a couple weeks.

Kirbys 1991 Ranger Build Up and Solid Axle Swap


Its way bigger in person than it looks like in pictures!
 

Attachments

  • Kirbys 1991 Ranger Build Up and Solid Axle Swap
    Doubler 3.jpg
    160.3 KB · Views: 179
how long did it take you to get the strong box? Going back through your thread it looked like the shifters came in a month or so, did it really take 6 months to get the strong box from ordering it in feb?
 
I haven’t been updating the thread well. It didn’t take 6 months- it took almost exactly what behemoth quoted me- which was 6-8 weeks if I remember correctly. They also updated me with texts about progress on the box- what stage of assembly it was in. Work has been busy for me and I got it in the mail and set it on the shelf until I have had time to update and hopefully I can assemble soon.
 
Ok- I finally got some time to work on the doubler. I went to the pull and pay in the heat and pulled the donor parts.

I took parts from 2 2001 exploder sports.

First off, took the front off of a case- luckily it was already pulled.
Kirbys 1991 Ranger Build Up and Solid Axle Swap

Then I used my trusty sawzall to hack off the sides of the case- carefully making sure not to cut into the ring gear.

Then I wacked the case apart to get out the ring gear.

Kirbys 1991 Ranger Build Up and Solid Axle Swap

Kirbys 1991 Ranger Build Up and Solid Axle Swap


Next I compressed the little clip to get out the planetary gears.

Lastly, because my Tcase is a 1991- I know my internals are likely going to be 4 gear. I definitely wanted a 6 gear in both cases, so I grabbed another set of planetary gears out of another 2001 Exploder sport.

Kirbys 1991 Ranger Build Up and Solid Axle Swap


The time bomb SOHC worked in my favor- glad there was 2 trucks there I could grab parts off of and glad they both already had the cases out.

With this pile of parts, I can get the doubler assembled without pulling out my current transfer case and putting my truck out of commission while I put it together. I didn't feel bad about tearing apart 2 transfer cases either- the yard charged me $30 a piece for the planetary gears! WOAH. I was expecting $10.
 
Next I started the assembly process:

I followed the instructions here:

They were spot on with the exception of the clip that holds the bearing in the front section- it was redesigned to mimic the factory design. Noted below.

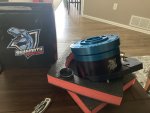
Here are the parts on the table ready to go: (the shifting section was still in the box)
Kirbys 1991 Ranger Build Up and Solid Axle Swap

First, I got the front portion ready by applying some tape to the face to hopefully keep that purdy anodizing in good shape. Unfortunately, I did garf it up a little when it was all done. Luckily it will be hidden inside the transmission adapter.

Kirbys 1991 Ranger Build Up and Solid Axle Swap

Next I cleaned up the ring gear (sun gear I think) and pressed it into the front section- carefully putting the tapered section in first.
Kirbys 1991 Ranger Build Up and Solid Axle Swap


Kirbys 1991 Ranger Build Up and Solid Axle Swap

It is supposed to fit just above flush.


Next, I pressed the shaft out of the planetaries. This required removing a circlip before pressing them apart. The clip was a royal pain. Those clips took the longest part of assembly. I need a better set of pliers I guess.

Kirbys 1991 Ranger Build Up and Solid Axle Swap


The next step includes putting the original bearing that was pressed on the shaft on top of the planetary gear set into the case. The video instructions are not accurate on this step- behemoth has changed designs to use the original clip and retention setup that is the same as factory. This took a lot of head scratching and a call to behemoth for me to sort out.

Here is the channel the clip lives in:

Kirbys 1991 Ranger Build Up and Solid Axle Swap


And here is a picture with that clip in place. I got the clip from one of the donor cases- the one off my case would have been fine too.

Kirbys 1991 Ranger Build Up and Solid Axle Swap


Once that clip is in place, you slide in the original bearing. I priced new ones of these, and I could only find a japanese bearing and it was $60 so I decided the original bearing out of my donor would be fine. Then, as it was- but now with a new anodized case in the mix- you press the shaft back into the gear set and the bearing. There is also a thrust washer that goes in between the bearing and planetaries. Lastly, the stubborn little clip goes into place.

Kirbys 1991 Ranger Build Up and Solid Axle Swap


And then a seal goes in. I am going to wait on that.

Next step is the shift section. You slide the collared shift gear into the shift fork and set aside. I like the quality on this whole section of the case. Super nice.

Kirbys 1991 Ranger Build Up and Solid Axle Swap


Also- note the o-ring seal on this section. IT would have been acceptable to just use RTV, but I am impressed behemoth put in a seal. I hate RTV.

Kirbys 1991 Ranger Build Up and Solid Axle Swap


The last section is the favorite because it involved the Behemoth spud shaft. Beef.

Kirbys 1991 Ranger Build Up and Solid Axle Swap


It involves assembling the spud shaft over the rear section of the case with the vent, a new bearing and a some bushings. Its really similar to the front install, but with the custom shaft.

Finally, we have a complete doubler, ready to be bolted to the front of my existing transfer case and then figuring out some shifters.

Kirbys 1991 Ranger Build Up and Solid Axle Swap


Of course it will be taken apart to bolt the pieces to the case and glue them.

There are 4 oil passage holes that will allow the cases to share oil. as you clock the center shifting case, the holes line up with 4 holes, or 3 or 2. I have 4 holes aligned here and the shifter handle near the factory location. I dont know if this will be the final resting place, but its a good place to start mockup. You can also see the garf I made in the front case. Ugh.

Kirbys 1991 Ranger Build Up and Solid Axle Swap


I might get some time to start messing with it in the next week or two. However, I have a camping trip this weekend- so I probably won't want my truck to be down. I might just add some tube to the bumpers this week and mess with the doubler next week or so.
 
Last edited:
This thing is sweet! I really want to do that same doubler set up.
 
This build is amazing man. It gives me so much insight coming from the Jeep world. I appreciate this thread and all the knowledge and experience in it!
 
I am glad it has been helpful to you.

I haven’t done much to the Ranger lately,

I did however have some issues with the steering. I have been wanting to add a high travel joint to the lower end of the drag link. This would mostly give me more clearance between the drag link and the tierod. In order to do that, I needed to shorten my drag link by 2.25”. My steering links are 1” .25 wall dom threaded for 7/8” 18 tpi 1 ton Chevy tie rod ends by my friend with a lathe. He also machined wrench flats on them. Unfortunately, he moved. I tried to get another machine shop to shorten my drag link and I haven’t found anyone who could build one for me.
It seems like everyone has gone to solid 7075 aluminum links because when you hit them they flex and go back to the original straight condition. So I ordered up a set for hammer down enterprizes. They were the cheapest and super quick.

Kirbys 1991 Ranger Build Up and Solid Axle Swap
 
That rear bumper looks amazing! I’m thinking about building something similar for my truck and was hoping you could share some more details about it.
 
Stealing a bunch of your pics for reference on my Explorer SAS... I am doing a 3 link but I think my brackets will be real similar to yours.

Also I can't help myself here, what is this ominous looking hole in your rotor for?
Kirbys 1991 Ranger Build Up and Solid Axle Swap
 
Haha! My ebrake came apart with a horrible noise and bound up inside- and this was the result! I had some challenges adapting the late model exploder 8.8 disk brakes to a full size early 90s full width 8.8 I think I covered it in here somewhere, but the axle shafts on the disk brakes exploders are relatively 1/4” longer. Meaning the whole length is shorter, but the wheel mounting surface flange is 5/16” further out from the caliper bracket, wheel bearing, wheel seal, etc.

So- with stock axle shafts it is really difficult to fit all the emergency brake parts in there. I tried a few things, but ended up getting custom chromo axle shafts from moser that were 1/4” longer and that resolved the problem.
 
That rear bumper looks amazing! I’m thinking about building something similar for my truck and was hoping you could share some more details about it.

thanks man! The bumper has been a work in progress. I have added some side pieces made of DOM 1/4” wall and some supports I might also had some quarter panel tubes for the rear corner too.
Kirbys 1991 Ranger Build Up and Solid Axle Swap

Here’s some pictures where you can see that
 
Ok- need to catch up here.

Got the links on and they are working well. I also replaced TREs while I was at it.

IMG_1604.jpeg


I got 1 7" spring from BC Broncos. The drivers side has been really sagging with my heavy butt and the toolbox. Someone predicted that... can't remember who, but they were right. It also had the fuel tank on the drivers side, so that adds to it. This spring is 1" taller than my current springs.


While it was apart, I thought I would address an issue that it has had for a long time. When hitting big g outs or catching air, it will bottom on the passenger side when the lower trackbar mount contacts the frame under the coil bucket. This limits travel by about an inch. It doesn't cause any problems in articulation, only when both sides are compressed at the same time.

You can see the problem here (I couldn't compress the suspension any more due to the placement of the lift's arms, but you get the idea)

Kirbys 1991 Ranger Build Up and Solid Axle Swap

So I fixed that.

IMG_1607.jpeg
]
Kirbys 1991 Ranger Build Up and Solid Axle Swap

IMG_1607.jpeg

I cut a little over an inch out. Then started patching it back together with some 1/4" flat stock I had laying around.
IMG_1609.jpeg

IMG_1608.jpeg

The first piece braced all the way back to the crossmember just for good measure. I snuck in there and welded it too.
IMG_1610.jpeg

Then I patched up the rest of it.
IMG_1611.jpeg

I also added the dust covers from JBG. Next big snow I'll see if they make a difference.


Here is the completed notch
IMG_1614.jpeg


I also redrilled one of the mounts for the coil bucket so it still has 4 1/2" bolts.

While I was there, I ground off the ruff stuff cover that I modified for the aluminum tierod and painted it. I dont think I mentioned it but there was some interference.

IMG_1612.jpeg

IMG_1613.jpeg


And I installed the new 7" lift coil (1" longer than the passenger side) on the drivers side.
My drivers side remote rest fox shock needs some work. The shaft is bent. I guess i need to send that puppy off one of these days. I set the lowers so they didn't bind at ride height, i really should have set them so they didn't bind at full droop I guess, and the lack of limit straps was not a good call- its leaking pretty nicely.
 
Last edited:

Sponsored Ad

TRS Events & Gatherings

Featured Rangers

Want to see your truck here? Share your photos and details in the forum.

TRS Latest Video

Official TRS Merchandise

Follow TRS On Instagram

TRS Ranger Sponsors


Product Suggestions

Back
Top