Next I started the assembly process:
I followed the instructions here:
They were spot on with the exception of the clip that holds the bearing in the front section- it was redesigned to mimic the factory design. Noted below.
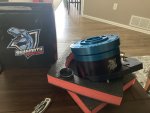
Here are the parts on the table ready to go: (the shifting section was still in the box)
First, I got the front portion ready by applying some tape to the face to hopefully keep that purdy anodizing in good shape. Unfortunately, I did garf it up a little when it was all done. Luckily it will be hidden inside the transmission adapter.
Next I cleaned up the ring gear (sun gear I think) and pressed it into the front section- carefully putting the tapered section in first.
It is supposed to fit just above flush.
Next, I pressed the shaft out of the planetaries. This required removing a circlip before pressing them apart. The clip was a royal pain. Those clips took the longest part of assembly. I need a better set of pliers I guess.
The next step includes putting the original bearing that was pressed on the shaft on top of the planetary gear set into the case. The video instructions are not accurate on this step- behemoth has changed designs to use the original clip and retention setup that is the same as factory. This took a lot of head scratching and a call to behemoth for me to sort out.
Here is the channel the clip lives in:
And here is a picture with that clip in place. I got the clip from one of the donor cases- the one off my case would have been fine too.
Once that clip is in place, you slide in the original bearing. I priced new ones of these, and I could only find a japanese bearing and it was $60 so I decided the original bearing out of my donor would be fine. Then, as it was- but now with a new anodized case in the mix- you press the shaft back into the gear set and the bearing. There is also a thrust washer that goes in between the bearing and planetaries. Lastly, the stubborn little clip goes into place.
And then a seal goes in. I am going to wait on that.
Next step is the shift section. You slide the collared shift gear into the shift fork and set aside. I like the quality on this whole section of the case. Super nice.
Also- note the o-ring seal on this section. IT would have been acceptable to just use RTV, but I am impressed behemoth put in a seal. I hate RTV.
The last section is the favorite because it involved the Behemoth spud shaft. Beef.
It involves assembling the spud shaft over the rear section of the case with the vent, a new bearing and a some bushings. Its really similar to the front install, but with the custom shaft.
Finally, we have a complete doubler, ready to be bolted to the front of my existing transfer case and then figuring out some shifters.
Of course it will be taken apart to bolt the pieces to the case and glue them.
There are 4 oil passage holes that will allow the cases to share oil. as you clock the center shifting case, the holes line up with 4 holes, or 3 or 2. I have 4 holes aligned here and the shifter handle near the factory location. I dont know if this will be the final resting place, but its a good place to start mockup. You can also see the garf I made in the front case. Ugh.
I might get some time to start messing with it in the next week or two. However, I have a camping trip this weekend- so I probably won't want my truck to be down. I might just add some tube to the bumpers this week and mess with the doubler next week or so.


