• Welcome Visitor! Please take a few seconds and Register for our forum. Even if you don't want to post, you can still 'Like' and react to posts.

Finally getting round to some body work...


rumblecloud

Well-Known Member
Supporting Member
Joined
Mar 6, 2020
Messages
1,822
City
48022
State - Country
MI - USA
Vehicle Year
1994
Vehicle
Ford Ranger
Engine
4.0 V6
Transmission
Automatic
Total Lift
1-1/2 inch front leveling
Total Drop
Stock
Tire Size
31/10.50/15
My credo
What's the worst that could happen?
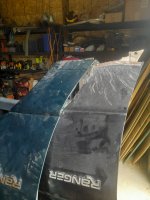
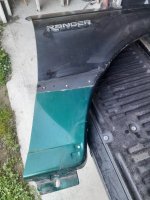
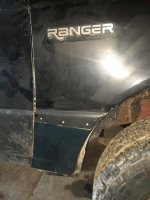
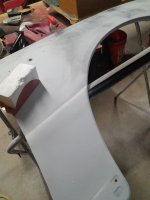
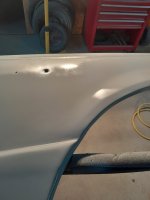
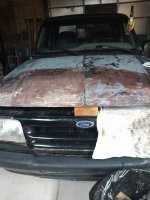
Been slowly working up to doing this re-paint. Being my first time I've been collecting equipment and things I need to complete the job. I have a ton of pics which I will start to post as I move through this project. It's black with a clear coat. The clear was pealing pretty bad on the hood and fenders were beginning to rust down at the base by the back of the wheel here's a couple of pics from the beginnings..
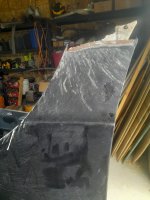
20250601_120442.jpg 20250621_143630.jpg

Plan is to do the fenders and tailgate (picked up a new one) off the truck, do the the hood on (too heavy to move around easily). Remove the bed and do some repair work. while that is off, I'll paint the cab. Not sure about the bed yet. May be able to do some surface work to make it passable for now -- plus, I'm sure I'll run out of time before winter sets in.
.
 
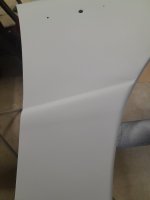
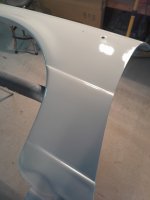
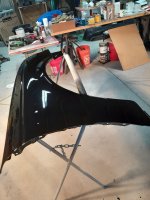
This has been a long process that I started way back in May, but slowly making progress. Prep work is very time consuming. The fenders received their final prime coat yesterday. Here ae some pics of the process:

20250621_143724.jpg
I replaced the driver side fender with a pull yard replacement last year. Earlier this year I picked up another pull yard fender they labelled as a 96. Turns out it was a 97. So I just cut off what I needed from the 97, matched it up with the 94...
20250622_191925.jpg 20250622_192416.jpg 20250712_175340.jpg
Some subtle differences but it's ok for now.

20250712_175416.jpg
Both fenders with final prime.. The driver side has a dent at the base that I couldn't get to because of a bracket on the backside - I may try to fix this, but ..The 97 portion at the base also has a couple of differences. .
Hood's up next.
 
Last edited:
Looking good. If you have a welder, weld some 16 penny nails or similar and with a pair of vice grips and hammer you can pull the dent that way. Then grind off the nail. It works really good what you have done.
At this point in the process, I'm willing to let small things go, :pray:
SIL (Son in law) whom I respect a lot is like "you can fix that..."

Today he gave me a little tip which I am sure is old hat for you guys.
I sprayed down my primer and thought it was pretty good, but no, it was all orange peal. I thought OP was more visually apparent, like an orange peal. Turns out, we think my primer dried too quickly - for which there are a number of causes for another topic.
At any rate he showed me this:
20250714_191754.jpg

He just lightly sprayed a flat black over the fender. Point being, that it helped define the orange peal. So when you sand it, the the low spots show the depressions...when they're gone you are, for the most part ---level. Lots of caveats here, but it was enlightening to me.
I'm a complete amateur at this and am enjoying every bit of it. I have the benefit of you guys and the SIL who's a body guy at (someplace dealer in Richmond, mi)) but I digress.

@Terrys87 please continue to offer your insights. They are much appreciated.
 
Learned a lot over the past few days about applying primer and orange peel (or is it peal). First is it's hard to avoid and second is how to get rid of it and third is "don't worry about it." HVLP gun set-up is squirrely. Combining air pressure flow and paint flow with the right pattern to get everything right is time consuming. I assume I'll get better at it as I gain more experience.
Anyway, I got the fenders knocked down and ready for the seal coat and then final paint. Here's a couple pics:
Seal coat:
20250717_164815.jpg 20250717_165108.jpg
It goes on kinda thin and wet then quickly dries flat - bout 8- 10 minutes depending on temp and humidity - both reasonable yesterday when I was doing this.

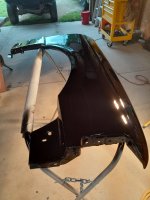
Here's a couple of the final paint.:
20250717_174530.jpg 20250717_180441.jpg
I'm really pleased with how it turned out for my first time. Not sure if I need to do another coat - not sure I want to screw it up. :unsure:
 
Last edited:
Wow, that looks really good. Black is the hardest to get straight. It shows everything. You did great on it. Paint/bodywork takes patience, but it is rewarding when done and it feels like a newer truck then when you are done. Great job!!!
 
Thanks Terry, that means a lot to me (y)
 
I think the first go round was beginner's luck. Gremlins are all over me now...
Fenders look good. I did notice some orange peal.along the tops of both, but nothing serious. Worse yet as I was cleaning the gun, I accidentally splattered some thinner on one fender - little spots in a small area. I was surprised that the thinner was able to soften the paint and leave impressions in the paint. I thought the hardener would handle that. Son said "No-Ah-Ah...90 days for a full cure and even then the paint may still soften under thinner attack. -- well sh*t.. So I'll have to wet sand and see if that takes out the blemishes.

This image is of the tailgate. longer story...
Paint is 4:1. Sealer Coat is 4:1:2. I can mix those pretty well. But damned if I can mix a smaller batch so I don't waste paint. Stuff is too expensive. I just have the tailgate to seal and paint now - try mixing a 2:.5:1. I am not good at it. The result was a primed and sealed tailgate with orange peal all over it. And I'm talking waves and ripples :p

20250722_125531.jpg


I mentioned earlier about using a light over spray to help identify high and low spots (orange peal). This image shows that in action. Using 280 on a styrofoam block you can see how it works. Helps a lot.

The tailgate is ready now for sealer and final paint. So hopefully I can get the mix right...🙏
 
I need to get better on using guide coat. I use a flat black rattle can spray for a guide coat as I some how always wind up using gray primer for most painitng. For smaller batches of paint, go to a Dollar store and get the cheap, disposable mixing cups. They have them in small sizes. It took me forever to fianlly find out how to use the paint mixing cups.

You are painting black and that is the most difficult color as it shows all flaws. If you get that down, you will have it made with any other color. Metallics can do what is called Tiger Stripes, but I think black is the hardest to get the body work done on.

On your orange peel, that is nothing to worry about most will wet sand out. Using sand paper on orange peel is a lot more safer then using a buffer and rubbing compound. A buffer will get you in trouble quick, be careful if you try to use a buffer. I would recommend wet sanding over a buffer.
 
What kind of primer are you using and what type of hardener? I wonder if it would benefit you to use a slower hardener if heat is a concern. That may help with the orange peel. Staying on a wet edge will help too... but some of it is actually overspray in my experience. If you have a real thick primer, you may also need to use a bigger tip on your spray gun. I think the "purple gun" from Harbor Freight has a 1.4mm tip which works good for base coat, some clears, thin primer and sealers, but not for high build primer. I hogged out the tip in one of my guns to 2mm and it it shoots high build WAY better.

I was using U-Pol high build primer on my last paint project and I remember reading that you could shoot it as a 4:1 primer filler, 4:1:1 primer surfacer, or 4:1:2 primer sealer. I shot a couple coats of primer filler, sanded the orange peel off, then shot it as surfacer and it turned out very smooth. IIRC I just gave it a scuff and shot paint & clear over that. Using sealer is a good practice but it is incredibly thin and runs super easily, almost worse than clear, and the stuff I used has a time window where you can shoot base over it so if you run it, you better be prepared to fix it or you're screwed.

Any additional time you can wait between primer and paint is also time well spent... primer shrinks a lot, especially over seam sealer and stuff like that. I gave my cab a couple of weeks to cure and I still ended up with hairline cracks through the clear coat in a couple spots. I would give it at least a week and heat will help it shrink up too.
 
Thanks for the insight.
@Terrys87 -- Yeah, I've had issues with buffers before with burn-thru and you can't hardly fix that. I'll be wet sanding for sure, 1500 or 2000 and see how it goes. When the black first went on I was amazed at how it looked. But then after it sits and you've had a chance to look at it up close, you can see all kinds of little nits and particles. Nevertheless, I am very pleased. I just hope I can figure out what the heck I did right. :unsure:

@Shran
I am using the same stuff I think:
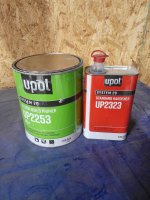
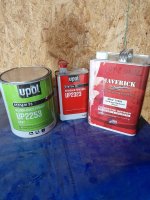
20250722_205704.jpg 20250722_205807.jpg

Left is Primer, right is sealer. You can see on the can I noted 4:1:2. And yes running the sealer was quick. It flashed in about 7 minutes. Very thin. I painted the black over it after about 30 minutes.

It's hard for me to be patient. But I know what happens if I'm not. So...

Thanks for taking the time to share.
R
 
That’s the same primer I used.

I used Nason sealer on some stuff but I quit on that because it was really expensive and it didn’t seem to be a better product.
 
A lot of the particles you see in my opinion is paint dust that goes in the air and settles down in the paint. You probably notice spraying primer takes a while to get a cloud in shop. Just a few minutes of spraying paint and it gets cloudy quick. Keeping your floor wet when painting can help trap a lot of paint dust.
 

Sponsored Ad


Sponsored Ad

TRS Events

Member & Vendor Upgrades

For a small yearly donation, you can support this forum and receive a 'Supporting Member' banner, or become a 'Supporting Vendor' and promote your products here. Click the banner to find out how.

Recently Featured

Want to see your truck here? Share your photos and details in the forum.

Ranger Adventure Video

TRS Merchandise

Follow TRS On Instagram

TRS Sponsors


Sponsored Ad


Sponsored Ad


Amazon Deals

Sponsored Ad

Back
Top