• Welcome Visitor! Please take a few seconds and Register for our forum. Even if you don't want to post, you can still 'Like' and react to posts.

'94 Ranger 4.0 OHV crankshaft damper pulley TTY bolt install?


Dunk67

Member
Joined
Nov 1, 2022
Messages
21
City
NJ
Vehicle Year
1988
Engine
2.9 V6
Transmission
Automatic
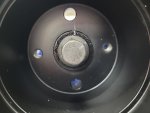
I am rebuilding a 4.0 OHV out of a '94 Ranger to swap into a Bronco II. Trying to install the balancer/damper on the crank and it does not want to fully seat. I initially installed the timing cover, lightly seated the bolts, and installed the dampener to center the seal, then tightened the dampener with a 1/2" drive ratchet pretty snug expecting final torque to be over 100 ft/lbs.

Once it was tight but the balancer was not yet pulled tight to the cam gear on the crank. I checked the book for torque spec, which calls for 30-37 ft/lbs + 90*... Which is to say a TTY bolt, so I need a new bolt. The old bolt is torqued to well above 37 ft/lbs and the balancer is pretty far front the cam gear on the crank. I'm doubtful that 37 ft/lbs+90* will get the balancer snug to the cam drive gear on the crank. Balancer is aftermarket Grayworks 102028. I have not tried to install the original balancer, which has dried and cracked rubber.

Is this crank damper bolt a TTY bolt I need to replace? What do I do if the balancer, aftermarket or original, doesn't seat against the cam drive gear at 37 ft/lbs+90*? This is the early style cam drive gear taht needs to be fully sealed against the crank for the tank to seat and ensure it doesn't come loose..
 
All TTY bolts are a one time use.

You sure the key didn't roll out of the key way?

Does this aftermarket balancer have the the keyway cut deep enough?
 
WTH is a TTY? I think we may need a BBoA…!
 
I think it can be TTY in 1994 but in this application it can be reused, in my opinion
New bolt from Ford is about $11 so not a big expense

But something is stopping the crank balancer from sliding in all the way, not a bolt issue
You probably need to pull it off and check it, could be woodruff key issue or manufacturing issue
Compare it to the old one
 
TTY= Torque To Yeild
 
TTY = Torque to Yeild
New style of bolt(1990s) that will stretch and hold, but can only be stretched one time, once loosened it can become brittle if stretched a 2nd time, not always, really depends on final torque the first time.
These are popular for head bolts, it makes manufacturing engines cheaper and faster

Torquing above 40ft/lbs needs the wrench to be calibrated often
Torquing to 30ft/lbs and then rotating 90deg once or twice doesn't really need any calibration
And computers can do 90deg in their sleep, lol
So engine assembly is cheaper and faster, no stopping to change or re-calibrate ALL the torque wrenches
Same for any bolt with higher torque specs on an assembly line, TTY just makes it easier
 
I cleaned up the key with a file before installing, had a burr from removal. I will check installed height proud of the crank vs how deep the groove in the new balancer is. I did verify the key slid easily through the entire groove though.

I've never had a balancer difficult to install before, but also never built one of these fancy new engines. Bolts are typically larger diameter than this one, didn't want to crank on it. I'll verify it's not hanging up on the key/groove and pick up a balancer install tool to get it fully seated without stressing the bolt or crank threads.

The bolt is E7RY-6A340-B, I'll stop at Ford for one. It's worth a few bucks to not worry about it.
 
The bolt came out chowdered at the last thread or two, and the first 20mm of thread in the crank was damaged. Well, the first 10mm of threads as I measured from the face of snout, and threads don't begin for 10mm from there. Threads end 38mm from the face.

I was able to chase the threads with a thread repair kit and it aligned with the good threads deeper down but I could not thread a new M12x1.5 bolt in past a turn or two. The thread chaser would get a little tight at the transition from damaged to undamaged threads no matter how many times I ran it through. I then used a standard M12x1.5 tap to clean up the rest of the damaged threads, going only to the transition to the good threads past the damaged spot.

I was able to run a new bolt in by hand for the 30mm of thread on the bolt. I'll measure the balancer/crank/bolt and see how much thread engagement it should have when installed. In theory it could have up to 18mm of good threads (granted the threads deeper in don't look that great.I'm questioning what I should torque the balancer bolt to, less than the 30-37 ft/lbs + 90* might be prudent? Or try the low end of that and if it pulls out scrap the crank and start over? I will fully seat the balancer with an install tool either way.

This is a reman crank from Enginetech, since I couldn't find anyone local that grinds cranks anymore. I did not inspect the threads before installing, other than verifying the original balancer bolt threaded in a couple turns (did not fully thread it in). I wonder if there may have been damaged at that bad spot deeper in the snout when I got it. When I pulled the balancer off it came off very easy. It was not a super tight press fit as though it got hard to turn because of pulling the damper on farther. One or two light turns with a wrench on the puller and it came off the rest by hand. Surface finish on the journals is good and all clearances checked out with plastigauge, no taper across journals. Mains were .002", .002", .0015", .002". All rods were .002". No unusual or large increase of torque to rotate as it was assembled.

The Enginetech bearings that came with this crank were poor quality control, several had nicks, one had bearing material proud of the surface where it was impacted that I had to shave down. For a stock low RPM rebuild, I grudgingly massaged the bearings as needed but I won't use their bearings again. The QC on the bearings makes me question whether damaged threads in the snout got past their QC too.

20240108_205152.jpg


20240108_205308.jpg
 
I picked up a new bolt today. It measures: M12 x 1.50 x 72mm

My notes below...

Threaded fully into crank (no balancer):
33mm thread left outside of crank
39mm threaded into crank

Crank threads end ~38mm from face of snout
Crank threads begin 10mm from face of snout
First 10mm damaged, cleaned up with chase tap
Crank timing gear 30mm from face

Balancer thickness at mount: 58mm
Balancer thick washer:
Thickness: 15mm
OD: 34mm
ID: 13mm

Balancer + thick washer: 73mm
-30mm=43mm of bolt used before crank snout face
73mm bolt - 43mm washer face to crank = 30mm bolt into crank snout
30mm into crank - 10mm before threads begin = 20mm thread engagement
19mm threads remaining unused

72mm bolt + 19mm unused crank threads = 91mm max bolt length


I considered a longer bolt to use some of the remaining threads, but it seems a flanged head 10.0 M12x1.50 bolt is a very specialty part. I can't find anything off the shelf, unless there is another application that is sold by some part number with no specs?

M12 x 1.50 x 85mm 10.9 flange head?
80mm, 90mm, is common length
1.75 is common thread
 
Can you return the crank? I bet it was damaged. That is a real bummer. I don't know if I would trust it.
 
I agree...

I sent a couple VW cranks for workand didn't check threaded holes well enough. The machine work was spot on but cranks were unusable. It happens... but I only did that once.

I would talk to them... get a replacement. Be honest and tell them you tried to repair the damage because the short block was assembled before you noticed it.
 
I bought the crank through RockAuto over 3 months ago on 10/3. They have a 30 day return policy but exempt any parts that have been installed.

Enginetech has a 12 month warranty, details below. In my dealing with warranties in the past they are generally worthless. I'd imagine Enginetech will claim installation error, as I would be honest and say that I used a used TTY bolt to pull the balancer on and did not use a balancer install tool. Much back and forth and to maybe get a lower cost replacement at best. I've never dealt with Enginetech customer support or warranty so it's pure speculation and they may be spectacular but being a budget brand I'm not optimistic.

-Enginetech will replace any product found to be defective in material or workmanship
by our Engineering Department or its designate. This policy continues for 12 months /
12,000 miles.
-Due to the nature of high performance and racing applications, Enginetech shall not,
under any circumstances, be liable for any special, incidental or consequential
damages of any kind from the purchase, installation or use of any Enginetech product
in a high performance engine or any vehicle used for racing purposes.
-Enginetech will not be liable for claims regarding labor, consequential damages or any
claimed loss other than replacement of defective product.

Worst warranty experience I've had was with Tenneco (Monroe/Rancho shocks) with a defenctive shock that would occasionally seize and break shock mounts. 3 shock mounts later they declined to stand behind their product and pay me the $70 or whatever I spent on shock mounts (didn't ask for anything for my labor and inconvenience) but finally offered to send a replacement. I told them to send it, then upon receiving I made a claim under their 90 day satisfaction guarantee allowing return and refund for any reason. They honored that but stilled me for a few dollars on the refund. Never buy a Tenneco/Monroe/Rancho product. Terrible company and terrible customer service. I replaced the shocks with Bilstein which have been great and I even had a question they got me to a tech real quick who gave me a clear answer.

In any event, for the $303.02 it cost for this crank to my door I'd rather not deal with warranty if it can work. I may send them an email to let them know the situation with both the crank and bearings and if they offer anything great, but maybe they'll at least take it as an opporunity to improve their QC and processes. I'll hang on to the original crank for now.

All that being said, I got a balancer isntall tool from Harbor Freight and used that to fully seat the balancer against the crank gear. Laughable, as I did not even use a wrench to fully seat the balancer. I was able to seat it turning to tool by hand, then cranked on the tool maybe 1/8 turn with a wrench and it was definitely fully seated. Nothing was hanging up at all. I could see a sliver of light above the keyway, between keyway and balancer groove.

I then torqued to 30 ft/lbs (low end of spec) and tightened the bolt a bit over 1/8 turn which was as much as I could reasonably do with a typical 1/2" drive ratchet. Spec on the 2.8/2.9 balancer bolt is 85-96 ft/lbs. Spec for 4.0 is 30-37 ft/lbs + 1/4 turn. Checked torque and it was above the max 75 ft/lbs my small torque wrench goes to. I'm guessing it's at least in that range and I doubt it will come loose at that amount of torque. I'm fairly confident to run it like this. See pic, white line was aligned at 30 ft/lbs.
 

Attachments

  • 20240110_185349.jpg
    20240110_185349.jpg
    92.6 KB · Views: 114

Sponsored Ad


Sponsored Ad

TRS Events

Member & Vendor Upgrades

For a small yearly donation, you can support this forum and receive a 'Supporting Member' banner, or become a 'Supporting Vendor' and promote your products here. Click the banner to find out how.

Recently Featured

Want to see your truck here? Share your photos and details in the forum.

Ranger Adventure Video

TRS Merchandise

Follow TRS On Instagram

TRS Sponsors


Sponsored Ad


Sponsored Ad


Amazon Deals

Sponsored Ad

Back
Top