Hoosierman
Well-Known Member
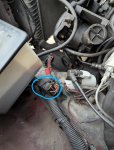
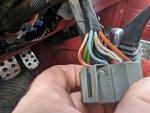
I'm not sure if my attachments will go through, they tend to be hit or miss with me. Anywho, looking at the IN connector from the main switch, I don't see any R/Y wires. One that is kinda obscured is the R/W wire. However, on the OUT connector from the dimmer switch to the headlights, there is both the R/Bk and R/Y wires, each of course going out.
Or am I misunderstanding the color codes?
Edit: The gray connector is the IN connector. The OUT happens to be dangling behind it in the photo, so it may seem that the IN connector has the R/Y wire going into it. But just so I clarify: I am reading that the R/Y wire is on one connector, and the R/Bk wire is on the other connector, and I am to jump the two. However in my case, BOTH wires are on the OUT connector.
")