
I had saved up enough money by the end of high school to buy myself a nice 4x4 to go play around in. I found my B2 on Craigslist and picked it up the next day. That was in May of 2009. The previous owner was from California, and that is why there is a California tag on the front and an OK plate on the rear. I have slowly worked on it for the past couple years, and I wanted to document what I've done. I've taught myself almost everything I know, with invaluable help from friends, family, and forums such as this one. I have also worked and payed for everything I have done to this truck.
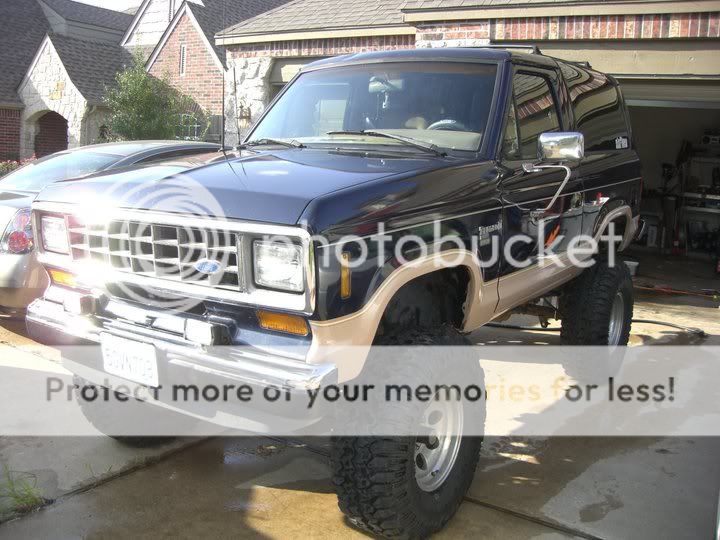
Here is the Bronco II when I bought it.
1988 Eddie Bauer Bronco II xlt
Fully loaded
2.9L
A4LD
BW 1350-E
Dana 28 LSD 4.10 R&P
Ford 7.5 LSD 4.10 R&P
Custom Stereo
4 inch Skyjacker Lift
33" x 12.50" Interco TRXUS MT

I took about four straight days after that to see what she could do.

Here is a flex shot.... or at least a try for one


But after about 6 months the Passenger side head gasket let go.
Soooo! I purchased a 1992 Ford Explorer with a rebuilt engine and blown trans for $600.
I started the swap in May 2010 and finished in July 2010.
The 4.0L OHV (Still in Explorer)

After some thinking I decided to Swap:
Engine
Dash
Sun visors
Center Console
Complete Wiring Harness
Fuel Pump
Radiator
Fluid Reservoirs
and I'm sure I'm Leaving something out..
First I had to gut my Bronco and my donor explorer

Wiring Harness Nightmare

Here is the original dash

Here is the Explorer Dash installed

In the mean time I picked up a Manual 1350 T-case.... I had to drive about 500 miles round trip to find the appropriate shifter and linkage for it.

New 4.0L installed

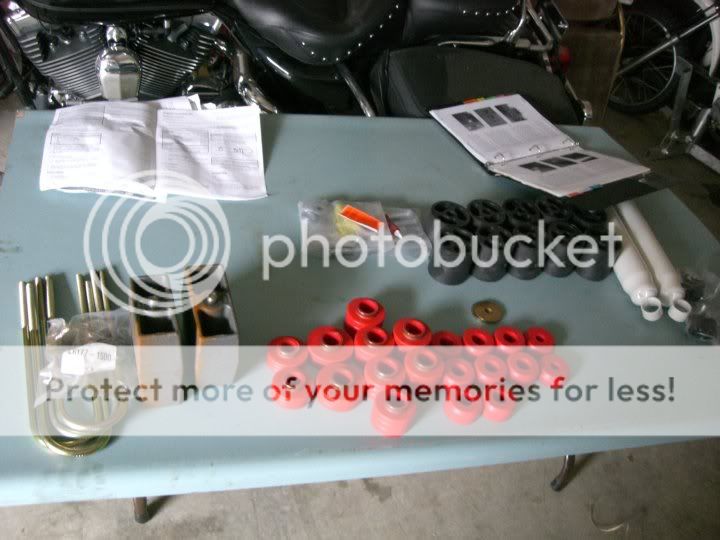
And While I was at it I decided to install a 3" body Lift along with new body mounts.
I also remounted my rear bumper afterward to cover the nasty gap a body lift leaves.
Parts ready for install. I also added a Huge B&M trans cooler and temp gauge to replace the factory unit.

New Height With body lift installed

After all my hard work. I fired the engine, put the trans in drive, and...... nothing happened. Come to find out do to my inexperience I just slipped the 4.0L torque converter on the trans and called it good. Then when I started my engine for the first time it trashed my trans pump. Since the whole thing was about do for an overhaul I had it towed to a local trans. shop. I spoke with them about some of the details. They installed a higher than stock stall torque converter, and said they used several parts from a newer 5R55E, which is the trans that comes in 95 and above explorers and rangers I believe. One I specifically remember was the steel overdrive assembly. So I guess that qualifies my new trans as a HD A4LD?
Here it is on the tow truck. The guy took out my neighbors mail box backing up to it lol. Bad day on the job.

And after about three months of hard work and an $1800 trans rebuild it was complete!
This was during a blizzard in early 2011.


I wheeled my bronco for about another year after this, until in April 2011 I decided I was fed up with the TTB.
I broke radius arm bushings like they were jello. The front springs were so stiff you might as well put pipes in their place, and the blocks on the rear caused some insane axle wrap.
My truck wheel base looked awkwardly narrow for its height, and it was also extremely top heavy.
So because I am an engineering student always looking for a project to do, I decided I wanted to attempt a SAS. I also was hired at an internship for the summer which made the funding not an issue.
I decided to go with a full width axles vs. EB axles mainly because of the added stability and the looks.
I chose a full width HP Dana 44 and Ford 9 inch from a '79 full time 4x4 f150.
Here is what I started out with.
Here is the High Pinion Dana 44 axle I picked up for $250. It was completely rusted, had an open diff. with 3.50 gears, and all bearings, ball joints, tie rods, were in need of replacement.

Here is the 9 inch I picked up. It was also completely rusted, had an open diff. and 3.00 gears. And I got what I paid for on this one. When I got it home I took the drums off to find out the brake internals had been gutted. The axle bearings were seized in the housing so I spent hours yanking, cursing, and hammering to get them out. Then I pulled the third member to find about half water and half gear oil coming out. After that I noticed that the housing was cracked next to the pinion support. At this point I just wanted to through it in the trash, but I new that I had searched for about 3 weeks just to find this one. Then the grinding began.....
Luckily I don't think this setup was used very long on whatever they had it on.

Someone had some crazy redneck engineering ideas

Notice the 1/2" bolt that was a track bar mount.

So approx. 4 cut off wheels, and grinding disk, and two flap wheels later this is how it sat.

The third member, full of rust, and cracked

The brakes

I then began ordering all my parts:
James Duff Extended Radius Arms
James Duff EB 5.5" Lift coils
Skyjacker 6" Lift Leaf Springs
James Duff Lower Coil Buckets
Master Rebuild Kits for F&R
USA Standard 5.13 gears for F&R
Lockright for Rear
F-250 Front Upper shock mounts
James Duff 35.5" Shocks
New Front Calipers
Drum Rebuild Kits
U bolts
Ball Joints
1330 to 1310 U joints
DOM Tubing
Tubing inserts
3/4" Heims & Jam nuts
Upper Track Bar Bracket
Adjustable Coil buckets
....... on and on
Here are many of my axle rebuild parts

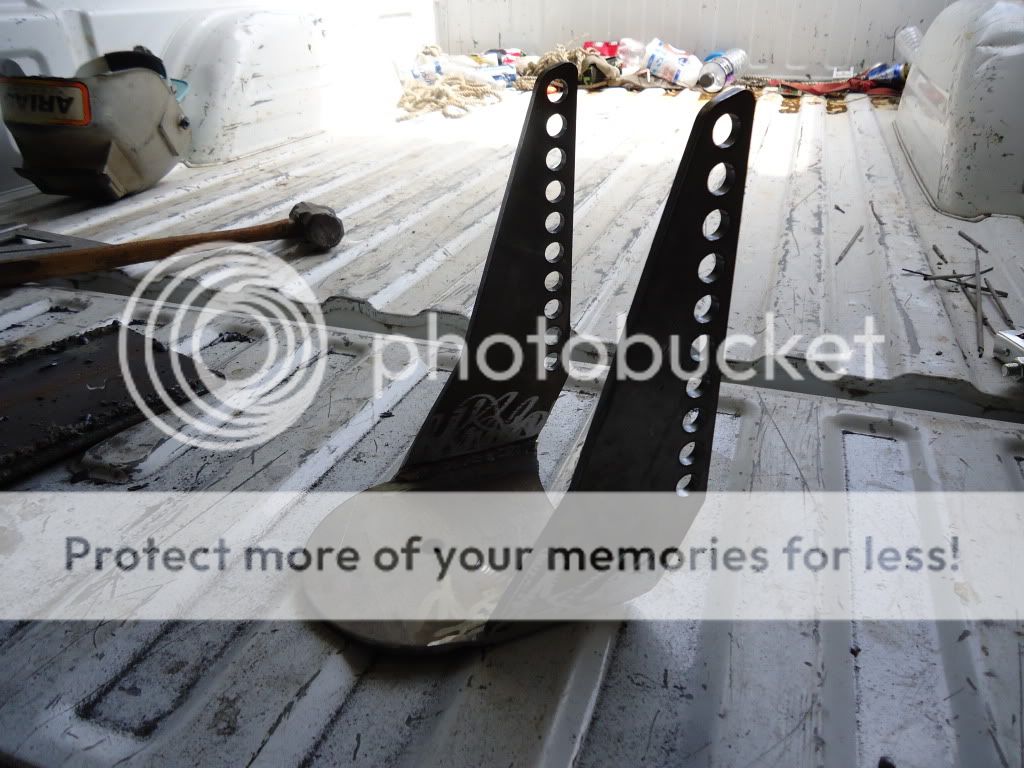
My James Duff extended radius arms

Here are the Heims that hold on my Radius Arms. Thats an 1.25" shank with 1" bolt hole

My Skyjacker 6" Lift Leaf Springs

The progressive rate coils from James Duff

And then the real work began!!
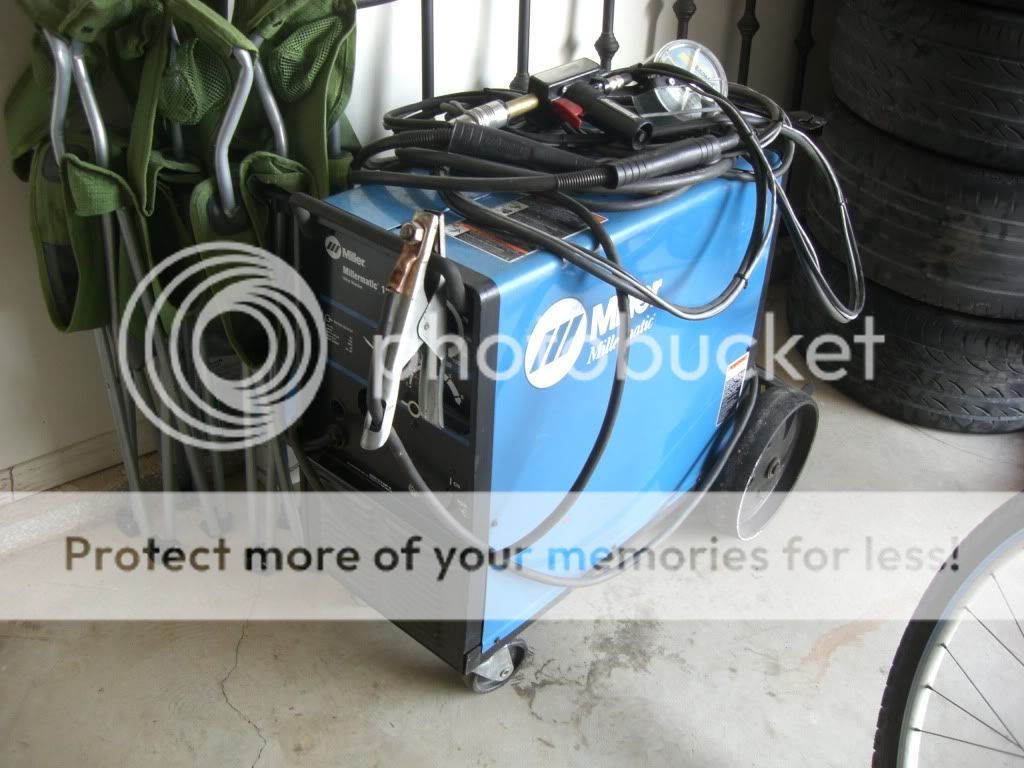
Planning on doing some welding? Here's what I came up with.

More recently I acquired this in my tool arsenal for free! Just need a few parts and it was good to go!
First I pulled the front axle and began cutting all the factory brackets off the frame. (Coil buckets & Trans mount)
I also starting preparing the fenders for the Bushwacker Cut Outs.

The Dana 28 ready to be picked up.

The old lift kit

Here is the Dana 44 awaiting new internals and paint. Has new 7 deg bushings, caps, and james duff zinc plated coil buckets already installed.


I then mounted my adjustable coil buckets from ballistic fab.
These solved two problems for me.
First, I wasn't sure how much these EB coils would lift my truck
Second, They space the coil out enough from the frame to fit the width of the wedges on the full width axle almost dead on!
You have to weld them yourself, but that's no big deal.

Fully Welded
Mounted

Finished


Now, the drivers side of the frame is a completely different story. I had to find a solution for creating a flat mounting surface around the power steering pump buldge. After a couple hours of thought I made a card board template, drew it in Autocad and cut it out at school on the cnc plasma table.
It is basically half a box made of 1/4" steel plate. Seems easier and better than spending hours grinding on a piece of C channel as I had seen others do.

Here are the track bar brackets I purchased from Ballistic Fab.
I only used the upper frame side bracket. Wish I hadn't wasted the money on the other.

Now I had to figure out how to mount my Ballistic Fab adjustable track bar bracket on the same side.
Soooooo I made another card board template and did the same. I cut a hole to clear all the power steering bolts.

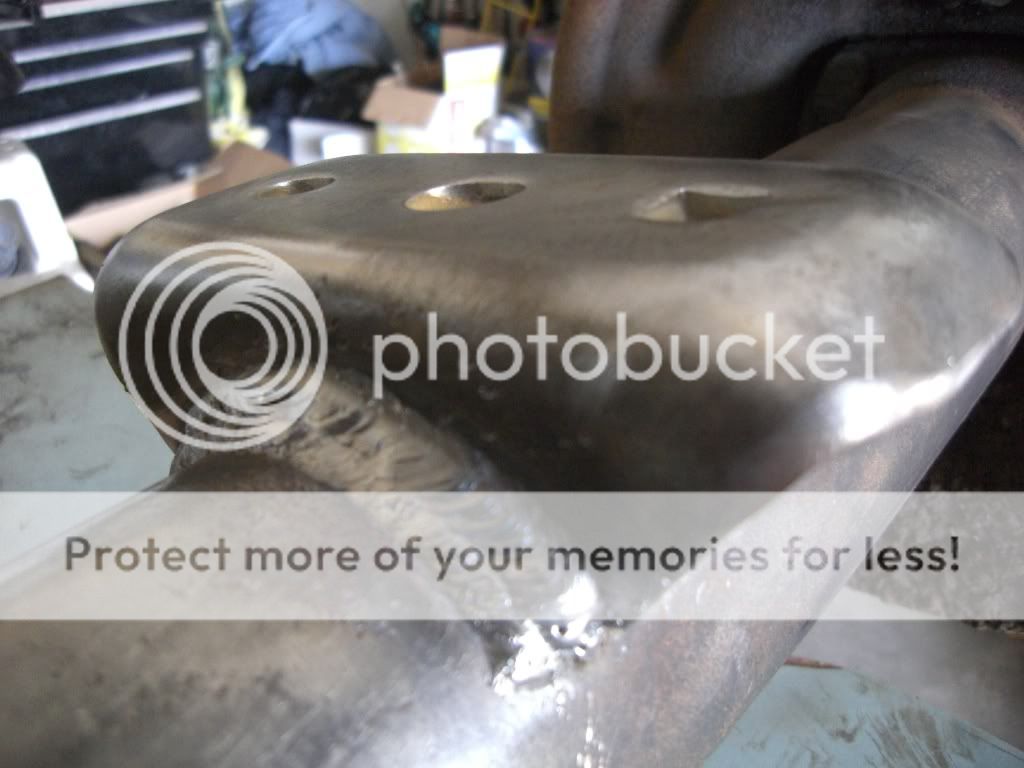
Next was mounting the track bar bracket. I also added a 3/8" x 1 1/2" steel bar from the engine cross member to the top mounting hole on the bracket for extra support.

Now I wanted to assemble my 9 inch to be mounted.
I had never looked at drum brakes before, nor was I about to spend extra money on special tools to do the job.
Surprisingly 30mins, a flat head screw driver, needle nose pliers, and a bent awl. The drums were fully built and ready to be mounted.

Needed to set the new leaf spring pads on.
Here is the 9 inch, fully rebuilt, and ready to be mounted.


And after a long day and some pretty sketchy maneuvering with two floor jacks on an un-level gravel driveway the rear axle was mounted.

Check out the my new Fender well clearance! I can now fit 37's (which was the point of running 5.13's)

Here is a good picture of the width gain prior to the Bushwacker install.

This is the first picture sitting on all four wheels, prior to the fender flares.
But this is how she sets.


Future Mods:
Roll Cage
James Duff F&R Bumpers
37" Tires
Winch
Please comment on my build if you'd like. I could always use some tips or words of encouragement!
Here is the Bronco II when I bought it.
1988 Eddie Bauer Bronco II xlt
Fully loaded
2.9L
A4LD
BW 1350-E
Dana 28 LSD 4.10 R&P
Ford 7.5 LSD 4.10 R&P
Custom Stereo
4 inch Skyjacker Lift
33" x 12.50" Interco TRXUS MT
I took about four straight days after that to see what she could do.
Here is a flex shot.... or at least a try for one
But after about 6 months the Passenger side head gasket let go.
Soooo! I purchased a 1992 Ford Explorer with a rebuilt engine and blown trans for $600.
I started the swap in May 2010 and finished in July 2010.
The 4.0L OHV (Still in Explorer)
After some thinking I decided to Swap:
Engine
Dash
Sun visors
Center Console
Complete Wiring Harness
Fuel Pump
Radiator
Fluid Reservoirs
and I'm sure I'm Leaving something out..
First I had to gut my Bronco and my donor explorer
Wiring Harness Nightmare
Here is the original dash
Here is the Explorer Dash installed
In the mean time I picked up a Manual 1350 T-case.... I had to drive about 500 miles round trip to find the appropriate shifter and linkage for it.
New 4.0L installed
And While I was at it I decided to install a 3" body Lift along with new body mounts.
I also remounted my rear bumper afterward to cover the nasty gap a body lift leaves.
Parts ready for install. I also added a Huge B&M trans cooler and temp gauge to replace the factory unit.
New Height With body lift installed
After all my hard work. I fired the engine, put the trans in drive, and...... nothing happened. Come to find out do to my inexperience I just slipped the 4.0L torque converter on the trans and called it good. Then when I started my engine for the first time it trashed my trans pump. Since the whole thing was about do for an overhaul I had it towed to a local trans. shop. I spoke with them about some of the details. They installed a higher than stock stall torque converter, and said they used several parts from a newer 5R55E, which is the trans that comes in 95 and above explorers and rangers I believe. One I specifically remember was the steel overdrive assembly. So I guess that qualifies my new trans as a HD A4LD?
Here it is on the tow truck. The guy took out my neighbors mail box backing up to it lol. Bad day on the job.
And after about three months of hard work and an $1800 trans rebuild it was complete!
This was during a blizzard in early 2011.
I wheeled my bronco for about another year after this, until in April 2011 I decided I was fed up with the TTB.
I broke radius arm bushings like they were jello. The front springs were so stiff you might as well put pipes in their place, and the blocks on the rear caused some insane axle wrap.
My truck wheel base looked awkwardly narrow for its height, and it was also extremely top heavy.
So because I am an engineering student always looking for a project to do, I decided I wanted to attempt a SAS. I also was hired at an internship for the summer which made the funding not an issue.
I decided to go with a full width axles vs. EB axles mainly because of the added stability and the looks.
I chose a full width HP Dana 44 and Ford 9 inch from a '79 full time 4x4 f150.
Here is what I started out with.
Here is the High Pinion Dana 44 axle I picked up for $250. It was completely rusted, had an open diff. with 3.50 gears, and all bearings, ball joints, tie rods, were in need of replacement.
Here is the 9 inch I picked up. It was also completely rusted, had an open diff. and 3.00 gears. And I got what I paid for on this one. When I got it home I took the drums off to find out the brake internals had been gutted. The axle bearings were seized in the housing so I spent hours yanking, cursing, and hammering to get them out. Then I pulled the third member to find about half water and half gear oil coming out. After that I noticed that the housing was cracked next to the pinion support. At this point I just wanted to through it in the trash, but I new that I had searched for about 3 weeks just to find this one. Then the grinding began.....
Luckily I don't think this setup was used very long on whatever they had it on.
Someone had some crazy redneck engineering ideas
Notice the 1/2" bolt that was a track bar mount.
So approx. 4 cut off wheels, and grinding disk, and two flap wheels later this is how it sat.
The third member, full of rust, and cracked
The brakes
I then began ordering all my parts:
James Duff Extended Radius Arms
James Duff EB 5.5" Lift coils
Skyjacker 6" Lift Leaf Springs
James Duff Lower Coil Buckets
Master Rebuild Kits for F&R
USA Standard 5.13 gears for F&R
Lockright for Rear
F-250 Front Upper shock mounts
James Duff 35.5" Shocks
New Front Calipers
Drum Rebuild Kits
U bolts
Ball Joints
1330 to 1310 U joints
DOM Tubing
Tubing inserts
3/4" Heims & Jam nuts
Upper Track Bar Bracket
Adjustable Coil buckets
....... on and on
Here are many of my axle rebuild parts
My James Duff extended radius arms
Here are the Heims that hold on my Radius Arms. Thats an 1.25" shank with 1" bolt hole
My Skyjacker 6" Lift Leaf Springs
The progressive rate coils from James Duff
And then the real work began!!
Planning on doing some welding? Here's what I came up with.
More recently I acquired this in my tool arsenal for free! Just need a few parts and it was good to go!
First I pulled the front axle and began cutting all the factory brackets off the frame. (Coil buckets & Trans mount)
I also starting preparing the fenders for the Bushwacker Cut Outs.
The Dana 28 ready to be picked up.
The old lift kit
Here is the Dana 44 awaiting new internals and paint. Has new 7 deg bushings, caps, and james duff zinc plated coil buckets already installed.
I then mounted my adjustable coil buckets from ballistic fab.
These solved two problems for me.
First, I wasn't sure how much these EB coils would lift my truck
Second, They space the coil out enough from the frame to fit the width of the wedges on the full width axle almost dead on!
You have to weld them yourself, but that's no big deal.
Fully Welded
Mounted
Finished
Now, the drivers side of the frame is a completely different story. I had to find a solution for creating a flat mounting surface around the power steering pump buldge. After a couple hours of thought I made a card board template, drew it in Autocad and cut it out at school on the cnc plasma table.
It is basically half a box made of 1/4" steel plate. Seems easier and better than spending hours grinding on a piece of C channel as I had seen others do.
Here are the track bar brackets I purchased from Ballistic Fab.
I only used the upper frame side bracket. Wish I hadn't wasted the money on the other.
Now I had to figure out how to mount my Ballistic Fab adjustable track bar bracket on the same side.
Soooooo I made another card board template and did the same. I cut a hole to clear all the power steering bolts.
Next was mounting the track bar bracket. I also added a 3/8" x 1 1/2" steel bar from the engine cross member to the top mounting hole on the bracket for extra support.
Now I wanted to assemble my 9 inch to be mounted.
I had never looked at drum brakes before, nor was I about to spend extra money on special tools to do the job.
Surprisingly 30mins, a flat head screw driver, needle nose pliers, and a bent awl. The drums were fully built and ready to be mounted.
Needed to set the new leaf spring pads on.
Here is the 9 inch, fully rebuilt, and ready to be mounted.
And after a long day and some pretty sketchy maneuvering with two floor jacks on an un-level gravel driveway the rear axle was mounted.
Check out the my new Fender well clearance! I can now fit 37's (which was the point of running 5.13's)
Here is a good picture of the width gain prior to the Bushwacker install.
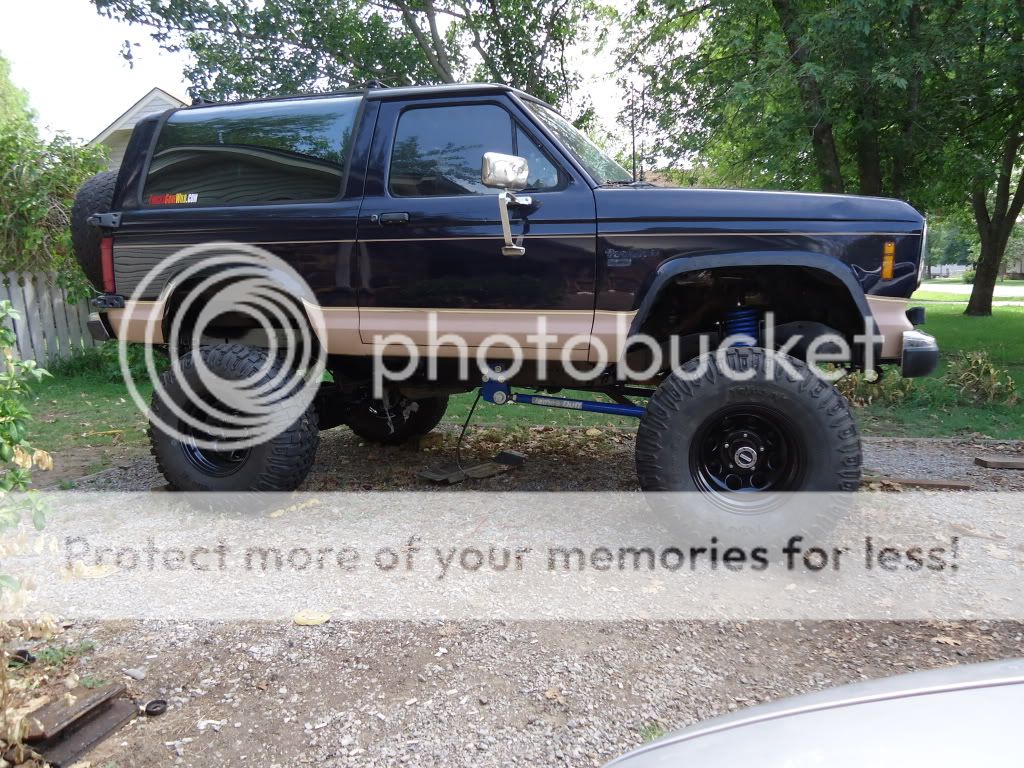
This is the first picture sitting on all four wheels, prior to the fender flares.
But this is how she sets.
Future Mods:
Roll Cage
James Duff F&R Bumpers
37" Tires
Winch
Please comment on my build if you'd like. I could always use some tips or words of encouragement!
Last edited:


