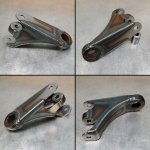
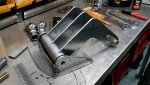
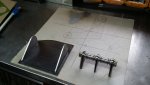
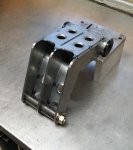
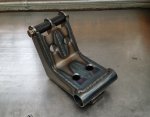
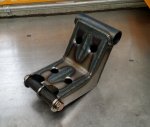
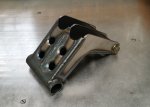
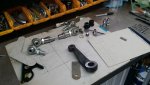
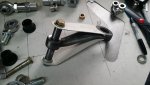
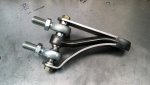
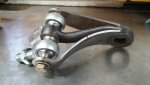
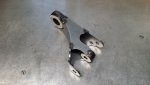
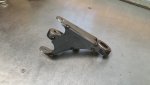
I started by drawing out the parts needed to scale on cardboard and mocking things up in the design I wanted. Here is the pitman arm as it was put together.
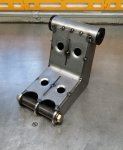
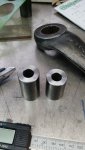
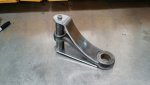
I had 3 pitman arms to work with: OEM 2wd, OEM 4wd, and an aftermarket drop down arm that was already on the truck. I found the 4wd pitman arm to be most ideal for this setup of mine as it placed the lower heim joint as close as possible to the passenger side beam pivot point. It also gave me a center reference point to start with. I drilled out the ball joint taper and welded in a chromoly slug I machined on the lathe with an OD of .750" and an ID of .500". I tig welded it into place. Now I could begin making tabs.
I had 3 pitman arms to work with: OEM 2wd, OEM 4wd, and an aftermarket drop down arm that was already on the truck. I found the 4wd pitman arm to be most ideal for this setup of mine as it placed the lower heim joint as close as possible to the passenger side beam pivot point. It also gave me a center reference point to start with. I drilled out the ball joint taper and welded in a chromoly slug I machined on the lathe with an OD of .750" and an ID of .500". I tig welded it into place. Now I could begin making tabs.
Attachments
-
 rangerstation_010_steeringdrawings.jpg204.8 KB · Views: 323
 -
 rangerstation_011_pitmanarmcardboards.jpg190.9 KB · Views: 335
 -
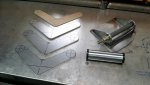
 rangerstation_012_pitmanweldspacers.jpg187.7 KB · Views: 329
 -
 rangerstation_013_pitmanarmupsidedown.jpg165.6 KB · Views: 327
 -
 rangerstation_014_pitmanarmwheims.jpg193.4 KB · Views: 331
 -
 rangerstation_015_pitmanarmunderside.jpg165.9 KB · Views: 321
 -
 rangerstation_017_pitmanarmsidetabright.jpg177.9 KB · Views: 329
 -
 rangerstation_016_pitmanarmsidetableft.jpg164.3 KB · Views: 322