
- Joined
- Mar 8, 2023
- Messages
- 13
- Reaction score
- 20
- Points
- 3
- Location
- Milton, Florida
- Vehicle Year
- 2003
- Make / Model
- ford ranger XLT
- Engine Type
- 3.0 V6
- Transmission
- Automatic
- 2WD / 4WD
- 2WD
- Total Lift
- 4" WULF suspension spindles, rear AAF
- Tire Size
- 31x10.5x15
So I've been wanting to do a thread on my build just to document and see where it goes. My plan as of right now is just a simple pre-runner look that has a little of my west coast style roots. Nothing crazy, its really just a commuter to and from work. I just want it to be my own style and just different from what everyone else has around here in the Florida panhandle.
Enough of the chit-chat on with the thread!!!
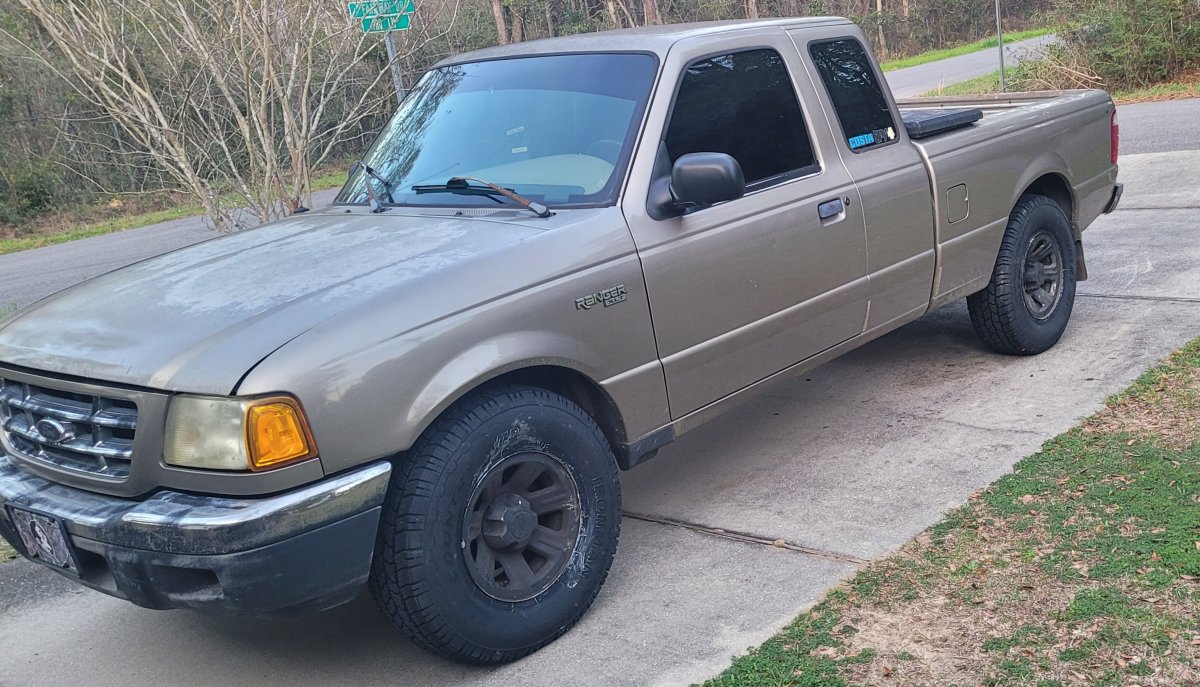
how I got it and with new tires (Iron man AT 2's 31x10.50x15:
NEW PARTS!!!
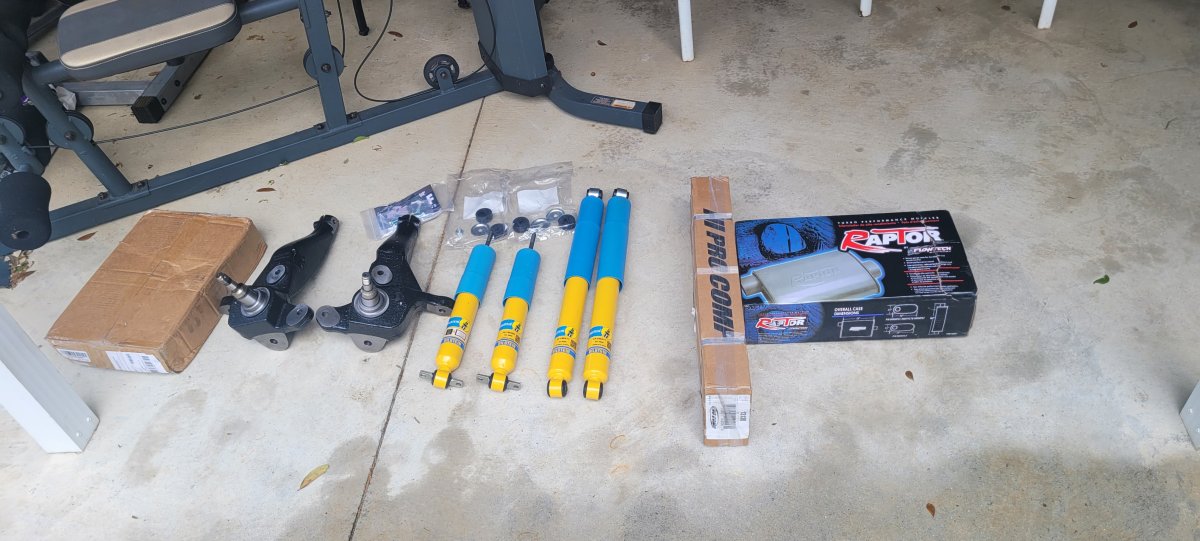
List from left to right:
Amazon front end kit https://www.amazon.com/dp/B07PQRGM8X?psc=1&ref=ppx_yo2ov_dt_b_product_details
Front end kit includes upper control arms w/ bushings and ball joints included
new tie rod ends (inner and outer) I didn't replace the inners this go around saving for a later date
Sway bar links
Lower ball joints
Next is the WULF SUSPENSION 4" lift spindles I got in a kit with an add-a-leaf for just under $400
Bilstein 4600's
And last but not least a cheap Raptor muffler you can get at just about any auto parts store (I ordered mine online from the cheapest place I could find it. Holley.com for 40 bucks)
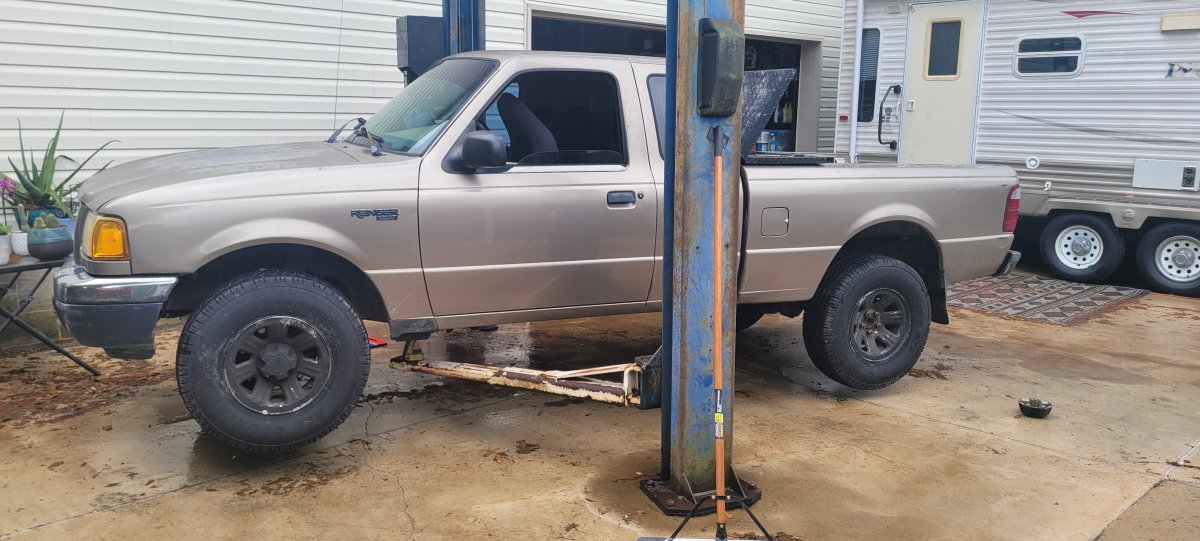
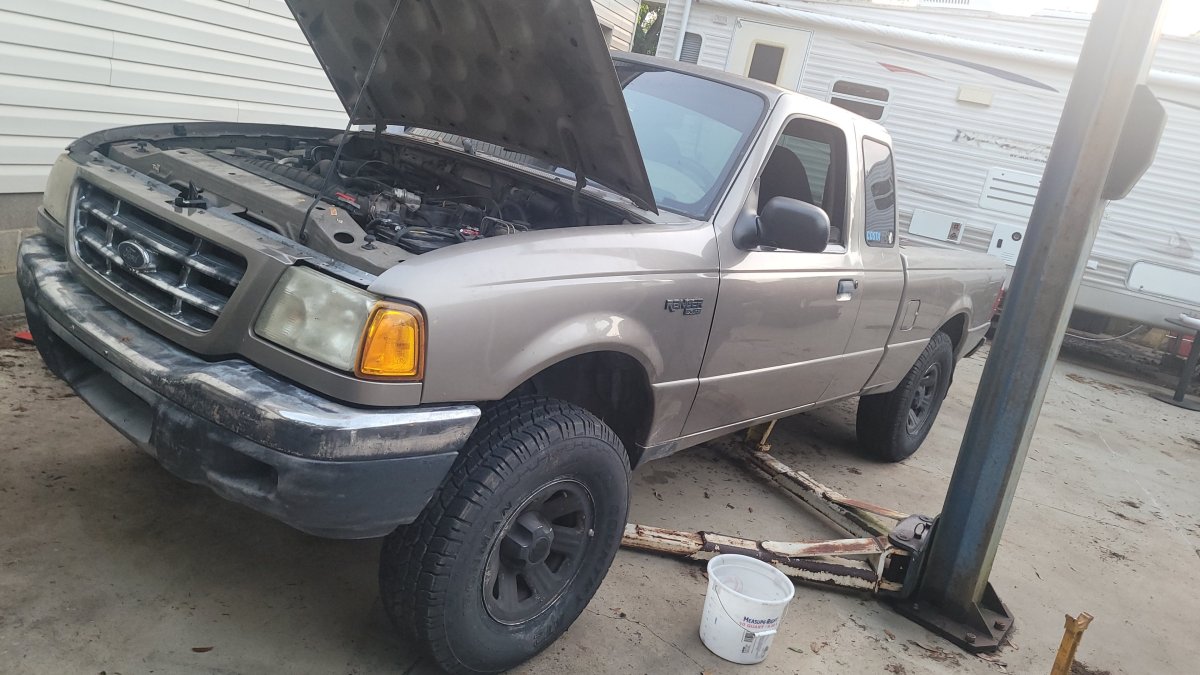
Time to tear it down, on the lift it goes:
I didn't get any pics of it but I took the bed off. To do that there is a connection for the lights at the left side of your tailgate roughly 4" from the center of the truck in between the bed and the bumper, disconnect that, the gas tank spout which is 3-6or7mm bolts (can't remember which) and 6 bolts that tie the bed to the frame which are torx head bolts 2 upfront about an inch from the cab and the set of four that you can see when you put the tailgate down. All reachable (at stock height)
Did this mainly because I have issues filling up my tank and it puking gas on me and wanted to figure out why. Come to find out after taking the spout and vent tube off, there is a cone like "screen" inside the tank connected to the fill tube that pushes down when you fill it. I assume it is to prevent people from being able to stick a hose in and siphon your gas? Vent tube is open, didn't see any issues around the charcoal overflow filter. Which is another vent type overflow that comes off the back of the tank goes to the charcoal filter and ties back into the mainline going to the fuel rail. So IDK what the issue is with filling the tank just gotta fill it slow I guess which is quite annoying,
Anyway taking the bed off was beneficial putting the rear shocks on. Easy access to the top bolts without having to raise the truck at all. Didn't get any pics of that install, I was in full get-er-done mode.
Pulled all the tires off and started to break down the front end. Took calipers and pads off. Set them on some jack stands instead of dangling in the wind by the break line. Took off the hub cap, cotter pin to the castle nut, and with a soft blow hammer tapped the rotors off.
Set the outer and inner bearings off to the side to inspect later. Ended up replacing the inner bearings and seal on both sides. Outers looked good just re-packed with fresh grease.
Next was the tie rod ends connected to the spindle. Castle nut and cotter pin on the bottom side. Just pushed it forward out of the way for the time being to the front of the truck.
ABS sensor 1 8mm bolt on the inside of the spindle disconnects it and another 8mm bolt for the wire in the middle of the spindle arm. tossed it up on the frame out of the way.
Unbolted the top ball joint which is a holder bolt that slides horizontal on the top of the spindle. Soft blow hammer to tap the upper control arm upward and ball joint out of the top of the spindle.
On to the lower control arm ball joint. Castle nut and cotter pin on the bottom, Hold the top of the spindle and soft blow hammer it down off the ball joint. Toss that old raggedy bitch out the way.
2 bolts and nuts where the upper arm connect to the frame. Bolt has a little tab that keeps it from spinning while you take the nut off. Thought that was convenient. Now on each side (Front and back) of the control arm you have the "adjustment pieces" these are just a piece of plate that act as a washer that you can slide forward and backward to adjust alignment. I didn't know this, first time taking off the upper arms. Thought that was cool and makes sense when adjusting alignment. Took the upper control arm out and threw it at the fence. no need for it anymore.
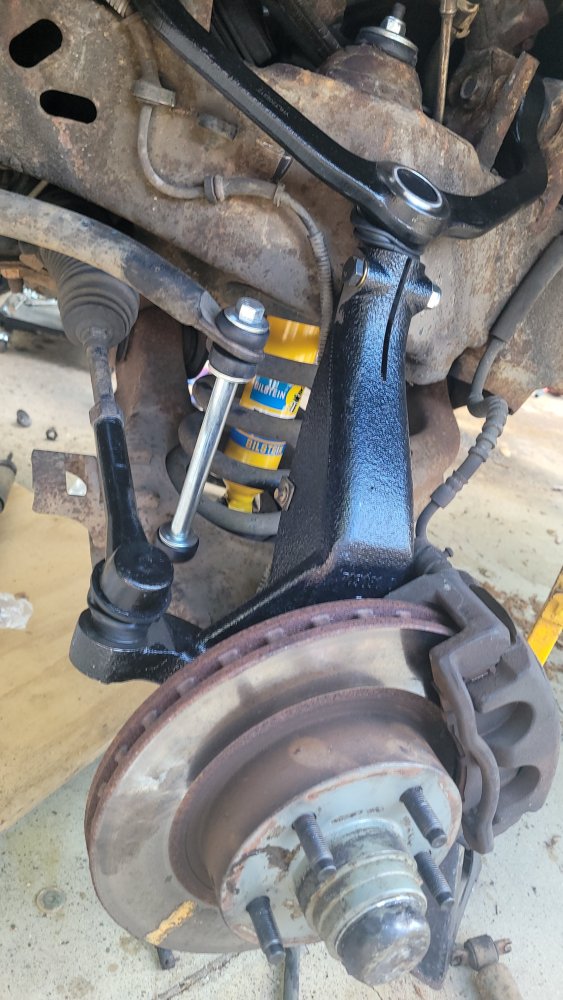
On to the juicy part of this mod of the truck. So in order for the lift spindles to work properly and have clearance you have to take an angle grinder or cut-off wheel to the lower control arm and shave off the bottom flare all the way around the end of the control arm. Let the sparks fly!!! After cutting that lip off i took some black spray paint and shot it on there to prevent it from rusting out. And now the not so fun part, Getting the lower ball joint out. There are a few ways you can go about it, luckily for me I have a ball joint press... Much better than beating it out with a hammer. Done that before its no fun and take awhile and you'll probably round out one of your big sockets on either side. Pressed that puppy out and throw it as far away as possible cuz its dookie now. Press in the new lower ball joint that came in the front end kit, slap on the ring clip attach the New upper control arm to the frame aaaannnnnnd we're ready for the new lift spindles!

So as you can see here^^^ laying on the ground right there is how much you have to cut off the lower control arm. Be careful and wear a face shield. Metal in the eye sucks I know from experience.
Now that the new spindle is in i can now change out the front shocks and put the new tie rod ends on.
Unbolted the 2 nuts on the bottom and 1 nut up top on the shocks. Had to get a pair of vice grips to hold the shaft from spinning and used a ratchet wrench below it on the nut. Slapped on the new sway bar links put the tie rod end into the spindle but left it loose until I could set it on its own weight and see about getting it lined up as best as possible without taking it to the tire shop.
Moving on... Before putting the bed and tires back on had to install the new Raptor muffler. Unfortunately I don't have pics. I only took some videos explaining what I did. After cutting out the old stock muffler I welded in the front side of the new one and had to figure out what to do without any extra piping or exhaust strapping. Luckily I'm pretty frugal and Macgyver'd the shit out of it") The old muffler has 2 mounts that connect to a bracket on the frame so I cut 1 of the mounts off the old muffler and where the new muffler sat I could unbolt the mount that bolts to the frame and flip it around to be in a good position to attach with the rubber piece and weld it to the shell of the new muffler on the thick part of the seem. Here is a video link of the clips i took during this process. In the first clip the hanger mounted to the frame was originally pointed in the other direction closer to the cab of the truck
The old muffler has 2 mounts that connect to a bracket on the frame so I cut 1 of the mounts off the old muffler and where the new muffler sat I could unbolt the mount that bolts to the frame and flip it around to be in a good position to attach with the rubber piece and weld it to the shell of the new muffler on the thick part of the seem. Here is a video link of the clips i took during this process. In the first clip the hanger mounted to the frame was originally pointed in the other direction closer to the cab of the truck
Put the bed back on Slapped the tires on and set her on her own weight.
Looking good. The tow is pretty gnarly right there. That's with the steering wheel dead center. So had to take that tie rod end off and back it out a few turns. Got her to look as straight as possible and tightened everything up and installed the cotter pins.
Overall I'm pretty satisfied. Ol' girl needed some love. The passenger side upper control arm bushing's were absolutely shot. I could take the wheel and wiggle it back and forth about an inch!
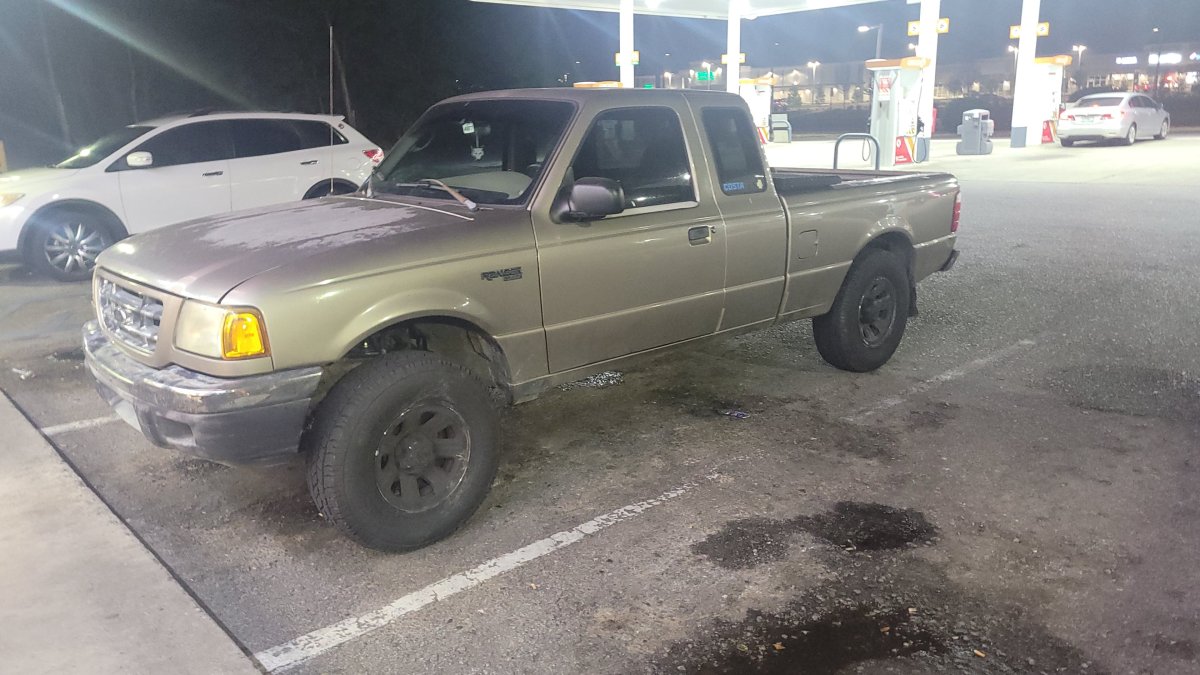
Took her on a test drive to the gas station up the street and I'm pretty stoked. Thought it would take me longer but actually got it all done in about 6 hrs.
Don't know what the future will hold quite yet but I'm looking into getting some 2" lift coils and then putting in the rear add a leaf. but for now here she is:
I know for sure I'm going to be cleaning it up. Already have plans for a new bumper, re-paint the wheels and rattle can her blue. Might look into a rear roll pan bumper. I like those. think they look clean. or just build a bumper IDK
Til next time thanks for joining in!
Jjustjjosh
Enough of the chit-chat on with the thread!!!
how I got it and with new tires (Iron man AT 2's 31x10.50x15:
NEW PARTS!!!
List from left to right:
Amazon front end kit https://www.amazon.com/dp/B07PQRGM8X?psc=1&ref=ppx_yo2ov_dt_b_product_details
Front end kit includes upper control arms w/ bushings and ball joints included
new tie rod ends (inner and outer) I didn't replace the inners this go around saving for a later date
Sway bar links
Lower ball joints
Next is the WULF SUSPENSION 4" lift spindles I got in a kit with an add-a-leaf for just under $400
Bilstein 4600's
And last but not least a cheap Raptor muffler you can get at just about any auto parts store (I ordered mine online from the cheapest place I could find it. Holley.com for 40 bucks)
Time to tear it down, on the lift it goes:
I didn't get any pics of it but I took the bed off. To do that there is a connection for the lights at the left side of your tailgate roughly 4" from the center of the truck in between the bed and the bumper, disconnect that, the gas tank spout which is 3-6or7mm bolts (can't remember which) and 6 bolts that tie the bed to the frame which are torx head bolts 2 upfront about an inch from the cab and the set of four that you can see when you put the tailgate down. All reachable (at stock height)
Did this mainly because I have issues filling up my tank and it puking gas on me and wanted to figure out why. Come to find out after taking the spout and vent tube off, there is a cone like "screen" inside the tank connected to the fill tube that pushes down when you fill it. I assume it is to prevent people from being able to stick a hose in and siphon your gas? Vent tube is open, didn't see any issues around the charcoal overflow filter. Which is another vent type overflow that comes off the back of the tank goes to the charcoal filter and ties back into the mainline going to the fuel rail. So IDK what the issue is with filling the tank just gotta fill it slow I guess which is quite annoying,
Anyway taking the bed off was beneficial putting the rear shocks on. Easy access to the top bolts without having to raise the truck at all. Didn't get any pics of that install, I was in full get-er-done mode.
Pulled all the tires off and started to break down the front end. Took calipers and pads off. Set them on some jack stands instead of dangling in the wind by the break line. Took off the hub cap, cotter pin to the castle nut, and with a soft blow hammer tapped the rotors off.
Set the outer and inner bearings off to the side to inspect later. Ended up replacing the inner bearings and seal on both sides. Outers looked good just re-packed with fresh grease.
Next was the tie rod ends connected to the spindle. Castle nut and cotter pin on the bottom side. Just pushed it forward out of the way for the time being to the front of the truck.
ABS sensor 1 8mm bolt on the inside of the spindle disconnects it and another 8mm bolt for the wire in the middle of the spindle arm. tossed it up on the frame out of the way.
Unbolted the top ball joint which is a holder bolt that slides horizontal on the top of the spindle. Soft blow hammer to tap the upper control arm upward and ball joint out of the top of the spindle.
On to the lower control arm ball joint. Castle nut and cotter pin on the bottom, Hold the top of the spindle and soft blow hammer it down off the ball joint. Toss that old raggedy bitch out the way.
2 bolts and nuts where the upper arm connect to the frame. Bolt has a little tab that keeps it from spinning while you take the nut off. Thought that was convenient. Now on each side (Front and back) of the control arm you have the "adjustment pieces" these are just a piece of plate that act as a washer that you can slide forward and backward to adjust alignment. I didn't know this, first time taking off the upper arms. Thought that was cool and makes sense when adjusting alignment. Took the upper control arm out and threw it at the fence. no need for it anymore.
On to the juicy part of this mod of the truck. So in order for the lift spindles to work properly and have clearance you have to take an angle grinder or cut-off wheel to the lower control arm and shave off the bottom flare all the way around the end of the control arm. Let the sparks fly!!! After cutting that lip off i took some black spray paint and shot it on there to prevent it from rusting out. And now the not so fun part, Getting the lower ball joint out. There are a few ways you can go about it, luckily for me I have a ball joint press... Much better than beating it out with a hammer. Done that before its no fun and take awhile and you'll probably round out one of your big sockets on either side. Pressed that puppy out and throw it as far away as possible cuz its dookie now. Press in the new lower ball joint that came in the front end kit, slap on the ring clip attach the New upper control arm to the frame aaaannnnnnd we're ready for the new lift spindles!
So as you can see here^^^ laying on the ground right there is how much you have to cut off the lower control arm. Be careful and wear a face shield. Metal in the eye sucks I know from experience.
Now that the new spindle is in i can now change out the front shocks and put the new tie rod ends on.
Unbolted the 2 nuts on the bottom and 1 nut up top on the shocks. Had to get a pair of vice grips to hold the shaft from spinning and used a ratchet wrench below it on the nut. Slapped on the new sway bar links put the tie rod end into the spindle but left it loose until I could set it on its own weight and see about getting it lined up as best as possible without taking it to the tire shop.
Moving on... Before putting the bed and tires back on had to install the new Raptor muffler. Unfortunately I don't have pics. I only took some videos explaining what I did. After cutting out the old stock muffler I welded in the front side of the new one and had to figure out what to do without any extra piping or exhaust strapping. Luckily I'm pretty frugal and Macgyver'd the shit out of it
The old muffler has 2 mounts that connect to a bracket on the frame so I cut 1 of the mounts off the old muffler and where the new muffler sat I could unbolt the mount that bolts to the frame and flip it around to be in a good position to attach with the rubber piece and weld it to the shell of the new muffler on the thick part of the seem. Here is a video link of the clips i took during this process. In the first clip the hanger mounted to the frame was originally pointed in the other direction closer to the cab of the truck Put the bed back on Slapped the tires on and set her on her own weight.
Looking good. The tow is pretty gnarly right there. That's with the steering wheel dead center. So had to take that tie rod end off and back it out a few turns. Got her to look as straight as possible and tightened everything up and installed the cotter pins.
Overall I'm pretty satisfied. Ol' girl needed some love. The passenger side upper control arm bushing's were absolutely shot. I could take the wheel and wiggle it back and forth about an inch!
Took her on a test drive to the gas station up the street and I'm pretty stoked. Thought it would take me longer but actually got it all done in about 6 hrs.
Don't know what the future will hold quite yet but I'm looking into getting some 2" lift coils and then putting in the rear add a leaf. but for now here she is:
I know for sure I'm going to be cleaning it up. Already have plans for a new bumper, re-paint the wheels and rattle can her blue. Might look into a rear roll pan bumper. I like those. think they look clean. or just build a bumper IDK
Til next time thanks for joining in!
Jjustjjosh


