
Introduction
This article describes how to add disc brakes from a Ford Mustang to a Ford Ranger 7.5-inch axle and Ford 8.8-inch 28-spline axle.
This modification DOES NOT work on the:
- 2002 FX4 Off Road
- 2003~2007 FX4 Level II (but NOT FX4 Off Road)
- 2008~2009 FX4 Off Road (only when equipped with the “XR8” option – Torsen diff/31-spline/4.10 ratio).
Performing The Upgrade
Installing 1994-2004 Ford Mustang rear disc brakes onto your stock Ford Ranger rear axle is nearly a bolt on affair and very easy to perform.
Upgrading to Mustang brakes give you nearly endless possibilities in pad and rotor choices compared to Ford Explorer rear axles. Additionally, with Mustang brakes, the parking brake is over 9000 times easier to hook up than with a Ford Expedition rear axle. You also get the benefit to keeping your rear axle if you have already invested in gears, lockers, or any maintenance (all of which you throw out with an Explorer swap). You also don’t have to weld on spring perches.
Within the Mustang rear disc brake conversions there are two options; You can use GT/V6 or Cobra brakes. The GT/V6s are 10.5-inch solid rotors, whereas the Cobras are 12-inch vented rotors. Obviously, the Cobras would be ideal as they are higher performance. Also note that you may have clearance problems if using 15-inch wheels and the larger Cobra brakes.
Getting Started
To start off with, you need to obtain all of the rear brake parts off of a 1994-2004 Ford Mustang.
The parts you need to get are:
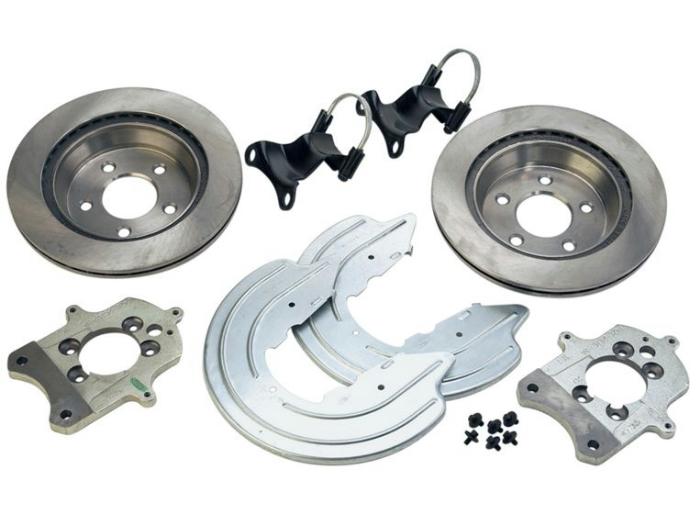
- Calipers
- Rotors
- Pads
- Caliper brackets
- Anti-moan brackets (optional, some don’t use it)
- Dust shield (optional, most don’t run them )
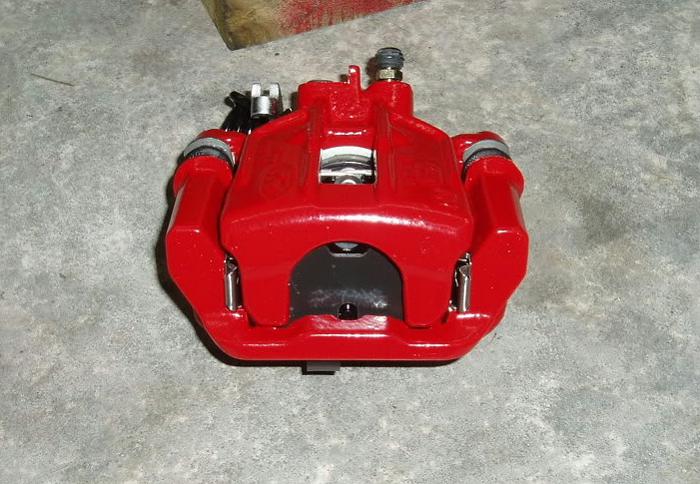
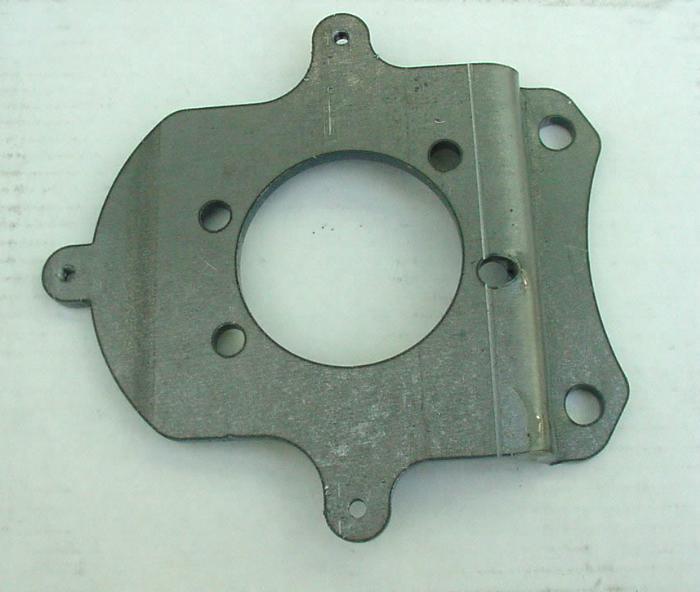
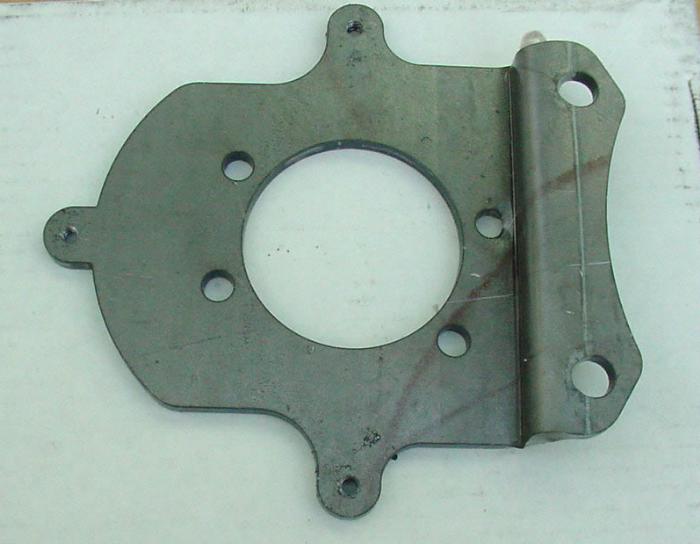
(Ford Mustang Caliper)
(Ford Mustang Caliper Bracket)
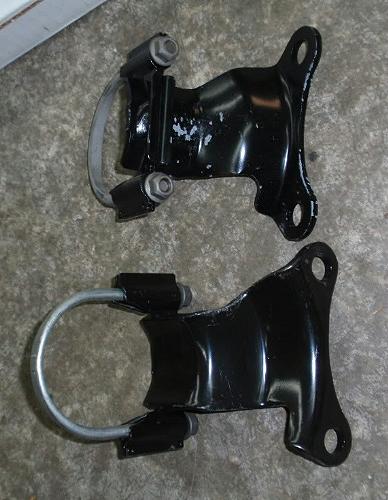
(Anti Moan Brackets)
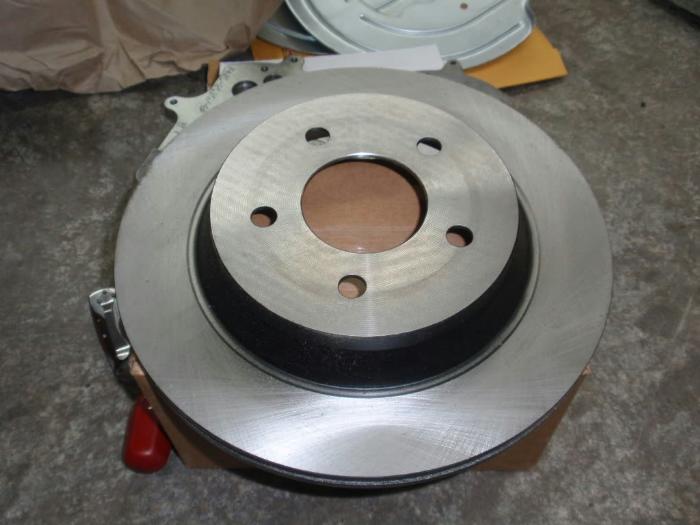
(Mustang Rotor)
(Mustang Dust Shields)
The next step is to remove your stock rear drum brakes.
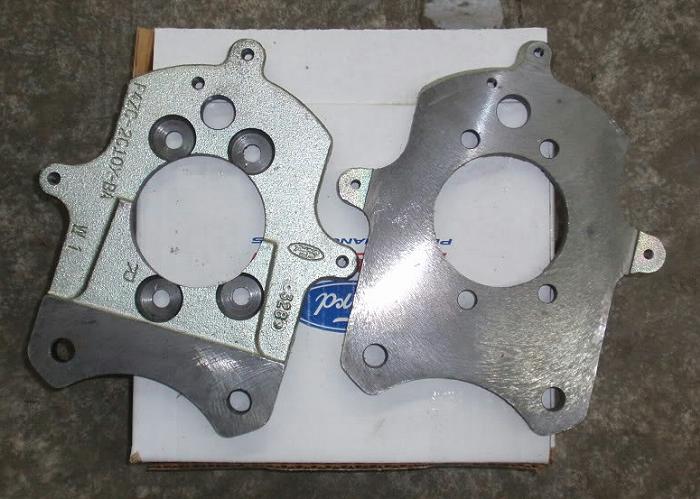
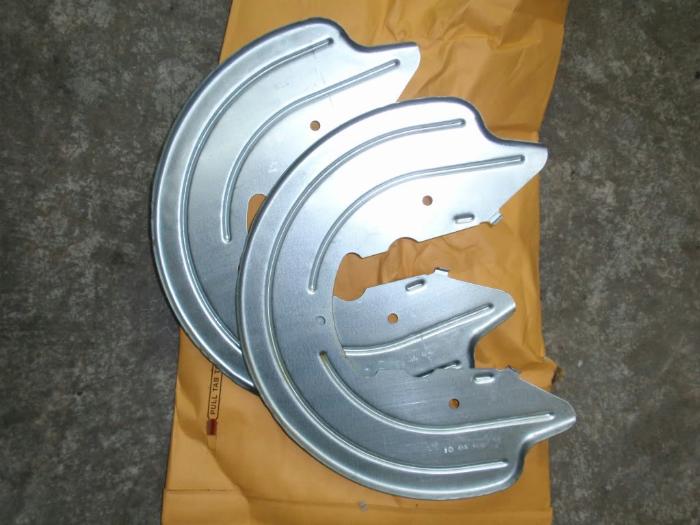
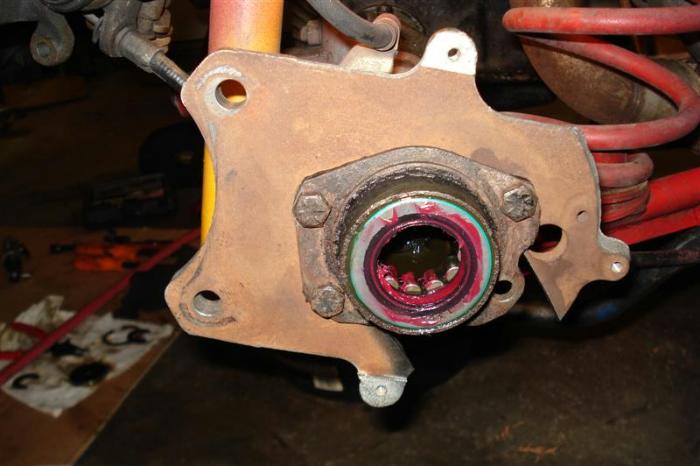
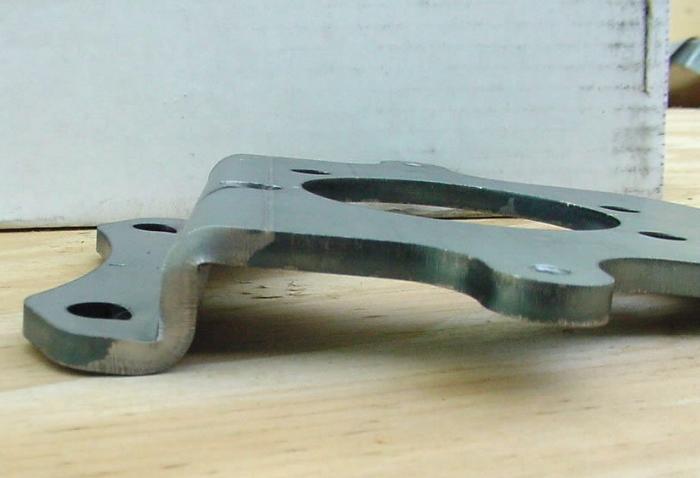
Now, you will need to modify the caliper bracket in order bolt it to the inside of the axle flange.
Here are pictures in order to show where you need to cut to bolt the caliper bracket to the inside of the axle flange:
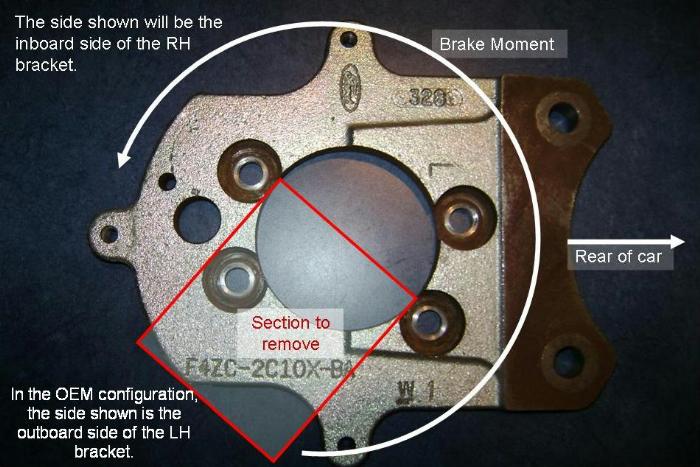
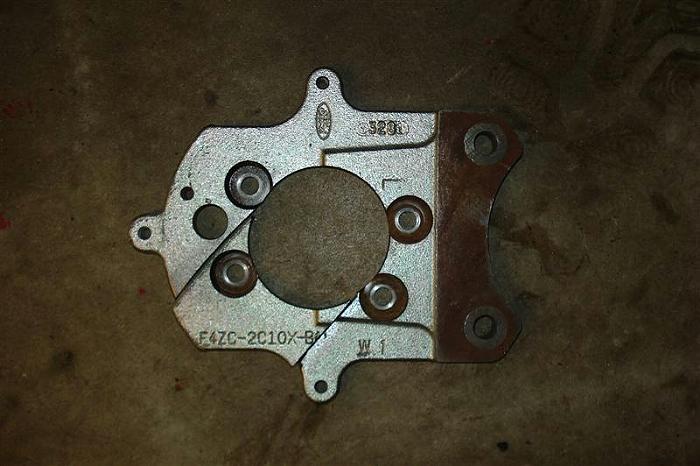
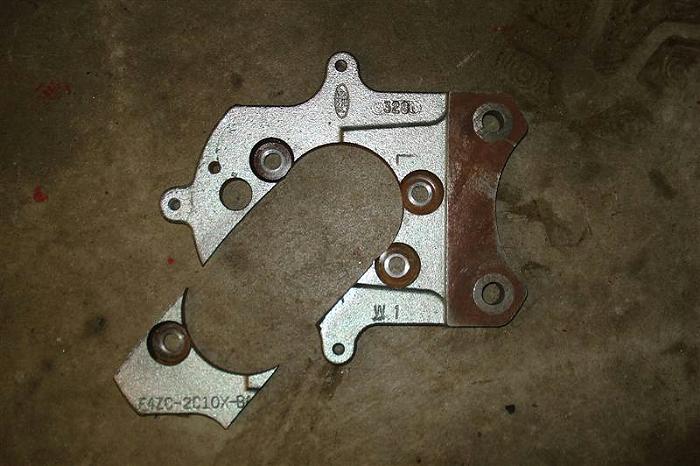
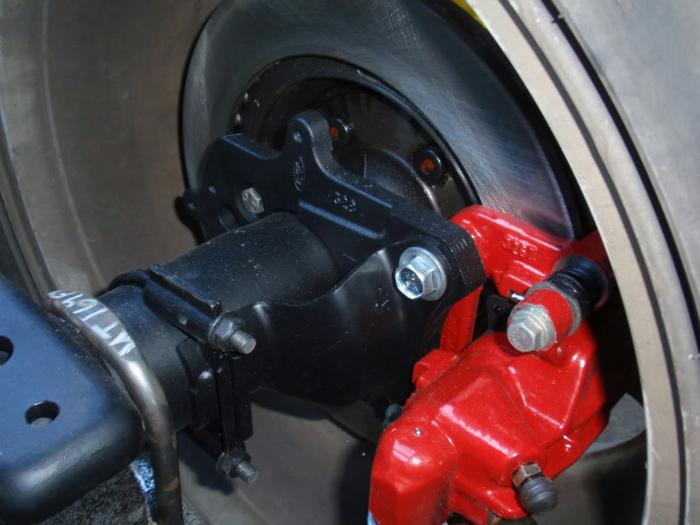
After you have modified the caliper bracket, you simply bolt it onto the axle flanges. However, after modifying you will need to bolt the Left bracket onto the right side, and the Right bracket onto the left side.
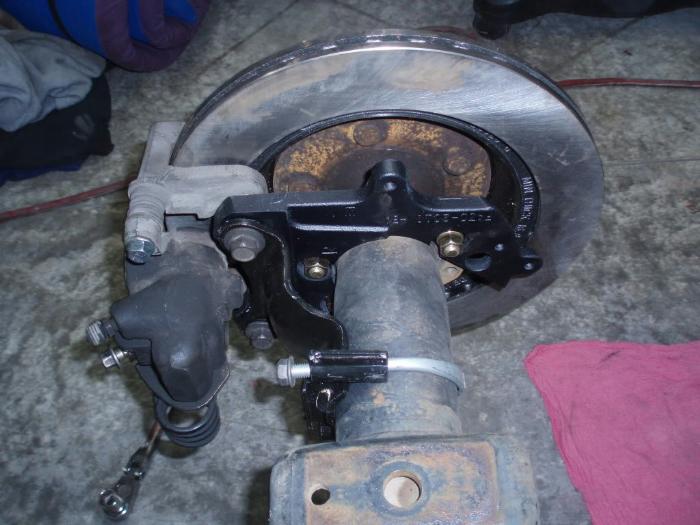
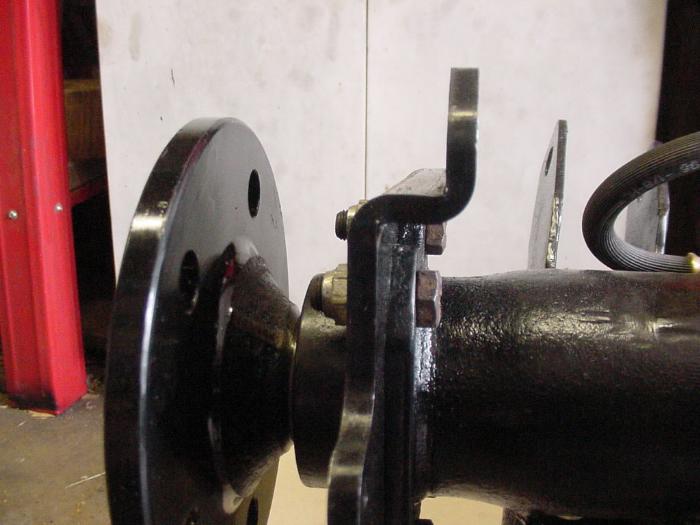
You can now slide on your rotor, attach the anti-moan bracket, and bolt the caliper up.
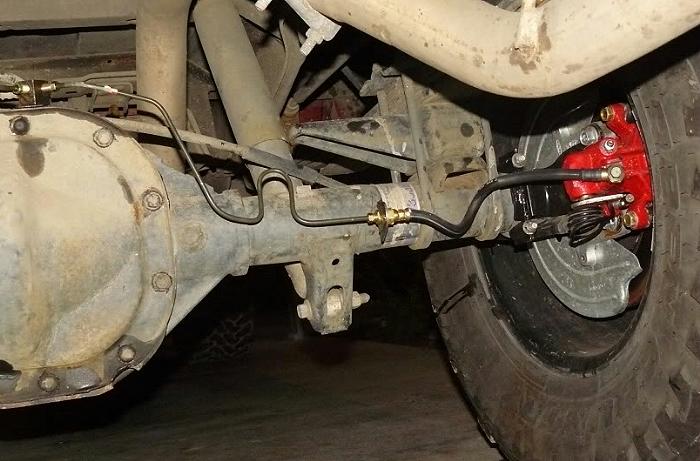
Now you need to run a soft line up to the caliper. I went with stainless steel braided lines and bent and flared new hard lines. The Ranger’s hard lines have a 3/16 tube inverted flare fittings so I have to get adapters to go to an AN-3 (the size on my SS braided lines). Then at the caliper end, it went to a 10mm banjo bolt.
If you don’t want to run braided lines, you can use stock mustang soft lines, and bend your stock hard lines forward so it isn’t in the way.
I also replaced the frame-to-axle soft line with a stainless steel braided:
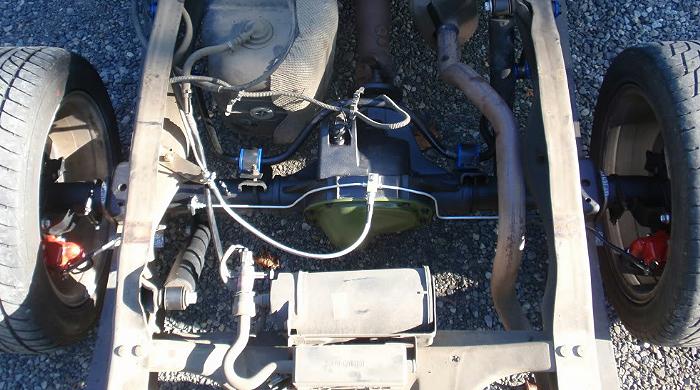
Currie Enterprises offers Part #: CE-6013C caliper flex hose kit:
| Description: Caliper flex hose kit for Mustang Cobra style disc brake kits. Kit includes the 2 rubber brake hoses, 2 caliper banjo bolts, 4 banjo bolt copper washers, 2 tabs to weld to your housing to insert the bulkhead fitting on the end of the hose into, and 2 bulkhead fitting to tab clips. Sold as a kit. |
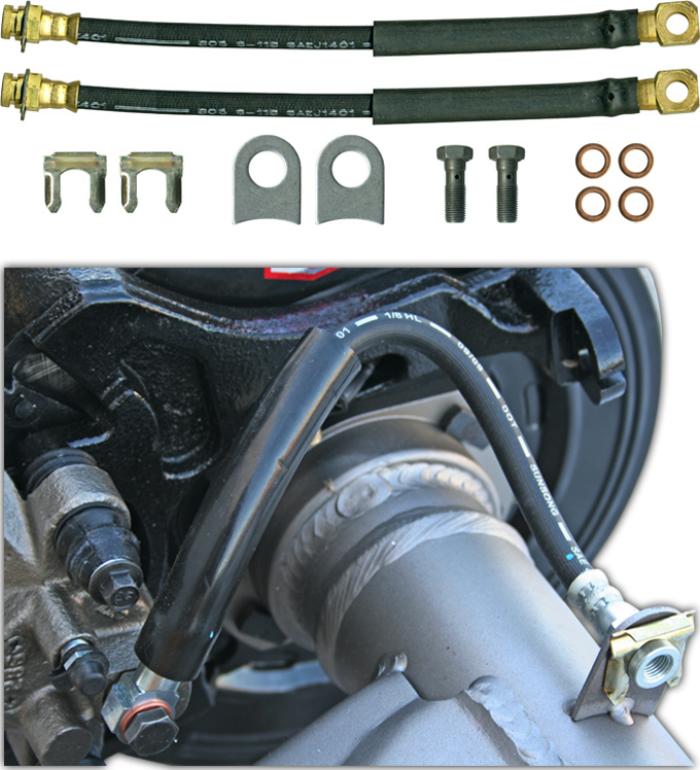
(The Currie Flex Hose Kit with the Mustang disc brakes on a Ranger)
Now you need to hook up the parking brakes. This step is cake. Simply insert the cable through the hole in the caliper, and attach the ball end on the spring of the caliper. Now, slide back the protective cable outside and measure the distance to the caliper. Now cut some 1/2inch copper pipe. See the picture for clarity…you’ll see how it works.
Now you need to bleed the brakes and bed them in and you’re done!
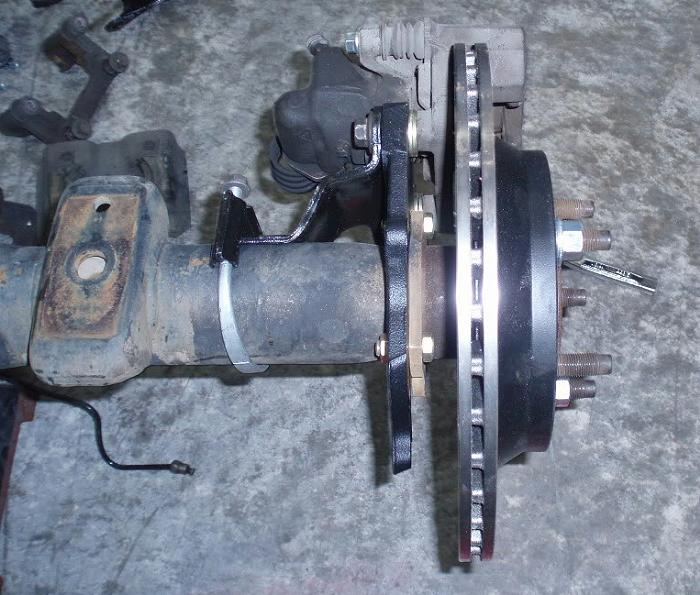
Here are my finished product:

Don’t Want To Search For Junkyard Parts:
Ford Racing offers a Rear Caliper Bracket Kit with Rotors (1994-2004 GT, V6):
You can Find These Kits At:
North Racecars Bracket:
You may have heard people mention the North Racecars brackets. Instead of having to cut the factory mustang bracket and bolt it behind the axle flange, this bracket bolts right up to the face of the axle flange.
These brackets are sold to Mustang enthusiasts, but remember, you’re using Mustang parts on your disc brake conversion.
North Racecars Instructions
Here is North Racecars instructions for these brackets:
Place vehicle securely on jack stands prior to starting disassembly. Remove wheels and brake drums on both sides
Remove cover in the center of rear end and catch the gear oil. If fluid is old, replace with new and add new friction modifier after all steps below are finished. Once cover is off, remove the 5/16” bolt that holds the big pin in the center of the traction lock unit. Remove pin once free.
Tap axles in to expose the C clips in the center of rear end. The big pin held the axles, so this is where the C clips will be. Remove C clips on each side, if worn-replace clips. Once C clips are out/off, the axles should slide out. DO NOT TURN EITHER AXLE WHILE REMOVING OR INSTALLING OR THE SPIDER GEARS WILL FALL OUT. THEY ARE VERY DIFFICULT TO REINSTALL. ALSO LEAVE THE SPRING INSTALLED THE C CLIPS WILL COME OUT WITH THEM INSTALLED
The four bolts hidden by the axle hold the brake backing plates on. Remove brake lines from rear of wheel cylinder on both sides, Remove all of the old brake parts as one unit, repeat on the other side. Remember to keep the bolts as they hold on the new NRC brackets. (Backing plates are not re-used).
Your new brackets mount where the backing plates used to be. Mount the brackets so the top (The part with two ears) tilts inboard and to the rear of the car re-using the bolts from step 6. They are marked left and right-they may appear to be the same, but are not.
PUT ‘C’ CLIPS ON AND PUSH AXLES BACK TO THEIR NORMAL POSITION. Install pin to hold axles.
Mount rotors using one or two lug nuts. Mount support brackets and check for fit. We over offset our brackets inboard intentionally. We have found that there are variations in rear ends, gears and axles. It is much easier to shim out than to grind off to fit. The install order is bolt head, bracket washer caliper. If the washers need to be doubled that is fine. No washer is also fine, the key is to center the support bracket over the rotor. It is close, but as long at there is space on both sides of the rotor it is fine. Remember to get C clips on before checking calipers and rotors for fit. The optional dust shields can be mounted at this time.
Put the flex line in place on the top of the lower control arm mount, right between the shock and the housing where the old hard line was. It fits really well in one spot, it lines the soft brake hose with the caliper well the soft line will have a nice S bend. The hard line will need to be bent or relocated to line up. Two holes may need to be drilled-one for the mounting hole and one for the alignment tab. If the original line clamps have the screws in them, you can use them or get another to keep the lines fixed in their original location. We have found that relocating the lines works the best, so using the old screws in the new holes works fine.
Cut, bend and double flare the hard line to go from the old drums to the newly mounted soft line. The hard line will be cut several inches in order to fit. Use the supplied red fitting to make the connection. Don’t forget to put the fitting on before you flare the line. (If this sounds like the voice of experience, it is)!
Make sure all the connections to the brake system are tight. Bleed brakes, reinstall traction lock pin, bolt and cover. Fill with fluid, reinstall wheels, remove vehicle from jack stands and test brakes in a safe area.
Resources:
Related Articles:
Sport Trac 12-Inch Rotor Upgrade For 2WD Ford Ranger
Explorer 8.8 Rear Disc Brake Conversion
Co Author:
TRS forum member DangerRanger01 put together this article based on his own experience performing this modification and sent it to the author to be used at The Ranger Station for other Ford Ranger owners to use.
Last Updated:
About The Author
Jim Oaks is the founder of TheRangerStation.com, the longest-running Ford Ranger resource online since 1999. With over 25 years of hands-on experience building and modifying Ford Rangers — including magazine-featured builds like Project Transformer — Jim has become one of the most trusted authorities in the Ford Ranger off-road and enthusiast space.
Since launching TheRangerStation.com, Jim has documented thousands of real-world Ranger builds, technical repairs, drivetrain swaps, suspension modifications, and off-road adventures contributed by owners worldwide. TheRangerStation.com has been referenced in print, video and online by enthusiasts, mechanics, and off-road builders looking for practical, and experience-based information.