
Introduction
Opening stuck rear door on 1998-2011 Ford Ranger when the plastic cable stays have broken at the (2) latches, and the upper latch cable works when pulled with pliers at the door handle, but the lower latch cable does not work when pulled with pliers, not allowing the door to open. Also includes steps to create a temporary door handle bypass to allow the door to operate until permanent replacement cable stays are installed.
Disclaimer: The Ranger Station.com, The Ranger Station.com Staff, nor the original poster are responsible for you doing this modification to your vehicle. By doing this modification and following this how-to you, the installer, take full responsibility if anything is damaged or messed up. If you have questions, feel free to PM the original poster or ask in the appropriate section of The Ranger Station.com forums.
I ASSUME NO RESPONSIBILITY FOR ANY MISHAPS / ERRORS / MISINFORMATION THAT MAY OCCUR AS A RESULT OF ANY FORM OF USE OF THE AFOREMENTIONED INFORMATION
Tools Needed
- 3/8″ ratchet
- #50 torx socket
- 15mm socket
- #27 torx bit & driver
- large flathead screwdriver wrapped in tape
- slip joint pliers
- wire cutters
- small angled pick
Materials Needed
- 18-gauge wire spool
- 2-each zip ties (6″-8″) *per door
- penetrating lubricant
- A thin but sturdy pole or stick approximately 4-feet long
Instructions
Here are the step-by-step instructions and images (* All photos are of a passenger side repair)
Photo 1. Open the front door and move the seat all the way forward. Disengage the two cable ends that are set inside of the rear door handle. It is important to note that the cable that comes into the upper portion of the door handle operates the LOWER latch, and the cable that comes into the lower portion of the door handle operates the UPPER latch. Clear out anything that may be in the rear space behind the front seats, so you have room to work.

Photo 2. Peel the covering up from the lower seat belt strap mount and remove the seat belt bolt with a #50 torx bit.
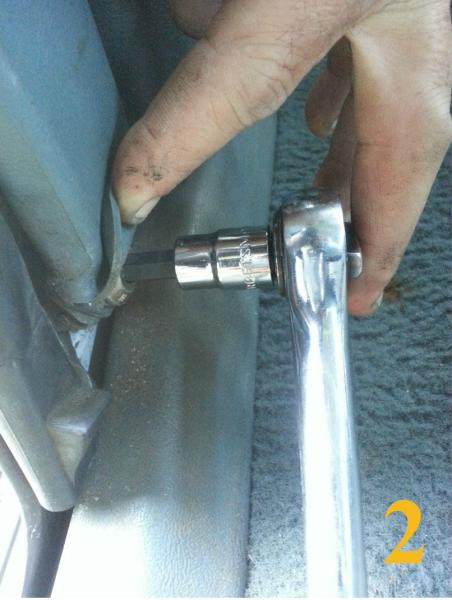
Photo 3. Flip up the upper seat belt strap mount and remove the nut with a 15mm socket. Allow the seat belt strap to fall and rest on the floor.

Photos 4 thru 9: Carefully remove the rubber door seal from the edge of the door but keep the top and bottom of the seal connected. Locate the interior trim plastic connector points and gently pry away from the body with a screwdriver wrapped in electrical tape (to minimize scratching).
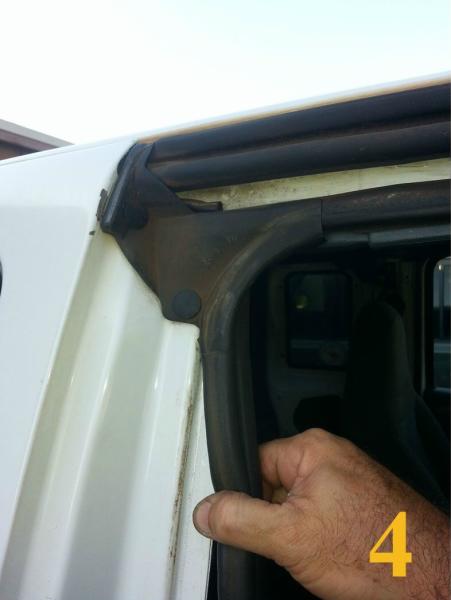
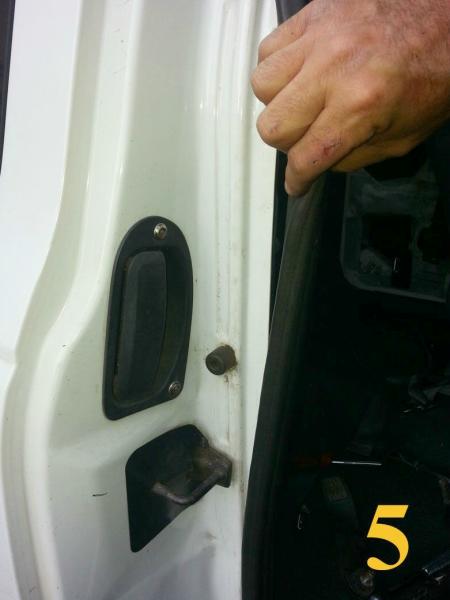
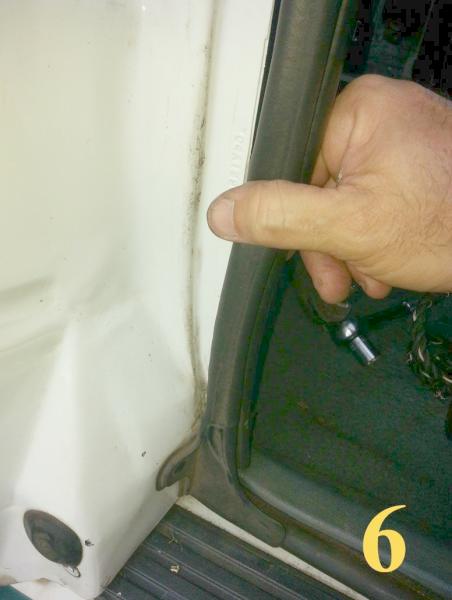
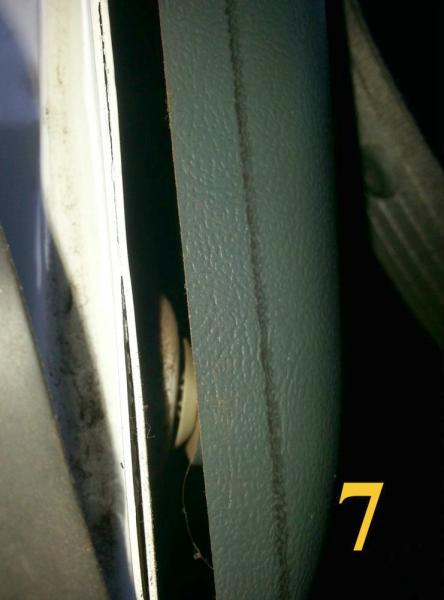
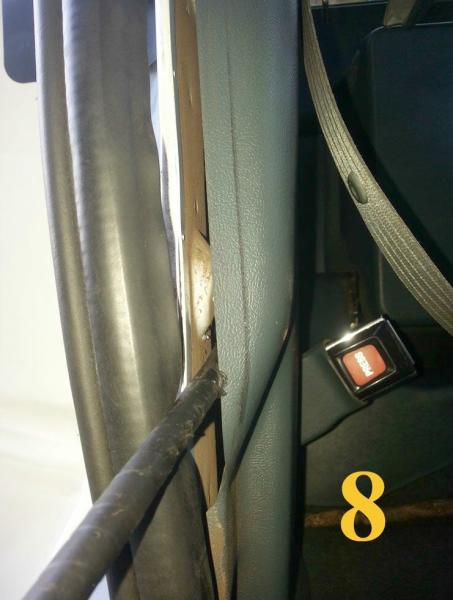
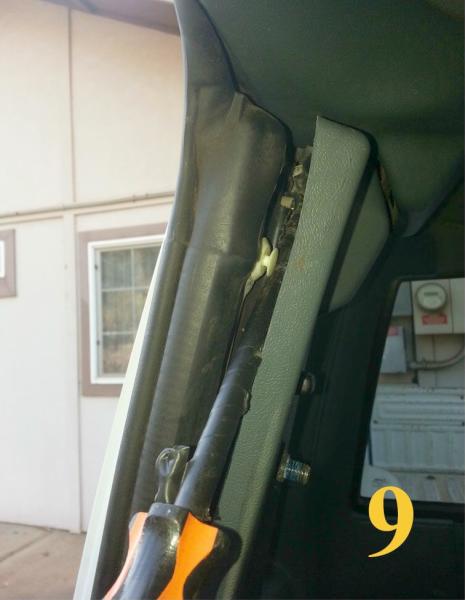
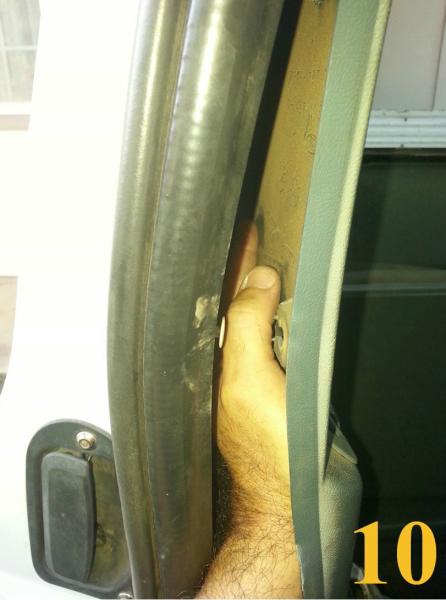
Photo 10. Once you pry the vertical row of connectors that are closest to you, reach an arm in between the trim panel and the body and gently pry the rest of the plastic connectors free. Some of them may break or stay on the body instead of coming off with the trim panel. If so, carefully pull them out with pliers, flatten, and reuse if possible.
(TRS Staff Note: NAPA can get these connectors. Some stores even have a book with every plastic plug like these tied inside to match the ones you have)
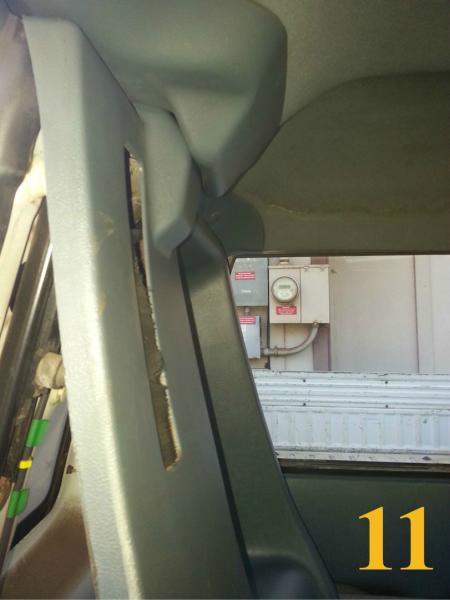
Photo 11. Once you have removed all of the plastic connectors, the trim panel should be free to move except for the area around the top latch.
Photos 12 thru 15. Gently raise the bottom of the trim panel and support it with a small pole or stick. You will now be able to see the metal rear door panel underneath. There is a small, recessed storage cubby in the bottom of the door trim, and with the trim removed there will be a hole where the storage cubby sits that will allow access to the lower latch. Remove the sound deadening material inside the door (photo #15).
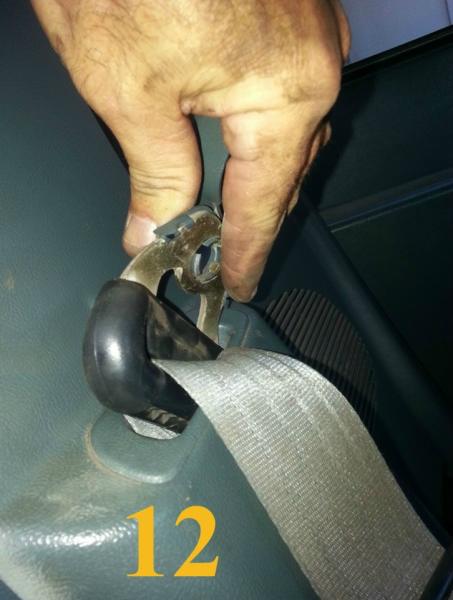
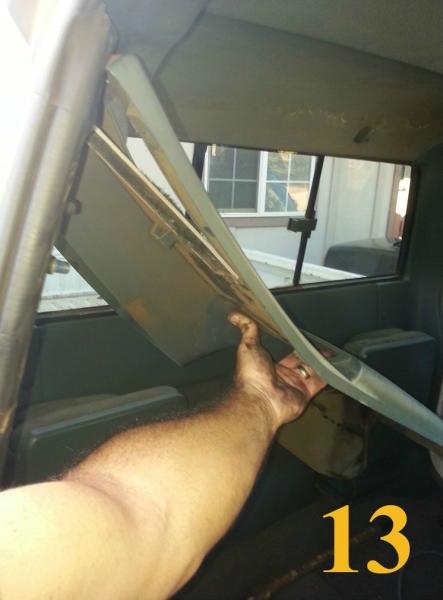
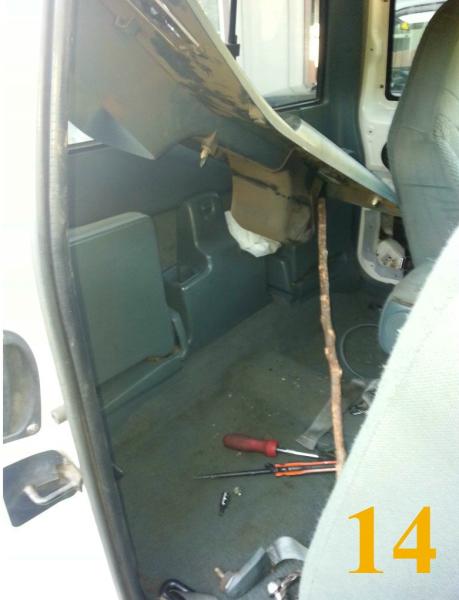
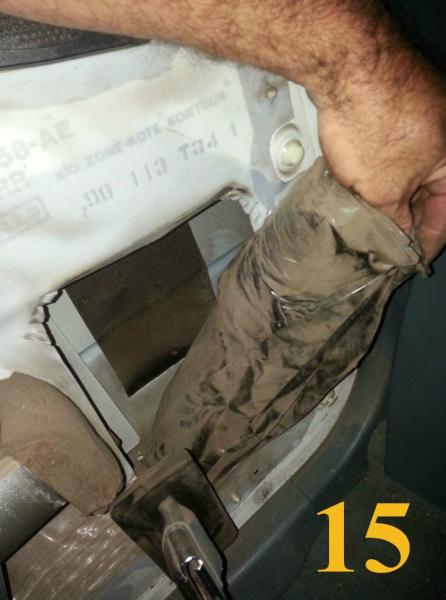
Photo 16. View of the door panel and lower latch access hole. The latch is located near the lower left corner of the hole in the photo.
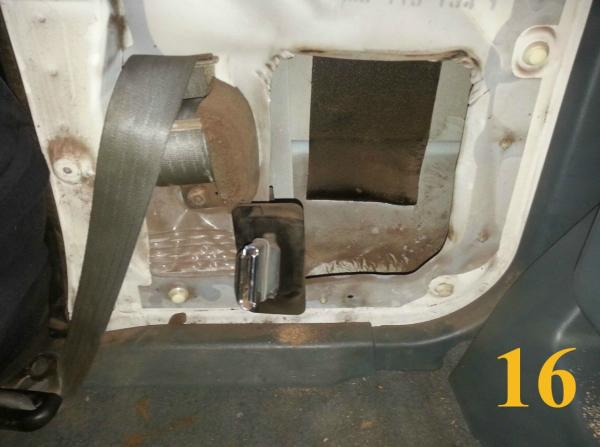
Photo 17. Remove the rear seat belt post with a #50 torx bit.
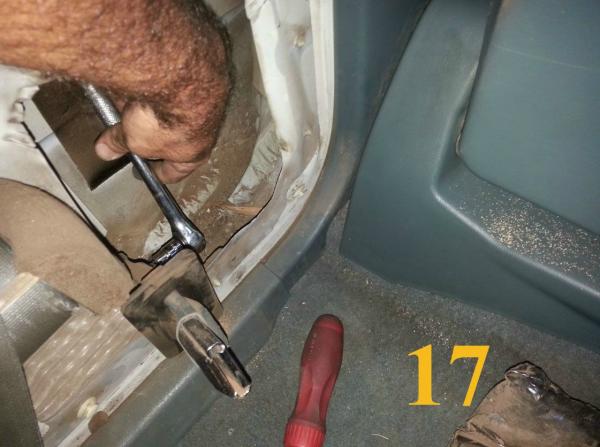
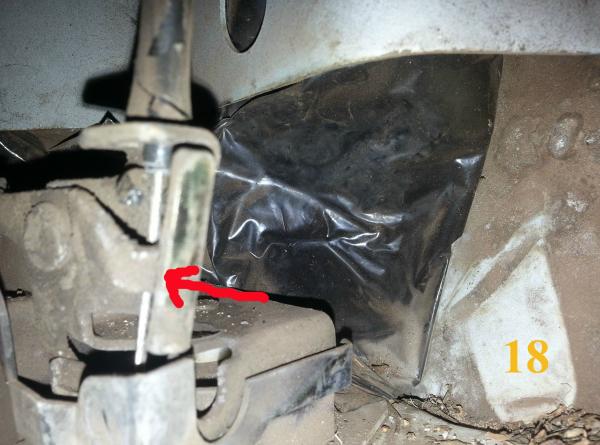
Photo 18. Detail view of lower latch mounted inside the bottom of the door. This is the side of the latch that is closest to the access hole in the door panel. At the top of the latch, you can see the broken plastic cable stay at the top bracket, and the bare cable running down to the little moveable tab below which is the part that needs to be raised up to open the latch (red arrow).
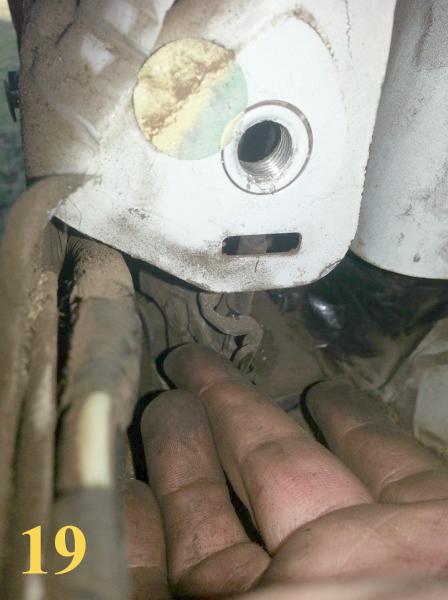
Photos 19 thru 20. Get a pair of pliers and prepare to tug on the upper latch cable at the door handle (remember that’s the cable connected to the LOWER part of the door handle!). At the same time, with feet / knees on the ground outside the vehicle, lay on your right side with your waist straddling the open front door, reach your hand down into the access hole and find the little tab shown in pic #18. Tug gently on the upper latch cable with pliers, while pushing up on the lower latch tab with your finger. Pull the door outward while doing all of this and the door should swing open (#20). This will allow you to remove the door trim interior panel from around the upper latch receiver. Set trim panel aside.

Temporary Door Handle Bypass
To allow for temporary operation of the door
Photos 21 thru 27. Now that the door is open, cut a piece of 18 ga wire around 30″ long. Feed one end of the wire through the bottom latch opening and angle the wire so that it threads between the side of the moveable tab and the top bracket. Use a small, angled pick to guide the wire into the correct position. Push about 12″ of the wire through until you can grab the end from the access hole side. Carefully feed the other end of the wire also into the lower latch opening, but thread this wire on the opposite side of the tab, carefully forming a wire loop around the tab. Maintain light but constant pressure on the looped wire so that it stays secure around the tab. Spray the latch with lubricating oil and pull on the wire to confirm that the tab moves freely (pic #27). You can also manually close the latch with a small screwdriver and test the latch operation by pulling on the wire to confirm that it opens.
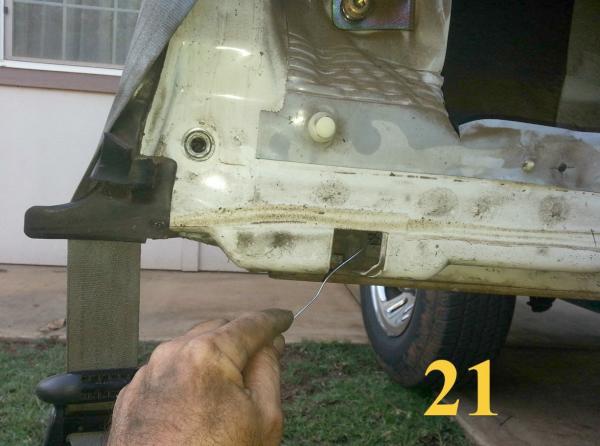
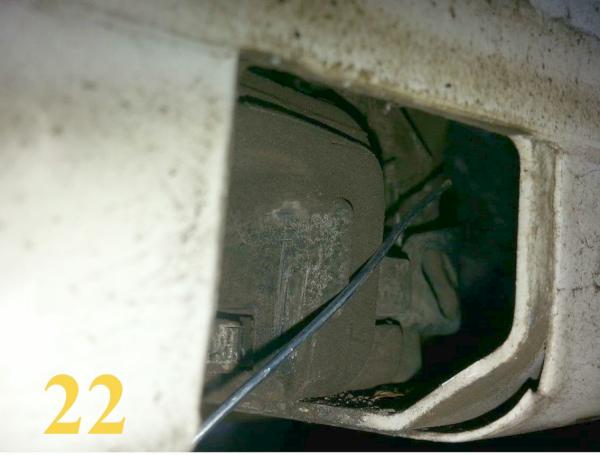
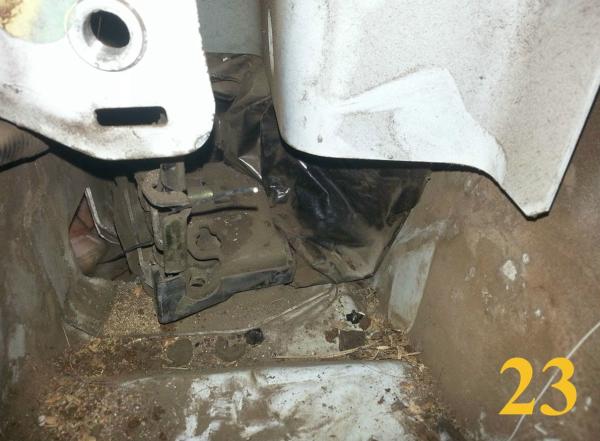
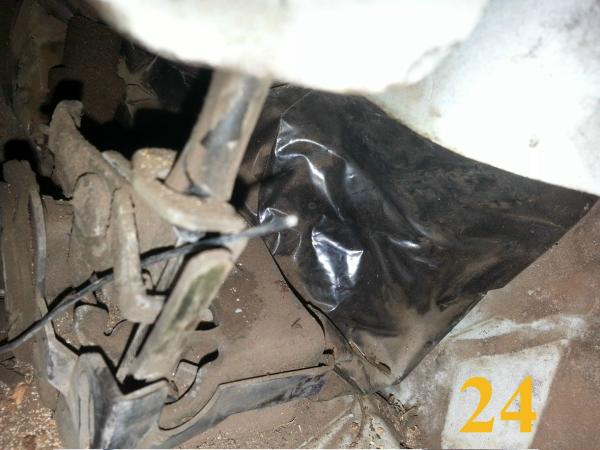
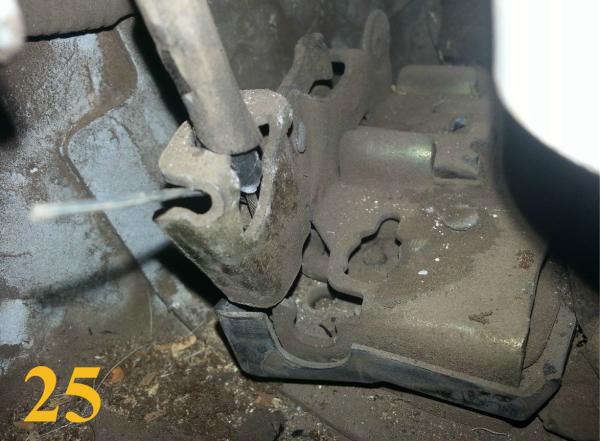
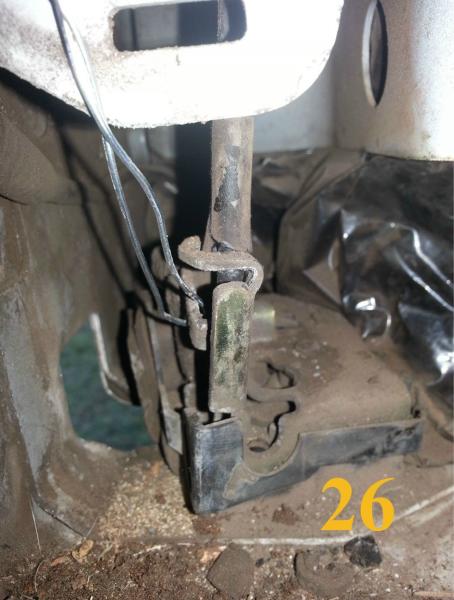
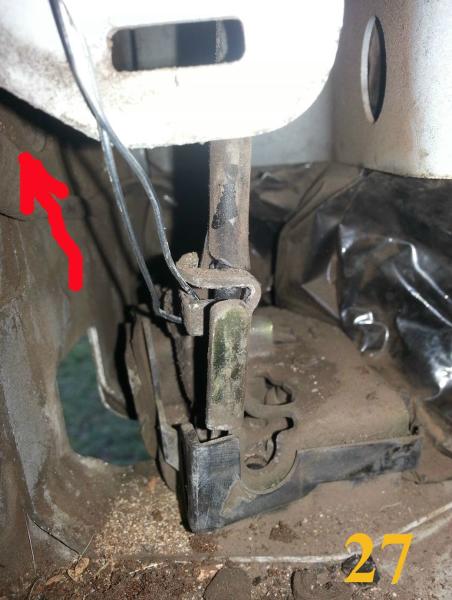
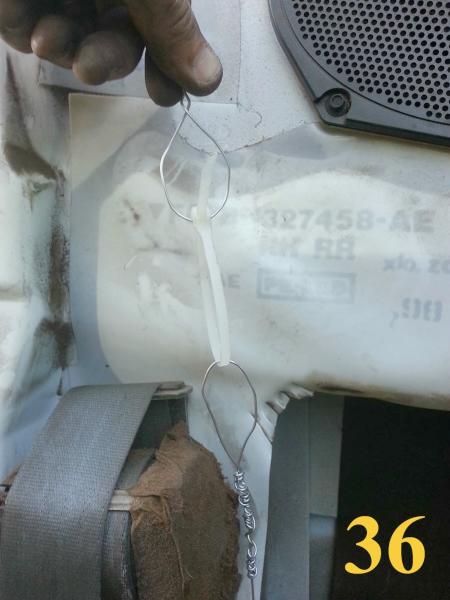
Photo 28. Take the free end of the wire and keeping a light tension on it, wrap it around the seat belt assembly so the loop stays around and connected to the moveable tab on the lower latch.
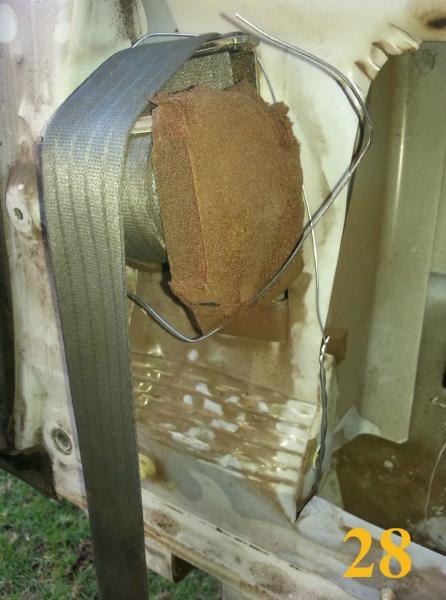
Photo 29. Now go to the upper door latch and remove the 3 bolts holding the bracket that is over the latch with a #27 torx bit.
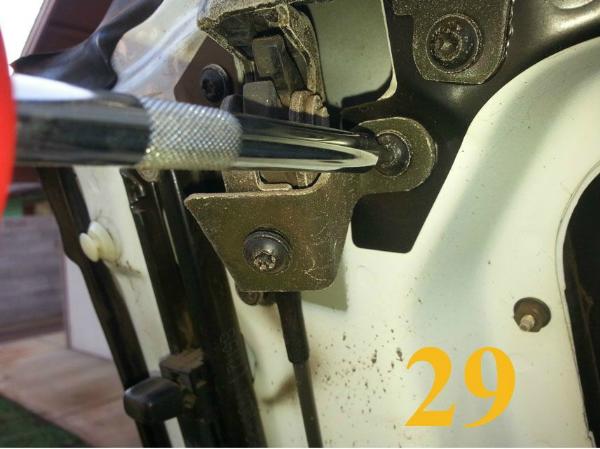
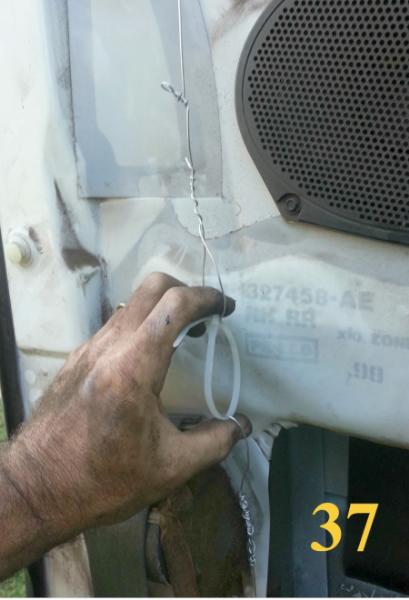
Photo 30. This will expose the broken upper plastic cable stay and the door cable itself. The larger diameter black plastic sleeve shown in the photo disintegrated after I lightly squeezed it between my fingers.
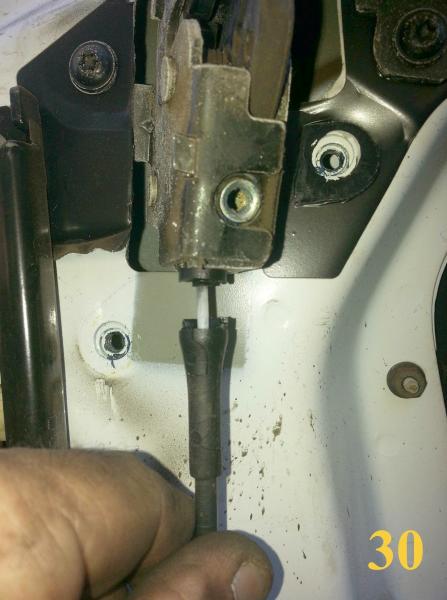
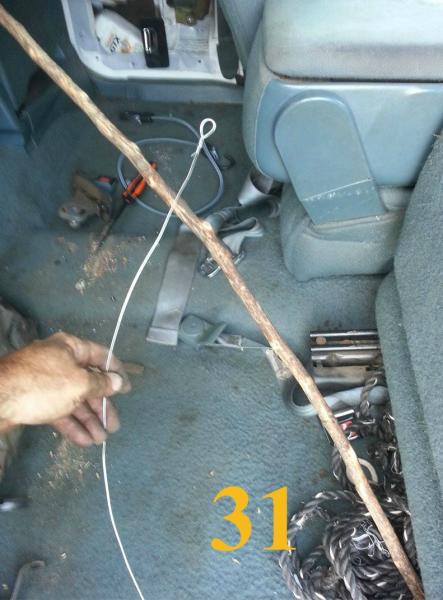
Photo 31. Cut a piece of 18 ga. wire about 36-inches long. Make a 1/4″ to 1/2″ loop on one end making sure it is wound tightly and will not slip.
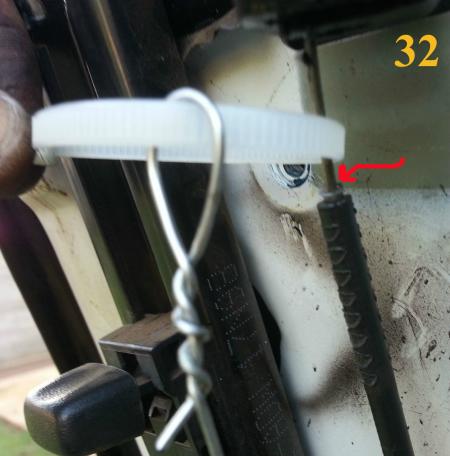
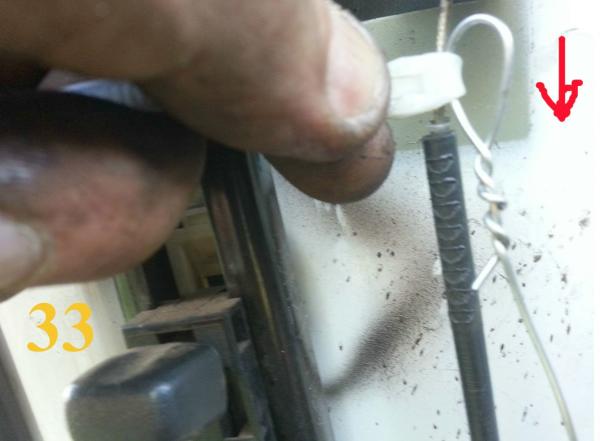
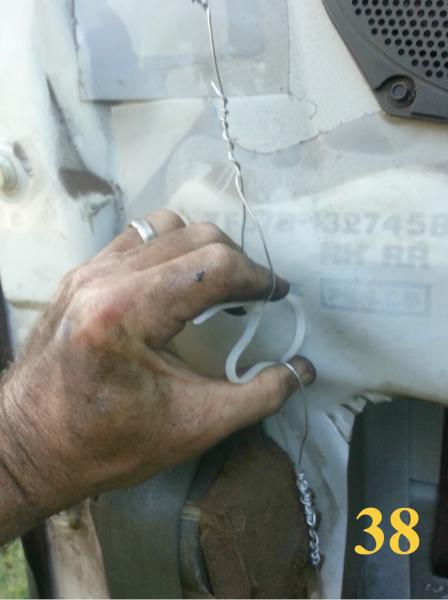
Photos 32 thru 34. Put a zip tie around the wire loop and also around the bare part of the upper latch cable, just below the latch. Do not wrap the zip tie around the black plastic cable sheath, only the bare wire above it. Tighten the zip tie and allow the wire loop to fall freely to its lowest point while tightening the zip tie as tight as possible around the cable. You want the bottom of the zip tie to sit snugly on the edge of the cable sheathing. You can now manually close the upper latch with a small screwdriver and test the operation by gently pulling downward on the wire to confirm if the latch opens. Then make a 1-1/2″ – 2″ diameter loop on the other end of the wire, terminating near the top of the door panel access hole.
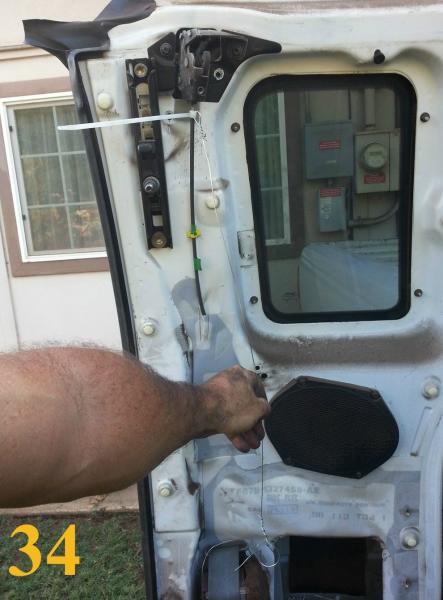
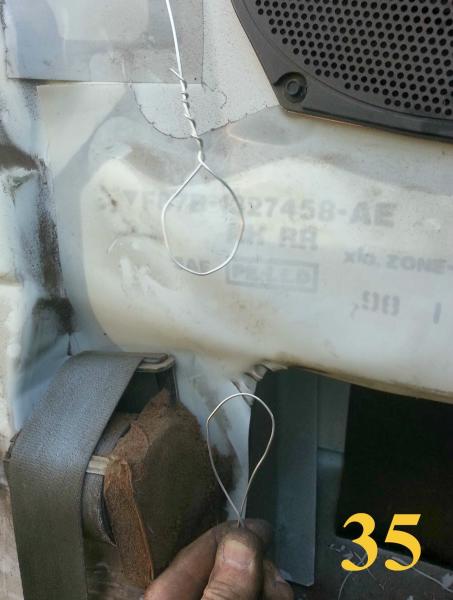
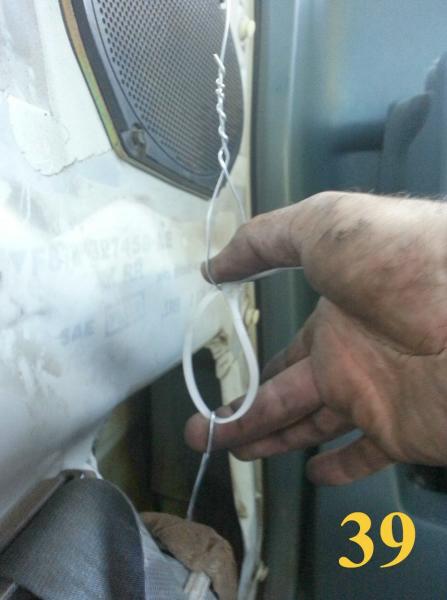
Photos 35 thru 38. Carefully unwrap the lower latch wire from around the seat belt assembly, keeping light pressure on the wire so the loop stays in position around the moveable tab on the lower latch, and form a 1-1/2″ – 2″ diameter loop in the end of the wire so that the loops from the upper and lower latches are about 2″ apart. You want to keep very light pressure on both wires but not enough pressure to open either of the latches. When the loops are the proper distance apart, loosely connect the wire loops with a zip tie. The zip tie will act as a spring and provide resistance so the wires will snap back. Adjust zip tie and wires for optimum tension. Perform testing of latch operation while the door is in the open position and adjust tension / wire position accordingly. Ensure that all parts are moving freely and do not require excessive force to operate.
Photos 39 thru 40. If testing in open position is successful, close the rear door and attempt to open it again.
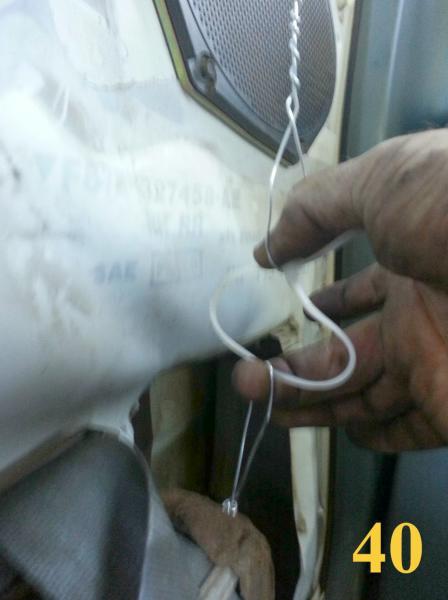
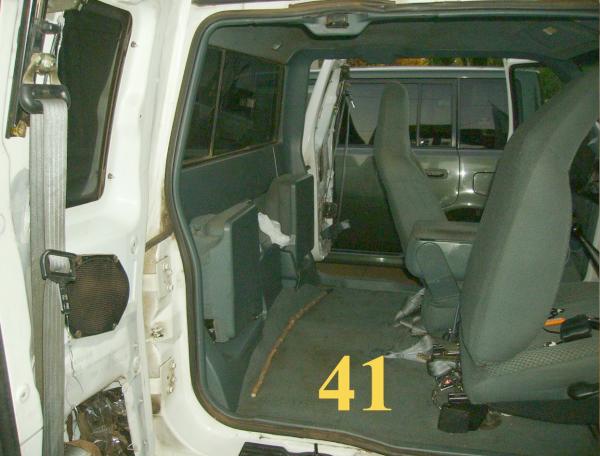
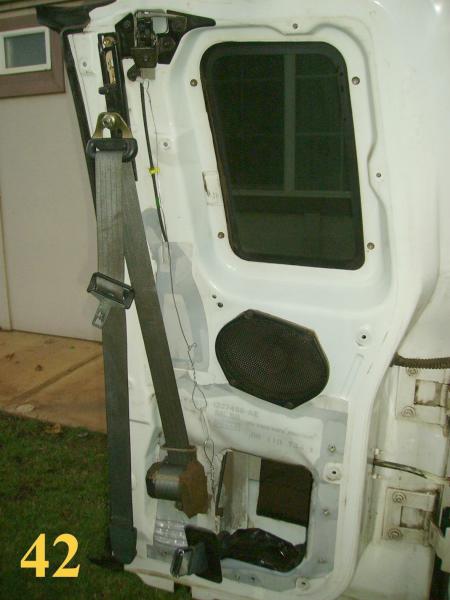
Photos 41 thru 42. Let the wind blow through your hair, enjoy a cold beverage and wait for new aluminum cable ends to arrive. The switch will be easy once they do. Remove wires and re-install the trim panel after the permanent fix is completed.
Contributor
This procedure was performed, photographed and documented by TRS forum member Rusty Carbs who submitted it to the author to be published at The Ranger Station to help other Ford Ranger owners.
Last Updated:
About The Author
Jim Oaks is the founder of TheRangerStation.com, the longest-running Ford Ranger resource online since 1999. With over 25 years of hands-on experience building and modifying Ford Rangers — including magazine-featured builds like Project Transformer — Jim has become one of the most trusted authorities in the Ford Ranger off-road and enthusiast space.
Since launching TheRangerStation.com, Jim has documented thousands of real-world Ranger builds, technical repairs, drivetrain swaps, suspension modifications, and off-road adventures contributed by owners worldwide. TheRangerStation.com has been referenced in print, video and online by enthusiasts, mechanics, and off-road builders looking for practical, and experience-based information.