Tools Required:
- Basic Sockets
- Ratchets
- Wrenches
- Seal Puller
- Picks
- Drill and other optional tools mentioned below
- Leather Mallet
- New differential fluid
- RTV sealant
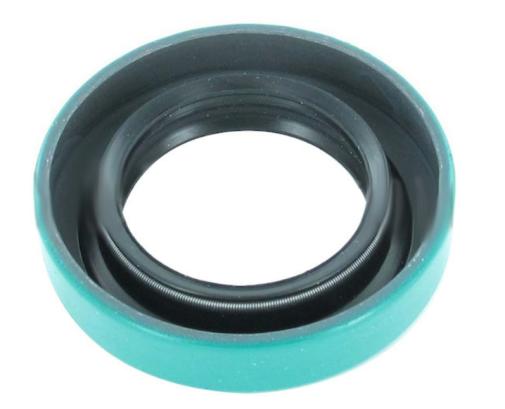
- New axle seals ($2.00 @ NAPA)

Procedure:
1) Pull off the differential cover and let the fluid drain out into a catch pan.
2) If it’s a Traction Lock 3.73 like this one, pull the little pieces of traction lock clutches out of the bottom of the case.
3) Now for the fun part, that pinion shaft has to come out to remove the axles. Unscrew the cross bolt and remove it.
Cross pin bolt
4) Remove the pinion shaft, it should slide out easily now.
5) Push the axles towards the center of the differential. They should move freely. I would recommend replacing both axle seals to avoid repeating this process in the near future. The C – clips should now be visible, so take a pair of needle-nosed pliers and carefully remove them. These C – clips are VERY slippery, so be careful not to drop them. As you are pulling them out, notice the orientation of the tiny black O-ring on the C – clip groove. If you need to, replace the C – clips.
6) Pull the axles out and wipe them off, remembering which side is which. An axle puller shouldn’t be needed unless you have a serious problem in there.
7) Take your seal puller and insert it into the hole in the seal. If you do not intend to replace the bearing in there, make the seal puller contacts ONLY the Axle Seal, not the bearing behind it. Slowly use the slide-hammer to remove the seal.
8) Admire this seal. As I said, ours were only $2.00 a piece, and managed to fry the breaks on one side, and cause countless hours of suffering (In my case at least).
9) Take your new seals and replace them in each side. We used a leather mallet here so we would not destroy the new seal, I suggest you do the same. In reality, you should have something that is the proper diameter to push the new seal in with. I suggest a large 3/4″ drive socket. Of course I didn’t bring those with me, so we used the old seal to hammer the new one in.
10) If your axles are OK, carefully replace them and push them all the way into the center.
11) Replace the C – clips, noting the position of the rubber O-ring. Here it is handy to have another person pushing the axles back and forth until you have unobstructed access to the C -clip groove. It is also handy to have a partner here WHO DOES NOT TURN THE AXLES. If you do this by mistake, you will spend some time trying to “Get the damn side gears back into position,” to quote Paul Gagnon. He’s right too, it’s annoying. When you have to turn the unit, do so buy turning the center section (yes, it’s somewhat painful to do).
12) Pull the axles outward, the C -clips should stop axle travel at a certain point.
13) Replace the pinion shaft and screw in your new bolt. Make sure it’s the special aircraft grade 1000 titanium bolt that doesn’t exist.
14) NOW you can turn your axles and make sure everything moves as it should.
15) Apply the proper type of RTV to your differential and replace the differential cover.
I hope this makes your job a lot easier than ours was. I would almost rather have taken my box of match sticks and set up a new ring and pinion… Sorry there are no pictures, but if someone has any, feel free to add them and any other information to this write-up.

