I’ve seen this question asked online for years and decided to offer my own explanation. I hope this helps.
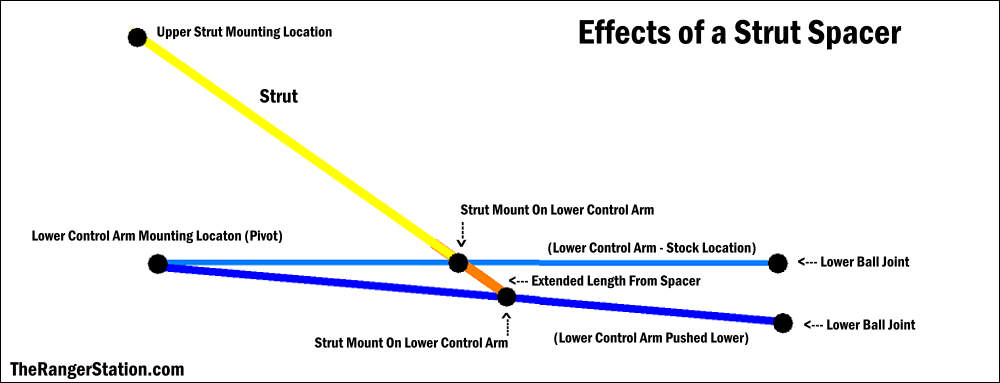
The lighter blue line above signifies your lower control arm in its stock location.
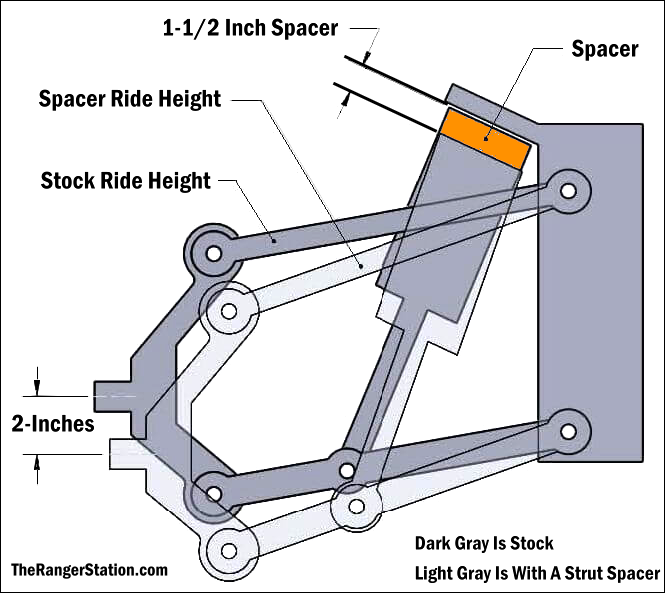
When you add a spacer (signified by the orange line) it pushes the control arm down lower (signified by the darker blue line). As you can see, the space between the original lower ball joint location and the new lower ball joint location is greater than the space between where the strut mount location is on the lower control arm compared to where it as after the strut spacer. The further down the strut pushes on the lower control arm the more it’s magnified at the end of the control arm where the ball joint is (where the wheel would be). There for a 1-inch spacer is going to give you more than a 1-inch lift.
This isn’t the best drawing, but I hope it helps you understand.

About The Author
Jim Oaks is the founder of TheRangerStation.com, the longest-running Ford Ranger resource online since 1999. With over 25 years of hands-on experience building and modifying Ford Rangers — including magazine-featured builds like Project Transformer — Jim has become one of the most trusted authorities in the Ford Ranger off-road and enthusiast space.
Since launching TheRangerStation.com, Jim has documented thousands of real-world Ranger builds, technical repairs, drivetrain swaps, suspension modifications, and off-road adventures contributed by owners worldwide. TheRangerStation.com has been referenced in print, video and online by enthusiasts, mechanics, and off-road builders looking for practical, and experience-based information.
