
I need to add switches in the cab of my 2021 Ford Ranger FX4 for my various lights and wanted a clean looking installation. I had considered swapping in the upfitter switches from a Tremor and then found this switch panel below from Air On Board:
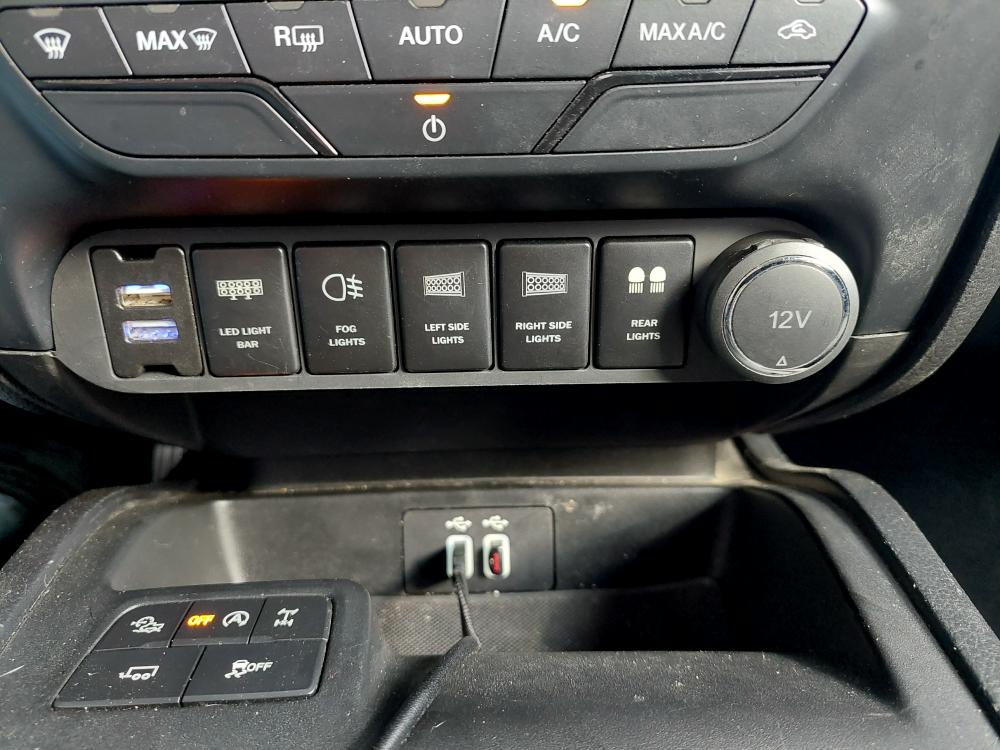
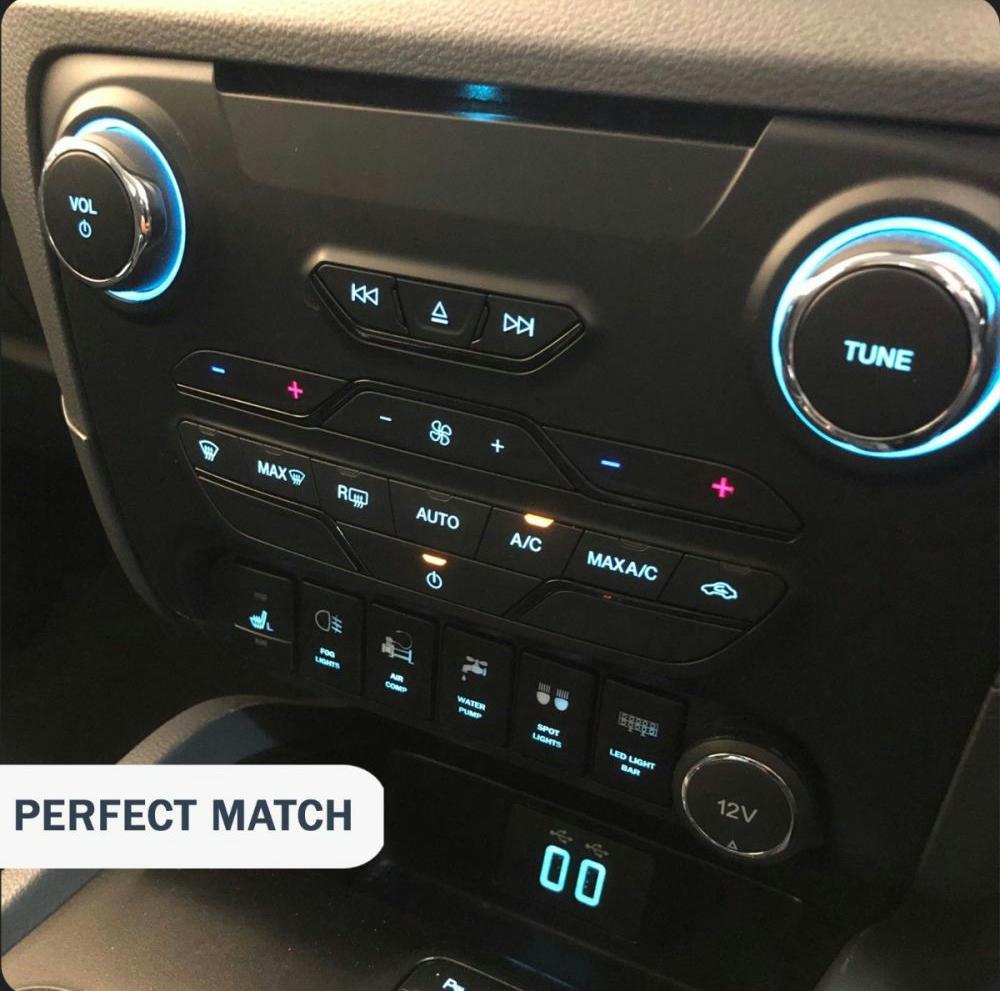
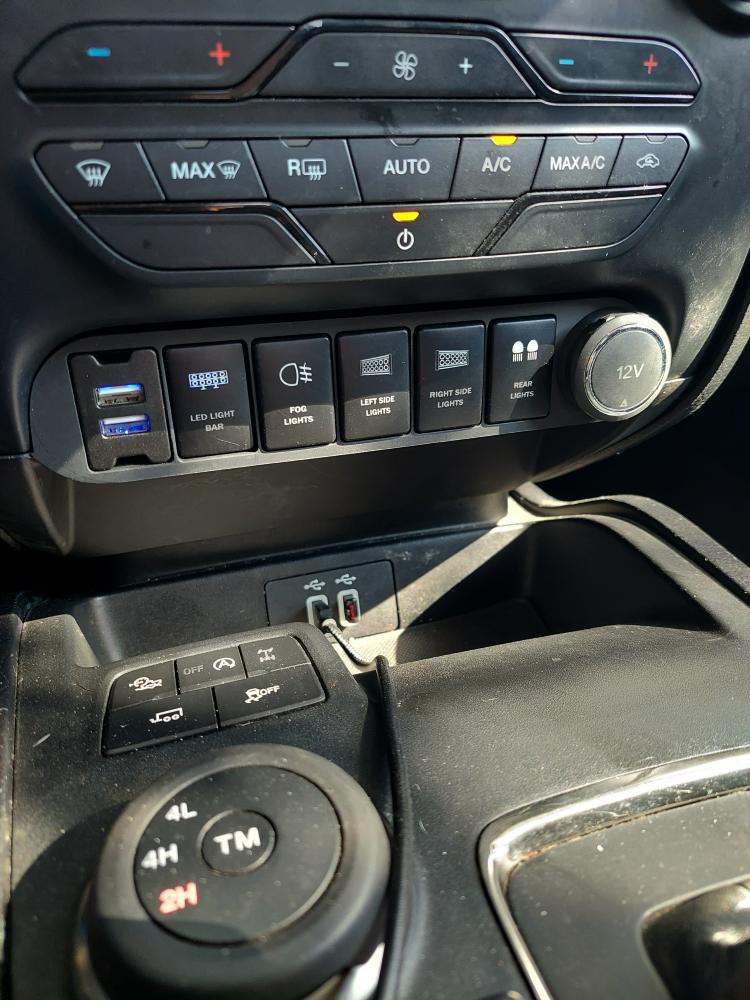
This is definitely the best-looking kit on the market, and I love how it looks like a factory installation when complete. The switches even light up to match the rest of the dash components. I also like that I can order switches that are labeled for my needs.
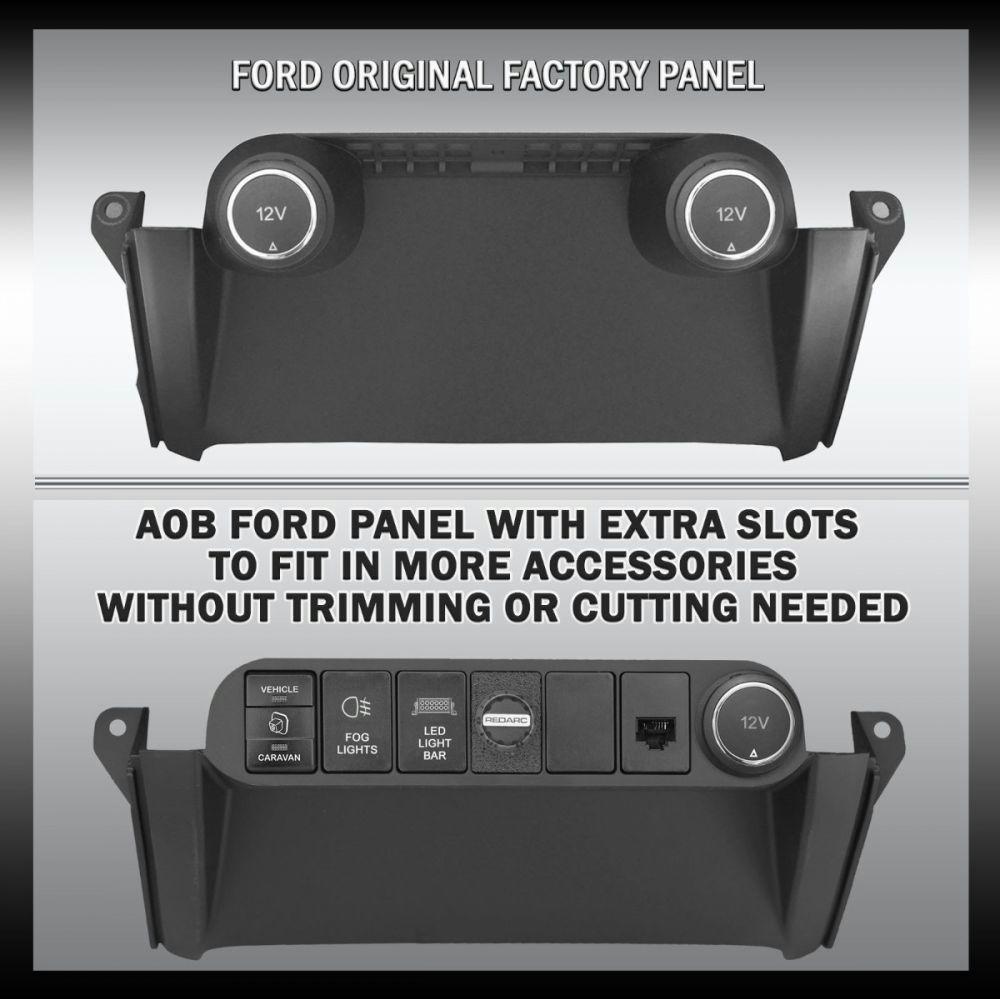
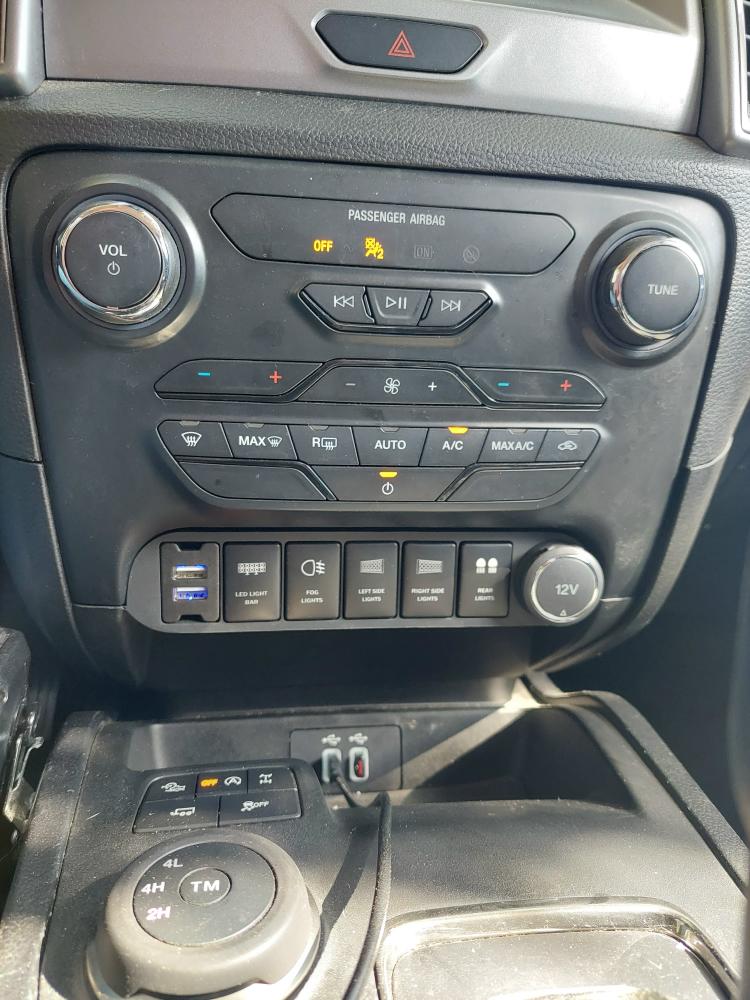
This FORD Panel for the Ranger PX2 PX3 was a little pricey at $105.00, but I like the clean factory look I’m going to get from it.
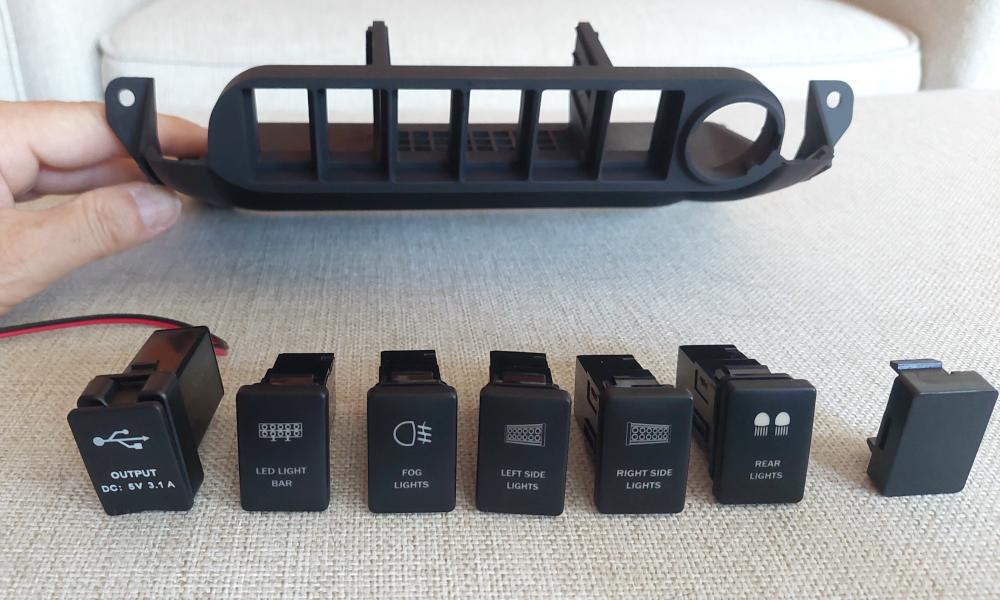
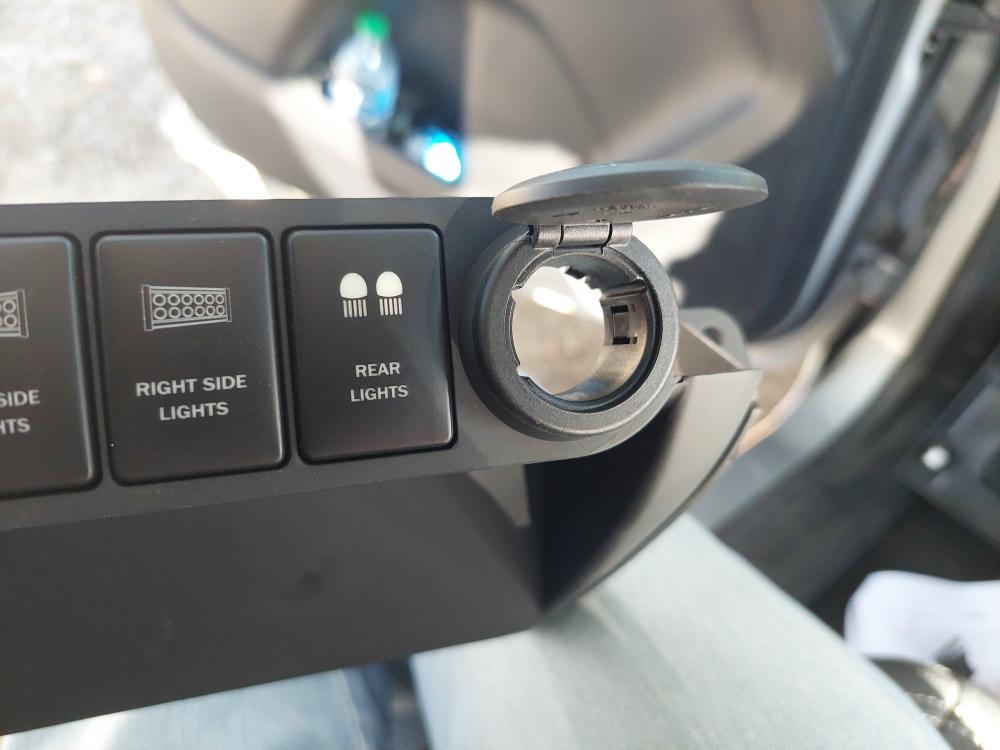
I ordered switches that were labeled to match my lights:
- LED Light Bar
- Fog Lights
- Left Side Lights
- Right Side Lights
- Rear Lights
I also bought a USB charging port that will replace the 12v jack that was on the left. I have them pictured below in the order they’ll be installed. I like that it comes with blank panels to fill in the openings. That would allow me to mount a toggle switch in the blanks if I wanted to save money on custom switches, but why go cheap now?
Installation:
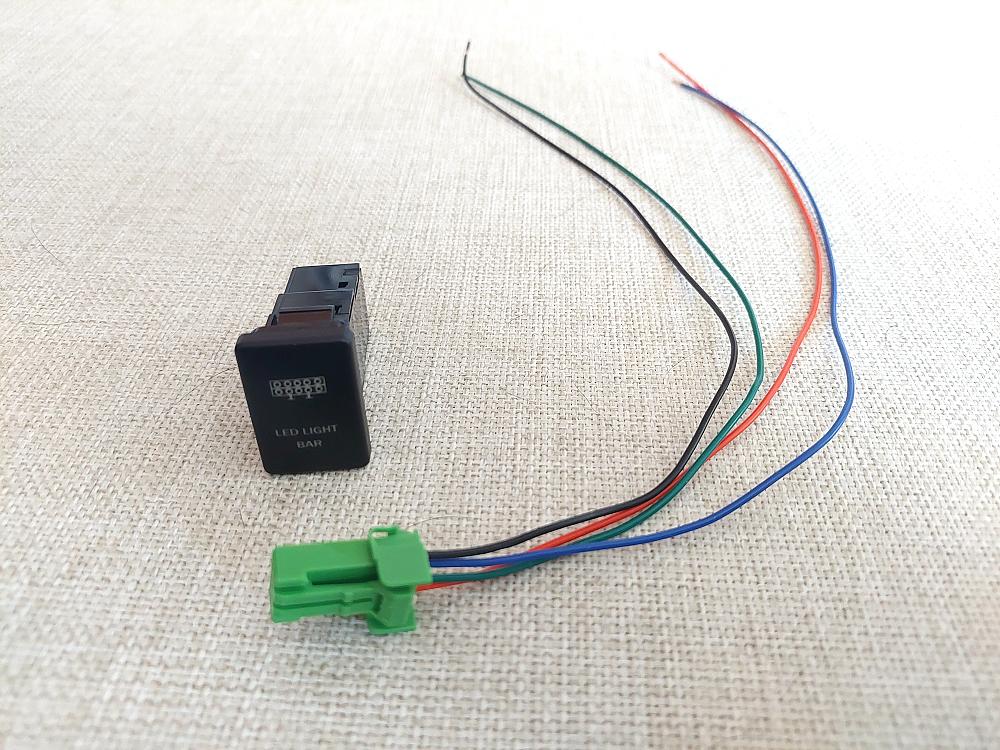
Each switch comes with a plug and wires:
Red: 12V to switch
Green: 12V out to relay / lights
Blue: Power in from dash lights
Black: Ground
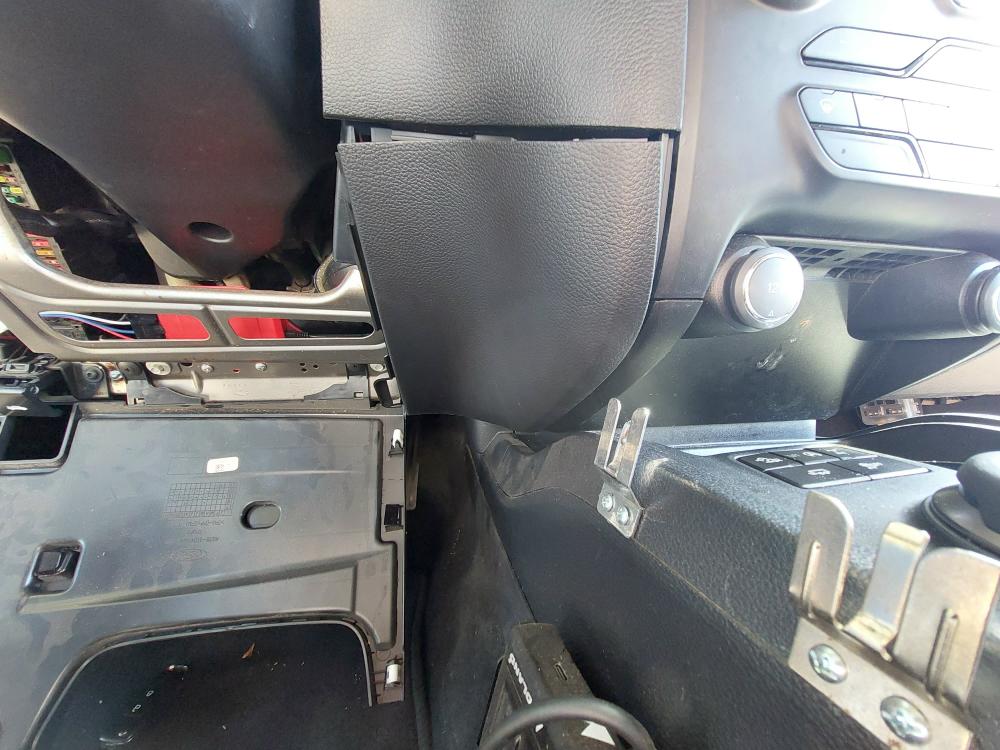
To begin installation, you need to pull the lower trim panels off from both sides. They pull straight back.
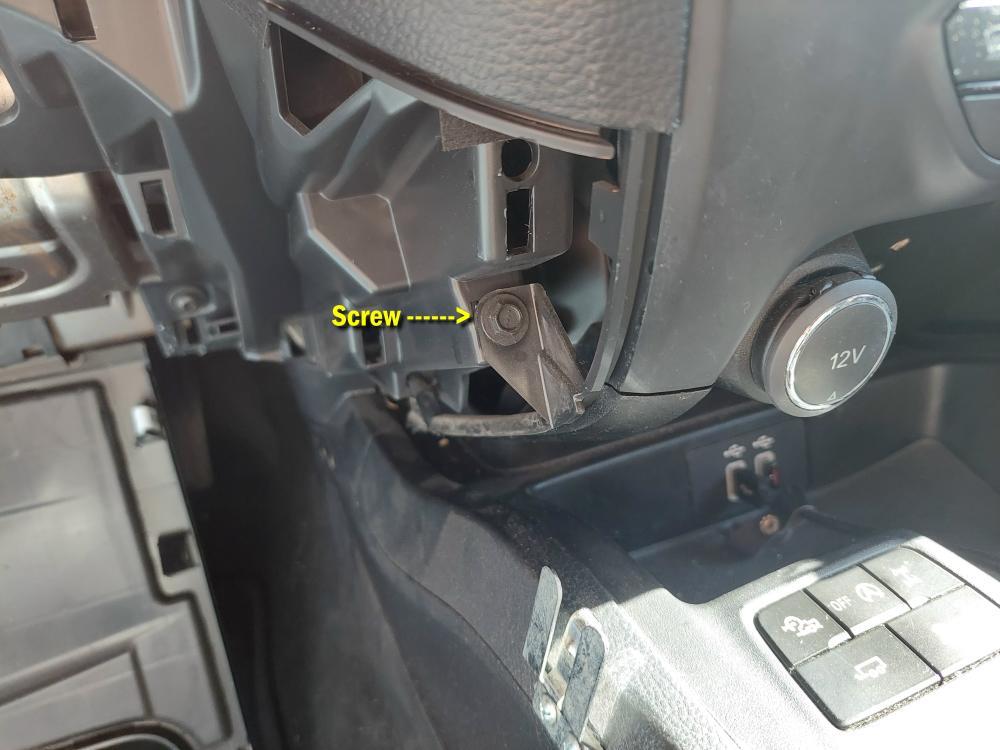
You’ll find a screw of both sides that holds the panel the 12V outlets are in.
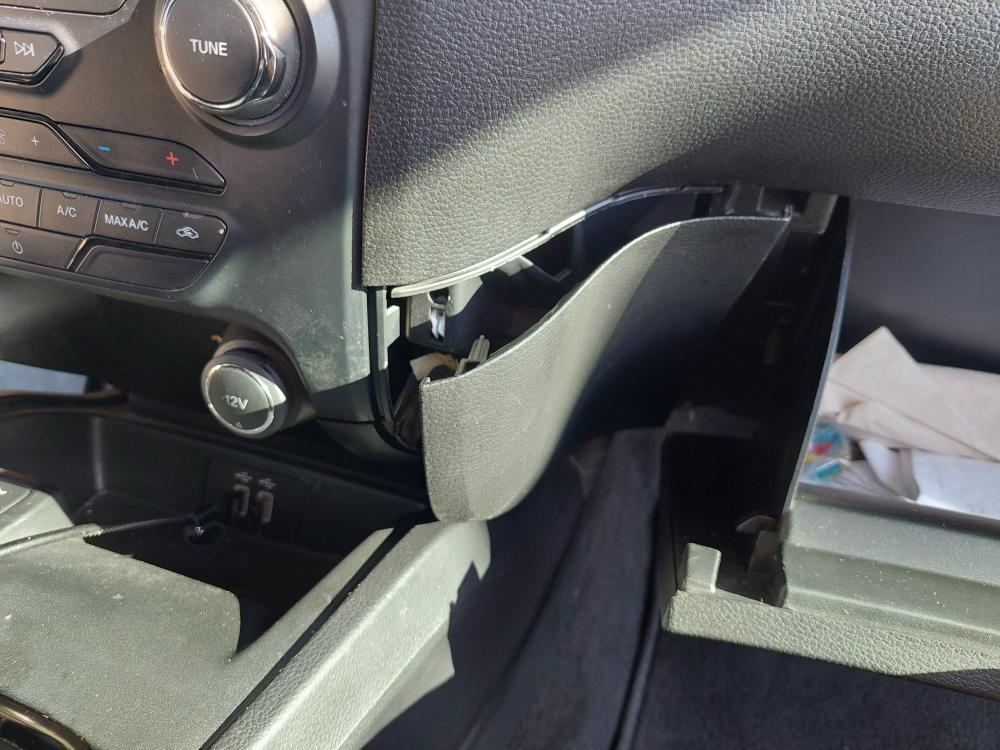
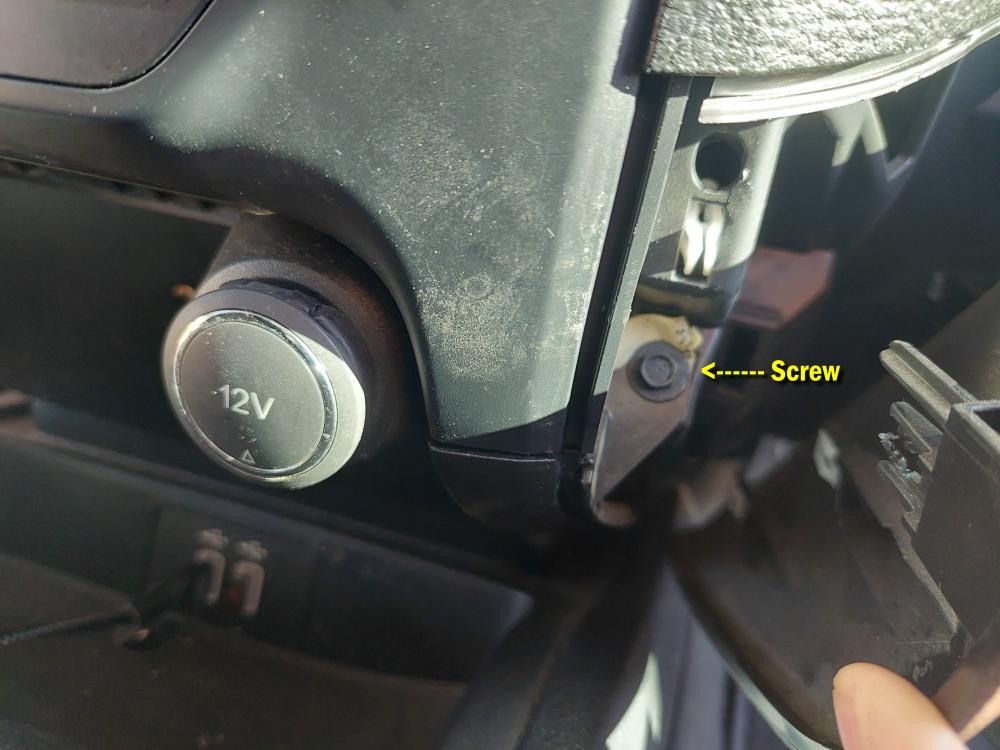
With those removed you can remove the panel by pulling straight back. There are (3) plastic clips that hold it in place. See the photo below.
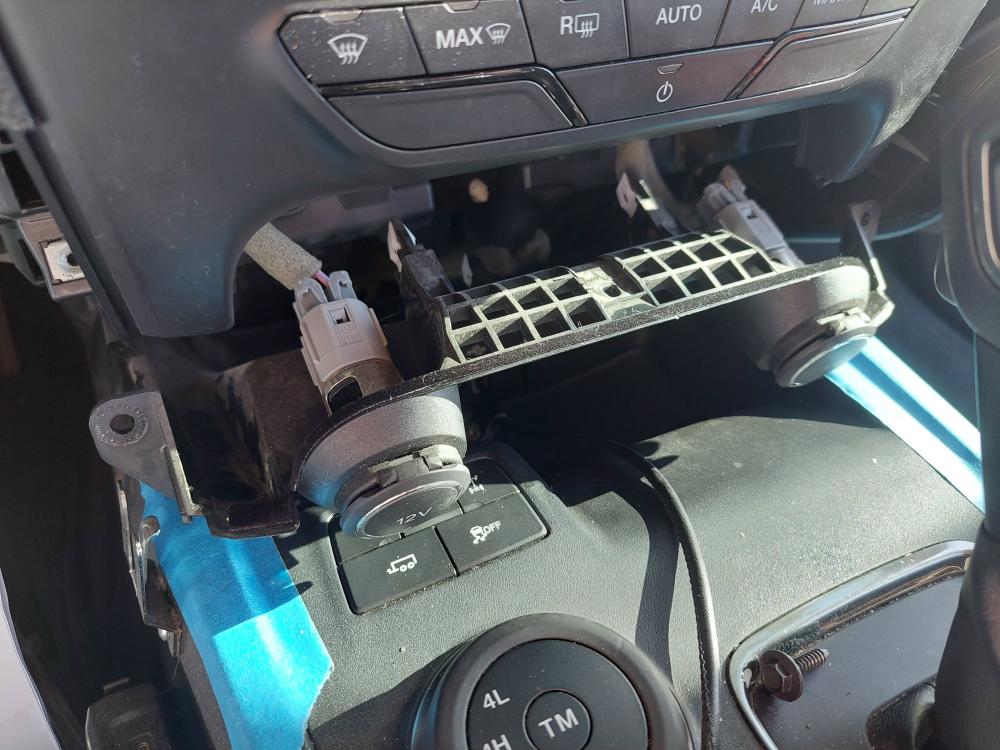
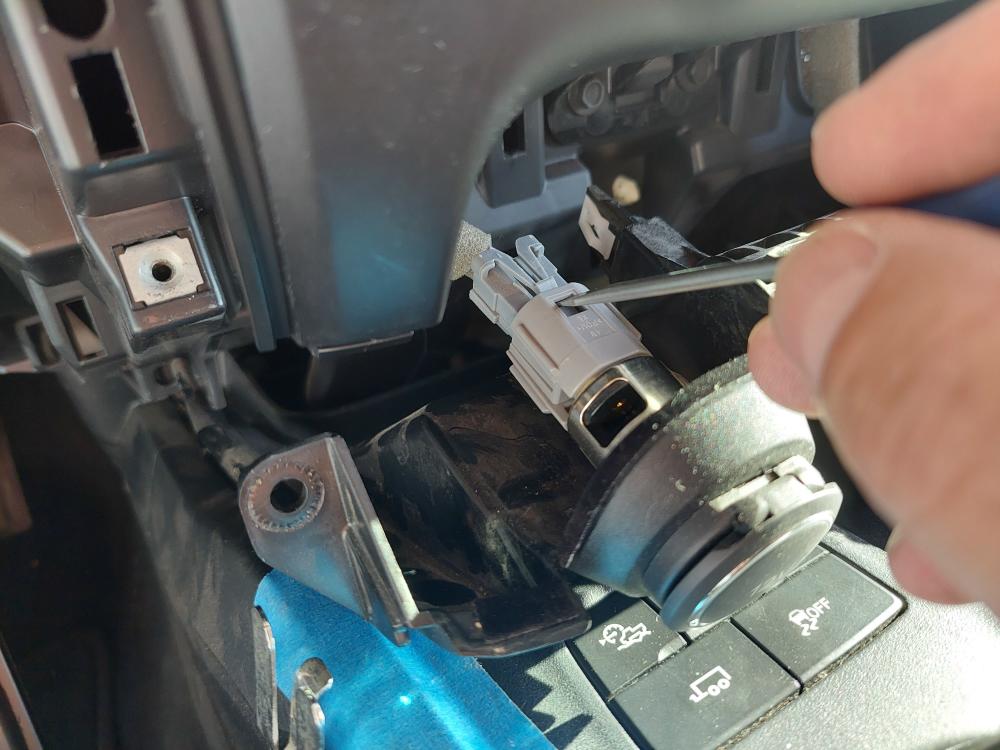
Next, remove the plugs for the 12V outlets. I used a small screwdriver and pushed down and back on the tab to slide the plug off.
Next, locate the (2) plastic tabs inside of the12V outlets and push them up as you wiggle the socket to get it loose.
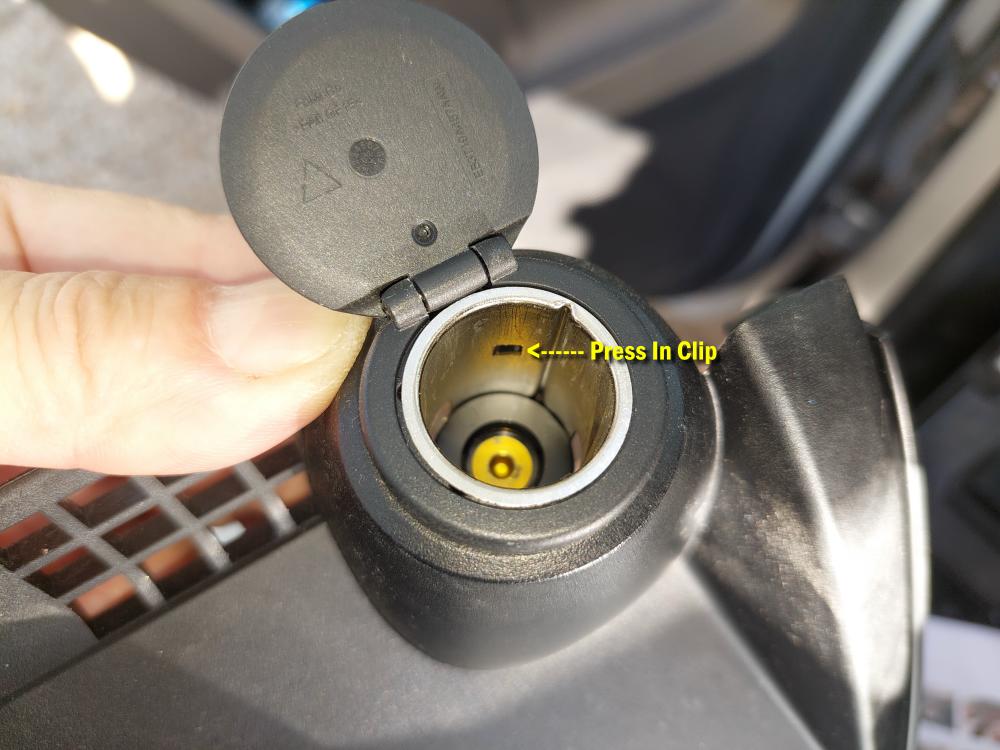
Next, slide the metal socket out of the front of the outlet and then remove the outlet cover.
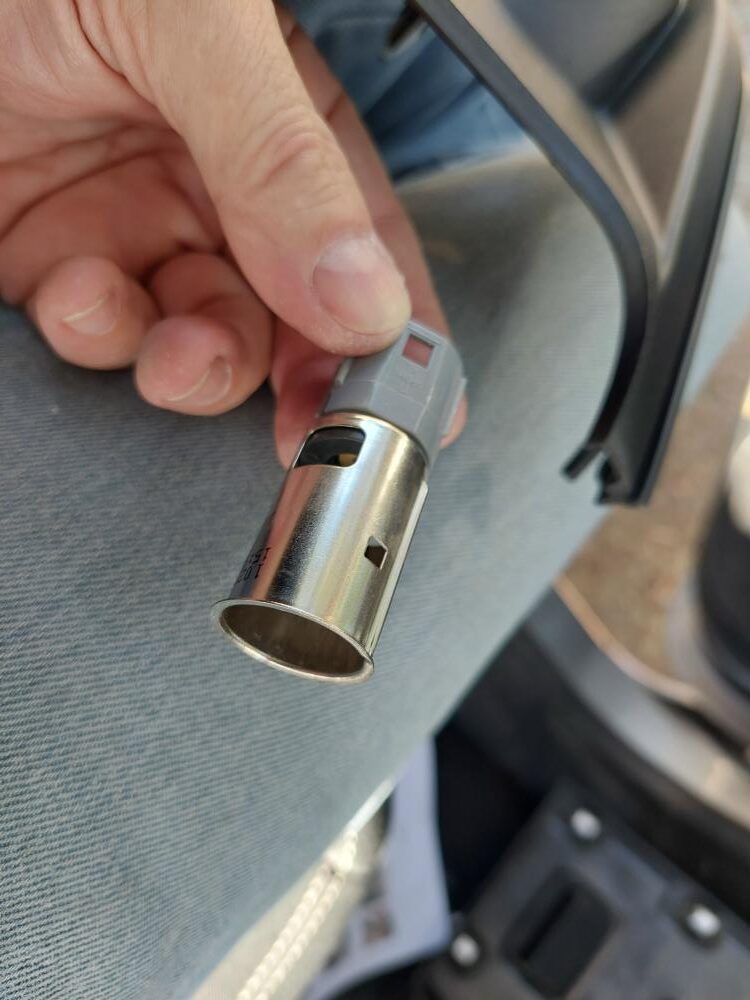
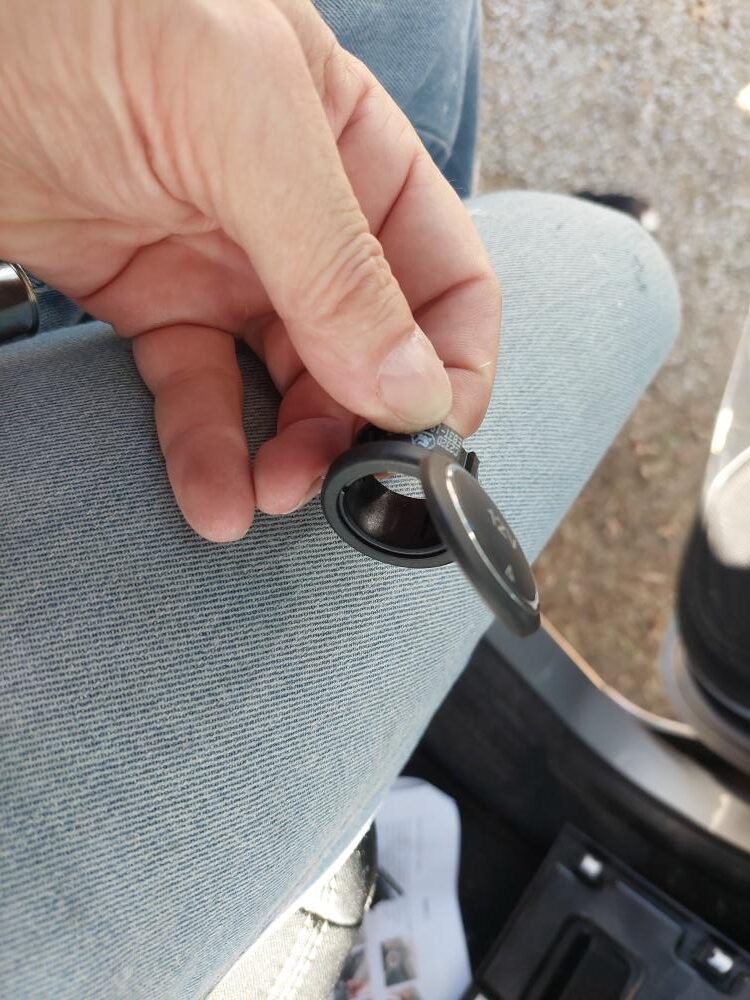
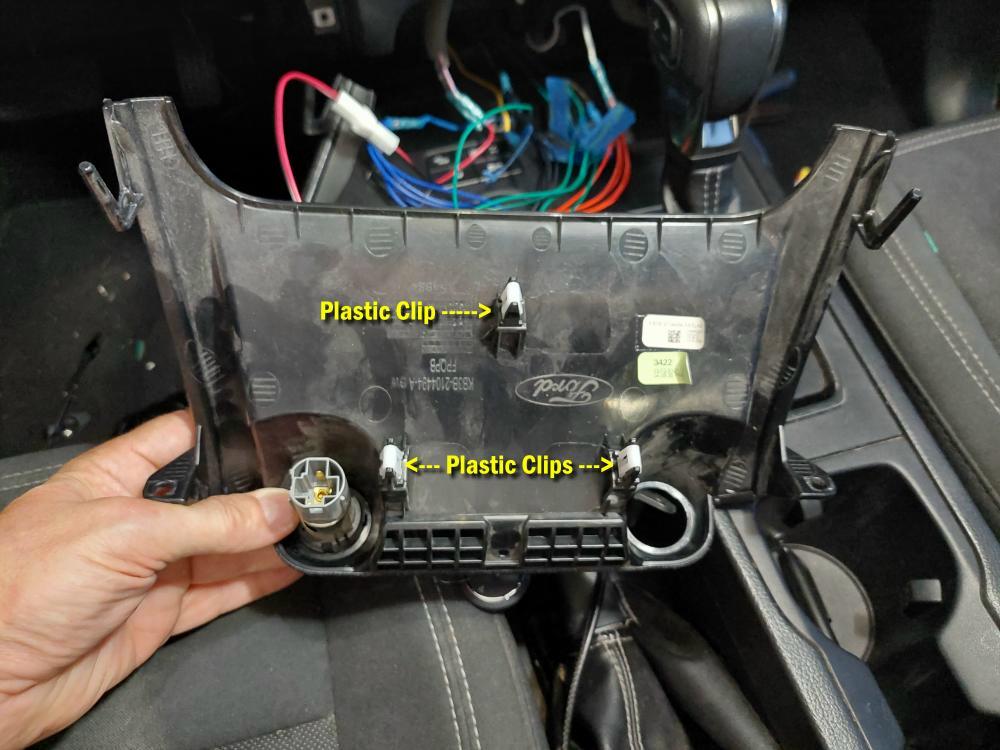
Reinstall them into the new panel in the reverse order. Note that the socket is keyed (notched) to only go in one way.

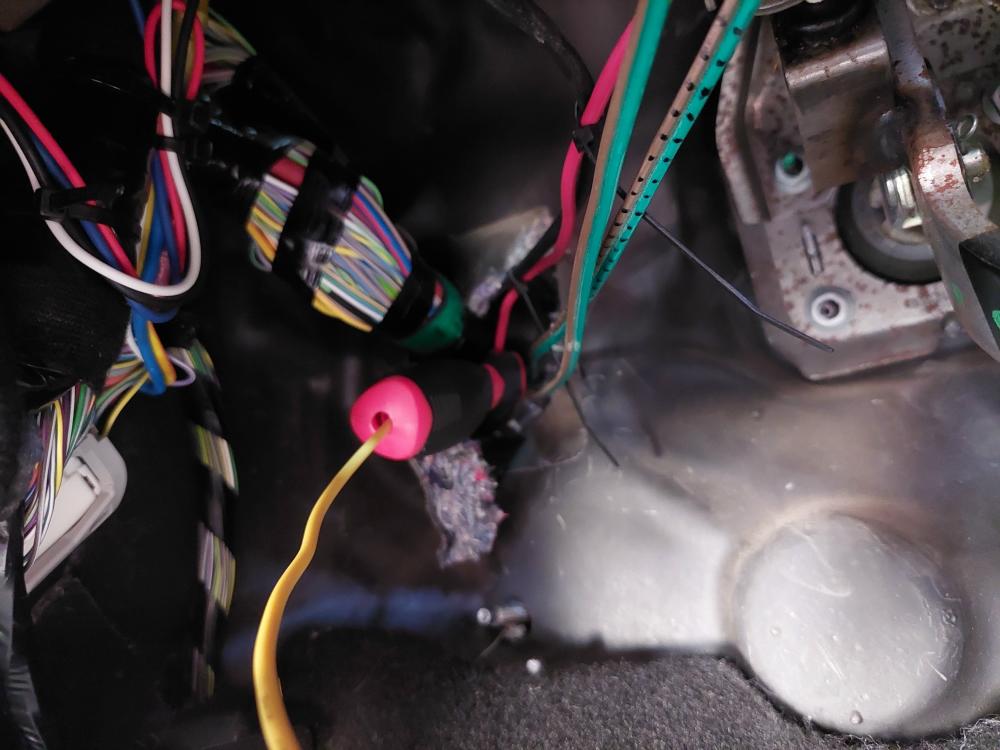
I used a Wire Insertion Tool to insert wires through the edge of the rubber boot in the firewall where the wiring harness passes through. I love this tool. Just push the tip through the rubber boot and feed the wire through the handle.

(Wire Insertion Tool – Click Here)
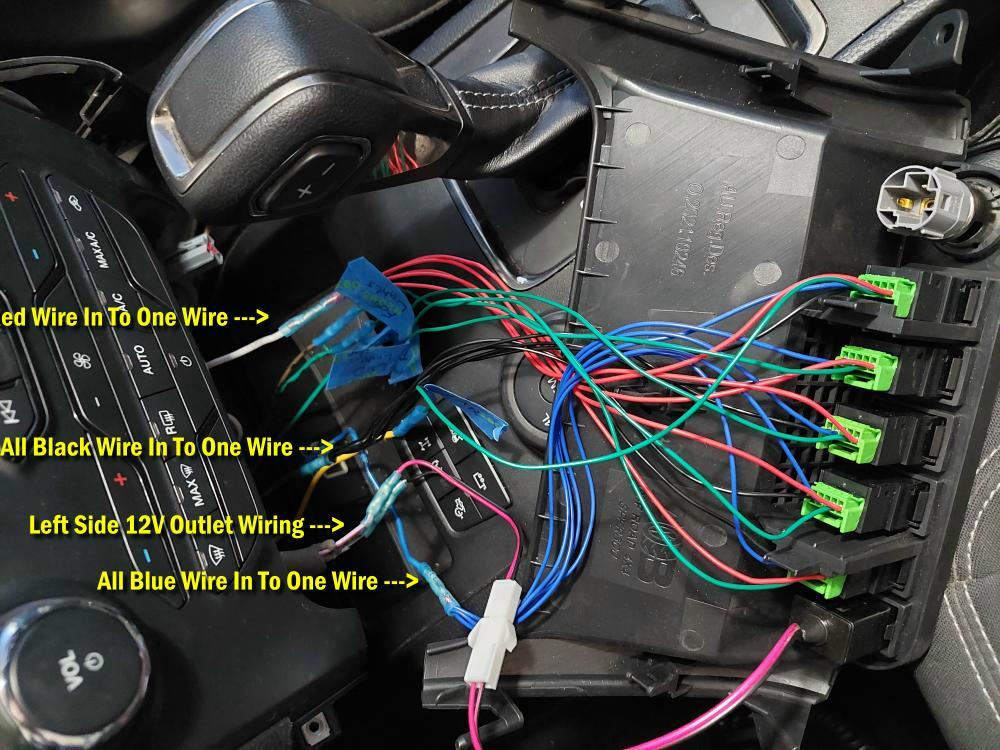
You can see in the pic above that I connected all of the red wires to one wire. That wire runs to the auxiliary 12V fuse block I added on the passenger side kick panel. This wire will provide power to the switches. When the switches are turned on, they send this power to a replay that sends power to the lights.
All of the black wires go to a single black ground wire.
I used the wiring from the left side 12V outlet to power the USB charging port.
All of the blue wires go to a single blue wire that will illuminate the switches when the dash lights are on.
The green wires were labeled with blue painters’ tape and connect to individual wires that lead to a relay for that particular light.
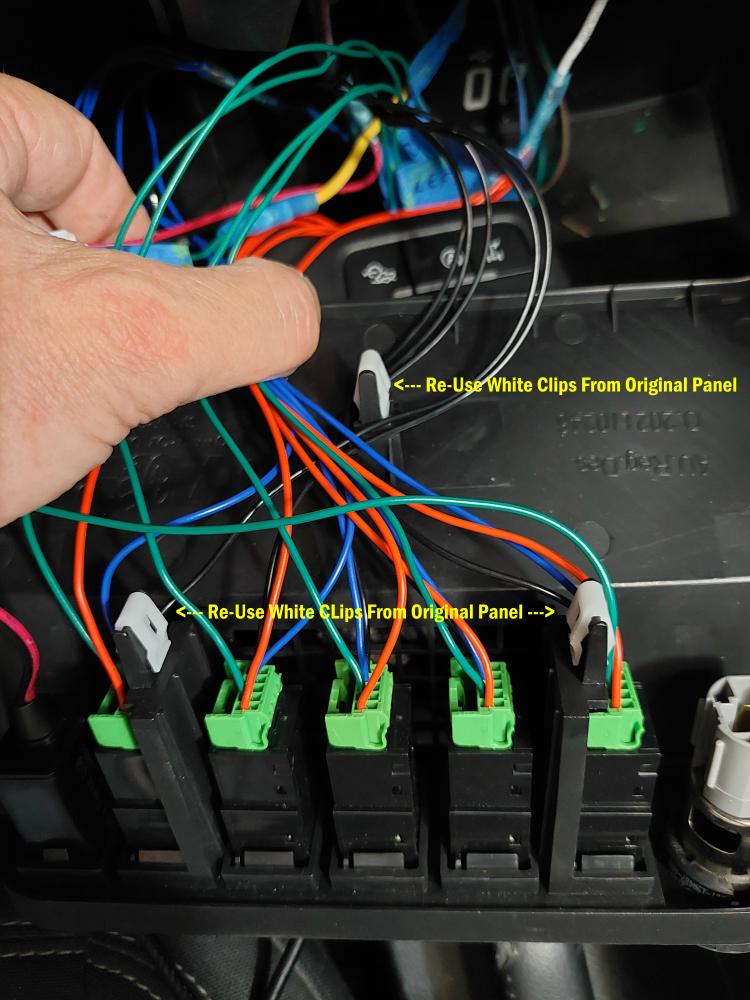
You have to re-use the white plastic clips from the factory panel on this new panel.
When installing, make sure the wires clear these clips and none of them are getting pinched anywhere.
I actually struggled a little to get this panel to snap in place. Probably from all of the wire behind it.
The side panels were a pain in the butt to get to snap in place as well.
I love the finished look of it. It looks like it came from the factory like this.
Related Article
Selecting The Proper Wire Size
Using Relays To Wiring Off Road Lights And Accessories
2021-2023 Ford Ranger Tremor Auxiliary Switches
2021-2023 Ford Ranger Tremor Auxiliary Switches
About The Author
Jim Oaks is the founder of TheRangerStation.com, the longest-running Ford Ranger resource online since 1999. With over 25 years of hands-on experience building and modifying Ford Rangers — including magazine-featured builds like Project Transformer — Jim has become one of the most trusted authorities in the Ford Ranger off-road and enthusiast space.
Since launching TheRangerStation.com, Jim has documented thousands of real-world Ranger builds, technical repairs, drivetrain swaps, suspension modifications, and off-road adventures contributed by owners worldwide. TheRangerStation.com has been referenced in print, video and online by enthusiasts, mechanics, and off-road builders looking for practical, and experience-based information.