4.0L SOHC Pulling the SOHC for inspection


@red78ta

Yes the connecting rod bolts are one time use; it is because of thread stretch. I have measured the used verses new, it is real...same goes for head bolts. Because of this, if you are doing anything fancy to the bottom end, use the old hardware until ready for assembly.

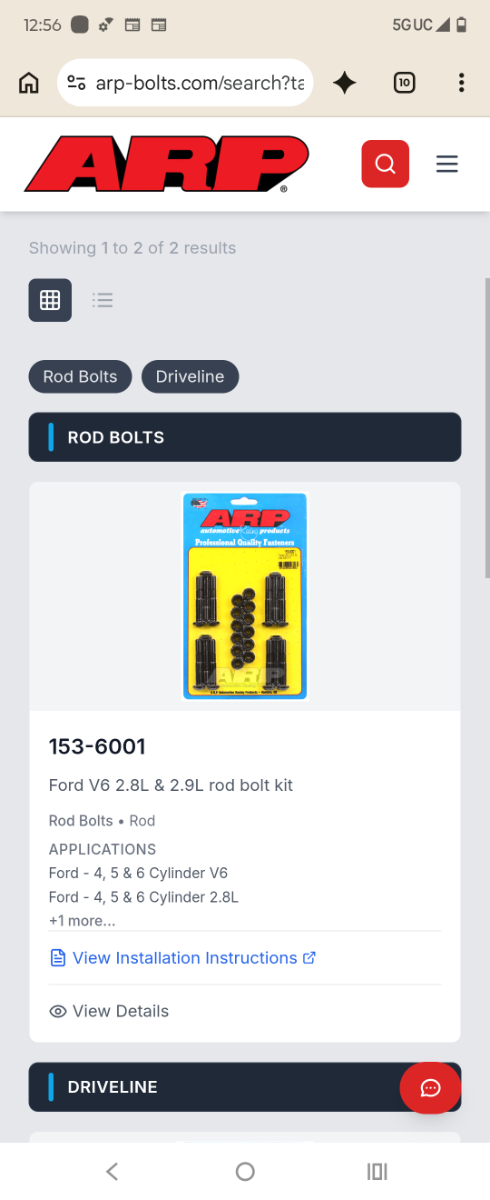
ARP does make a V-6 set for the 2.9l and 4.0l OHV (part# 153-6001)
Pulling the SOHC for inspection
, I am not certain that it will fit the SOHC 4.0 but I would be SUPER surprised if they didn't. They are a out $70 for the set, Summit sells them; should be easy to determine if compatible.

NOTE
The ARP nuts do require a small amount of machining to work with the Cologne (Ford) V-6's.
 
@gaz thanks! Yea I had read the ARP bolts had more force and thus required some machining to keep things “round” or something. I’m avoiding machining as we don’t have one in town and to leave you have to take a plane or ferry, lol. I’ve got head bolts (oreiley’s carried those) too.

Today I gapped the rings and installed them. Cleaned up some more stuff, now I really am just waiting on those conrod bolts and nuts. They shipped yesterday so hopefully soon!
 

Attachments

  • Pulling the SOHC for inspection
    image.jpg
    403.6 KB · Views: 36
  • Pulling the SOHC for inspection
    image.jpg
    475.3 KB · Views: 28
@red78ta
For HEAD bolts, I have found that allen head grade 8 bolts from the hardware specialty store work PERFECT (like Tacoma Screw), a set of those bolts runs about $15-17.
The problem with ARP connecting rod sets is that the nuts interfere with the rod; the adjustment (clearancing) can be performed with a Dremel.

CORRECTION
My
bust...not the nuts, it is the rectangular bolt head, just a little too much meat on the rod side.
 
Last edited:
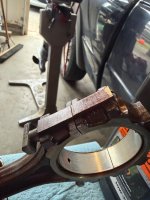
Got the rod bolts and nuts in last night, need some help. I can’t get the bolts to slide down far enough to get the nuts on, figured I’d ask here for how to get them seated all the way before trying something stupid. It was easier to take a pic with the rod out, obviously I’m not gonna tighten it down outside the engine 😂
 

Attachments

  • Pulling the SOHC for inspection
    IMG_0440.jpeg
    310.9 KB · Views: 32
Deep socket + vice. I got it
 
Pistons installed, con rod bolts torqued to 20 newtons and 90 deg. Taking a break for lunch.
 

Attachments

  • Pulling the SOHC for inspection
    IMG_0442.jpeg
    374.2 KB · Views: 31
  • Pulling the SOHC for inspection
    IMG_0441.jpeg
    364.1 KB · Views: 22
Guess a rear jackshaft seal didn’t come with my kit or gasket set; just ordered one. Will probably get back to work on the ranger when I’m back from Fairbanks.
 
So I would have been able to get back to it before leaving for Fairbanks but the jackshaft seal arrived (or didn’t I guess) like this…
 

Attachments

  • Pulling the SOHC for inspection
    IMG_0449.jpeg
    343.4 KB · Views: 23
Okay so the jackshaft seal saga is over lol. Now I can get back to the rest of the motor
 

Attachments

  • Pulling the SOHC for inspection
    IMG_0500.jpeg
    293.4 KB · Views: 6
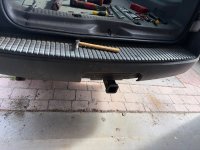
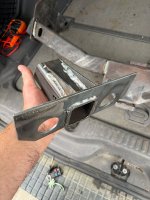
Put in the head gaskets/heads his morning and torqued down the new bolts. Now I’m autocad designing a hitch receiver for a buddy’s front bumper so he can buy a bike rack on it. I’ll weld up in the lab this afternoon. The class 2 on the explorer I got was so rusted out it almost broke off when I towed my boat with it; so Monday I cut off the brackets, cleaned them up, and bent/welded a tube to beef it up and welded it all back together. Can tow with that now while I work on the ranger.
 

Attachments

  • Pulling the SOHC for inspection
    IMG_0501.jpeg
    374.3 KB · Views: 5
  • Pulling the SOHC for inspection
    IMG_0499.jpeg
    394.5 KB · Views: 10
  • Pulling the SOHC for inspection
    IMG_0498.jpeg
    528.5 KB · Views: 5
  • Pulling the SOHC for inspection
    IMG_0497.jpeg
    439.9 KB · Views: 6
  • Pulling the SOHC for inspection
    IMG_0506.jpeg
    377.1 KB · Views: 6
  • Pulling the SOHC for inspection
    image.jpg
    398.4 KB · Views: 8
Used the laser cleaner at the lab to clean up the hitch for the ranger, it came off the spare one and will go on the main one at some point. Will put some POR15 or something on it to protect it. Also made the hitch for my buddies bumbler. I forgot the thumb drive so I had to redraw it at the lab on the cnc.
 

Attachments

  • Pulling the SOHC for inspection
    IMG_0508.jpeg
    464.6 KB · Views: 5
  • Pulling the SOHC for inspection
    image.jpg
    305.9 KB · Views: 5
I think I really need one of those laser cleaners. Think HF or PA would have one in surplus?
 
I was gonna post a video of it but couldn’t figure out how. It’s really amazing. I think it was like $15k, came straight from china and has a warning that it can blind people at like a mile away or some crazy thing… the lab got it a few years back, it just zaps off rust/paint whatever and doesn’t eat away any of the good metal.
 
I wonder if it would work to clear burnt on oil or undercoating. Would be cool for prepping frames for paint.

Probably would start a fire or put out enough toxic fuels to kill a small town.

Should try it.
 
Used the laser cleaner at the lab to clean up the hitch for the ranger, it came off the spare one and will go on the main one at some point. Will put some POR15 or something on it to protect it. Also made the hitch for my buddies bumbler. I forgot the thumb drive so I had to redraw it at the lab on the cnc.
Have been seriously considering one of these. Oil well debris is a sonofabitch to get off of downhole equipment
 

Sponsored Ad

America 250

Featured Rangers

Want to see your truck here? Share your photos and details in the forum.

TRS Latest Video

Official TRS Merchandise

Follow TRS On Instagram


Product Suggestions

Back
Top